Chapter 4. Setting Up the macOS Notes App
In Part I, we looked at the Apple Developer Program, the tools you use for developing on Apple platforms, and the fundamentals of the Swift language. Now we’re actually going to build some apps!
In this chapter, we’ll start building Notes. Notes is a Mac app that lets you write notes, which contain text plus a number of other attachments: images, locations, videos, sounds, contacts, and more. We’ll be creating an iOS counterpart for Notes later on, in Part III.
We’re not going to be doing any coding in this chapter, but it’s still important! We’ll be doing all the setup to make a real, working macOS app, using Xcode, by the end of the chapter (it won’t do much, though!).
The kind of setup that we’ll be doing in this chapter is fundamental to the creation of most Swift-based applications for macOS and iOS. One of the most striking things about developing for Apple’s platforms using Xcode and Swift is just how much work is done for you. Just one or two years ago, the setup we’ll accomplish in this chapter would have taken lines upon lines of code.
Even if you’re only interested in learning to use Swift to create iOS applications, we suggest that you work through the chapters (there are only three!) that cover the creation of the macOS application anyway. You’ll gain a better understanding of using Swift with Xcode to build applications, and you’ll be better equipped to work on the iOS application once we start on that, in Part III.
Designing the macOS Notes App
When we first sat down to build this app, the only thing we had figured out so far was that we wanted to “make a notes app that lets you add attachments.” To determine how this would work overall, we started drawing wireframes.
Tip
A wireframe is a very rough drawing of the app that you’re about to make. It’s much faster to get your ideas down on paper (digital or physical) than it is to actually implement the app itself, and the act of drawing your ideas helps you organize your thoughts.
The application that we used to make these wireframes was OmniGraffle, a fantastic vector drawing tool that’s very well suited for wireframes. You don’t need any software at all to get started figuring out an app idea, however—pencil and paper will work just as well.
Note
The wireframes were drawn several weeks before we started writing this book, not once we had a finished app ready. This means, just like wireframes for real-world products, they differ slightly from the finished product. This is OK when your development team is small, such as when it’s just you and maybe one other, because in this case, the goal of wireframing isn’t to create a perfect blueprint for others to implement, but rather to get a solid understanding of how your app needs to work.
This book isn’t here to teach you how to design wireframes or conceptualize the applications that you’ll build, but we have to start somewhere. Programming without considering what you’re building, in our experience, leads to poor-quality software. That’s why we’re starting with wireframes and showing them to you.
The process for figuring out how the wireframes needed to come together came from the OmniGraffle equivalent of doodling: we drew rectangles on the page, pretended they were windows, and asked ourselves how we’d use the app. When we (inevitably) ran up against a limitation in the design, we went back to the design and added, removed, or changed the content of the screen. We continued to go back and forth on this design until we were sure that the app’s design was usable.
You can see the wireframe for the app in Figure 4-1.
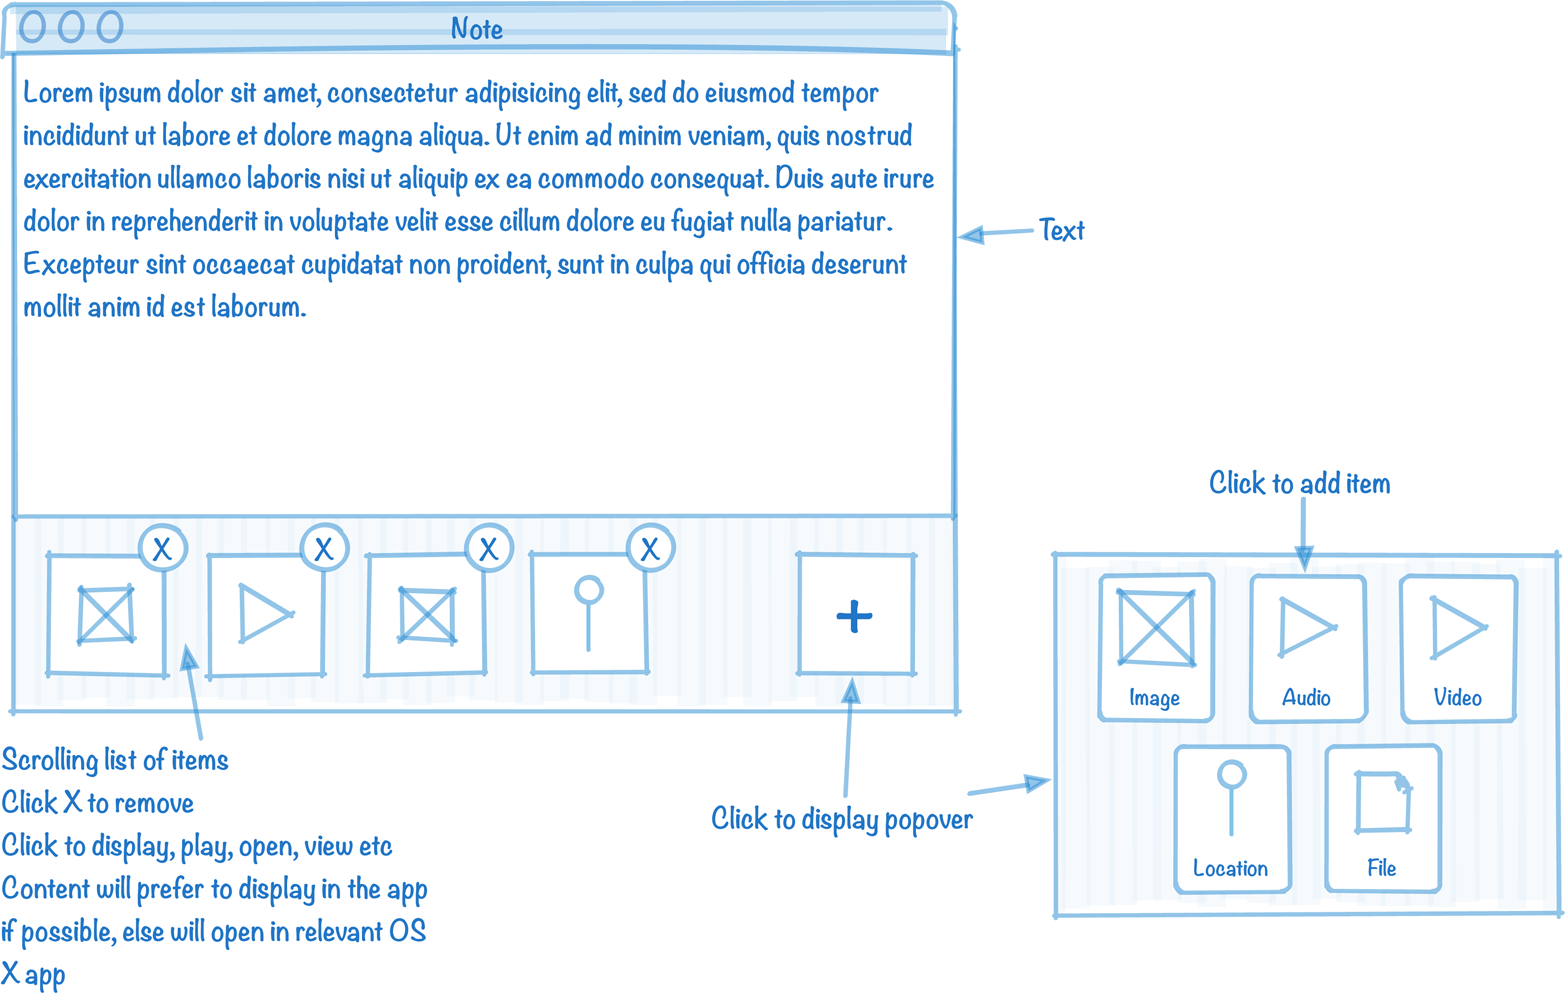
Figure 4-1. The macOS app’s wireframes
On macOS, each document is given its own window. The app itself has no “main window”; instead, the only visible component will be the document windows.
The focus of the app is the text editor, which takes up the majority of the space. Underneath it, a horizontally scrolling list of all of the attachments is shown. For each attachment in the document, we’ll show a preview image. Next to the list of attachments, we’ll show a button that allows the user to attach new items to the document; when it’s clicked, a popover will appear that presents the various options available. Above this button, we’ll add a button that opens the location attachment, if one is present.
By the end of these chapters, the app outlined in the wireframes will be a real, working app, as shown in Figure 4-2.
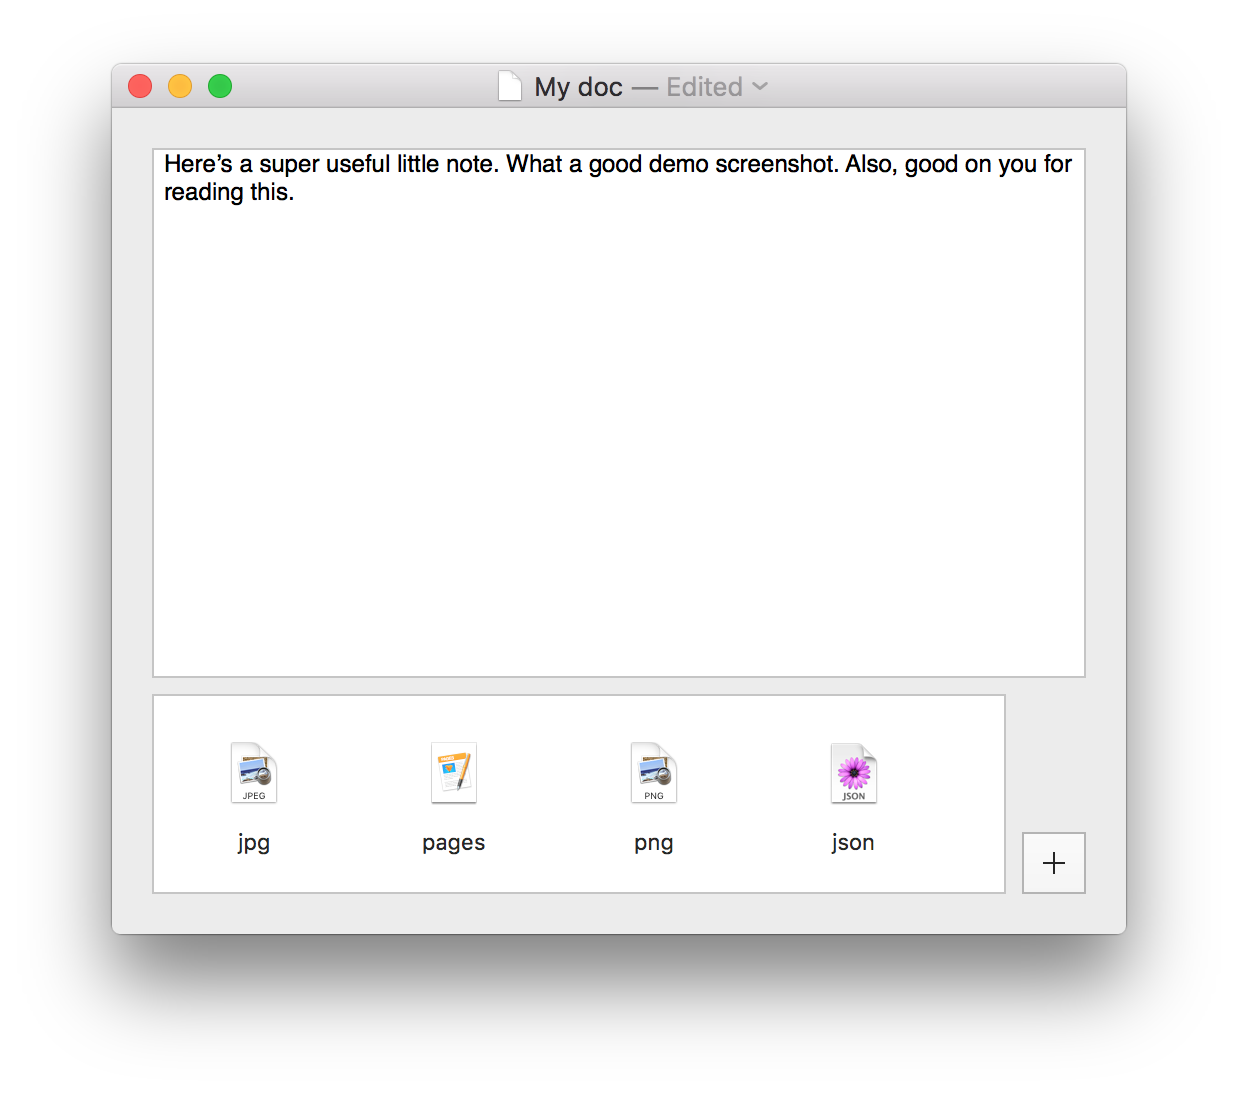
Figure 4-2. The macOS app
The Mac app has several key features:
-
It uses the macOS document model, which means that it gets a number of useful behaviors for free, including versioning and autosave, plus the ability to associate its document types with the app (meaning that when you double-click a file, it will open in the app).
-
Documents contain text that can be formatted—that is, you can italicize and bold text, change the color of letters, and so on.
-
Documents can also store attachments. When you add an attachment, it’s displayed in a list underneath the text area.
-
You can add attachments by either clicking an Add button, which presents a window that lets you select the file you want to add, or by dragging and dropping the file into the list of attachments.
-
Double-clicking an attachment presents a Quick Look window that allows you to view the contents of the file.
-
You can open the location that’s attached to the document (which we’ll examine in quite a bit more detail when we build the iOS app in Part III) in the Maps application.
Creating the macOS Project
The first thing we need to do is create an Xcode project for our macOS app. We’ll be working in this project for most of the rest of the book, including the iOS app, which will be added as a target in the same project. If you need a refresher on Xcode and the development tools, see Chapter 1.
-
Launch Xcode, as shown in Figure 4-3.
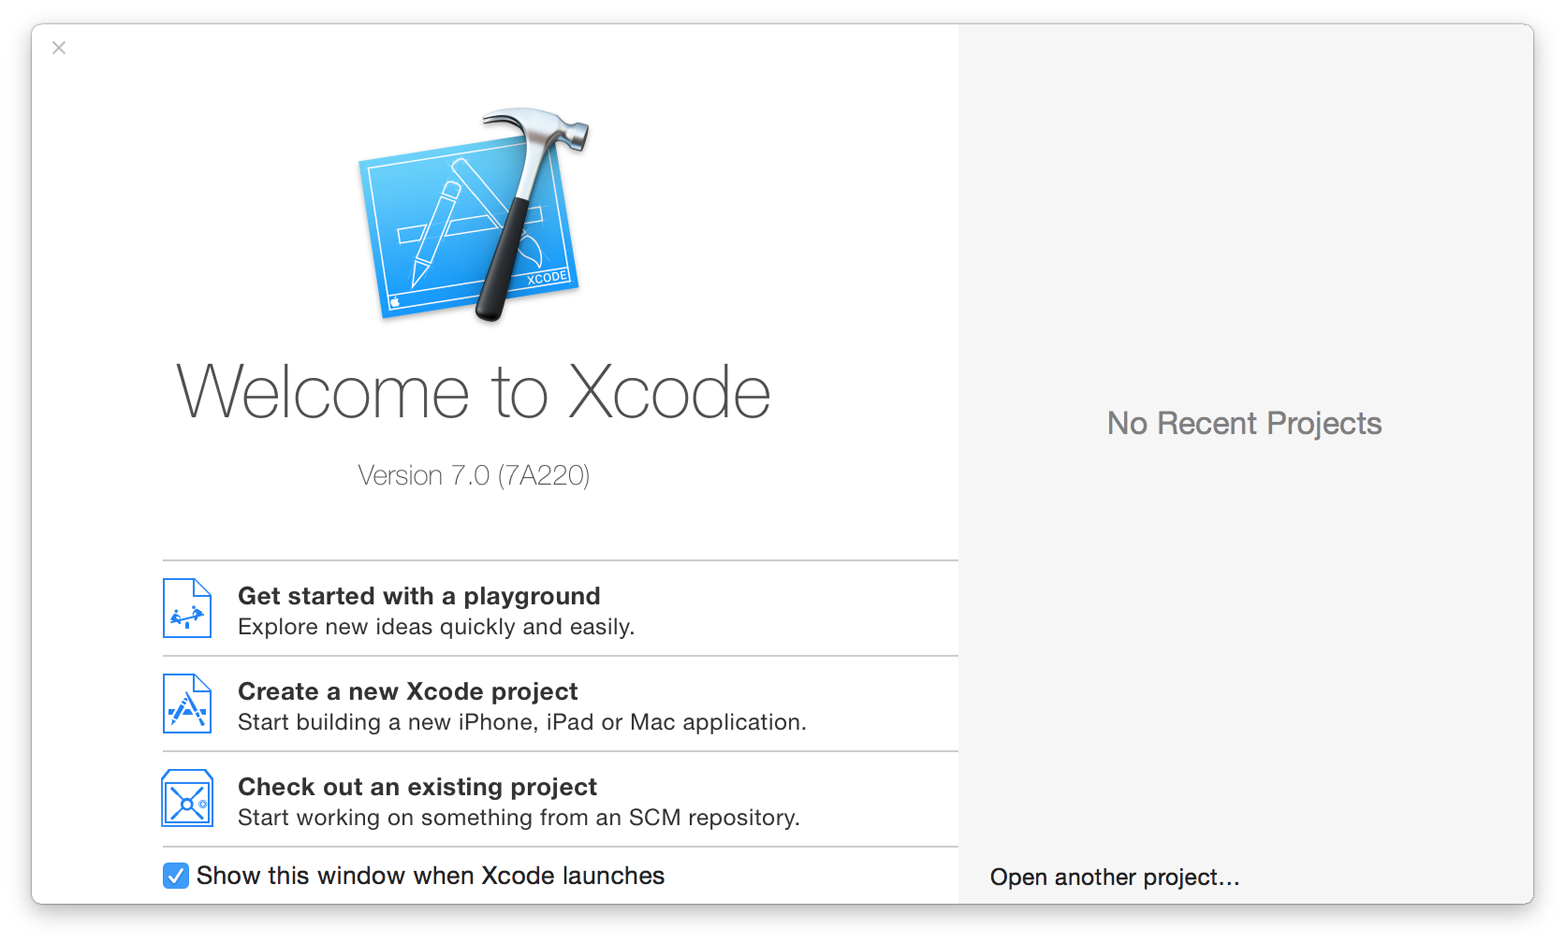
Figure 4-3. The “Welcome to Xcode” screen
-
Click the “Create a new Xcode project” button.
The list of project templates will appear. Click Application under the macOS heading, in the left column (which includes categories for Apple’s other platforms, such as iOS, tvOS, and watchOS), and then select Cocoa Application (Figure 4-4). Click Next.
Tip
The other templates provide a default setup for different types of application. You can do everything provided by each template manually, if you want. They’re just a collection of provided files and code. The templates shown in Figure 4-4 are those provided by Apple, and they ship with Xcode.
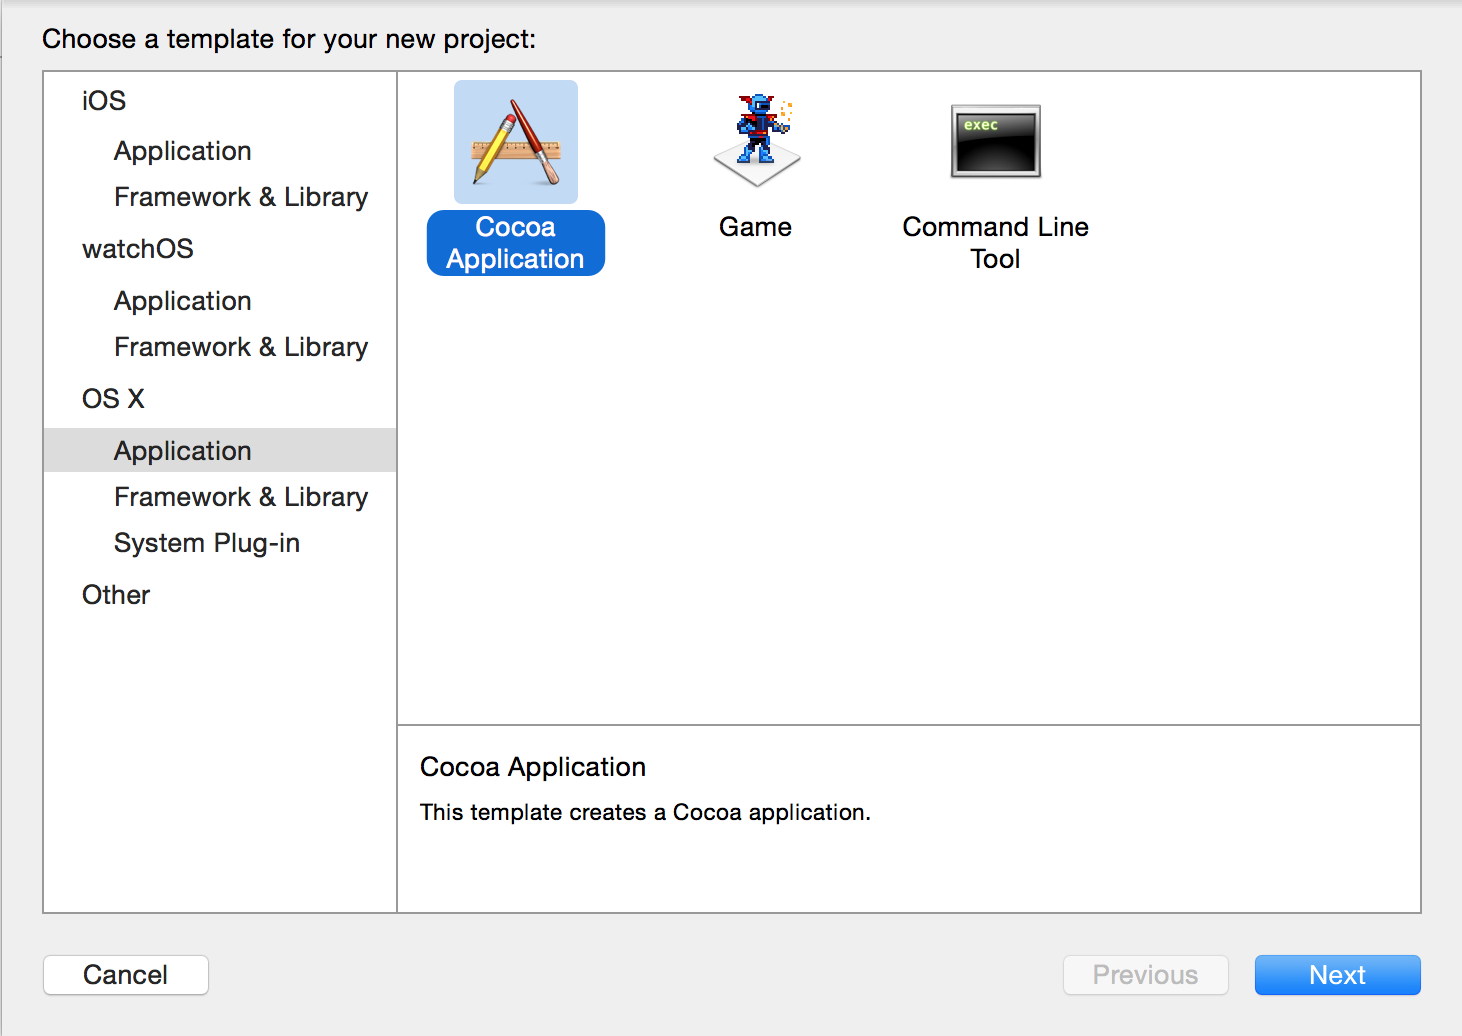
Figure 4-4. Selecting a Cocoa app
-
You’ll be prompted to give the project a name, plus some additional information (see Figure 4-5). Use the following settings:
-
Product Name: Notes
-
Organization Name: Your company’s name. Enter your own name if you’re not making this app for a company.
-
Organization Identifier: Your domain name, reversed; for example, if you own mycompany.com, enter
com.mycompany. (Customize this based on your domain name; if you don’t have one, entercom.example.)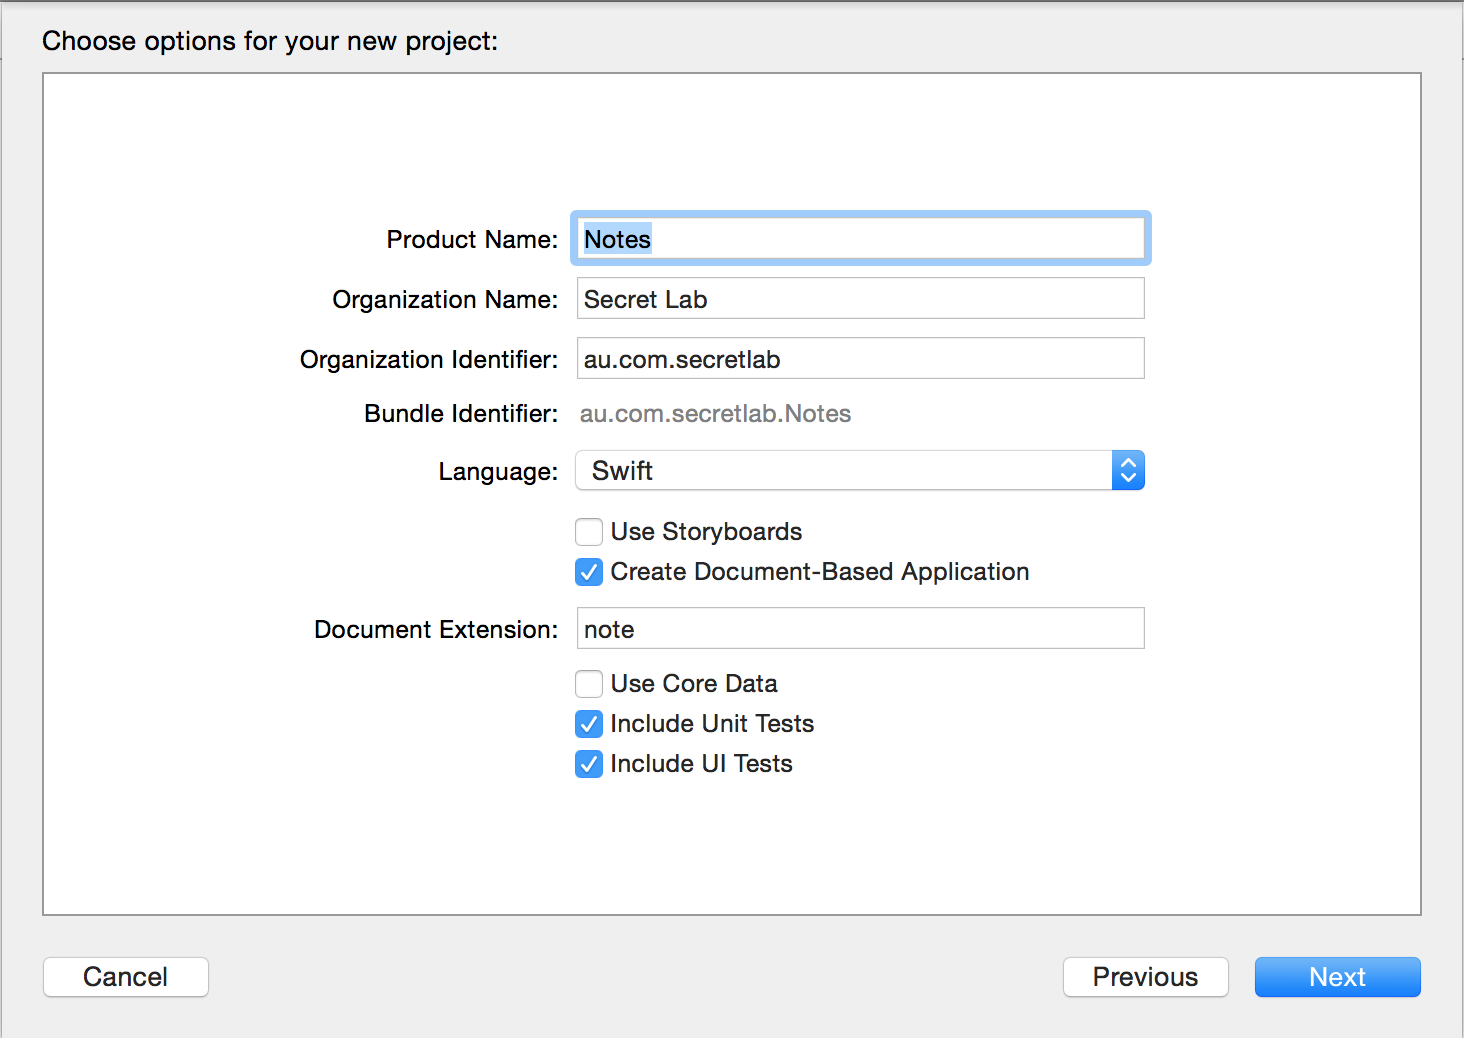
Figure 4-5. Configuring the Cocoa app
Note
The organization name and the product name are used to create the app’s bundle identifier. A bundle identifier is a period-separated string that uniquely identifies a bundle of code and resources. For example, if you use
com.exampleas your organization identifier, the bundle ID will becom.example.Notes.Bundle identifiers are used everywhere in the macOS and iOS ecosystem. A bundle identifier forms the basis of your app ID, which is the unique string that identifies your app on the App Store. Bundle IDs are used to distinguish between apps. Your app’s bundle ID is also used as the basis of other IDs, such as the uniform type identifier (UTI) for your documents, which we’ll cover in “Defining a Document Type”.
-
Language: Swift
We’re setting the language to Swift, because—well—this is a Swift book! You can set this to Objective-C if you want, though! But the rest of the book will make absolutely no sense if you do.
-
Use Storyboards: Off
We’re not turning storyboards on here because we’re going to use the other means of creating a UI, nibs, for the macOS app. We’ll use storyboards when we build the iOS app, in Part III. We’re deliberately using both UI techniques so you’ll get experience with both. We’ll explain more about nibs versus storyboards in “A Basic UI”.
-
Create Document-Based Application: On
This setting asks Xcode to provide the basics of a document-based application to us, in the template that it generates for the project. This will give us a
Documentclass that we can build from. A document-based application is one that handles multiple documents, each with its own window. Much of this infrastructure is provided for free by Apple’s document architecture. You can learn more about this in the documentation. -
Document Extension: note
Since our Notes app will work with documents that represent notes, we set the file extension for the basic document-based application that Xcode is going to generate to something that makes sense. In this case, we’ll be making a Notes app that works with .note files. We’ll talk about this more throughout the remainder of this chapter.
-
Use Core Data: Off
Core Data is a framework provided by Apple that lets you store data in a manner similar to a database, but local to your app. We’re not using Core Data in this book, as it’s a topic that warrants a book all on its own. Additionally, the limits of Core Data are quite easy to hit, and it’s often more useful, as well as more of a learning experience, to build storage infrastructure for your app from scratch. If we’d turned this on, stubs for Core Data, as well as a data model, would be added to the project that Xcode will generate for us. If you really must, you can learn more about Core Data in the documentation. Don’t say we didn’t warn you!
-
Include Unit Tests: On
-
Include UI Tests: On
Leaving these two on creates stubs for unit tests and UI tests, respectively. We’ll touch on these subjects much later, in Chapter 16.
Note
If you’re using macOS Yosemite, note that UI tests will run only on macOS 10.11 El Capitan or later. You can create a project that includes UI tests on Yosemite, but you won’t be able to run them.
-
-
Click the “Next” button, and Xcode will ask you where you’d like to save the project (which will be a folder with the same name as you put in the Product field), and then it will create a project for you to work with.
Now that the project has been set up, we need to provide more information about the documents that this app will be working with.
Tip
We recommend that you store this project (and, indeed, anything else that you might work on) in Git, or a similar version control system. It’s out of the scope of this book to explore Git, but we strongly recommend you take some time to explore it if you’re not already using it. Xcode has some basic support for Git built in, which you can read about in Apple’s documentation.
-
Select the Notes project at the top of the Project Navigator (Figure 4-6). If you need a refresher on the Xcode interface, flip back to “The Xcode Interface”.
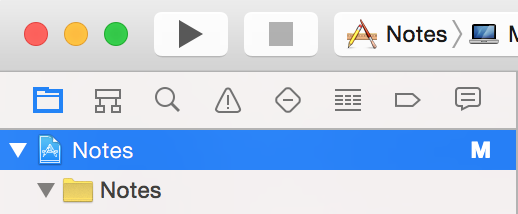
Figure 4-6. Selecting the project
The main editor will show information about the overall project.
There’s a lot that you get for free just by creating the project. In addition to the app itself, you get an application that is capable of working with document-like objects. If you run the application right now, you’ll already be able to create new “documents” by pressing ⌘-N, though you won’t yet be able to save them to disk.
Defining a Document Type
We’ll now provide some more information about the document type. Notes will be a document-based application, which means it will behave like other document-based applications on macOS, such as Pages or TextEdit.
-
Select the Notes application from the list of targets. As a reminder, a project can contain multiple targets, each of which collects the code, user interface, and other resources required to generate a product. We first mentioned targets back in “The Xcode Interface”.
If you don’t see the list of targets, make sure the Notes project (it has a blueprint icon) is selected in the Project Navigator, and then click the icon that looks like a square with a vertical line inside it, at the top left of the editor (Figure 4-7). This will toggle the projects and targets list (Figure 4-8).
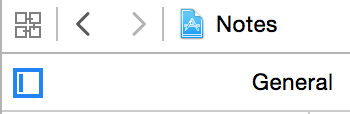
Figure 4-7. Opening the targets list
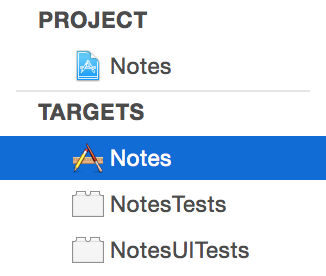
Figure 4-8. Selecting the Notes target
-
Select the Info tab from the top of the editor, shown in Figure 4-9.

Figure 4-9. The Info tab
-
Scroll down to the Document Types section, and open it by clicking the triangle. There’s already the beginnings of a document type laid out, because we asked Xcode to create a document-based application, and it knows that such an application will need a document type.
We need to add a little more description, including a proper name for the document, as well as an identifier similar to our organization identifier, so our document type won’t collide with any other possible files with a .note extension:
-
Set Name to
Note. -
Set Identifier to your organization identifier, plus .Note. For example, if your organization identifier is
com.example, the document’s identifier iscom.example.Note.This defines this document as conforming to this uniform type identifier, which is the method by which the system works out the types of files.
-
A uniform type identifier looks very similar to a bundle identifier: it’s a period-separated string. For example, the UTI for PDF files is com.adobe.pdf.
UTIs were invented to deal with the thorny problem of identifying the types of files. If you’re given a blob of information, what you can do with it depends on the kind of data that it contains. For example, Adobe Photoshop can open images but not Word documents, and if the user wants to open a Word document, the operating system shouldn’t even consider opening it in Photoshop. However, it’s not reasonable for the OS to inspect the contents of the file to tell the difference, so we need some kind of metadata that describes those contents.
Originally, file types were simply identified by the file extension. For example, the JSON data interchange format uses the file extension .json. This worked fairly well, until we hit the problem of type granularity.
You see, a JSON file isn’t just describable solely as JSON data—it’s also a text file, a chunk of binary data, and a file (as opposed to a directory). There are thousands of plain-text formats out there, and a text editor shouldn’t have to manually specify each one that it’s capable of opening.
This is where UTIs come in. UTIs are a hierarchy of types: when a UTI is declared, it also declares all of the other types that it conforms to. For example, the UTI for JSON is public.json; this UTI also conforms to public.text, which represents plain text and itself conforms to both public.data and public.content. This means that, even if you don’t know anything about the specifics of the JSON file format, you know that JSON is text.
When you create a new type of document, you add information to the app that exports the new UTI. This means that when the app is installed on the system, the operating system will detect the fact that you’re declaring a new type of document. In addition, because your app registers itself as one that can also open that type of document, the system will record that if the user double-clicks files of that type, your app should be the one that’s launched.
When you export a UTI, you provide as much information as possible about it: any icon to use, a textual description of what the type is, all existing UTIs that the new type conforms to, and any other information that the system can use to identify the file. This additional information includes things that other operating systems use, such as file extensions, MIME types, and OSTypes (which were used by Mac OS Classic, the precursor to macOS).
Note
Different kinds of apps work with different kinds of data, and it helps to be familiar with the different types of UTIs that are out there. You can find a list of UTIs that the system defines in Apple’s documentation.
The document type in this app will be one that conforms to the com.apple.package type, which means that it’s a folder that contains other files, but should be presented to the user as a single file. macOS and iOS make extensive use of packages, since they’re a very convenient way to present a file that contains other information. This is perfect for our file format, since it contains attachments.
Note
We’ll be talking more about this approach in “Package File Formats”.
-
Select the box for “Document is distributed as a bundle” (Figure 4-10).
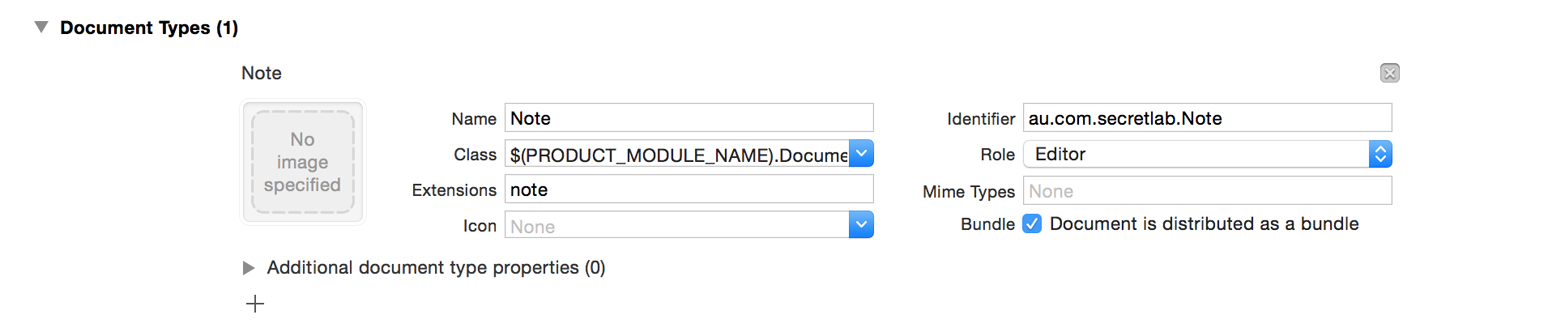
Figure 4-10. Defining a document type
The Note document type that we’ve just described is a new type that the rest of the system doesn’t know about yet. Because we’ve just invented this new UTI, we need to export it to the system, as shown in Figure 4-11. Let’s do that now.
-
Open the Exported UTIs section.
-
Click the + button in this section to add a new entry.
-
Provide the following information, as shown in Figure 4-11:
-
Set Description to
Note. -
Set Extensions to
note. -
Set Identifier to the same as the identifier you provided earlier (e.g.,
com.example.Note). -
Set Conforms To to
com.apple.package. This tells the system that files of this type are actually folders (“packages”) of files.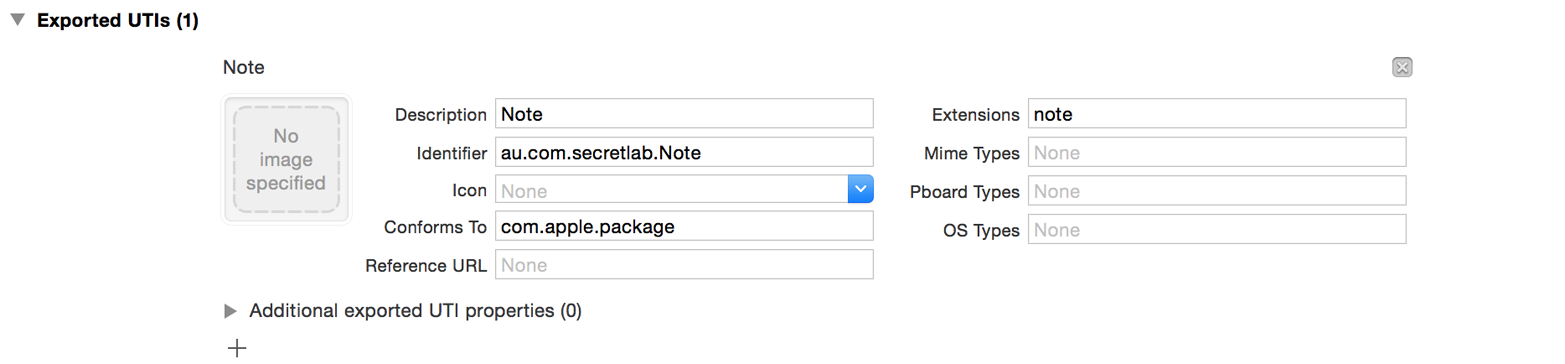
Figure 4-11. Defining a new uniform type identifier
-
-
Run the app by clicking the play button in the upper-left corner of the window, or by pressing ⌘-R on your keyboard. After compiling, the app will launch.
It doesn’t do much, but you can already create new documents by pressing ⌘-N, as shown in Figure 4-12. Pretty neat!
It might not seem like you’ve done a lot, because we haven’t done any programming (we did warn you!). But really, you’ve accomplished a whole lot in this chapter, helped along by parts of the process that Xcode automates. In brief, you’ve:
-
created a brand-new macOS app, complete with support for multiple documents, open in multiple windows.
-
defined a brand-new file extension, .note, and told the system about it by exporting it as a UTI.
-
been given a
Documentclass, written in Swift, for you to extend to do what you need. (Did you notice the Document.swift file in the Project Navigator? We’ll be working with that in the next chapter!)
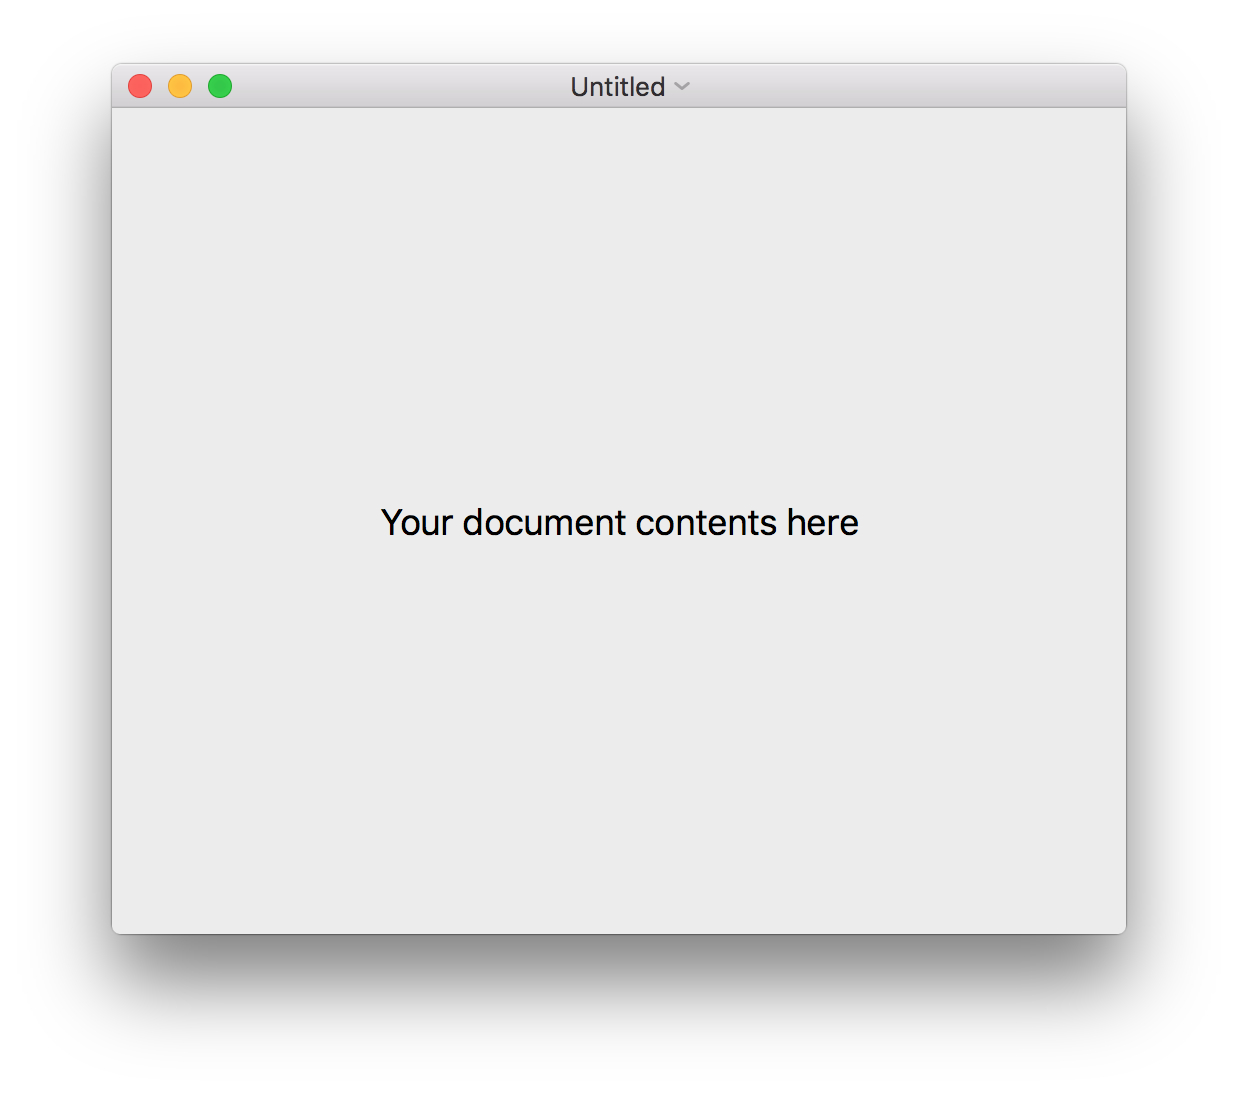
Figure 4-12. The current state of the app
In the next chapter, we’ll make the app even better, but there’s one last cosmetic thing we need to do first!
Adding the Icon
Finally, we’ll add the icon to the application’s asset catalog. We probably wouldn’t really add the application icon at this point in the process, but since we’re providing an icon for you to use, and since apps look better with an actual icon instead of the Apple default icon, we thought we’d do it here. It’s also a good opportunity to talk about asset catalogs.
In Xcode, an asset catalog is a file that contains the assets that your app uses. It is most commonly used to store images, but can be used to store all sorts of assets: data files, app icons, placeholder images for certain OS features, and various other things.
The predominant use for asset catalogs is storing images. Asset catalogs simplify management of images that your app uses as part of its user interface. Importantly, each image itself is composed of each of the different versions that the system could use. A good example of this in practice is the icon that we’re about to add.
A macOS app’s icon can be presented at a variety of sizes: if it’s in the Dock, it will probably be about 64 pixels high; but if it’s being shown in List mode in the Finder, it may be only 16 pixels high. This gets even more complicated when you add Retina displays into the mix, where there may be more physical pixels per screen point than a non-Retina screen (that is, an image might report itself as 16 × 16 screen points, but will physically be a 32 × 32 pixel image). For optimal image quality, it’s best to provide a separate image file for different sizes—as shown in the following exercise; downscaling a large image or upscaling a small one generally results in a pretty significant drop in image quality:
-
Locate the macOS Icon.png and macOS Icon@2x.png files in the downloaded resources. As a reminder, these are available via this book’s website.
-
Open the Assets.xcassets file, and select the AppIcon item in the list of assets.
-
Drag the macOS Icon.png file onto the slot labeled 1x Mac 512pt. Next, drag the macOS Icon@2x.png file onto the slot labeled 2x Mac 512pt.
The app now has an icon (see Figure 4-13)! You might be wondering what the “1x” and “2x” mean: the 1x icon is the version of the icon for non-Retina displays, and the 2x icon is the version of the icon for Retina displays. The 2x image is double the resolution of the 1x image. You can learn more about Retina displays and macOS apps in Apple’s documentation.
Rather than requiring you to individually address each possible version of the image, the asset catalog saves you time by creating image sets for each image. The application image is an image set, which lets you provide multiple files for a single image. At runtime, the system will select the most appropriate image to use. You still provide the images, but you only have to refer to what the image is representing by name, rather than the specific resolution version. In this case, the system looks for the AppIcon item, in the asset catalog, and knows to use the 1x version for non-Retina displays, and the 2x version for Retina displays.
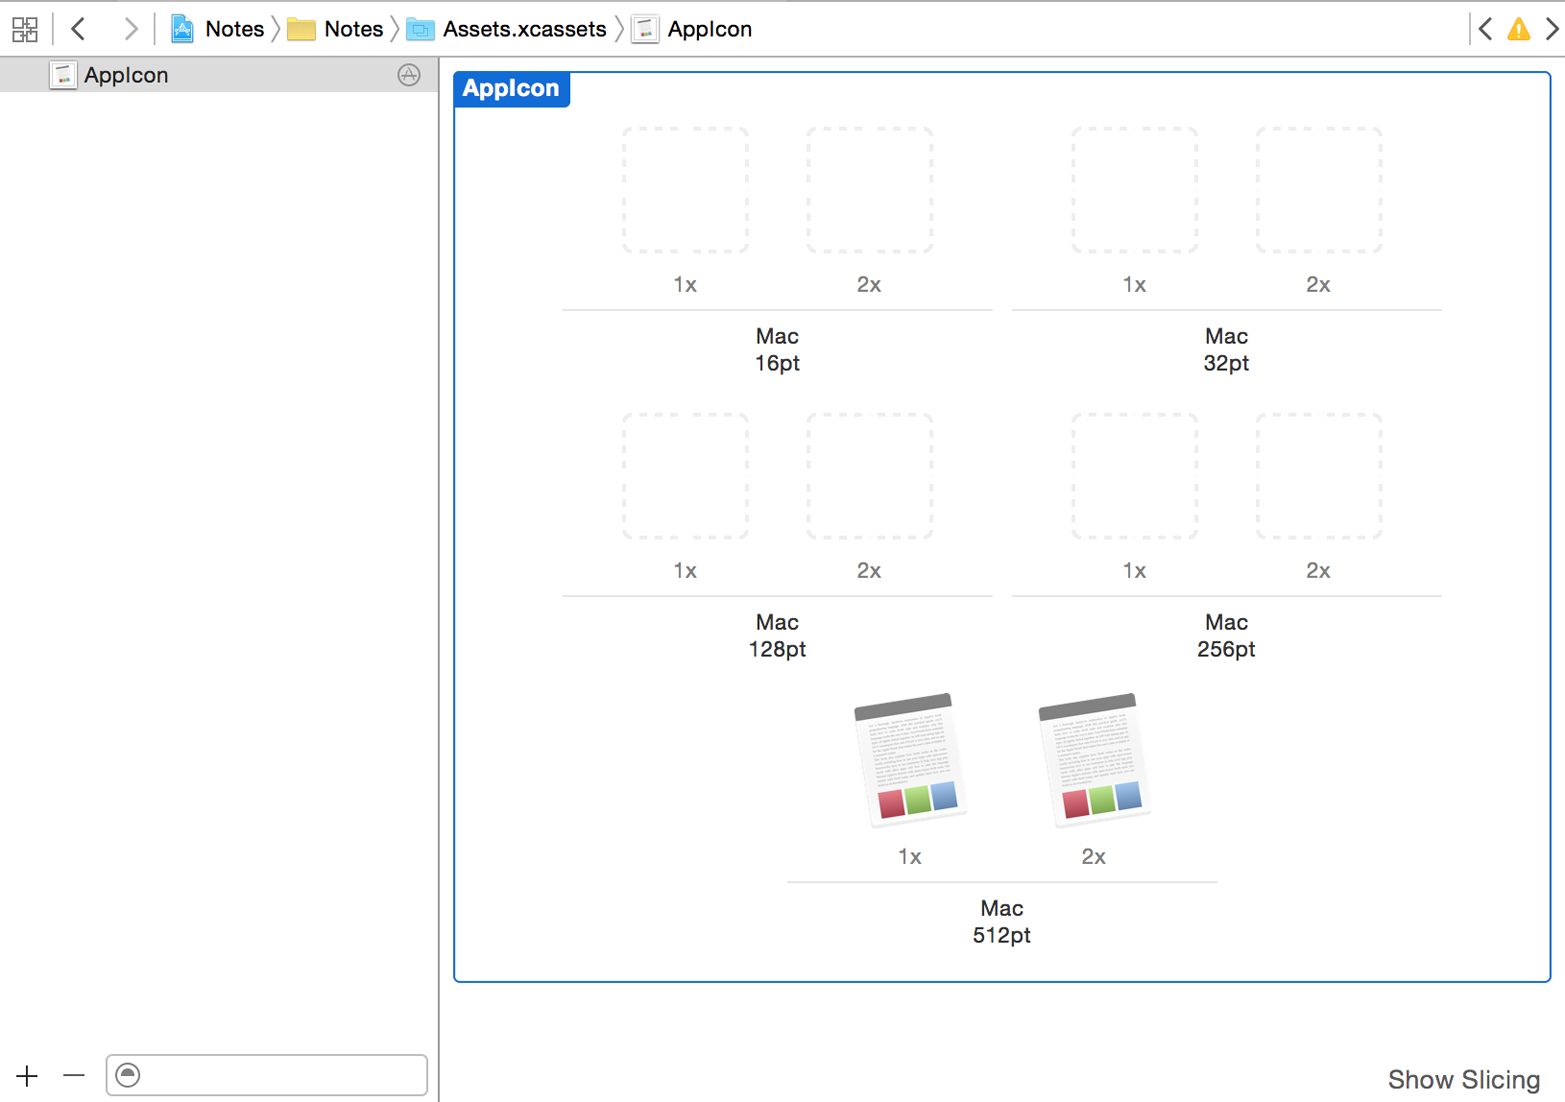
Figure 4-13. The app icon
Conclusion
Now that you’ve made it to the end of this first chapter on creating macOS apps, let’s look back at what you’ve learned. In addition to developing an idea of how document-based applications work and how this particular app will work, we’ve done some fairly low-level plumbing of the type system and introduced an entirely new document type. In the next chapter, we’ll start adding features to the app and start building an actual, working, feature-full app.
Get Learning Swift, 2nd Edition now with the O’Reilly learning platform.
O’Reilly members experience books, live events, courses curated by job role, and more from O’Reilly and nearly 200 top publishers.

