Connecting to a Wireless Network
MacBook Air wears its wireless heart on its sleeve by not having an Ethernet port, which most other Macs available today use to make a wired connection to a network switch or router. Instead, MacBook Air comes with a built-in wireless networking card that enables it to connect to Wi-Fi (Wireless Fidelity) networks. That’s not to say that MacBook Air is incapable of making wired network connections. If you happen to be using a network that doesn’t offer Wi-Fi, all you need to do is attach an Ethernet adapter to one of MacBook Air’s USB ports (using, say, Apple’s USB Ethernet adapter; see Chapter 1) or to MacBook Air’s Thunderbolt port (using Apple’s Thunderbolt to Gigabit Ethernet adapter).
Connecting to a Wi-Fi network
Wireless networking is MacBook Air’s forte, so here are the steps to follow to connect MacBook Air to a wireless network:
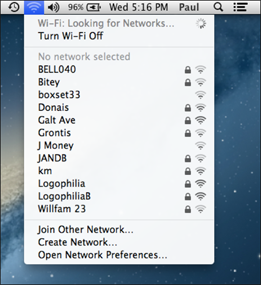
1. In the menu bar, click the Wi-Fi status icon. MacBook Air displays a list of available wireless networks, as shown in Figure 2.1.

2.1 Click the menu bar’s Wi-Fi status icon to see a list of wireless networks that are within range of MacBook Air.
2. Choose the network you want to join. If the network is password-protected, MacBook Air prompts you for the password.
3. Type the password. If the password is long or complex, you can be sure that you’re typing it correctly by selecting the Show password check ...
Get MacBook Air Portable Genius, 4th Edition now with the O’Reilly learning platform.
O’Reilly members experience books, live events, courses curated by job role, and more from O’Reilly and nearly 200 top publishers.

