Appendix B. Papilio AVR Loading
If you want to check out the operation of the Papilio AVR (Arduino microcontroller), there are a few additional steps you will need to complete.
Step 1: Power Up
First, plug your other USB-Micro cable into the Papilio module and move SW1 to the “up” position. You still need to have the FPGA USB cable connected to the USB-Mini connector. You don’t have to change the PWRSEL jumper for this exercise.
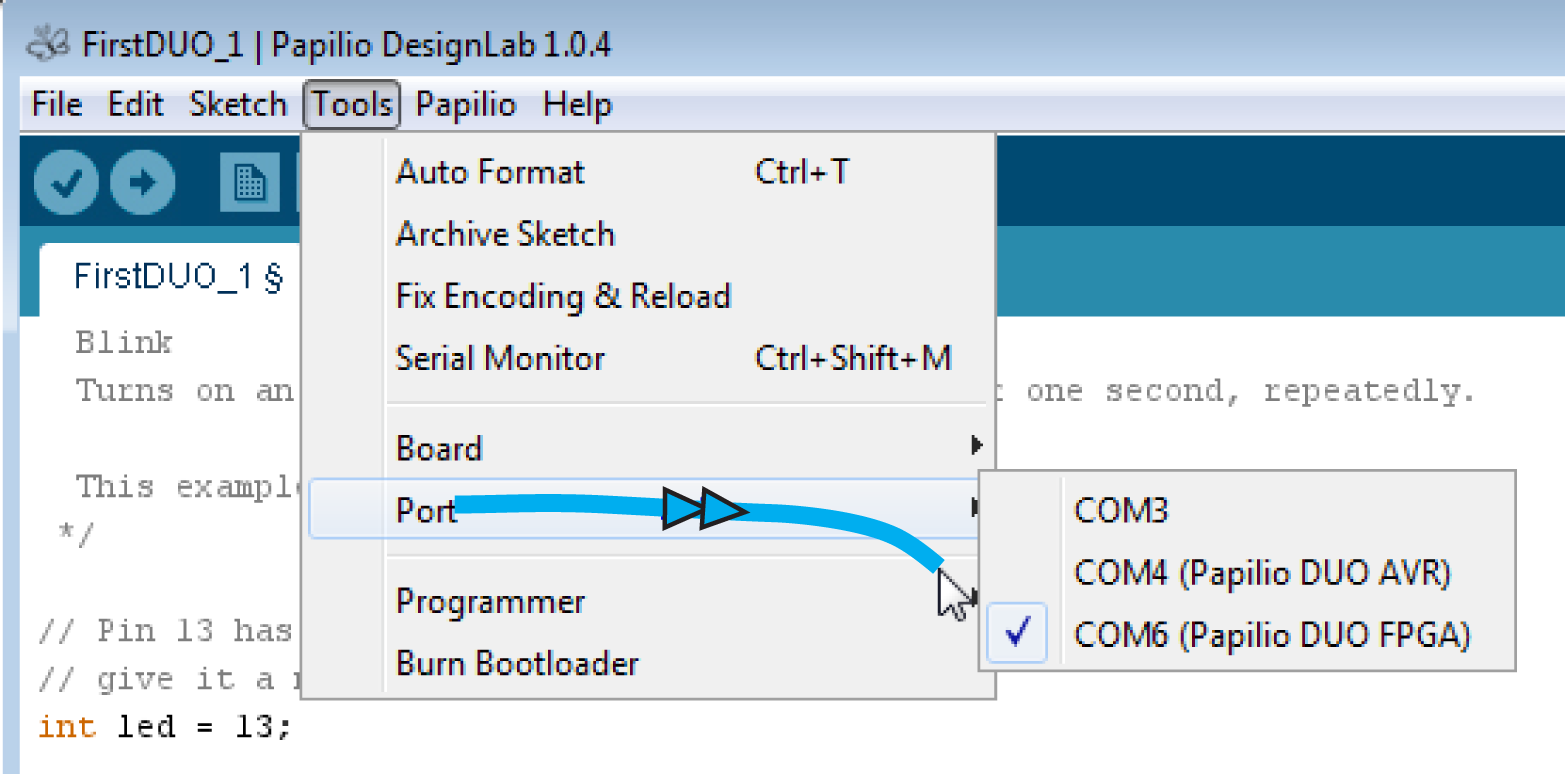
You’ll notice now that there are two Papilio DUOs listed in DesignLab’s Tools→Port submenu: one for the FPGA and one for the AVR. You’ll need to select the FPGA COM port first, as shown in Figure B-1.

Figure B-1. Select ...
Get Make: FPGAs now with the O’Reilly learning platform.
O’Reilly members experience books, live events, courses curated by job role, and more from O’Reilly and nearly 200 top publishers.

