7.2. Selecting and Planning a Lab Area
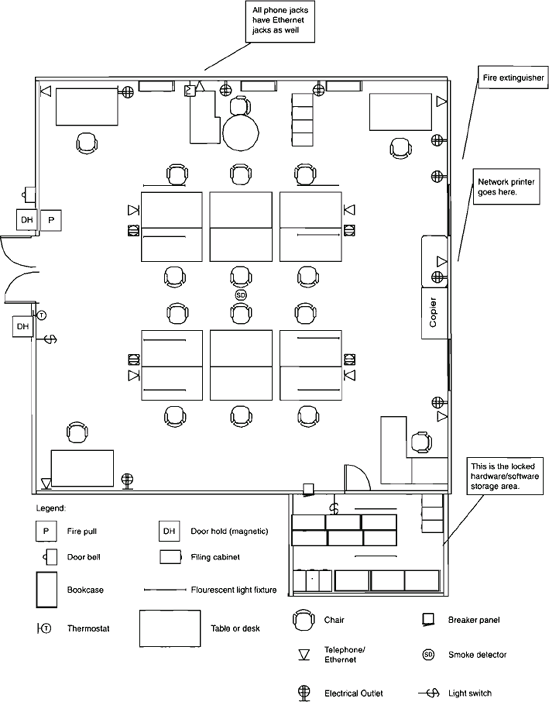
Once you've decided that a test lab is necessary, you'll need to select a location for the lab and plan its configuration. As you consider the factors outlined here, try to sketch a scaled floor plan of the lab, along the lines of the example shown in Figure 7.1. Make this floor plan as large as possible if you sketch it on paper, or use graphing or drawing software such as Visio. Either way, you should count on developing the floor plan iteratively; you might even need to start all over if you discover that the space you initially selected is unsuitable.
Size.
Is the potential lab space large enough? When the shape of the room is anything other than square or rectangular and wide, you must consider size in conjunction with layout—that is, you must look at the actual working space. Also consider the height of the ceiling; I have seen racks of equipment as high as eight feet. Pay attention to the doors—everything in the lab must come in and, eventually, go out through them. Begin your sketch of the lab by drawing the lab area, including the location of the doors and the direction in which they open.
Figure 7.1. An example of a floor plan sketch for a test lab.
Lighting.
Windows can provide both aesthetic benefits and a welcome break for testers. Some of the most pleasant test labs I ever worked in had high-rise views, one of downtown Taipei ...
Get Managing the Testing Process: Practical Tools and Techniques for Managing Hardware and Software Testing now with the O’Reilly learning platform.
O’Reilly members experience books, live events, courses curated by job role, and more from O’Reilly and nearly 200 top publishers.

