Formatting Table Cells
Although table styles provide a rough cut on the formatting, you might like to fine-tune your table formatting as well. In the following sections you learn how to adjust various aspects of the table’s appearance.
Changing row height and column width
You might want a row to be a different height or a column a different width than others in the table. To resize a row or column, follow these steps:
1. | Position the mouse pointer on the border below the row or to the right of the column that you want to resize. The mouse pointer turns into a line with arrows on each side of it.
|
2. | Hold down the mouse button as you drag the row or column to a new height or width.
A dotted line appears showing where it will go.
|
3. | Release the mouse button.
|
You can also specify an exact height or width measurement using the Height and Width boxes in the Cell Size group on the Layout tab. Select the row(s) or column(s) to affect, and then enter sizes in inches or use the increment buttons, as shown in Figure 23-11.
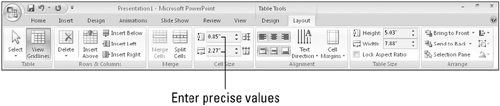
The Distribute Rows Evenly and Distribute Columns Evenly buttons in the Cell Size group (see Figure 23-11) adjust each row or column in the selected range so that the available space is occupied evenly among them. This is handy especially if you have drawn the table yourself rather than allowed ...
Get Office 2007 Bible now with the O’Reilly learning platform.
O’Reilly members experience books, live events, courses curated by job role, and more from O’Reilly and nearly 200 top publishers.

