Importing Image Files into PowerPoint
Most of the choices you make regarding a raster image’s resolution, color depth, and file type are done outside of PowerPoint. Consequently, by the time you’re ready to put them into PowerPoint, the hard part is over.
Assuming you have already acquired the image, use the following steps to insert it into PowerPoint.
1. | Display the slide on which you want to place the image.
|
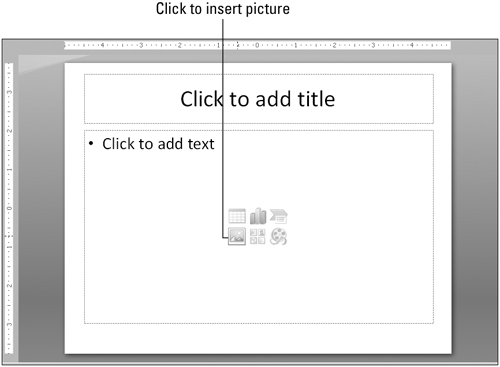
2. | If the slide has a content placeholder for Insert Picture from File, as in Figure 24-38, click it. Otherwise, click Picture on the Insert tab. The Insert Picture dialog box opens.
Figure 24-38. You can insert a picture by using the Insert Picture from File content placeholder icon.
|
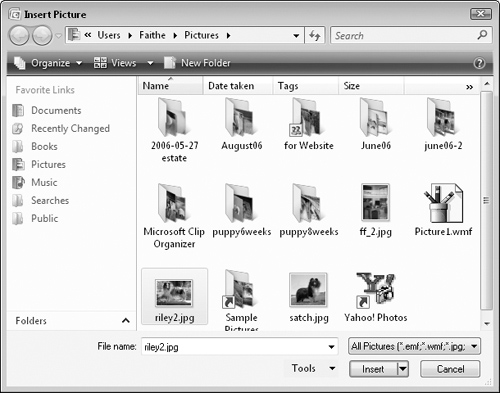
3. | Select the picture to import. See Figure 24-39. You can switch the view by using the View (or Views) button in the dialog box to see thumbnails or details if either is effective in helping you determine which file is which.
|
4. | Click Insert. The picture is inserted.
|
Tip
If you have a lot of graphics in different formats, consider narrowing down the list that appears by selecting a specific file type from the file type list. By default it is set to All Pictures, as in Figure 24-39.
Linking to a graphic file
If you ...
Get Office 2007 Bible now with the O’Reilly learning platform.
O’Reilly members experience books, live events, courses curated by job role, and more from O’Reilly and nearly 200 top publishers.


