
chapter 2: editing in word 75
This browsing method also works if your document’s styles (see page 141) in-
clude any Heading styles. Use these preformatted font styles to set off chapter
titles, captions, or subtopics. When you browse by heading, your insertion point
skips from one heading to the next, bypassing all the mere mortal body text in
between.
• Browse by Edit. Unlike the other browse objects, this one possesses a limited
short-term memory. Word only remembers the last three places you clicked in
your document. See the sidebar on the previous page for details.
Tip: Even though you’ve selected a browse object, you’re not stuck with using the mouse to click the
Navigator buttons. The keyboard shortcut c-Page up or Page down takes you from one item to the next.
Finding and Replacing
When editing a document, sometimes you know exactly what you want to revise,
but just don’t know where it is. For instance, you want to go back and read the
paragraph you wrote about mansions, but you don’t remember what page it’s on. Or
suppose you’ve found out that you misspelled Sarah’s name all the way through an
article. Now you have to replace every occurrence of Sara with Sarah—but how do
you make sure that you’ve got them all?
That’s where Find and Replace comes in.
Find
If you just want to find a certain word (or even part of a word), choose Edit→Find
(or press c-F). The Find and Replace dialog box opens, as shown in Figure 2-6.
Type the word you’re looking for, and then click Find Next (or press Return or c-
F).
Tip: If you turn on “Highlight all items found in Main Document,” the Find Next button changes to say
Find All. Now Word will select all occurrences of the search term simultaneously. At that point, you can
bold them all, italicize them all, cut them all, or perform other kinds of neat global maneuvers.
Now Word searches for your search term, starting from the position of the insertion
point. If it finds what you’re seeking, it scrolls to and highlights each occurrence of
that word or phrase in your document. (If it doesn’t find any occurrences, an error
message tells you so.)
If Word finds an occurrence, but it’s not the one you had in mind, you can keep
clicking Find or hitting Return to find successive occurrences. When Word reaches
the end of your document, it starts searching again from the beginning. When it
finally wraps around so far that it finishes searching the whole file, another dialog
box lets you know.
Navigating Your
Documents
76 office x for macintosh: the missing manual
The Find box remains on the screen throughout the process, but don’t let that stop
you; you can pause and edit your document at any time. Just click in your document
window, sending the Find box to the background. To resume your search, click the
Find dialog box to bring it forward, then click Find Next.
Tip: The keystroke Shift-F4 (or Shift-c-Y) means “find the next occurrence of whatever I just searched
for.” The advantage is that it works even after you’ve closed the Find box altogether—and even if you
performed your search hours ago (provided you haven’t closed the document).
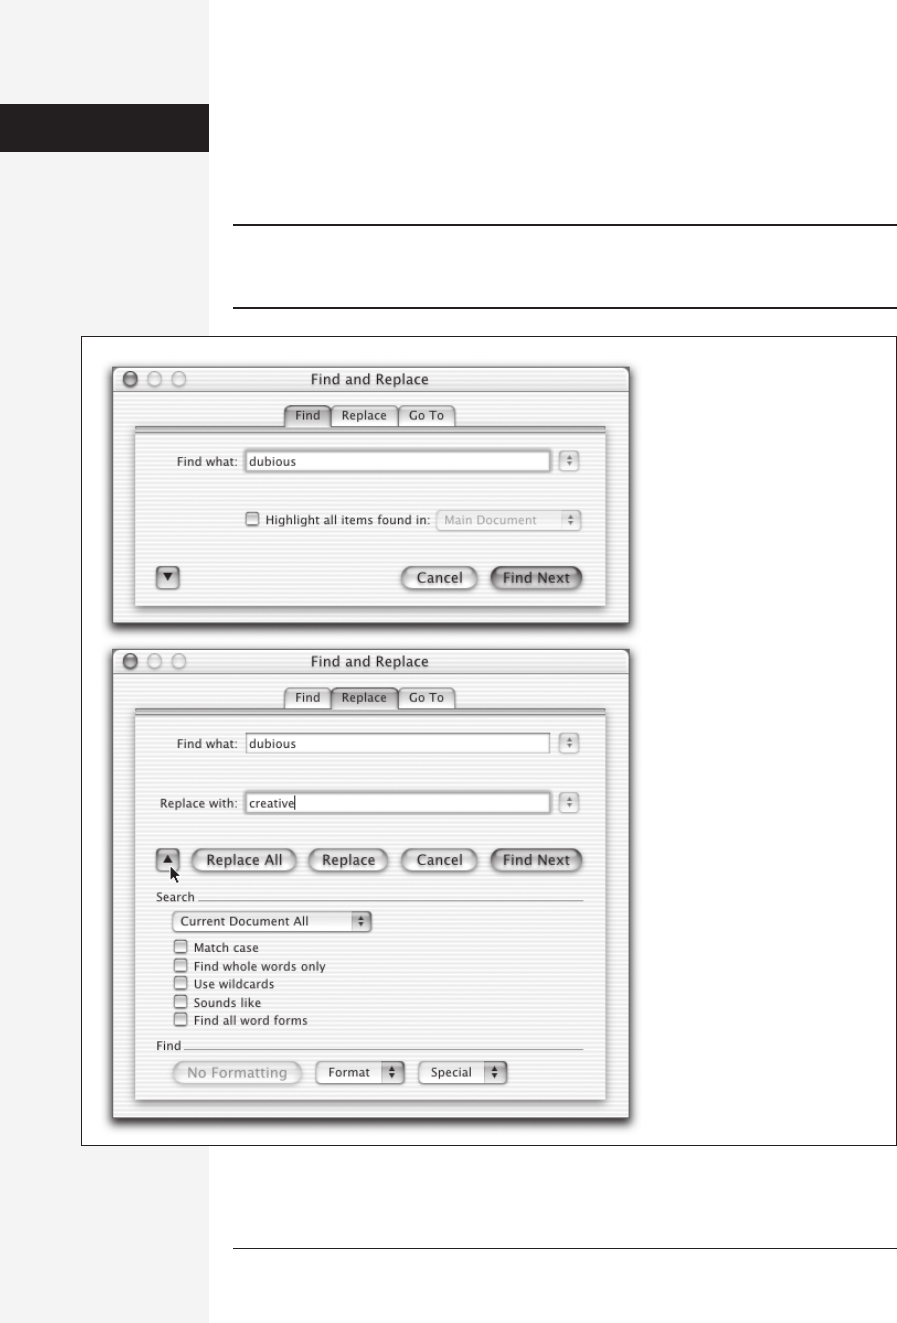
Figure 2-6:
Top: The Find dialog box.
Bottom: The expanded Replace
box. The Format and Special
menus at the bottom of this
dialog box let you search for a
font, typestyle, paragraph break,
and so on. If you’d like to find all
your italics and change them to
boldface, or find all the dashes
and delete them, this is the way
to do it.
Finding and
Replacing
Get Office X for Macintosh: The Missing Manual now with the O’Reilly learning platform.
O’Reilly members experience books, live events, courses curated by job role, and more from O’Reilly and nearly 200 top publishers.

