Chapter 4. Developing and Deploying Your First Application
At this point, you should have a good understanding of the OpenShift platform and have it running locally. Now comes the good stuff, actually using the platform for application development and deployment. In this chapter, we are going to create and deploy our first application using the popular open source WildFly application server for Java-based applications. We will also use a bit of git, since it is the main way OpenShift interacts with source code. But before we get started, we need to cover a few basics of both Git and WildFly in case you are not familiar with them.
Understanding the Tools
Git
Git is a program that provides distributed version control. You may have used Subversion, CVS, or Visual SourceSafe, which are all centralized version control systems. In centralized systems there is a master server and everyone else has a copy of the code that they need to synchronize with the master. With Git, every repository, from the one on your laptop to the one on a remote server, is considered a legitimate master. Everything is kept in sync through patches sent between repositories. You can use Git as a pseudo-centralized version control system by having everyone on the team agree on “the master.” Wikipedia has a good discussion about some of the differences between centralized and distributed version control systems.
The important thing to keep in mind about Git is that the Git repository on your machine is considered a repository, and you need to commit your changes there first. That means you have to add any new files and commit any changes on your local machine before you can push your changes to any other Git repository.
On OpenShift, in order to take advantage of the S2I builder images, you will need to have your source code in a reachable Git repository. By reachable, we mean that your OpenShift server has the ability to see the repository and clone contents over the network. This can include both public and private repositories as long as OpenShift can establish a network connection to the Git repository host. For the work we do here, you will have two Git repositories:
-
A remote repository on GitHub (or any public Git repository of your choice)
-
A local repository on your local machine
There are three basic commands you need to work with OpenShift:
git add-
Add a file to your local Git repository. Even if you have a file in the directory representing your Git repo, it is not considered part of the repository until you add it.
git commit-
Commit any changes you have made to your local repository.
git push-
Push the changes from your local repository up to your publicly addressable repository on GitHub.
If you are interested in learning more, you’re in luck; there are several different decent documents to get you going. If you are coming from Subversion land, there is even a Git introduction for you. The fine people at GitHub have also put together a nice collection of resources about Git.
A quick note about the difference between Git and GitHub. Git is the tool, and GitHub is a site that allows for public and private hosting of Git repositories. GitHub also adds a lot of social features, making it very easy for developers to find and collaborate on code. That said, you can certainly use GitHub with OpenShift while using the automated builder images provided with S2I.
WildFly
If you are a Java Developer, you are probably familiar with the WildFly application server from Red Hat. If not, what you need to know is that WildFly is an application server that implements the Java Platform, Enterprise Edition specification, often referred to as Java EE. What you may not know is that WildFly was formally known as JBoss AS and went through a name change in November of 2014. This was done to more closely align with the open source community the server is targeted at and to ensure developers were not confused between JBoss AS and JBoss EAP.
WildFly is a free and open source project under the LGPL version 2.1 license. For this book, we are going to be using version 10 of the WildFly application server that was released in February of 2016.
Note
We will be using the WildFly server for this example but the code will also work on the popular Tomcat server.
For more information on the WildFly application server, refer to the official website.
If you are not a Java developer, don’t fret, as you can still follow along with the exercises in this book as the main purpose is to learn how to interact with the platform. The process is almost identical regardless of the programming language or server your application project uses.
Creating Our First Application
Now that we understand the basic tools we need for our first application, Git and WildFly, it’s time to dig in and start working with the platform. However, we do have to complete one additional step before we actually deploy our first application: we need to fork, or make a copy of, the sample application we will be using in this chapter.
Creating a Copy of the Sample Application
In Chapter 1, you created an account on the popular GitHub service. Now we are going to use that account to fork the application code that we will be using to deploy. As is often standard practice in technical books, the first application we are going to deploy is a simple Hello, world application. Let’s get started.
Log in to your GitHub account and then point your browser to the repository for the sample application.
Once the page has loaded, and you are authenticated with your GitHub account, you should see a fork button in the upper righthand corner of the screen as shown in Figure 4-1.
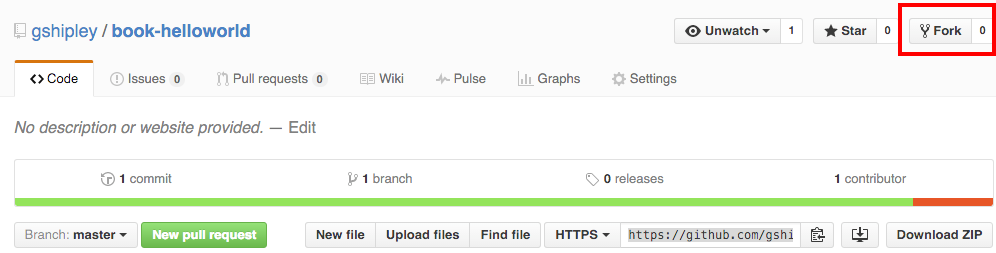
Figure 4-1. Fork project
After you fork the application code, you will have a working copy in your account that you are free to modify and use for deployment on the platform.
Creating the Application
Now that we have a copy of the source code project in our personal GitHub account, we can create a project and a corresponding pod that will contain our deployed source code. The first thing we want to do is log in to the web console by opening up the following URL: https://10.2.2.2:8443.
When prompted for the username and password, use the following:
-
Username: user
-
Password: password
Next, click the New Project button, which will drop you in the projection creation flow as shown in Figure 4-2.
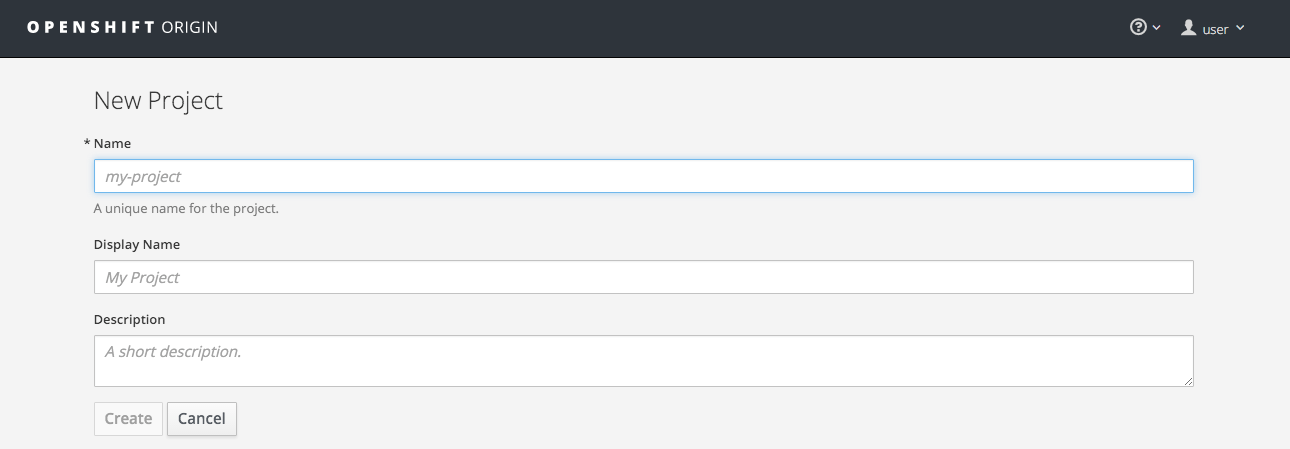
Figure 4-2. New project
Enter this information in the fields provided:
| Field Name | What to enter | Description |
|---|---|---|
Name |
|
The name of your project |
Display Name |
|
The project name that will be displayed in the UI |
Description |
|
Details about your project |
Note
Project names have to be unique across the entire OpenShift environment. You can think of a project as a unique namespace for your applications.
After you fill in the fields above, click Create. You will then select the type of template you would like to use for your first application. For this example, click the wildfly:10.0 application template. You will then name your application as well as the URL for your GitHub repository that we forked previously in this chapter, as shown in Figure 4-3.
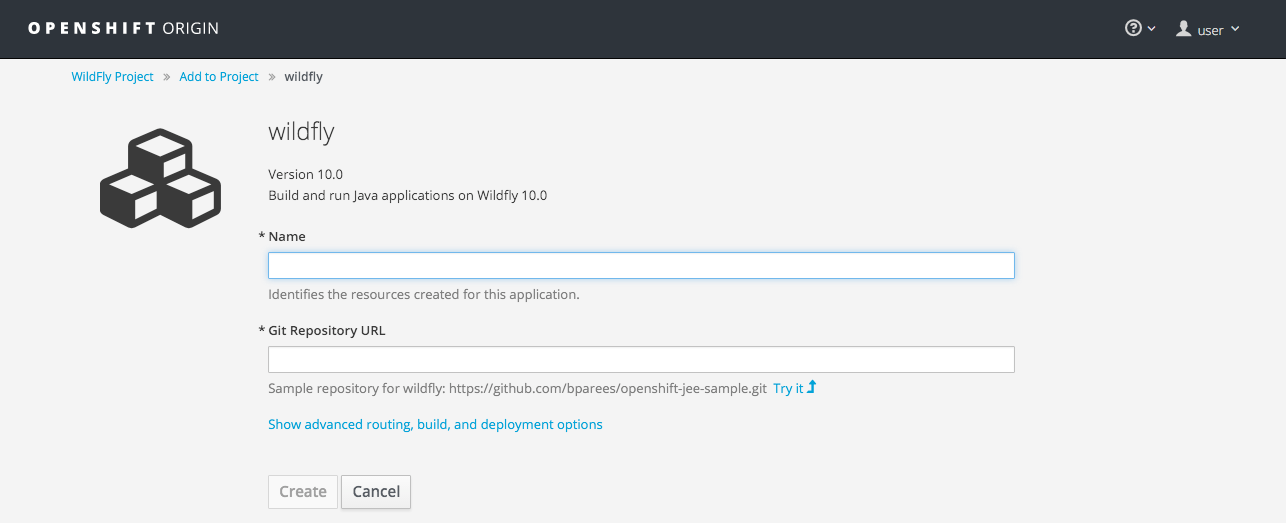
Figure 4-3. Select template
Enter helloworld as the name, and then paste the URL for your repository on GitHub. If you are not familiar with GitHub, the repository URL is shown on the repository home page as shown in Figure 4-4.
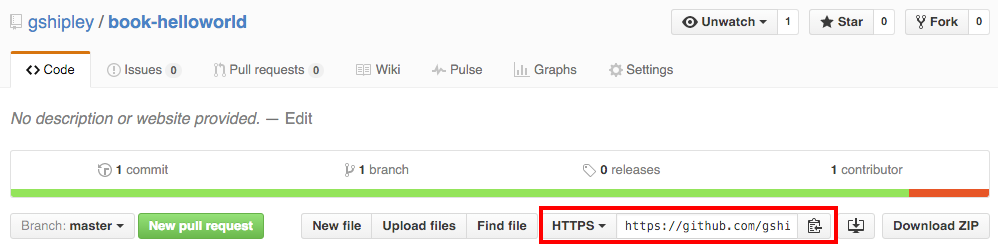
Figure 4-4. GitHub repo URL
Tip
Many first-time users of GitHub find that the repository URL is not the same URL displayed in the browser. A Git repository URL normally ends with the .git extension.
Once you have entered in the name and correct repository URL, click the Create button. Then watch the magic begin!
At this point, the process we discussed in Chapter 1 regarding S2I is executed. Depending on the speed of your Internet connection, this may take a few minutes as the builder image is downloaded and the source code for the project is compiled. You will know your source code is ready when the indicator for your pod turns blue as shown in Figure 4-5.
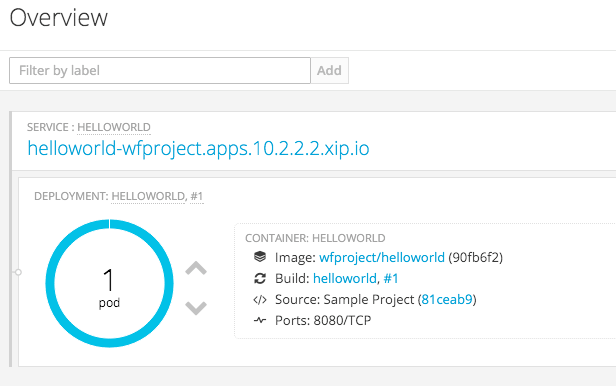
Figure 4-5. Running pod
Note that the application also has an associated route, which is the DNS name for your application on your local network. In this specific example, the URL is helloworld-wfproject.apps.10.2.2.2.xip.io. If you click that URL you will be directed to the running application and will see the following content on the displayed web page:
Hello, OpenShift.
Congratulations! You are now officially an expert at deploying Java-based projects using Docker-based containers. That wasn’t so bad, was it?
Making a Code Change and Starting a New Build
In the previous section, we deployed a very simple application. It is also important to understand how to modify the code and begin a new build of your project.
If you don’t have the project cloned locally to your machine, do that now. If you are not familiar with Git, you will want to execute the following command in the directory where you would like the source code to be stored ensuring you replace your_repository_url with the correct .git repo file you used to create the project:
git clone your_repository_url
To see how modifying code works with the platform, open up your favorite editor, or IDE, and edit the following file in the repository:
src/main/webapp/index.html
Find the following line:
<h1>Hello, OpenShift.</h1>
Change it to:
<h1>Hello, OpenShift builds.</h1>
Now that you have modified some super mission critical source code, it’s time to commit the change to your local repository and then push the change to the remote repository on GitHub. To accomplish this, issue the following commands:
git commit -am "Updated index.html to change message."
git push
You can verify that the change was reflected in your upstream (GitHub) repository by visiting your project on the GitHub web console.
Now we need to start a new build of our application so OpenShift can deploy the new source. Go to the project overview page inside the OpenShift web console and then click Browse and then Builds. You will see a table listing each of the different types of builds that have been created for your project. At this point, you should only see one build with the following information:
| Name | Last Build | Status | Created | Type | Source |
|---|---|---|---|---|---|
helloworld |
#1 |
Complete in one minute, 14 seconds |
9 minutes ago |
Source |
repo URL |
Note that the name of the build (helloworld) is actually a link. Click the name and you will be taken to the build overview page as shown in Figure 4-6.
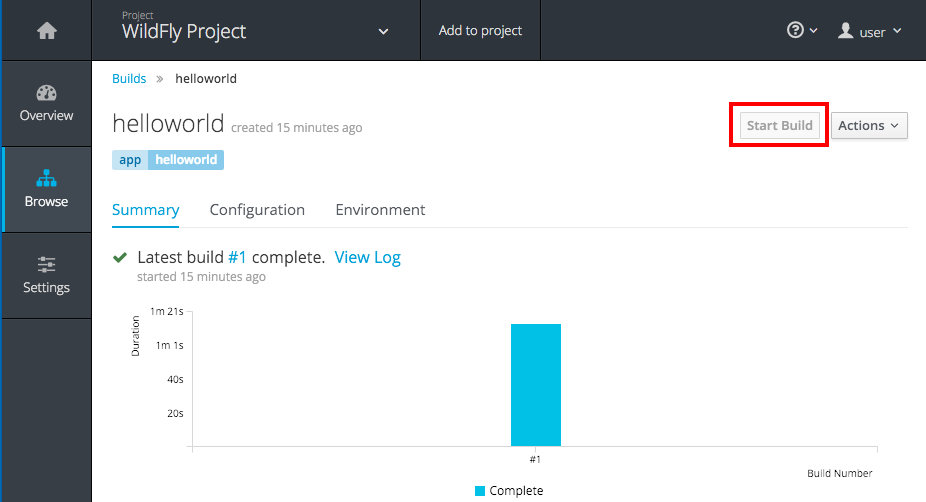
Figure 4-6. Build overview
Once you click the Start Build button, a new build will be triggered that will clone the updated source code from the application’s GitHub repository and the remainder of the S2I flow will be executed. Once the build and deployment are complete, you will be able to see the result of the modifications by clicking the application’s URL displayed on the project overview page in the web console. In this specific example, the URL is helloworld-wfproject.apps.10.2.2.2.xip.io.
Summary
In this chapter, we learned how to create and deploy our first application on the OpenShift platform. After we deployed the application, we learned how to make a code change and perform a new build. In the next chapter, we will continue working on the application by looking at adding dependencies for the language runtime as well connecting and using a database on the OpenShift platform.
Get OpenShift for Developers now with the O’Reilly learning platform.
O’Reilly members experience books, live events, courses curated by job role, and more from O’Reilly and nearly 200 top publishers.

