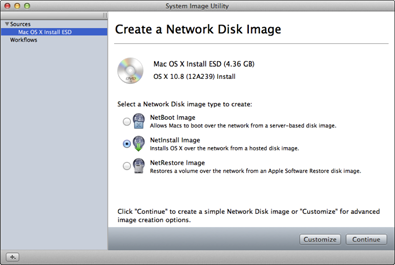
Figure 15-1: Use System Image Utility to create NetBoot, NetInstall, and NetRestore images.
Creating a System Image
System Image Utility is easy to use. When you launch it, it lists volumes or installers from which it can create images. (It can’t create an image of the drive from which you booted.) The first screen lists the OS X 10.8 Mountain Lion installer that you downloaded from the App Store, if you have it in your Applications folder. (You may remember that when you download the installer from the App Store, you can keep the file by quitting the installer after it automatically launches.) System Image Utility recognizes that the file is there. But you can also create a disk image that includes applications that you want to run on the client Macs.
You can also create images from a Mac that you set up with specific applications.
You access System Image Utility from the Server app’s Tools menu at the top of the screen. When you select System Image Utility, the window shown in Figure 15-1 opens. You can choose whether to create a NetBoot, NetInstall, or NetRestore image. From within System Image Utility, you can save the image to the NetBoot share in /Library/NetBoot.

Creating a NetBoot set
You may first want to create a NetBoot set that you will use to remotely boot the client Macs while you are installing via NetInstall or NetRestore. Typically, you configure a Mac with ...
Get OS X Mountain Lion Server For Dummies now with the O’Reilly learning platform.
O’Reilly members experience books, live events, courses curated by job role, and more from O’Reilly and nearly 200 top publishers.

