Chapter 4. Vision
This chapter explores the practical side of implementing vision-related artificial intelligence (AI) features in your Swift apps. Taking a top-down approach, we explore seven vision tasks, and how to implement them by using Swift and various AI tools.
Practical AI and Vision
Here are the seven practical AI tasks related to vision that we explore in this chapter:
- Face detection
-
This uses image analysis techniques to count faces in an image and perform various actions with that information, such as applying other images on top of the face, with the correct rotation.
- Barcode detection
-
This uses Apple’s frameworks to find barcodes in images.
- Saliency detection
-
This task finds the most salient area of an image using Apple’s frameworks.
- Image similarity
-
How similar are two images? We build an app that lets the user pick two images and determine how similar they are.
- Image classification
-
Classification is a classic AI problem. We build a classification app than can tell us what we’ve taken a photo of.
- Drawing recognition
-
Recognition is basically classification, no matter what you’re classifying, but in the interest of exploring a breadth of practical AI topics with you, here we build an app that lets you take a photo of a line-drawing and identify the drawing.
- Style classification
-
We update our Image Classification app to support identifying the style of a supplied image by converting a model built with another set of tools into Apple’s CoreML format.
Task: Face Detection
Whether you need to check if there is, in fact, a face present to help a user validate and verify their profile photo, or you want to actually start drawing things on top of a supplied photo SnapChat-style, face detection is a useful feature for lots of apps.
For the first task, we’re going to look at how easy it is to add practical face detection features to your Swift iOS apps. We’re going to do this without any model training, using Apple’s provided AI frameworks (“Apple’s Other Frameworks”).
Because of this, this task is a little different from many of the others in this book in that the toolkit for performing face recognition is largely provided by Apple. We follow a similar process, using Apple’s frameworks, in “Task: Image Similarity” and “Task: Speech Recognition”, among others.
You could go and train a model that understands what a face is, but Apple has done the work for you: look no further than the camera app on iOS, and how it can identify a face.
Problem and Approach
Much like many of the practical AI tasks in this book, face detection is everywhere. The authors’ collective favorite media depiction of facial detection is in the fabulously forward-looking fictional TV show, Person of Interest.
Tip
Seriously, we cannot recommend Person of Interest more highly. Stop reading this and go watch it and then come back and continue reading. We’ll still be here.
In this task, we’re going to explore the practical side of face detection by doing the following:
-
Making an app that can detect human faces in images, allowing us to confirm that a user has supplied a useful profile picture
-
Using Apple’s tools for doing this without training a model
-
Exploring the next steps for improved face detection
We’re going to build an app that can count the number of faces in a photo chosen by the user. You can see the app in Figure 4-1.
Building the App
We’re going to use Apple’s newest user interface (UI) framework, SwiftUI, to build the user interface for this app.
We use both SwiftUI and UIKit for different examples in this book to give you a practical grasp of the use of both of Apple’s iOS UI frameworks in building AI-driven apps. We often chose which framework to use fairly arbitrarily, just like in the real world (don’t tell clients that, though).
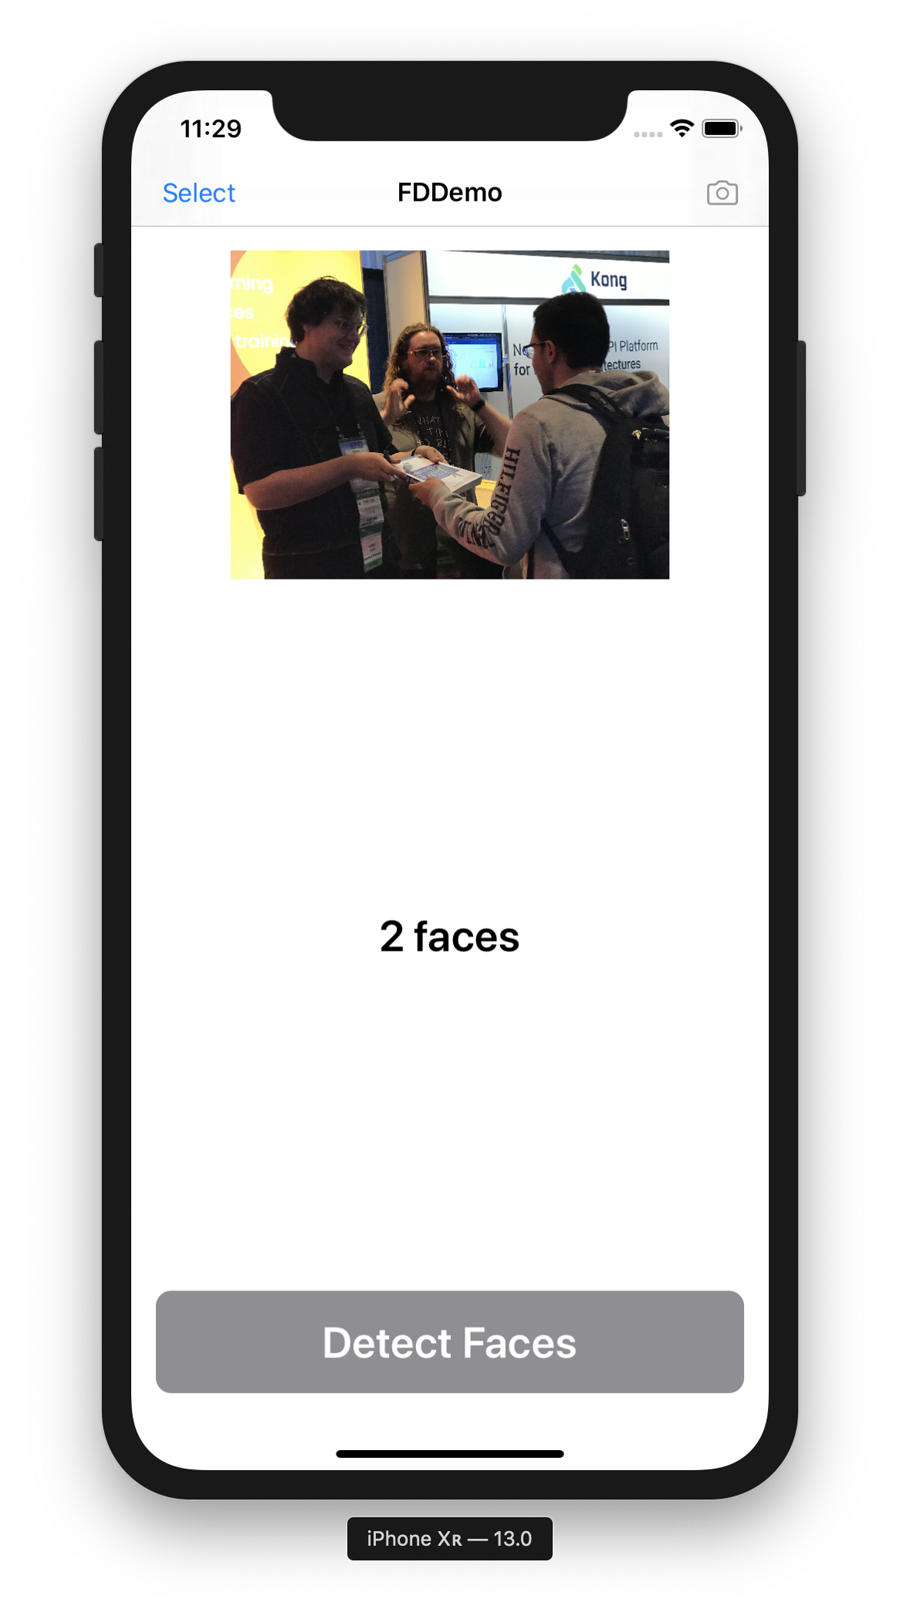
Figure 4-1. The final version of our face counting app
The final form of the app in Figure 4-1 consists of the following SwiftUI components:
-
A
NavigationViewin which to display the title of the app as well as the button to select a photo -
An
Imageto display the chosen image in which the app will count the faces -
A
Buttonto trigger the face counting -
Some
Textto display the count of faces
Tip
If you need a refresher on SwiftUI, check Apple’s documentation as well as our website.
However, we construct this view from multiple subviews, and the way we do this might be a little unfamiliar compared to how we use SwiftUI elsewhere in this book. We’ve done this to help demonstrate the breadth of approaches that you can take to constructing a UI (for much the same reason as we use SwiftUI and UIKit, for different practical examples, throughout the book). This approach gives you maximum exposure to the real-world ways of doing things.
Tip
If you don’t want to manually build the face-counting iOS app, you can download the code from our website; look for the project named FDDemo-Starter. After you have that, follow along through the rest of this section (we don’t recommend skipping it) and then meet us at “What Just Happened? How Does This Work?”.
To make the face counting iOS app yourself, you’ll need to do the following:
-
Fire up Xcode.
-
Create an iOS app project in Xcode, choosing the “Single View App” template. The project should be Swift and the SwiftUI checkbox should be selected, as shown in Figure 4-2.
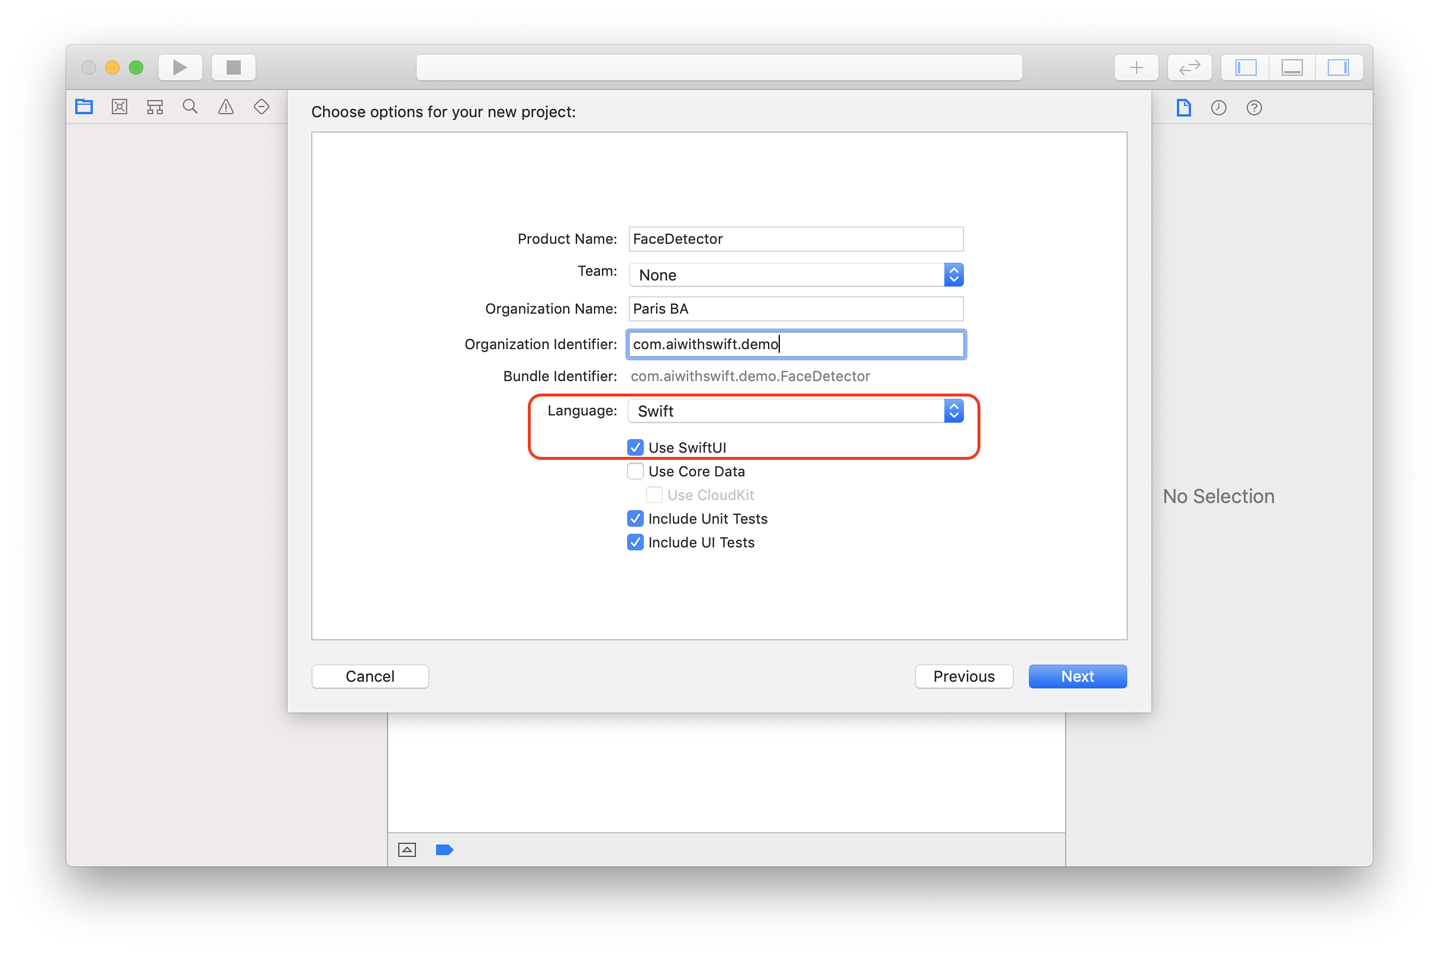
Figure 4-2. Creating a new project with SwiftUI
-
Add a new Swift file called Faces.swift to the project (File menu → New → File), and add the following
imports:importUIKitimportVisionNothing particularly interesting here: we’re importing UIKit because we’re using
UIImage, and it comes with it, and we’re importing Vision, because that’s the Apple framework that we’ll be using to detect faces. -
Below the
imports, add the followingextensiononUIImage:extensionUIImage{funcdetectFaces(completion:@escaping([VNFaceObservation]?)->()){guardletimage=self.cgImageelse{returncompletion(nil)}letrequest=VNDetectFaceRectanglesRequest()DispatchQueue.global().async{lethandler=VNImageRequestHandler(cgImage:image,orientation:self.cgImageOrientation)try?handler.perform([request])guardletobservations=request.resultsas?[VNFaceObservation]else{returncompletion(nil)}completion(observations)}}}
This extension on UIImage adds a detectFaces function to UIImage, allowing us to ask any UIImage to detect the faces in it. The code within the function creates VNDetectFaceRectanglesRequest and dispatches it on a queue.
What does VNDetectFaceRectanglesRequest do? It returns the bounding box (rectangular box) for any faces detected in the image that it’s analyzing. You can learn more about it in Apple’s documentation. We run the VNDetectFaceRectanglesRequest as part of a VNImageRequestHandler, which is an object that allows us to run image analysis requests.
Note
This book isn’t here to teach Swift, but just in case you need a reminder: an extension allows you to add new functionality to existing classes, structures, enumerations, or protocols. This new functionality, as you might have guessed, includes functions. You can read more about extensions in Swift in the Swift documentation.
The call to DispatchQueue.global().async { } allows us to run the call to VNImageRequestHandler (in which we run our VNDetectFaceRectanglesRequest) on a global thread so that our UI is not locked. You can learn more about the DispatchQueue class in Apple’s documentation.
Next, create a new file in the project (ours is called Views.swift), which we use to define some SwiftUI elements for our app:
-
importSwiftUI and then add a newViewstruct, calledTwoStateButton:structTwoStateButton:View{privatelettext:Stringprivateletdisabled:Boolprivateletbackground:Colorprivateletaction:()->Void}The
TwoStateButtonstructdefines aButtonthat can be enabled or disabled, change color, and otherwise do button-y things. Very useful. -
The
TwoStateButtonwill also need abody:varbody:someView{Button(action:action){HStack{Spacer()Text(text).font(.title).bold().foregroundColor(.white)Spacer()}.padding().background(background).cornerRadius(10)}.disabled(disabled)}The
bodyhandles the drawing of theTwoStateButton(which actually just draws aButtonand someText, based on the values of the variables). -
It will also need an
init()function:init(text:String,disabled:Bool,background:Color=.blue,action:@escaping()->Void){self.text=textself.disabled=disabledself.background=disabled?.gray:backgroundself.action=action}The
init()function initializes a newThreeStateButtonto certain parameters (text, whether it’s disabled, a background color, and an action when the button is pressed). -
Next, create another
Viewstruct, calledMainView:structMainView:View{privateletimage:Ullmageprivatelettext:Stringprivateletbutton:TwoStateButtonThis
Viewhas some variables to store aUIImage, aString, and aTwoStateButton(which we created a moment ago!). -
The
MainViewwill need abody:varbody:someView{VStack{Image(uiImage:image).resizable().aspectRatio(contentMode:.fit)Spacer()Text(text).font(.title).bold()Spacer()self.button}}The
bodydraws anImage, someSpacers, someText, and aTwoStateButton(defined by the variable). -
The
MainViewwill also need aninit():init(image:UIImage,text:String,button:()->TwoStateButton){self.image=imageself.text=textself.button=button()}The
init()function creates theMainView, setting the value of the image, the text, and the button. -
We also need to add a rather long
struct, inheriting fromUIViewControllerRepresentable, in order to be able to summon aUIImagePicker, which is part of the older UIKit framework, from within SwiftUI:structImagePicker:UIViewControllerRepresentable{typealiasUIViewControllerType=UIImagePickerControllerprivate(set)varselectedImage:UIImage?private(set)varcameraSource:Boolprivateletcompletion:(UIImage?)->()init(camera:Bool=false,completion:@escaping(UIImage?)->()){self.cameraSource=cameraself.completion=completion}funcmakeCoordinator()->ImagePicker.Coordinator{letcoordinator=Coordinator(self)coordinator.completion=self.completionreturncoordinator}funcmakeUIViewController(context:Context)->UIImagePickerController{letimagePickerController=UIImagePickerController()imagePickerController.delegate=context.coordinatorimagePickerController.sourceType=cameraSource?.camera:.photoLibraryreturnimagePickerController}funcupdateUIViewController(_uiViewController:UIImagePickerController,context:Context){}classCoordinator:NSObject,UIImagePickerControllerDelegate,UINavigationControllerDelegate{varparent:ImagePickervarcompletion:((UIImage?)->())?init(_imagePickerControllerWrapper:ImagePicker){self.parent=imagePickerControllerWrapper}funcimagePickerController(_picker:UIImagePickerController,didFinishPickingMediaWithInfoinfo:[UIImagePickerController.InfoKey:Any]){print("Image picker complete...")letselectedImage=info[UIImagePickerController.InfoKey.originalImage]as?UIImagepicker.dismiss(animated:true)completion?(selectedImage)}funcimagePickerControllerDidCancel(_picker:UIImagePickerController){print("Image picker cancelled...")picker.dismiss(animated:true)completion?(nil)}}}This is a lot of code that allows SwiftUI to provide enough of UIKit’s functionality to summon a
UIImagePicker.You can learn more about
UIViewControllerRepresentablein Apple’s documentation: you use it to fake the abilities of a UIKit view when you’re using SwiftUI. Essentially, it’s a way to bridge features of the older UI framework with the new one.
-
Finally, still in Views.swift, we need to add an extension to
UIImagethat allows us to manipulate the orientation as needed:extensionUIImage{funcfixOrientation()->UIImage?{UIGraphicsBeginImageContext(self.size)self.draw(at:.zero)letnewImage=UIGraphicsGetImageFromCurrentImageContext()UIGraphicsEndImageContext()returnnewImage}varcgImageOrientation:CGImagePropertyOrientation{switchself.imageOrientation{case.up:return.upcase.down:return.downcase.left:return.leftcase.right:return.rightcase.upMirrored:return.upMirroredcase.downMirrored:return.downMirroredcase.leftMirrored:return.leftMirroredcase.rightMirrored:return.rightMirrored}}}Next, we move over to ContentView.swift:
-
First, update the
imports as follows:importSwiftUIimportVision -
Add an extension on
ContentViewto the end of the ContentView.swift file:extensionContentView{} -
Within, add a function to return our main view:
privatefuncmainView()->AnyView{returnAnyView(NavigationView{MainView(image:image??placeholderImage,text:"\(faceCount)face\(faceCount==1?"":"s")"){TwoStateButton(text:"Detect Faces",disabled:!detectionEnabled,action:getFaces)}.padding().navigationBarTitle(Text("FDDemo"),displayMode:.inline).navigationBarItems(leading:Button(action:summonImagePicker){Text("Select")},trailing:Button(action:summonCamera){Image(systemName:"camera")}.disabled(!cameraEnabled))})}This function not only returns our main view, but also creates it. SwiftUI magic!
-
Add a function to return the image picker:
privatefuncimagePickerView()->AnyView{returnAnyView(ImagePicker{resultinself.controlReturned(image:result)self.imagePickerOpen=false})} -
And add a function to return a camera view:
privatefunccameraView()->AnyView{returnAnyView(ImagePicker(camera:true){resultinself.controlReturned(image:result)self.cameraOpen=false})} -
Back near the top, add some
@Statevariables to theContentView:structContentView:View{@StateprivatevarimagePickerOpen:Bool=false@StateprivatevarcameraOpen:Bool=false@Stateprivatevarimage:UIImage?=nil@Stateprivatevarfaces:[VNFaceObservation]?=nil}These define the things that can change: whether the image picker is open, whether the camera is open, the image itself, and the faces detected.
Note
You can learn more about States in the SwiftUI documentation.
-
Add some
privatevariables, too:privatevarfaceCount:Int{returnfaces?.count??0}privateletplaceholderImage=UIImage(named:"placeholder")!privatevarcameraEnabled:Bool{UIImagePickerController.isSourceTypeAvailable(.camera)}privatevardetectionEnabled:Bool{image!=nil&&faces==nil}These store the face count, the placeholder image (displayed until the user chooses an image), the availability of a camera, and whether detection (which is reflected in the availability of the button) is enabled.
-
Update the
bodyto look as follows:varbody:someView{ifimagePickerOpen{returnimagePickerView()}ifcameraOpen{returncameraView()}returnmainView()}The
bodyViewreturns the image picker if the image picker should be open, the camera likewise; otherwise, it returnsmainView(), which is the function that we added to theContentViewby way of an extension, earlier. -
privatefuncgetFaces(){print("Getting faces...")self.faces=[]self.image?.detectFaces{resultinself.faces=result}}This function calls the
detectFaces()function, which we added earlier, as an extension onUIImagein the Faces.swift file, calling it on the current image. -
We also need a function to display the image picker:
privatefuncsummonImagePicker(){print("Summoning ImagePicker...")imagePickerOpen=true} -
As well as the camera:
privatefuncsummonCamera(){print("Summoning camera...")cameraOpen=true}Add a launch screen and icon if you want, and launch your app! You can select a photo from the photo library or take a photo if you’re running it on a real device, press the Detect Faces button, and the app will tell you how many faces it finds. You can see it working earlier, in Figure 4-1.
What Just Happened? How Does This Work?
There’s not much to say here. We’re building an app that can detect faces. For our first pass, we’ve used SwiftUI to create an iOS app that lets the user select a photo from their library, or take a new photo, and count the faces in it. As we said, not much to say.
We didn’t have to train any machine-learning models to do this as we made use of Apple’s supplied frameworks. If you’re curious about how Apple’s frameworks might work, we discuss that later in Chapter 11.
Improving the App
In this section, we improve our face-counting app to not only count the faces in a chosen image, but draw a box around them, as well, as shown earlier, in Figure 4-1.
You’ll need to have completed the app described in “Building the App” to follow from here. If you don’t want to do that, or need a clean starting point, you can download the resources for this book from our website and find the project FDDemo-Starter.
If you don’t want to follow the instructions in this section, you can also find the project FDDemo-Completed, which is the end result of this section. If you go down that route, we strongly recommend reading the code as we discuss it in this section and comparing it with the code in FDDemo-Completed so that you understand what we’re adding.
There are not too many code changes to make here, so let’s get started and get those boxes drawn around some faces:
-
Open the Faces.swift file and add the following extension on
Collectionbelow the existing extension:extensionCollectionwhereElement==VNFaceObservation{} -
The extension to
Collectionis valid only where the elements of theCollectionare of typeVNFaceObservation. -
Within this extension add the following:
funcdrawnOn(_image:UIImage)->UIImage?{UIGraphicsBeginImageContextWithOptions(image.size,false,1.0)guardletcontext=UIGraphicsGetCurrentContext()else{returnnil}image.draw(in:CGRect(x:0,y:0,width:image.size.width,height:image.size.height))context.setStrokeColor(UIColor.red.cgColor)context.setLineWidth(0.01*image.size.width)lettransform=CGAffineTransform(scaleX:1,y:-1).translatedBy(x:0,y:-image.size.height)forobservationinself{letrect=observation.boundingBoxletnormalizedRect=VNImageRectForNormalizedRect(rect,Int(image.size.width),Int(image.size.height)).applying(transform)context.stroke(normalizedRect)}letresult=UIGraphicsGetImageFromCurrentImageContext()UIGraphicsEndImageContext()returnresult} -
This extension on
Collectionallows us to work with theVNFaceObservations we get back and adds a function calleddrawnOn(), which draws a box around each face in the image. -
Update the
getFaces()function in ContentView.swift to call the newdrawnOn()function we added a moment ago:privatefuncgetFaces(){print("Getting faces...")self.faces=[]self.image?.detectFaces{resultinself.faces=resultifletimage=self.image,letannotatedImage=result?.drawnOn(image){self.image=annotatedImage}}}Note
You might be wondering why we’re using extensions for everything. We’re doing it for a couple of reasons, but first and foremost we’re doing it to make sure our code is split up into relatively easily digestible pieces. We don’t want to overcomplicate things by having enormous classes. There’s enough code to digest already.
You can now run your app, choose an image, tap the button, and observe that any faces in the image have a box around them, as shown in Figure 4-3.
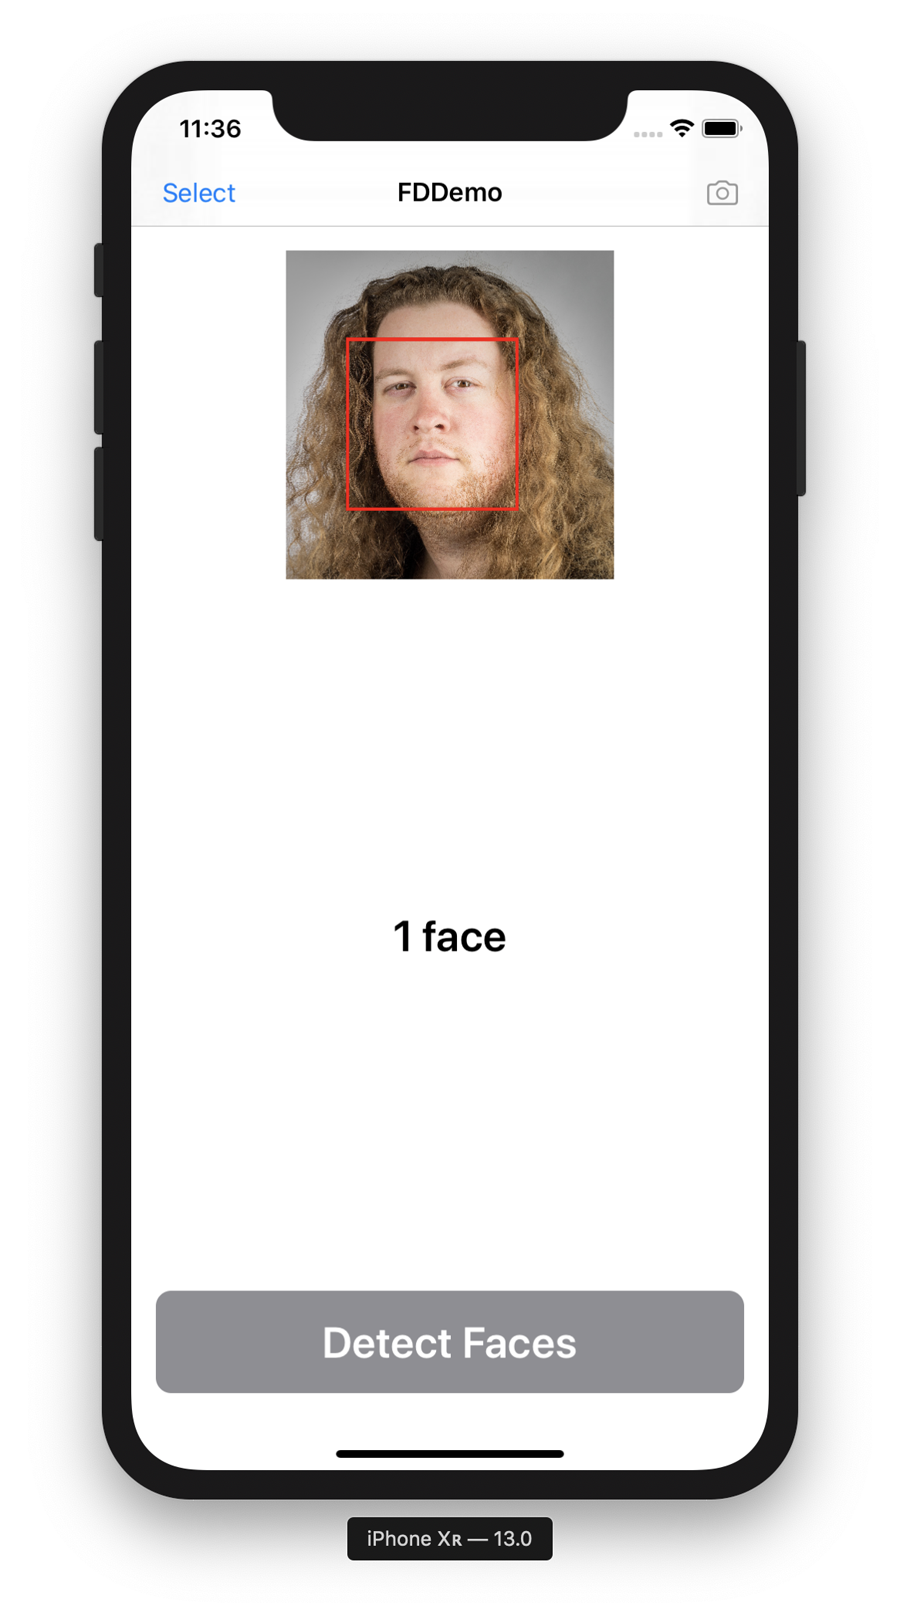
Figure 4-3. The improved face detector
Even More Improvements
We’d normally quit while we we’re ahead and talk about how and why everything works at this point, but we’re not going to do that here. Face detection is just too much fun. So far in this chapter, we’ve looked at how you can build an app that counts faces in a supplied image and then modified the app to draw a red box around the faces it detected.
In this section, let’s take that a step further, and render an emoji on top of detected faces. You can’t get much more practical than that, as shown in Figure 4-4.
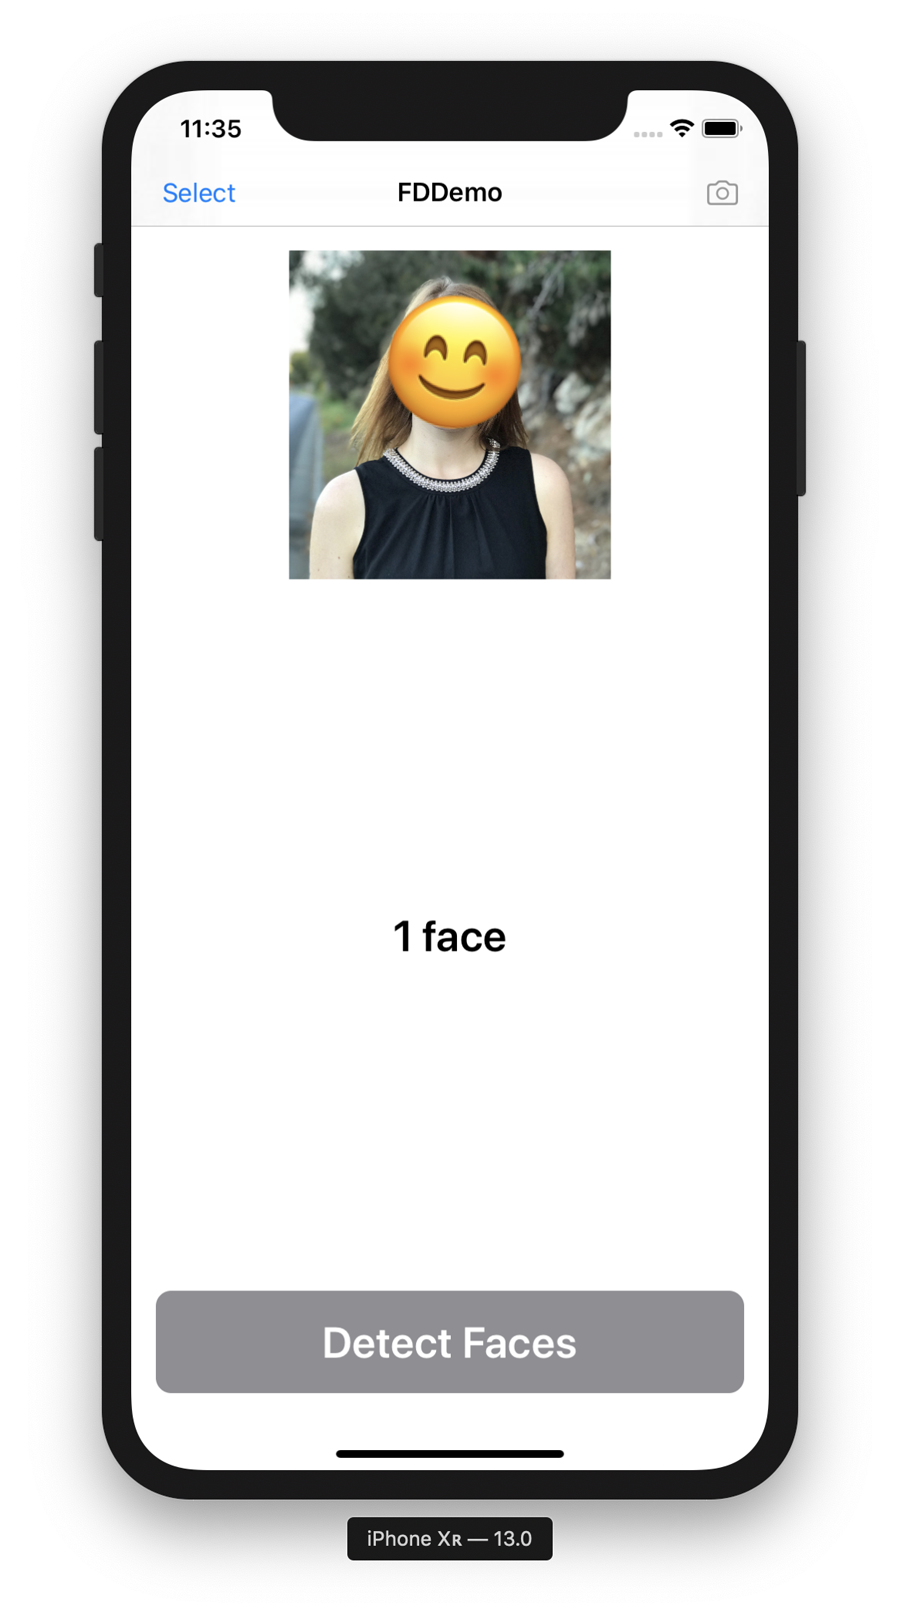
Figure 4-4. The face detection app applying an emoji on top of faces
You’ll need to have completed the app described in “Improving the App” to follow from here. If you don’t want to do that or need a clean starting point, you can download the resources for this book from our website, and find the project FDDemo-Complete. We build on the app from that point.
If you don’t want to follow the instructions in this section, you can also find the project FDDemo-Improved, which is the end result of this section. If you go down that route, we strongly recommend reading the code as we discuss it in this section and comparing it with the code in FDDemo-Improved so that you understand what we’re adding.
The only changes we need to make this time occur in Faces.swift:
-
Below the
detectFaces()function, add a new function namedrotatedBy()to the extension we created onUIImage:funcrotatedBy(degrees:CGFloat,clockwise:Bool=false)->UIImage?{varradians=(degrees)*(.pi/180)if!clockwise{radians=-radians}lettransform=CGAffineTransform(rotationAngle:CGFloat(radians))letnewSize=CGRect(origin:CGPoint.zero,size:self.size).applying(transform).sizeletroundedSize=CGSize(width:floor(newSize.width),height:floor(newSize.height))letcentredRect=CGRect(x:-self.size.width/2,y:-self.size.height/2,width:self.size.width,height:self.size.height)UIGraphicsBeginImageContextWithOptions(roundedSize,false,self.scale)guardletcontext=UIGraphicsGetCurrentContext()else{returnnil}context.translateBy(x:roundedSize.width/2,y:roundedSize.height/2)context.rotate(by:radians)self.draw(in:centredRect)letresult=UIGraphicsGetImageFromCurrentImageContext()UIGraphicsEndImageContext()returnresult}This function returns a
UIImagethat’s been rotated by the degrees specified as aCGFloat, in either a clockwise or counterclockwise direction. -
Add an extension on
VNFaceLandmarks2D, which contains a functionanchorPointInImage()that allows us to center each set of points that may have been detected in a face (representing eyes, eyebrows, lips, and such):extensionVNFaceLandmarks2D{funcanchorPointInImage(_image:UIImage)->(center:CGPoint?,angle:CGFloat?){// centre each set of points that may have been detected, if// presentletallPoints=self.allPoints?.pointsInImage(imageSize:image.size).centerPointletleftPupil=self.leftPupil?.pointsInImage(imageSize:image.size).centerPointletleftEye=self.leftEye?.pointsInImage(imageSize:image.size).centerPointletleftEyebrow=self.leftEyebrow?.pointsInImage(imageSize:image.size).centerPointletrightPupil=self.rightPupil?.pointsInImage(imageSize:image.size).centerPointletrightEye=self.rightEye?.pointsInImage(imageSize:image.size).centerPointletrightEyebrow=self.rightEyebrow?.pointsInImage(imageSize:image.size).centerPointletouterLips=self.outerLips?.pointsInImage(imageSize:image.size).centerPointletinnerLips=self.innerLips?.pointsInImage(imageSize:image.size).centerPointletleftEyeCenter=leftPupil??leftEye??leftEyebrowletrightEyeCenter=rightPupil??rightEye??rightEyebrowletmouthCenter=innerLips??outerLipsifletleftEyePoint=leftEyeCenter,letrightEyePoint=rightEyeCenter,letmouthPoint=mouthCenter{lettriadCenter=[leftEyePoint,rightEyePoint,mouthPoint].centerPointleteyesCenter=[leftEyePoint,rightEyePoint].centerPointreturn(eyesCenter,triadCenter.rotationDegreesTo(eyesCenter))}// else fallbackreturn(allPoints,0.0)}}Note
VNFaceLandmarks2Drepresents all of the landmarks that Apple’s Vision framework can detect in a face, exposed as properties. You can learn more about it in Apple’s documentation. -
We also need an extension on
CGRectthat returns aCGRectcentered on aCGPointprovided:extensionCGRect{funccenteredOn(_point:CGPoint)->CGRect{letsize=self.sizeletoriginX=point.x-(self.width/2.0)letoriginY=point.y-(self.height/2.0)returnCGRect(x:originX,y:originY,width:size.width,height:size.height)}} -
While we’re at it, let’s add an extension on
CGPoint:extensionCGPoint{funcrotationDegreesTo(_otherPoint:CGPoint)->CGFloat{letoriginX=otherPoint.x-self.xletoriginY=otherPoint.y-self.yletdegreesFromX=atan2f(Float(originY),Float(originX))*(180/.pi)letdegreesFromY=degreesFromX-90.0letnormalizedDegrees=(degreesFromY+360.0).truncatingRemainder(dividingBy:360.0)returnCGFloat(normalizedDegrees)}}This extension adds a function called
rotationDegreesTo()that returns some degrees to rotate by, given another point. This helps orient facial features with the emoji we’ll be drawing on the face. -
We also need an extension on
Array, for arrays ofCGPoints:extensionArraywhereElement==CGPoint{varcenterPoint:CGPoint{letelements=CGFloat(self.count)lettotalX=self.reduce(0,{$0+$1.x})lettotalY=self.reduce(0,{$0+$1.y})returnCGPoint(x:totalX/elements,y:totalY/elements)}}This adds a function,
centerPoint(), which returns aCGPointfor an array of points. -
Because we’re working with emojis, which are actually text, we also need an extension on
String:extensionString{funcimage(ofsize:CGSize,scale:CGFloat=0.94)->UIImage?{UIGraphicsBeginImageContextWithOptions(size,false,0)UIColor.clear.set()letrect=CGRect(origin:.zero,size:size)UIRectFill(CGRect(origin:.zero,size:size))(selfasAnyObject).draw(in:rect,withAttributes:[.font:UIFont.systemFont(ofSize:size.height*scale)])letimage=UIGraphicsGetImageFromCurrentImageContext()UIGraphicsEndImageContext()returnimage}}This allows us to get a
UIImagefrom aString, which is useful because we want to be able to display emojis on top of an image, and we want those emojis to be images. -
Replace the extension on
Collectionwith the following:extensionCollectionwhereElement==VNFaceObservation{funcdrawnOn(_image:UIImage)->UIImage?{UIGraphicsBeginImageContextWithOptions(image.size,false,1.0)guardlet_=UIGraphicsGetCurrentContext()else{returnnil}image.draw(in:CGRect(x:0,y:0,width:image.size.width,height:image.size.height))letimageSize:(width:Int,height:Int)=(Int(image.size.width),Int(image.size.height))lettransform=CGAffineTransform(scaleX:1,y:-1).translatedBy(x:0,y:-image.size.height)letpadding:CGFloat=0.3forobservationinself{guardletanchor=observation.landmarks?.anchorPointInImage(image)else{continue}guardletcenter=anchor.center?.applying(transform)else{continue}letoverlayRect=VNImageRectForNormalizedRect(observation.boundingBox,imageSize.width,imageSize.height).applying(transform).centeredOn(center)letinsets=(x:overlayRect.size.width*padding,y:overlayRect.size.height*padding)letpaddedOverlayRect=overlayRect.insetBy(dx:-insets.x,dy:-insets.y)letrandomEmoji=["
","
","
","
","
","
","
","
","
"].randomElement()!ifvaroverlayImage=randomEmoji.image(of:paddedOverlayRect.size){ifletangle=anchor.angle,letrotatedImage=overlayImage.rotatedBy(degrees:angle){overlayImage=rotatedImage}overlayImage.draw(in:paddedOverlayRect)}}letresult=UIGraphicsGetImageFromCurrentImageContext()UIGraphicsEndImageContext()returnresult}}To cut a long story short, this extension (and its new
drawnOn()function) draws a random emoji on top of the face.
And with that, we’re done. You can launch your app, choose an image, and watch it apply a random emoji to the faces detected in the image. Show your friends and family and annoy them with it; we’ll be here when you get back. You can see an example of the final app in Figure 4-5.
Figure 4-5. Our final face detector, replete with emoji
Task: Barcode Detection
We’re not going to unpack this task much, especially not after looking at “Task: Face Detection”, because it’s both similar to face detection and very simple.
We’re going to do this one in a Playground because it’s so simple to step through. It does require a fair bit of boilerplate code, though:
-
Fire up Xcode and create a new iOS-flavor Playground, as shown in Figure 4-6.

Figure 4-6. Creating a new iOS-flavor Playground in Xcode
-
Add a new source file called Extensions.swift to the Playground. In Extensions.swift,
importthe following:importUIKit
Tip
To find this code in our resources, head to our website, download the resources, and find the Playground in the BarcodeAndSaliencyDetection folder.
-
Add the following extension on
CGSize:publicextensionCGSize{funcscaleFactor(tosize:CGSize)->CGFloat{lethorizontalScale=self.width/size.widthletverticalScale=self.height/size.heightreturnmax(horizontalScale,verticalScale)}}This extension will allow us to call our function,
scaleFactor(), on aCGSize, to return the scaling factor that would make the CGRect fit in a box of the indicated size. -
Add an extension on
CGRect:publicextensionCGRect{funcscaled(byscaleFactor:CGFloat)->CGRect{lethorizontalInsets=(self.width-(self.width*scaleFactor))/2.0letverticalInsets=(self.height-(self.height*scaleFactor))/2.0letedgeInsets=UIEdgeInsets(top:verticalInsets,left:horizontalInsets,bottom:verticalInsets,right:horizontalInsets)letleftOffset=min(self.origin.x+horizontalInsets,0)letupOffset=min(self.origin.y+verticalInsets,0)returnself.inset(by:edgeInsets).offsetBy(dx:-leftOffset,dy:-upOffset)}funccropped(tosize:CGSize,centering:Bool=true)->CGRect{ifcentering{lethorizontalDifference=self.width-size.widthletverticalDifference=self.height-size.heightletnewOrigin=CGPoint(x:self.origin.x+(horizontalDifference/2.0),y:self.origin.y+(verticalDifference/2.0))returnCGRect(x:newOrigin.x,y:newOrigin.y,width:size.width,height:size.height)}returnCGRect(x:0,y:0,width:size.width,height:size.height)}}This extension allows us to call
scaled()on aCGRectto likewise scale it by a size (a scale factor), or callcropped()on aCGRectto crop it to a specifiedCGSize. -
Create an extension on
UIImage:publicextensionUIImage{varwidth:CGFloat{returnself.size.width}varheight:CGFloat{returnself.size.height}varrect:CGRect{returnCGRect(x:0,y:0,width:self.width,height:self.height)}varinvertTransform:CGAffineTransform{returnCGAffineTransform(scaleX:1,y:-1).translatedBy(x:0,y:-self.height)}}This extension has a few variables to store width and height and the like.
-
Within the
UIImageextension, we need to add some code to properly handle the orientation of the image:varcgImageOrientation:CGImagePropertyOrientation{switchself.imageOrientation{case.up:return.upcase.down:return.downcase.left:return.leftcase.right:return.rightcase.upMirrored:return.upMirroredcase.downMirrored:return.downMirroredcase.leftMirrored:return.leftMirroredcase.rightMirrored:return.rightMirrored}} -
Crop the image, based on a
CGSize:funccropped(tosize:CGSize,centering:Bool=true)->UIImage?{letnewRect=self.rect.cropped(to:size,centering:centering)returnself.cropped(to:newRect,centering:centering)} -
And based on a
CGRect:funccropped(torect:CGRect,centering:Bool=true)->UIImage?{letnewRect=rect.applying(self.invertTransform)UIGraphicsBeginImageContextWithOptions(newRect.size,false,0)guardletcgImage=self.cgImage,letcontext=UIGraphicsGetCurrentContext()else{returnnil}context.translateBy(x:0.0,y:self.size.height)context.scaleBy(x:1.0,y:-1.0)context.draw(cgImage,in:CGRect(x:-newRect.origin.x,y:newRect.origin.y,width:self.width,height:self.height),byTiling:false)context.clip(to:[newRect])letcroppedImage=UIGraphicsGetImageFromCurrentImageContext()UIGraphicsEndImageContext()returncroppedImage} -
Scale the image by using a
CGFloat:funcscaled(byscaleFactor:CGFloat)->UIImage?{ifscaleFactor.isZero{returnself}letnewRect=self.rect.scaled(by:scaleFactor).applying(self.invertTransform)UIGraphicsBeginImageContextWithOptions(newRect.size,false,0)guardletcgImage=self.cgImage,letcontext=UIGraphicsGetCurrentContext()else{returnnil}context.translateBy(x:0.0,y:newRect.height)context.scaleBy(x:1.0,y:-1.0)context.draw(cgImage,in:CGRect(x:0,y:0,width:newRect.width,height:newRect.height),byTiling:false)letresizedImage=UIGraphicsGetImageFromCurrentImageContext()UIGraphicsEndImageContext()returnresizedImage} -
Back in the main body of the Playground,
importthe following:importUIKitimportVision -
Create an extension on
VNImageRequestHandlerwith a convenience initializer:extensionVNImageRequestHandler{convenienceinit?(uiImage:UIImage){guardletcgImage=uiImage.cgImageelse{returnnil}letorientation=uiImage.cgImageOrientationself.init(cgImage:cgImage,orientation:orientation)}}A
VNImageRequestHandleris used to work with images in Apple’s Vision framework. It acts as a handle for an image that we’re working with, so we don’t need to mess with the real definitive copy of an image. Our convenience initializer allows us to create one with aUIImagebecauseVNImageRequestHandlertypically requires aCGImage, which is a different way of storing an image in Apple’s frameworks.
Tip
A UIImage is a very high-level way of storing an image, and is easy to create from files, for example. UIImages are safe to use in threaded environments, and are immutable. CGImage’s are not immutable, and can be used if you need to meddle with the contents of an image. You can learn about UIImage and CGImage in Apple’s documentation, if you’re curious.
-
Insert an extension on
VNRequest, adding aqueueFor()function:extensionVNRequest{funcqueueFor(image:UIImage,completion:@escaping([Any]?)->()){DispatchQueue.global().async{iflethandler=VNImageRequestHandler(uiImage:image){try?handler.perform([self])completion(self.results)}else{returncompletion(nil)}}}}This queues up requests for the
VNImageRequestHandler: it allows us to push things into Vision to be processed. -
Add an extension on
UIImage, and a function to dectect rectangles (just in case we want to look for those) and to detect barcodes:extensionUIImage{funcdetectRectangles(completion:@escaping([VNRectangleObservation])->()){letrequest=VNDetectRectanglesRequest()request.minimumConfidence=0.8request.minimumAspectRatio=0.3request.maximumObservations=3request.queueFor(image:self){resultincompletion(resultas?[VNRectangleObservation]??[])}}funcdetectBarcodes(typessymbologies:[VNBarcodeSymbology]=[.QR],completion:@escaping([VNBarcodeObservation])->()){letrequest=VNDetectBarcodesRequest()request.symbologies=symbologiesrequest.queueFor(image:self){resultincompletion(resultas?[VNBarcodeObservation]??[])}}// can also detect human figures, animals, the horizon, all sorts of// things with inbuilt Vision functions}
Both of these functions work the same way: they add a function to UIImage that lets us ask for barcodes or rectangles. When called, the function creates a request with Vision and looks for the type of thing we’re asking for.
To test it, drag an image with a barcode (or a QR code) into the Resources folder of the Playground, as shown in Figure 4-7 and then add some code to the Playground to call our barcode-finding code:
letbarcodeTestImage=UIImage(named:"test.jpg")!barcodeTestImage.detectBarcodes{barcodesinforbarcodeinbarcodes{("Barcode data:\(barcode.payloadStringValue??"None")")}}
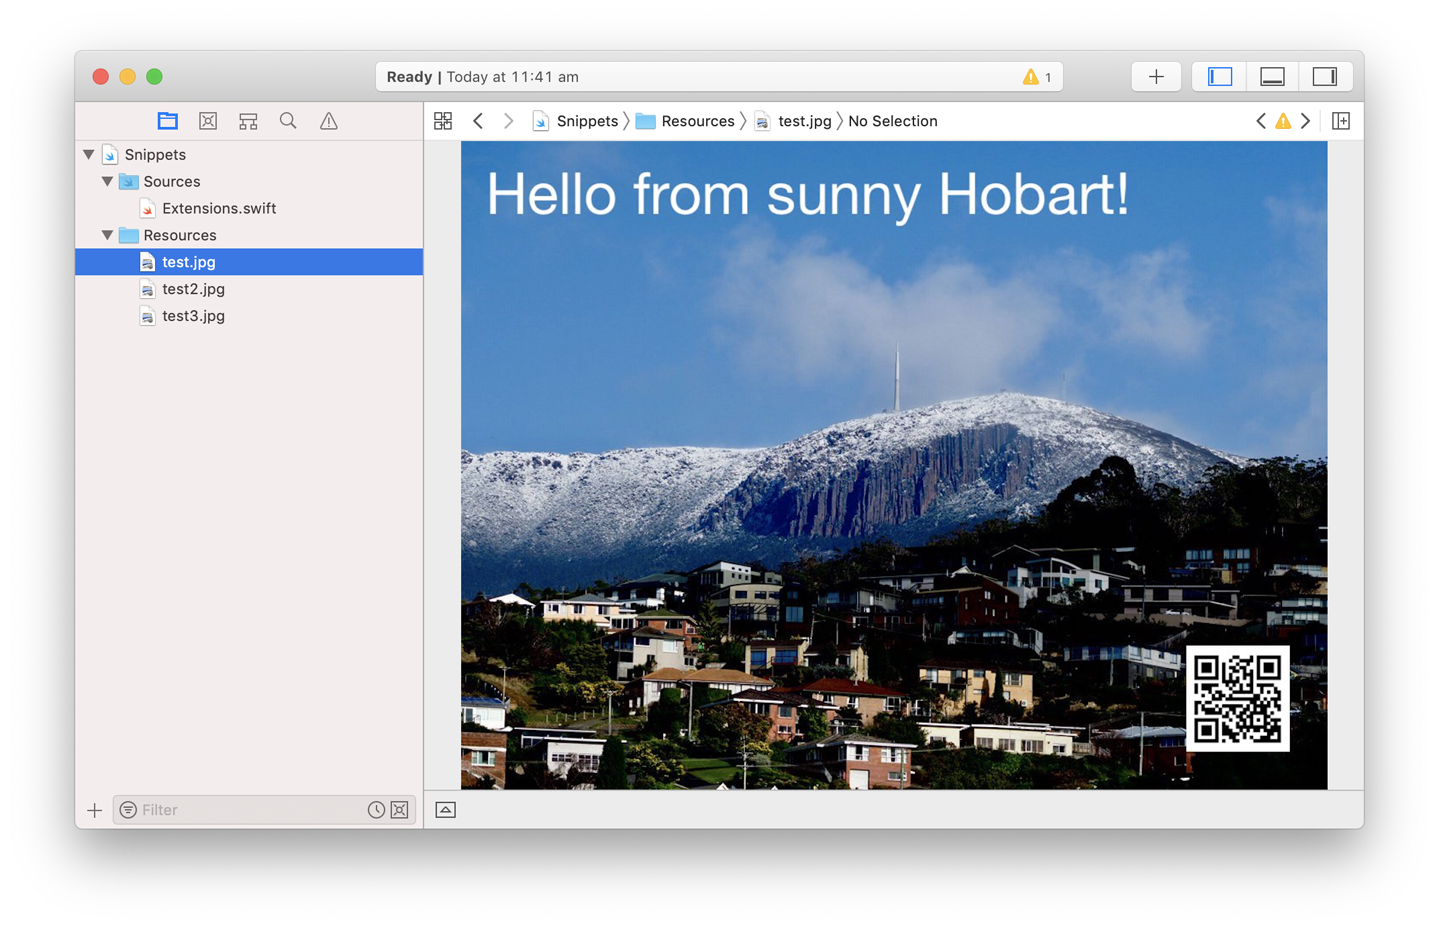
Figure 4-7. Resources for the barcode finder
This code first specifies an image (the one we dragged in, which we know has a barcode in it) and then calls the detectBarcodes() function we created on it. You should see something resembling Figure 4-8 when it works. That’s it!
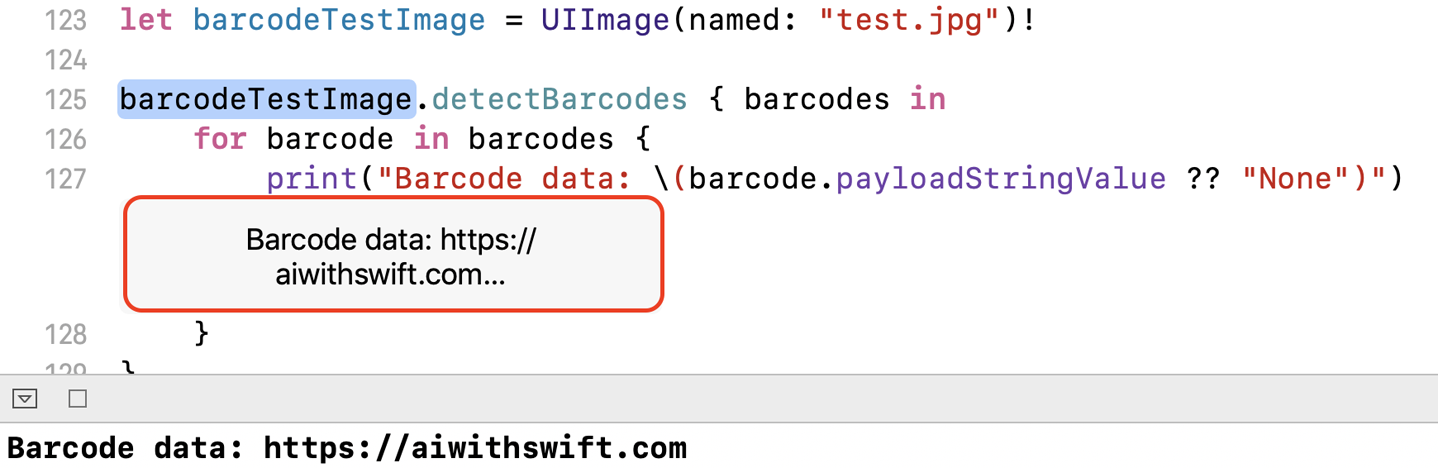
Figure 4-8. Our barcode has been detected
Task: Saliency Detection
Closely related to barcode detection is saliency detection: finding the most interesting, or salient, bit of an image. For this task, we take the Playground we wrote for “Task: Barcode Detection”, and add support for saliency detection.
Confused by what we mean by saliency detection? Check out Figure 4-9 for an example.
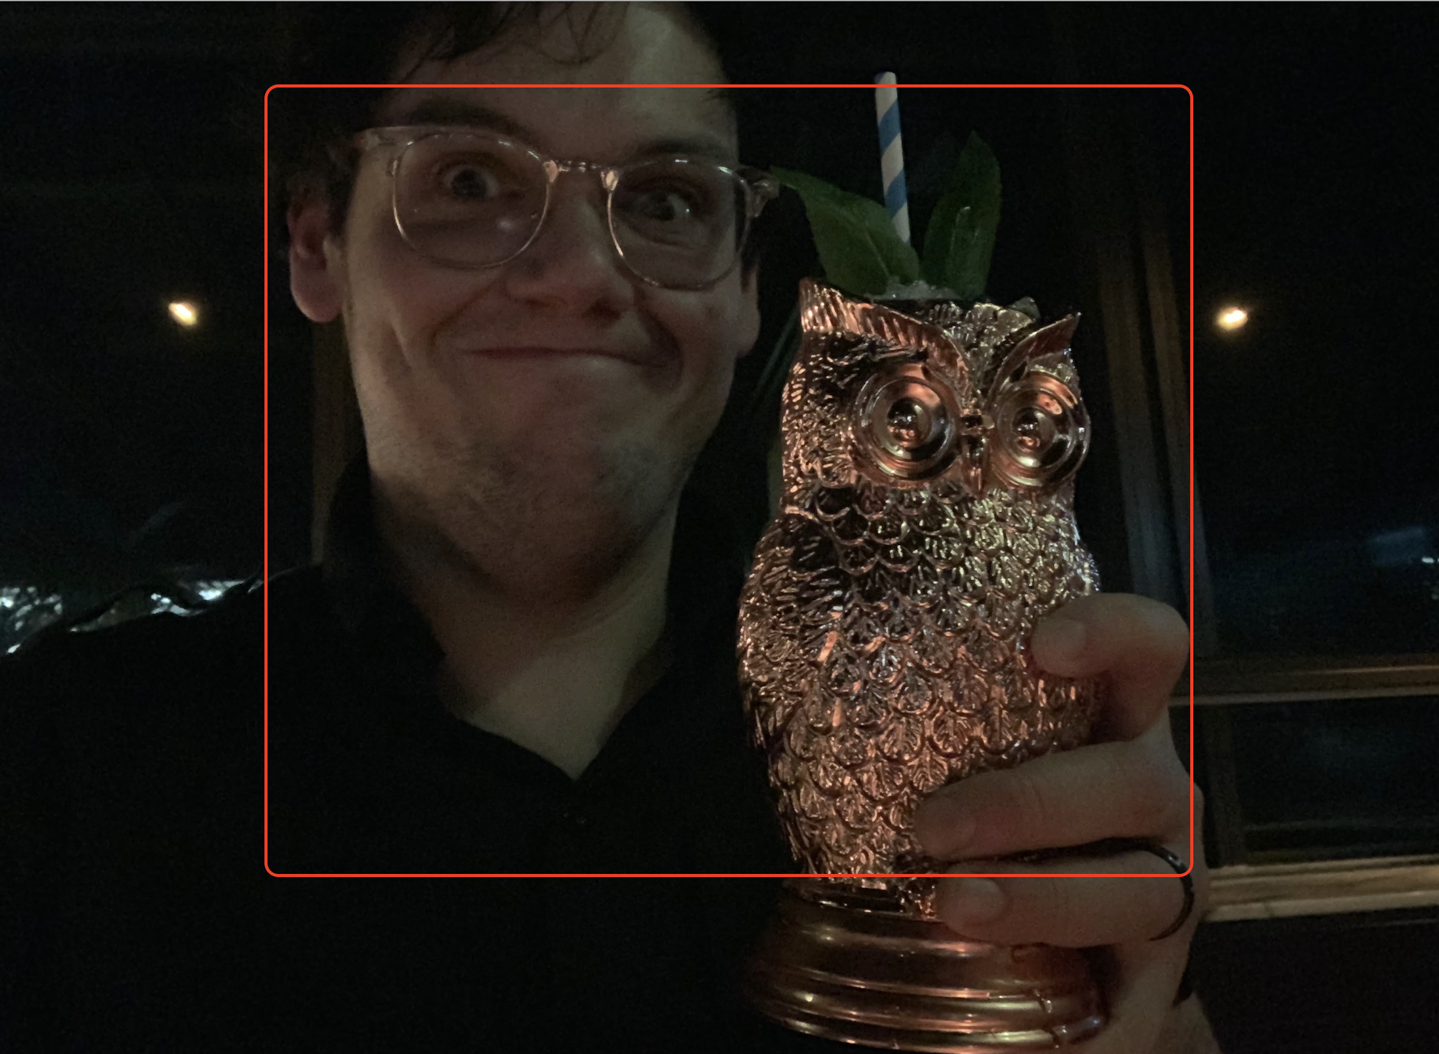
Figure 4-9. An example of saliency detection. A box is drawn around the salient bit of this image (Paris with an owl cocktail mug!).
Tip
Detecting saliency is, for all intents, generating a heatmap of an image that can be used to highlight areas of interest.
Open the Playground we created in “Task: Barcode Detection”:
-
Working in the main body of the Playground, we’ll need to add an extension on
UIImage:extensionUIImage{} -
Within this extension, let’s first add an enumeration for the type of saliency we want to look at:
enumSaliencyType{caseobjectnessBased,attentionBasedvarrequest:VNRequest{switchself{case.objectnessBased:returnVNGenerateObjectnessBasedSaliencyImageRequest()case.attentionBased:returnVNGenerateAttentionBasedSaliencyImageRequest()}}}This gives us a nice shorthand way of accessing either
VNGenerateObjectnessBasedSaliencyImageRequestorVNGenerateAttentionBasedSaliencyImageRequest.VNGenerateObjectnessBasedSaliencyImageRequestrelates to detecting the parts of an image that are most likely to be objects, whereasVNGenerateAttentionBasedSaliencyImageRequestrelates to detecting the parts of an image that are likely to be most interesting.
Note
To find this code in our resources, head to our website, download the resources, and find the Playground in the BarcodeAndSaliencyDetection folder.
-
While still within the
UIImageextension, add a function calleddetectSalientRegions():funcdetectSalientRegions(prioritisingsaliencyType:SaliencyType=.attentionBased,completion:@escaping(VNSaliencyImageObservation?)->()){letrequest=saliencyType.requestrequest.queueFor(image:self){resultsincompletion(results?.firstas?VNSaliencyImageObservation)}}This function allows us to ask a
UIImageto give us its salient regions (this sounds far more exciting than it actually is) based on the type of saliency we want. -
Add a
cropped()function, which crops the image based on the saliency request, cropping to the salient bit:funccropped(withsaliencyObservation:VNSaliencyImageObservation?,tosize:CGSize?=nil)->UIImage?{guardletsaliencyMap=saliencyObservation,letsalientObjects=saliencyMap.salientObjectselse{returnnil}// merge all detected salient objects into one big rect of the// overaching 'salient region'letsalientRect=salientObjects.reduce(into:CGRect.zero){rect,objectinrect=rect.union(object.boundingBox)}letnormalizedSalientRect=VNImageRectForNormalizedRect(salientRect,Int(self.width),Int(self.height))varfinalImage:UIImage?// transform normalized salient rect based on larger or smaller// than desired sizeifletdesiredSize=size{ifself.width<desiredSize.width||self.height<desiredSize.height{returnnil}letscaleFactor=desiredSize.scaleFactor(to:normalizedSalientRect.size)// crop to the interesting bitfinalImage=self.cropped(to:normalizedSalientRect)// scale the image so that as much of the interesting bit as// possible can be kept within desiredSizefinalImage=finalImage?.scaled(by:-scaleFactor)// crop to the final desiredSize aspectRatiofinalImage=finalImage?.cropped(to:desiredSize)}else{finalImage=self.cropped(to:normalizedSalientRect)}returnfinalImage}
We can test this by dragging some images into the Resources folder of the Playground (as we did in “Task: Barcode Detection”) and then do the following:
-
Define an image (pointing to one of those we dragged to the Resources folder) and a size to which to crop it:
letsaliencyTestImage=UIImage(named:"test3.jpg")!letthumbnailSize=CGSize(width:80,height:80) -
Define some
UIImages to store the two different types of saliency crops we want (attention and object):varattentionCrop:UIImage?varobjectsCrop:UIImage? -
Call our
detectSalientRegions()function (twice; once for each type of saliency):saliencyTestImage.detectSalientRegions(prioritising:.attentionBased){resultinifresult==nil{print("The entire image was found equally interesting!")}attentionCrop=saliencyTestImage.cropped(with:result,to:thumbnailSize)print("Image was\(saliencyTestImage.width)* "+"\(saliencyTestImage.height), now "+"\(attentionCrop?.width??0)*\(attentionCrop?.height??0).")}saliencyTestImage.detectSalientRegions(prioritising:.objectnessBased){resultinifresult==nil{print("The entire image was found equally interesting!")}objectsCrop=saliencyTestImage.cropped(with:result,to:thumbnailSize)print("Image was\(saliencyTestImage.width)* "+"\(saliencyTestImage.height), now "+"\(objectsCrop?.width??0)*\(objectsCrop?.height??0).")}
You should see something that looks like Figure 4-10. Try it with different images to see what the app thinks is salient.
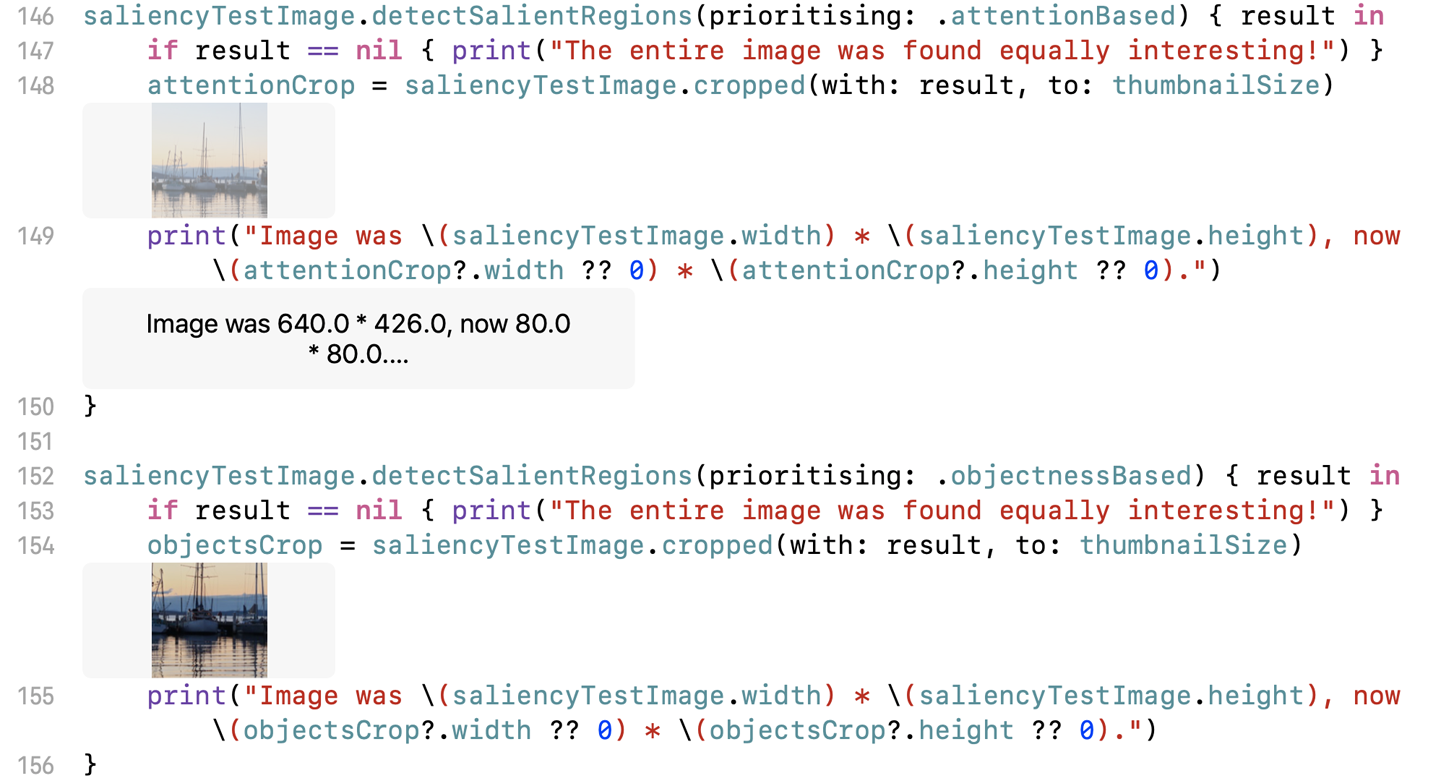
Figure 4-10. The saliency detector is working
Task: Image Similarity
Comparing two images to determine how similar they are is, at its core, a straightforward application of AI. Whether you need this for a game or to see how similar a user’s profile pictures are, there’s a variety of uses for checking how similar an image is.
In this task, we explore how you can quickly and easily compare two images in your Swift applications and, again, without any model training involved.
This task is similar to the previous ones in that there is a toolkit for checking image similarity provided by Apple. You could build a machine-learning application that understands how to inform you of the distance between two images, but Apple has done the work for you, so why would you? This book is practical.
Problem and Approach
Image similarity is one of those subtle practical AI things that’s super useful when you need it, but difficult to quantify why you might need it in advance. In this task, we look at the practical side of image similarity by doing the following:
-
Building an app that allows the user to select, or take, two pictures, and determine how similar they are (by percentage)
-
Using Apple’s tools for doing this without training a model
-
Exploring the potential next steps for image similarity, and other ways to tackle this and similar problems
To demonstrate how to do this, we’re going to build the app shown in Figure 4-11. Let’s get started.
Building the App
We’re again going to be using Apple’s newest UI framework, SwiftUI, to build the app for determining image similarity as a practical AI task.
The final form of the app we’re going to build in this task can be seen in (Figure 4-11) and consists of the following SwiftUI components:
-
A
NavigationView, with an app title and someButtons (as.navigationBarItems) to allow the user to pick a photo from their library, or take a photo with their camera -
Two
Imageviews, which will actually beOptionalResizableImageclasses (we create these in a moment) to display the two images that we want to get the similarity of -
A
Buttonto trigger the comparison of the two images, and another to clear the two images -
Some
Textto display the similarity percentages
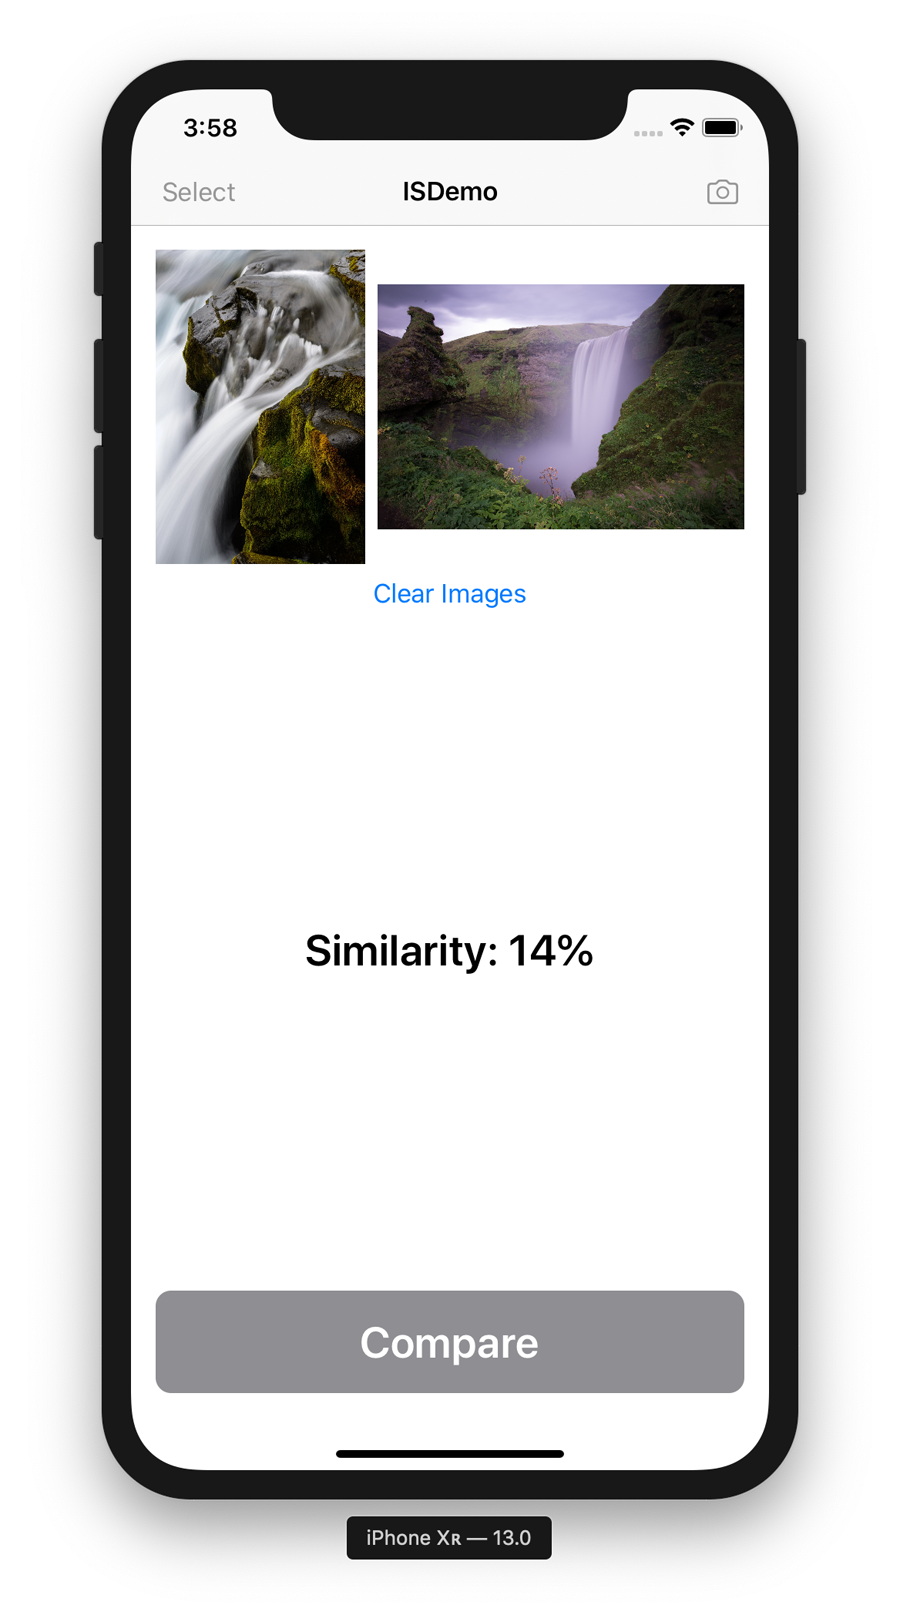
Figure 4-11. The final version of the Image Similarity app
Note
This book is here to teach you the practical side of using AI and machine-learning features with Swift and on Apple’s platforms. Because of this, we don’t explain the fine details of how to build apps; we assume that you mostly know that (although if you don’t, we think you’ll be able to follow along just fine if you pay attention). If you want to learn Swift, we recommend picking up Learning Swift (also by us!) from the lovely folks at O’Reilly.
If you don’t want to manually build the iOS app, you can download the code from
our website and then find the project named ISDemo-Complete. After you have that, we strongly recommend that you still proceed through this section, comparing the notes here with the code you downloaded.
To create the app yourself, you’ll need to do the following:
-
Create an iOS app project in Xcode, choosing the Single View App template, and selecting the SwiftUI checkbox.
-
Add a new filed named Views.swift and import the following:
importSwiftUI -
Create a new
Viewfor an image that can resize:structOptionalResizableImage:View{letimage:UIImage?letplaceholder:UIImagevarbody:someView{ifletimage=image{returnImage(uiImage:image).resizable().aspectRatio(contentMode:.fit)}else{returnImage(uiImage:placeholder).resizable().aspectRatio(contentMode:.fit)}}} -
Create a
Viewfor aButtonLabel:structButtonLabel:View{privatelettext:Stringprivateletbackground:Colorvarbody:someView{HStack{Spacer()Text(text).font(.title).bold().foregroundColor(.white)Spacer()}.padding().background(background).cornerRadius(10)}init(_text:String,background:Color){self.text=textself.background=background}}Our
ButtonLabelis some text of a certain color. -
Create a
Viewso that we can work with aUIImagePicker:structImagePickerView:View{privateletcompletion:(UIImage?)->()privateletcamera:Boolvarbody:someView{ImagePickerControllerWrapper(camera:camera,completion:completion)}init(camera:Bool=false,completion:@escaping(UIImage?)->()){self.completion=completionself.camera=camera}} -
Create a wrapper for
UIViewControllerRepresentableso that we can actually use aUIImagePicker:structImagePickerControllerWrapper:UIViewControllerRepresentable{typealiasUIViewControllerType=UIImagePickerControllerprivate(set)varselectedImage:UIImage?private(set)varcameraSource:Boolprivateletcompletion:(UIImage?)->()init(camera:Bool,completion:@escaping(UIImage?)->()){self.cameraSource=cameraself.completion=completion}funcmakeCoordinator()->ImagePickerControllerWrapper.Coordinator{letcoordinator=Coordinator(self)coordinator.completion=self.completionreturncoordinator}funcmakeUIViewController(context:Context)->UIImagePickerController{letimagePickerController=UIImagePickerController()imagePickerController.delegate=context.coordinatorimagePickerController.sourceType=cameraSource?.camera:.photoLibraryreturnimagePickerController}funcupdateUIViewController(_uiViewController:UIImagePickerController,context:Context){//uiViewController.setViewControllers(?, animated: true)}classCoordinator:NSObject,UIImagePickerControllerDelegate,UINavigationControllerDelegate{varparent:ImagePickerControllerWrappervarcompletion:((UIImage?)->())?init(_imagePickerControllerWrapper:ImagePickerControllerWrapper){self.parent=imagePickerControllerWrapper}funcimagePickerController(_picker:UIImagePickerController,didFinishPickingMediaWithInfoinfo:[UIImagePickerController.InfoKey:Any]){print("Image picker complete...")letselectedImage=info[UIImagePickerController.InfoKey.originalImage]as?UIImagepicker.dismiss(animated:true)completion?(selectedImage)}funcimagePickerControllerDidCancel(_picker:UIImagePickerController){print("Image picker cancelled...")picker.dismiss(animated:true)completion?(nil)}}} -
In the Views.swift file, add the following extension on
UIImageso that we can fix an image’s orientation:extensionUIImage{funcfixOrientation()->UIImage?{UIGraphicsBeginImageContext(self.size)self.draw(at:.zero)letnewImage=UIGraphicsGetImageFromCurrentImageContext()UIGraphicsEndImageContext()returnnewImage}}
Next, we make a file called Similarity.swift in which we perform the actual image similarity test:
-
Add some
imports:importUIKitimportVision -
Add an extension on
UIImage:extensionUIImage{} -
Within the extension, add the following function to compare similarity:
funcsimilarity(toimage:UIImage)->Float?{varsimilarity:Float=0guardletfirstImageFPO=self.featurePrintObservation(),letsecondImageFPO=image.featurePrintObservation(),let_=try?secondImageFPO.computeDistance(&similarity,to:firstImageFPO)else{returnnil}returnsimilarity}The similarity is calculated by computing the distance between the two images in question.
-
Add the following function to generate a feature print observation, which will assist in deriving image similarity:
privatefuncfeaturePrintObservation()->VNFeaturePrintObservation?{guardletcgImage=self.cgImageelse{returnnil}letrequestHandler=VNImageRequestHandler(cgImage:cgImage,orientation:self.cgImageOrientation,options:[:])letrequest=VNGenerateImageFeaturePrintRequest()iflet_=try?requestHandler.perform([request]),letresult=request.results?.firstas?VNFeaturePrintObservation{returnresult}returnnil}Notice that we called the
featurePrintObservation()function that we wrote here earlier, in thesimilarity()function. TheVNFeaturePrintObservations are the things that the distance is computed between insimilarity(). -
At the end of the Similarity.swift file, we need another extension on
UIImagein order to obtain its orientation:extensionUIImage{varcgImageOrientation:CGImagePropertyOrientation{switchself.imageOrientation{case.up:return.upcase.down:return.downcase.left:return.leftcase.right:return.rightcase.upMirrored:return.upMirroredcase.downMirrored:return.downMirroredcase.leftMirrored:return.leftMirroredcase.rightMirrored:return.rightMirrored}}}
Finally, we need to move to the ContentView.swift file:
-
Add our
States to the top of theContentViewstruct:@StateprivatevarimagePickerOpen:Bool=false@StateprivatevarcameraOpen:Bool=false@StateprivatevarfirstImage:UIImage?=nil@StateprivatevarsecondImage:UIImage?=nil@Stateprivatevarsimilarity:Int=-1 -
Below them, add the following attributes:
privateletplaceholderImage=UIImage(named:"placeholder")!privatevarcameraEnabled:Bool{UIImagePickerController.isSourceTypeAvailable(.camera)}privatevarselectEnabled:Bool{secondImage==nil}privatevarcomparisonEnabled:Bool{secondImage!=nil&&similarity<0} -
Within the
ContentViewstruct, but outside of thebodyView, add a function to clear our images and similarity rating:privatefuncclearImages(){firstImage=nilsecondImage=nilsimilarity=-1} -
And another to get the similarity:
privatefuncgetSimilarity(){print("Getting similarity...")ifletfirstImage=firstImage,letsecondImage=secondImage,letsimilarityMeasure=firstImage.similarity(to:secondImage){similarity=Int(similarityMeasure)}else{similarity=0}print("Similarity:\(similarity)%")} -
And another for when control is returned from getting a similarity:
privatefunccontrolReturned(image:UIImage?){print("Image return\(image==nil?"failure":"success")...")iffirstImage==nil{firstImage=image?.fixOrientation()}else{secondImage=image?.fixOrientation()}} -
And one more to summon an image picker:
privatefuncsummonImagePicker(){print("Summoning ImagePicker...")imagePickerOpen=true} -
And one to summon a camera view:
privatefuncsummonCamera(){print("Summoning camera...")cameraOpen=true} -
Update your
bodyViewas follows:varbody:someView{ifimagePickerOpen{returnAnyView(ImagePickerView{resultinself.controlReturned(image:result)self.imagePickerOpen=false})}elseifcameraOpen{returnAnyView(ImagePickerView(camera:true){resultinself.controlReturned(image:result)self.cameraOpen=false})}else{returnAnyView(NavigationView{VStack{HStack{OptionalResizableImage(image:firstImage,placeholder:placeholderImage)OptionalResizableImage(image:secondImage,placeholder:placeholderImage)}Button(action:clearImages){Text("Clear Images")}Spacer()Text("Similarity: "+"\(similarity>0?String(similarity):"...")%").font(.title).bold()Spacer()ifcomparisonEnabled{Button(action:getSimilarity){ButtonLabel("Compare",background:.blue)}.disabled(!comparisonEnabled)}else{Button(action:getSimilarity){ButtonLabel("Compare",background:.gray)}.disabled(!comparisonEnabled)}}.padding().navigationBarTitle(Text("ISDemo"),displayMode:.inline).navigationBarItems(leading:Button(action:summonImagePicker){Text("Select")}.disabled(!selectEnabled),trailing:Button(action:summonCamera){Image(systemName:"camera")}.disabled(!cameraEnabled))})}}
We don’t need to touch the ContentView_Previews struct in this case.
You now can run the app, pick two images, take two photos (or some combination thereof), and then tap the button to get a rating of how similar they are. Brilliant.
What Just Happened? How Does This Work?
You might have noticed that we didn’t go through the process of finding data to train a model, training a model, and integrating the model into an app. Instead, we just built an app, and it all just worked. (You might also be seeing a theme in our tasks so far…)
Wouldn’t it be nice if everything were like this?
So far, we’ve been using features of Apple’s Vision framework, which is a suite of computer vision algorithms, to compare two images. (We introduced Vision back in “Apple’s Other Frameworks”.)
The feature we used to perform the image similarity comparison in this chapter is called VNFeaturePrintObservation. Computing a feature print allows two images to have a pair-wise distance computed: this allows us to ask for a similarity (a distance) between images. You can learn more about what might be happening under the hood later, in Chapter 11.
Tip
You can learn more about this feature in Apple’s documentation.
Next Steps
What’s next depends on what you want to do next. As mentioned in Chapter 2, Apple’s Vision framework has a variety of uses to address practical AI needs in your projects.
As supplied, and without any work from you other than using the appropriate bits of the framework, you can use Vision to detect faces and landmarks in faces such as the nose, mouth, eyes, and similar; text, barcodes, and other types of two-dimensional codes; and track features in video and beyond.
Vision also makes it easier to work with CoreML for image classification and object detection with your own machine-learning models.
Note
You could also do a different kind of image similarity. For example, Apple’s Turi Create library adopts an entirely different approach.
Task: Image Classification
In this first substantive practical task for which we build our own model, we take a look at an all-time classic practical application of AI: image classification.
Tip
Think of an image classifier like a hat that sorts images, as if it were from a certain popular magic-based fictional universe.
A classifier is a machine-learning model that takes input and classifies it into a category based on what it thinks the input is. An image classifier takes this with an image, and informs you as to which label (or class) it thinks the image belongs to, based on however many predefined labels it knows about.
Image classification is typically a deep-learning problem. For a refresher on what deep learning means, check back to Chapter 1.
Note
Deep learning is not the only way in which you can make an image classifier, but it’s currently one of the most effective ways.
Problem and Approach
As appropriate as it would be to tackle such a classic AI problem with a classic dataset (classifying whether a picture is of a cat or a dog), we’re a little more creative!
We’re going to build a binary image classifier that notifies us whether it thinks it sees a banana or an apple (Figure 4-12). Amazing, huh? (We’re not much more creative, it would seem.)
Tip
The importance of bananas to machine learning researchers cannot be overstated.
For this task, we’re going to explore the practical side of image classification by doing the following:
-
Building an app that allows us to use or take photos and determine whether they contain a banana or an apple
-
Selecting a toolkit for creating a machine-learning model and assembling a dataset for the problem
-
Building and training an image classification model
-
Incorporating the model into our app
-
Improving our app
After that, we quickly touch on the theory of how it works, and point you to further resources for improvements and changes that you can make on your own.
We want this book to stay firmly rooted in the practical, task-based side of things that Apple’s platforms make so easy, so we’re going to approach this top-down. By this we mean that we start with the practical output we want: an app that can distinguish between a banana and an apple (Figure 4-12), and work down until we know how to make that work. We don’t start with an algorithm or a formula; we start with the practical desired result.

Figure 4-12. Our app will be able to identify images of each of these fruits
Figure 4-13 presents some images of what we’d like our resulting app to be. Let’s get started.
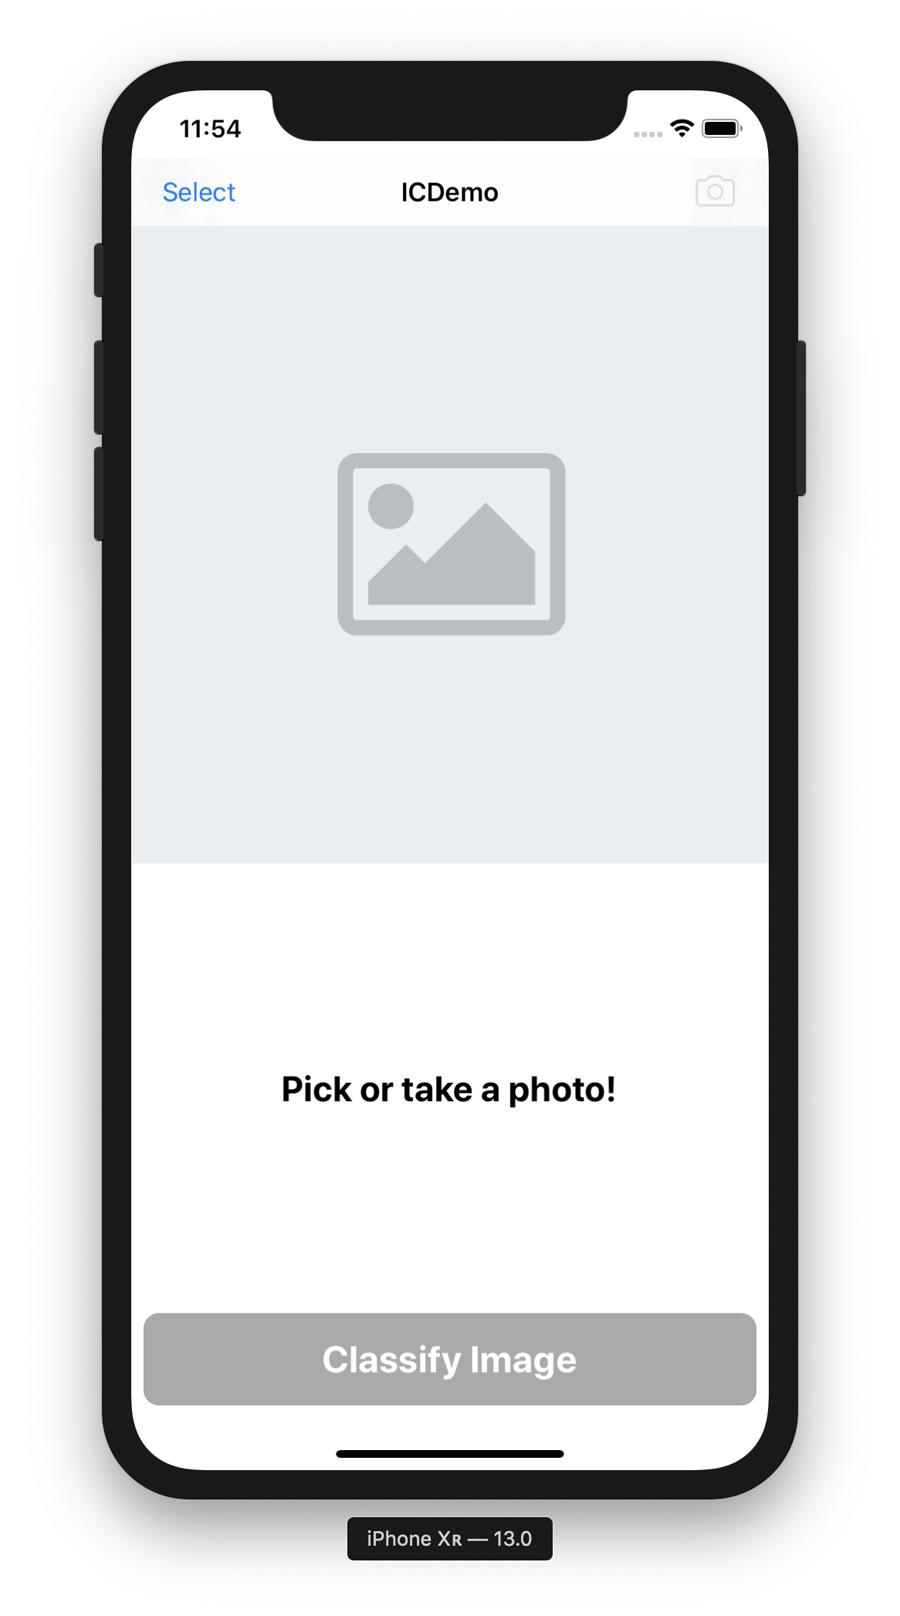
Figure 4-13. Our final app (we’ll be ready to win any game of Banana or Apple?!)
Building the App
The hottest, unicorniest startups in the world use machine learning to do things. It is known. We need to get in on this machine-learning action. We obviously need an app.
The starting point iOS app that we’re going to build first incorporates the following features:
-
Two buttons: one to pick a photo from the user photo library, and one to take a photo with the camera (if a camera is available)
-
An image view to display the chosen or taken image
-
A label to display some instructions (and eventually display what class it thinks the image chosen is)
-
A button to trigger the image classification
Figure 4-14 depicts an image of this first pass of the app. The app is going to be built using Apple’s UIKit framework, Apple’s older UI framework for iOS. You can learn more about UIKit in Apple’s documentation.
Note
This book is here to teach you the practical side of using AI and machine-learning features with Swift and on Apple’s platforms. Because of this, we don’t explain the fine details of how to build apps; we assume that you mostly know that (although if you don’t, we think you’ll be able to follow along just fine if you pay attention). If you want to learn Swift, we recommend picking up Learning Swift (also by us!) from the lovely folks at O’Reilly.
If you don’t want to manually build the starting point iOS app, you can download the code from our website and find the project named ICDemo-Starter. After you have that, skim through the rest of this section, and then meet us at “AI Toolkit and Dataset”.
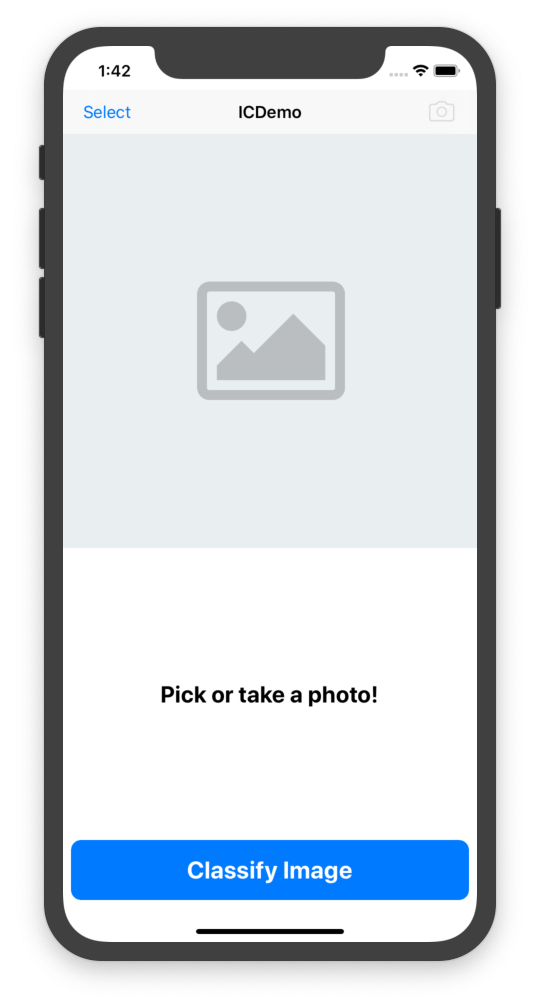
Figure 4-14. The first phase of (what will become) our image classifier app
To make the starting point yourself, you need to do the following:
-
Create an iOS app project in Xcode, choosing the Single View App template. We did not select any of the checkboxes below the Language drop-down (which was, of course, set to “Swift”).
-
After you create your project, open the Main.storyboard file and create a user interface with the following components:
-
An image view to display the chosen image
-
A label to show both instructions and the classification of an image
-
A button to trigger the image classification
-
buttons to allow the user to pick an image from their photo library and take a photo (we used two navigation bar buttons for this). Figure 4-15 shows an example of our storyboard.
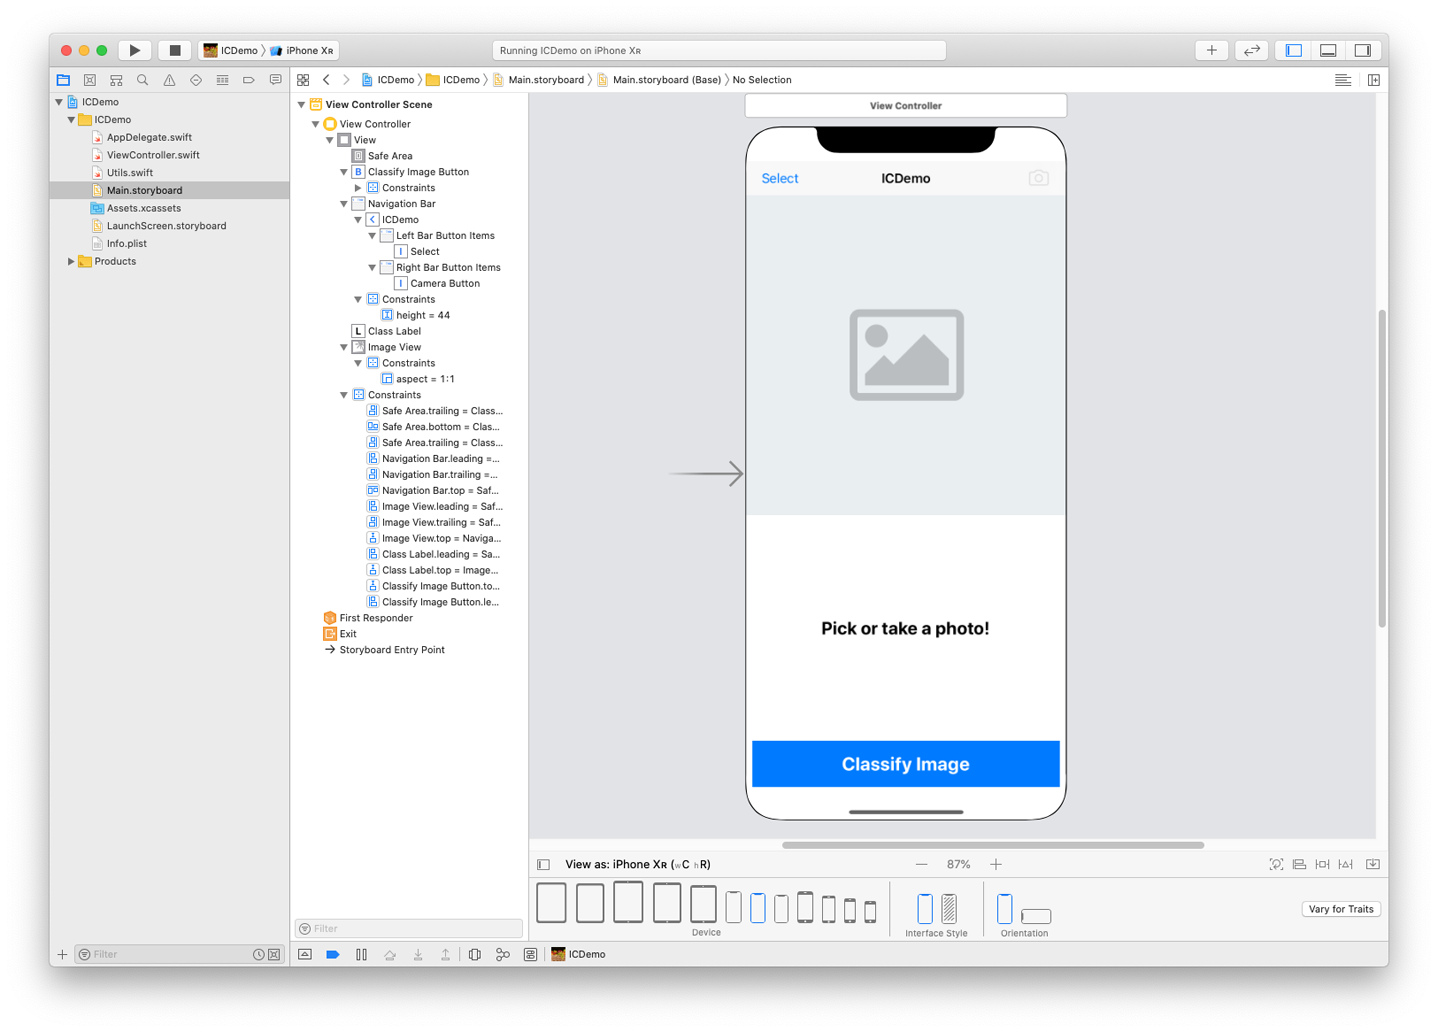
Figure 4-15. Our storyboard
After you’ve laid out the necessary elements, make sure you add the proper constraints.
-
-
Connect outlets for the UI objects as follows:
@IBOutletweakvarcameraButton:UIBarButtonItem!@IBOutletweakvarimageView:UIImageView!@IBOutletweakvarclassLabel:UILabel!@IBOutletweakvarclassifyImageButton:UIButton! -
Connect actions for the UI objects as follows:
@IBActionfuncselectButtonPressed(_sender:Any){getPhoto()}@IBActionfunccameraButtonPressed(_sender:Any){getPhoto(cameraSource:true)}@IBActionfuncclassifyImageButtonPressed(_sender:Any){classifyImage()} -
You also need to declare two variables in the
ViewControllerclass:privatevarinputImage:UIImage?privatevarclassification:String? -
Modify the
viewDidLoad()function, making it look as follows:overridefuncviewDidLoad(){super.viewDidLoad()cameraButton.isEnabled=UIImagePickerController.isSourceTypeAvailable(.camera)imageView.contentMode=.scaleAspectFillimageView.image=UIImage.placeholder} -
Add the following function to enable or disable controls based on the presence of input to classify:
privatefuncrefresh(){ifinputImage==nil{classLabel.text="Pick or take a photo!"imageView.image=UIImage.placeholder}else{imageView.image=inputImageifclassification==nil{classLabel.text="None"classifyImageButton.enable()}else{classLabel.text=classificationclassifyImageButton.disable()}}} -
Add another function to perform the classification which currently just sets the classification to “FRUIT!” because there’s no AI yet):
privatefuncclassifyImage(){classification="FRUIT!"refresh()} -
Add an extension to the end of the ViewController.swift file, as follows (it’s a fair chunk of code, which we explain in a moment):
extensionViewController:UINavigationControllerDelegate,UIPickerViewDelegate,UIImagePickerControllerDelegate{privatefuncgetPhoto(cameraSource:Bool=false){letphotoSource:UIImagePickerController.SourceTypephotoSource=cameraSource?.camera:.photoLibraryletimagePicker=UIImagePickerController()imagePicker.delegate=selfimagePicker.sourceType=photoSourceimagePicker.mediaTypes=[kUTTypeImageasString]present(imagePicker,animated:true)}@objcfuncimagePickerController(_picker:UIImagePickerController,didFinishPickingMediaWithInfoinfo:[UIImagePickerController.InfoKey:Any]){inputImage=info[UIImagePickerController.InfoKey.originalImage]as?UIImageclassification=nilpicker.dismiss(animated:true)refresh()ifinputImage==nil{summonAlertView(message:"Image was malformed.")}}privatefuncsummonAlertView(message:String?=nil){letalertController=UIAlertController(title:"Error",message:message??"Action could not be completed.",preferredStyle:.alert)alertController.addAction(UIAlertAction(title:"OK",style:.default))present(alertController,animated:true)}}This code allows us to summon the camera or the user photo library. After the user has taken a photo or chosen one, the image is returned. If, for some reason, the image chosen is
nil, it also provides for the display of an alert view usingsummonAlertView(), to notify the user what happened.
And finally, code-wise, add a new Swift file to the project and name it Utils.swift (or similar):
-
In this new Swift file, add the following:
importUIKitextensionUIImage{staticletplaceholder=UIImage(named:"placeholder.png")!}extensionUIButton{funcenable(){self.isEnabled=trueself.backgroundColor=UIColor.systemBlue}funcdisable(){self.isEnabled=falseself.backgroundColor=UIColor.lightGray}}extensionUIBarButtonItem{funcenable(){self.isEnabled=true}funcdisable(){self.isEnabled=false}}This defines an extension on
UIImagethat allows us to specify a placeholder image. It also defines an extension onUIButtonthat allows us toenable()ordisable()the button. We also add the equivalent onUIBarButtonItem, which is the navigation bar equivalent of aUIButton. -
Add a launch screen and an icon, if you’d like (our starter project has some), and launch the app in the simulator. You should see something like the image we showed earlier, in Figure 4-14.
You can select an image (or take a photo if you’re running it on a real device) and see the image appear in the image view. As Figure 4-16 demonstrates, when you tap the Classify Image button, you should see the label update to say “FRUIT!”.
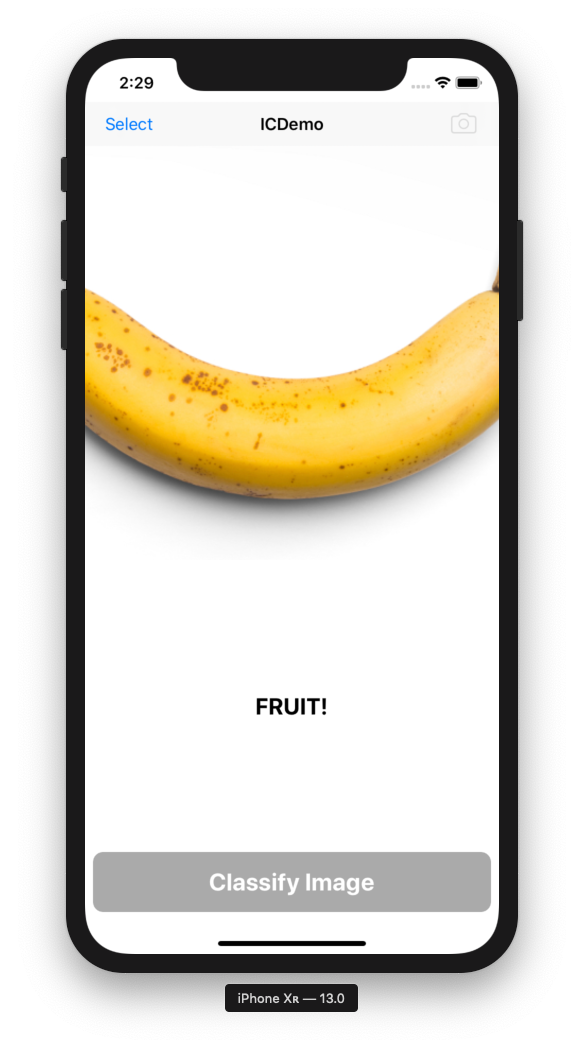
Figure 4-16. Our starter app for the image classifier is ready
AI Toolkit and Dataset
You’ll need to assemble your toolkit for this task. The primary tools we’ll be using in this case are the CreateML application and the CoreML and Vision frameworks.
First, we use the CreateML application, Apple’s task-based tool for building machine-learning models to assemble, train, and validate a model that can, hopefully, distinguish between bananas and apples.
Then, we use CoreML to work with that model.
At this point you might be thinking, “CoreML? Isn’t this entire book about CoreML? Have the authors gone off the rails? Is that why there are four authors? Did they keep replacing one another?”
Well, we can’t comment whether we’ve gone off the rails, but we promise you that even though CoreML is a central component of this book, it’s not the only one.
CoreML takes care of the using, reading from, talking to, and otherwise dealing with machine-learning models in your apps. We’re going to be using it in this scenario for exactly that: getting a model into our app and communicating with it.
For more details on the nitty-gritty of the tools, check back to Chapter 2, particularly “CreateML”.
Our final tool for Banana or Apple?! is Vision. Vision is a framework, also from Apple, that provides a whole lot of smarts to help with computer-vision problems. As it turns out, recognizing images and classifying them is a computer-vision problem. We used Vision a lot earlier in this chapter, for Face Detection, Barcode Detection, Saliency Detection, and Image Similarity. For those, we were directly using Vision. This time, we use Vision to work with our own model, and with CoreML. We discussed Apple’s other frameworks earlier, in “Apple’s Other Frameworks”, and you can see where Vision fits in with the other frameworks in Figure 4-17.
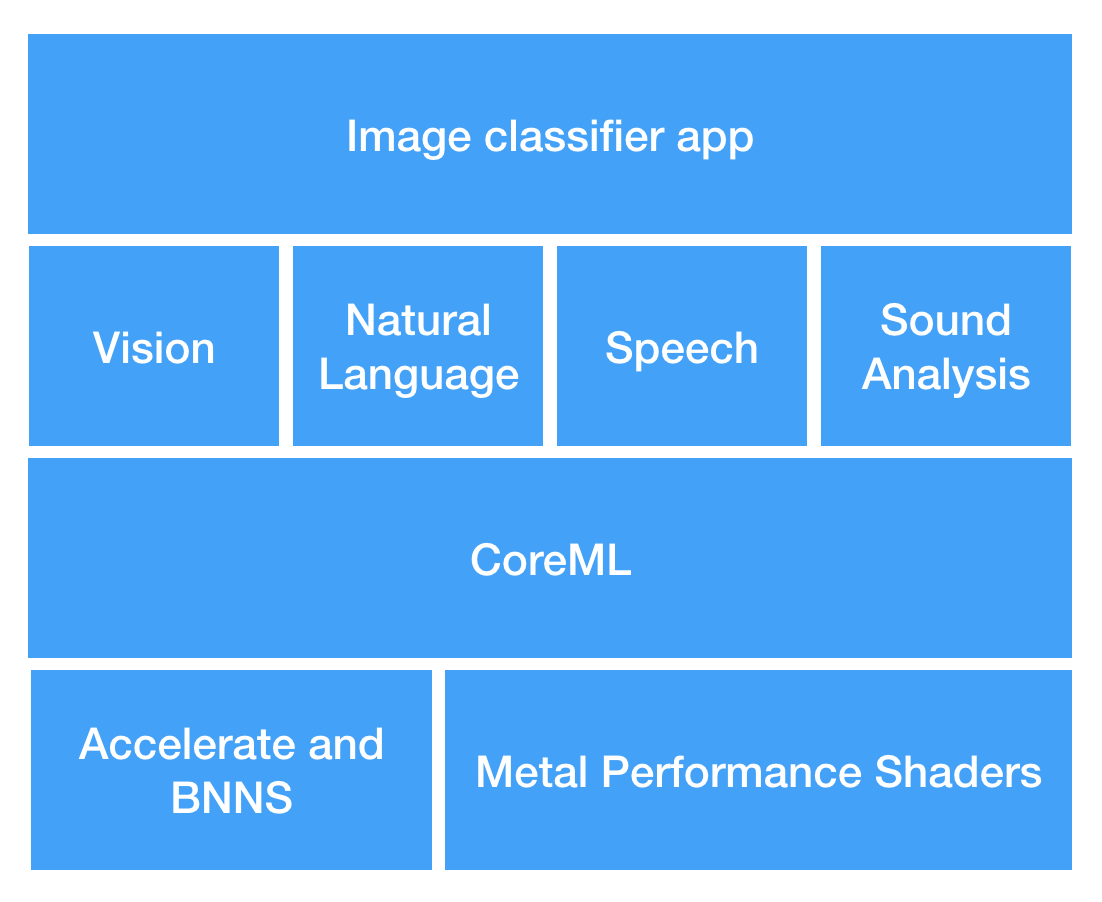
Figure 4-17. Where CoreML fits with our other AI tools
Before we can make an app that can classify different kinds of fruit from a picture, we need some pictures of fruit. Thankfully, as with many things, the boffins from Romania have us covered with the Fruit-360 dataset.
This dataset contains 103 different types of fruit, cleanly separated into training data, test data, as well as images with more than one fruit per image, for audacious multi-fruit classification. Figure 4-18 illustrates an example of the kinds of images that are in the dataset.
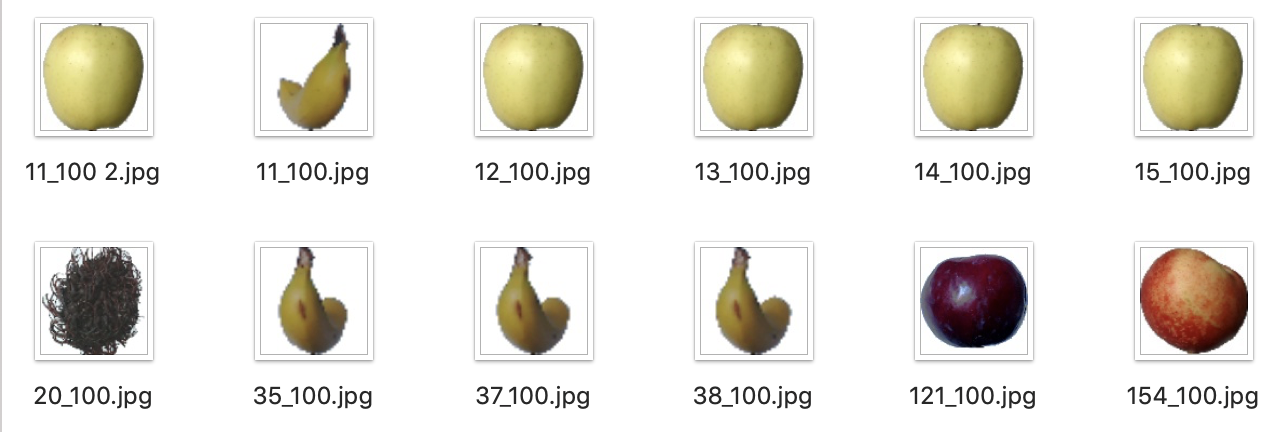
Figure 4-18. Examples of the fruit images
Note
At this point you might have gathered that if we used all of these images for our classification model, the app would not only be able to advise us whether we’re looking at a banana or an apple, but whether we’re what looking at is one of 103 different fruits: Apples (different varieties: Crimson Snow, Golden, Golden-Red, Granny Smith, Pink Lady, Red, Red Delicious), Apricot, Avocado, Avocado ripe, Banana (Yellow, Red, Lady Finger), Cactus fruit, Cantaloupe (two varieties), Carambula, Cherry (different varieties, Rainier), Cherry Wax (Yellow, Red, Black), Chestnut, Clementine, Cocos, Dates, Granadilla, Grape (Blue, Pink, White (different varieties)), Grapefruit (Pink, White), Guava, Hazelnut, Huckleberry, Kiwi, Kaki, Kohlrabi, Kumsquats, Lemon (normal, Meyer), Lime, Lychee, Mandarine, Mango, Mangostan, Maracuja, Melon Piel de Sapo, Mulberry, Nectarine, Orange, Papaya, Passion fruit, Peach (different varieties), Pepino, Pear (different varieties, Abate, Kaiser, Monster, Red, Williams), Pepper (Red, Green, Yellow), Physalis (normal, with Husk), Pineapple (normal, Mini), Pitahaya Red, Plum (different varieties), Pomegranate, Pomelo Sweetie, Quince, Rambutan, Raspberry, Redcurrant, Salak, Strawberry (normal, Wedge), Tamarillo, Tangelo, Tomato (different varieties, Maroon, Cherry Red, Yellow), Walnut. Truly, we live in an age of marvels. (We’re just going to use the apples and bananas right now, though.)
Let’s get the dataset ready to train a model. All you’ll need to do is head over to the Fruit-360 dataset and download it by hitting the big green button. After you’ve extracted it, you should be looking at something that resembles the image shown in Figure 4-19.
Because we only want to look for apples or bananas, you should now copy out the apple and banana folders from the Training folder and put them in a new folder somewhere safe, as shown in Figure 4-20.
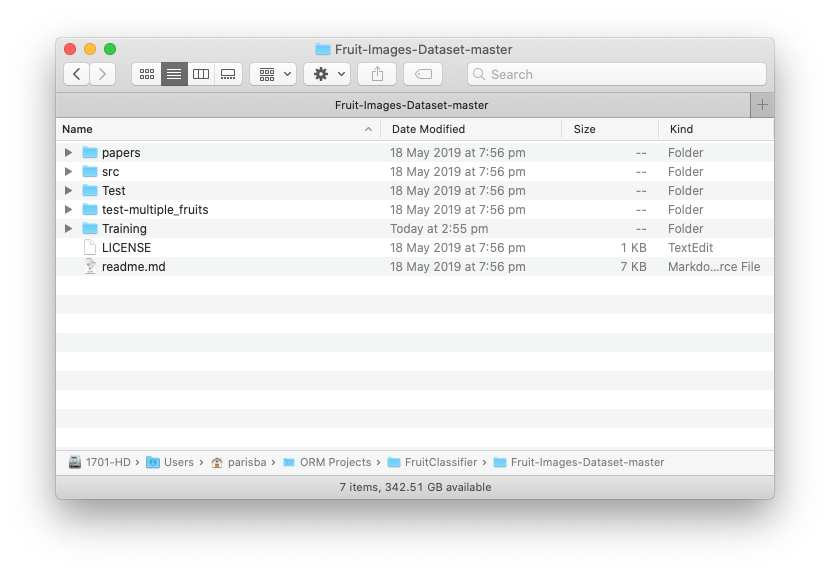
Figure 4-19. The Fruit-360 dataset, extracted and ready to go
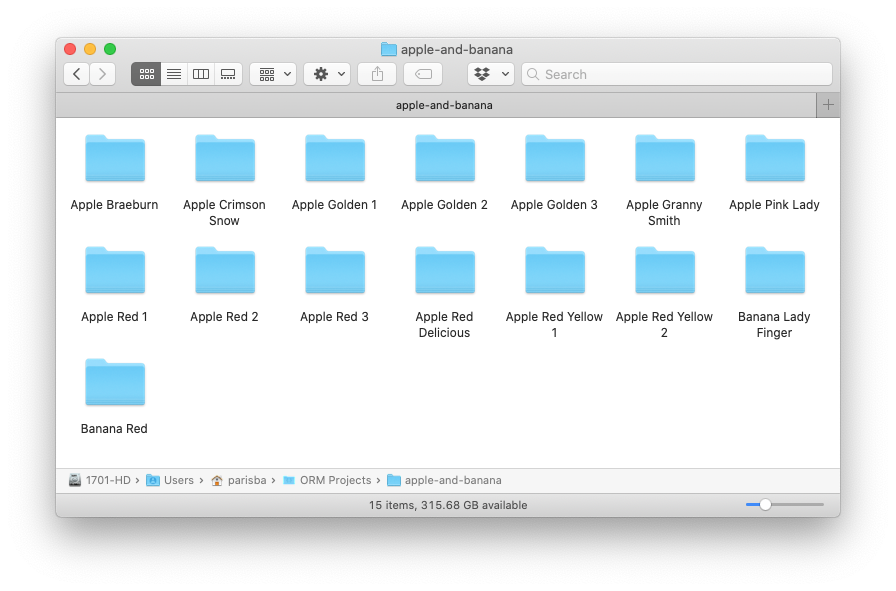
Figure 4-20. The Apple and Banana images, ready to go
Creating a model
With our dataset ready to go, we now turn to Apple’s CreateML application to build a model. CreateML has come in a few different iterations over the years, but, here, we use the newest: the application version.
Tip
To learn more about the various incarnations of CreateML, check back to Chapter 2.
Let’s build our fruit classifier. Open CreateML: you can find CreateML by firing up Xcode, and then selecting the Xcode menu → Open Developer Tool → CreateML, and then do the following:
Tip
If you like launching macOS apps using Spotlight, you can just summon Spotlight and type CreateML. Magic.
-
With CreateML open, select the Image Classifier template, as shown in Figure 4-21, and then click Next.
-
Give your project some details, as shown in Figure 4-22, and again click Next.
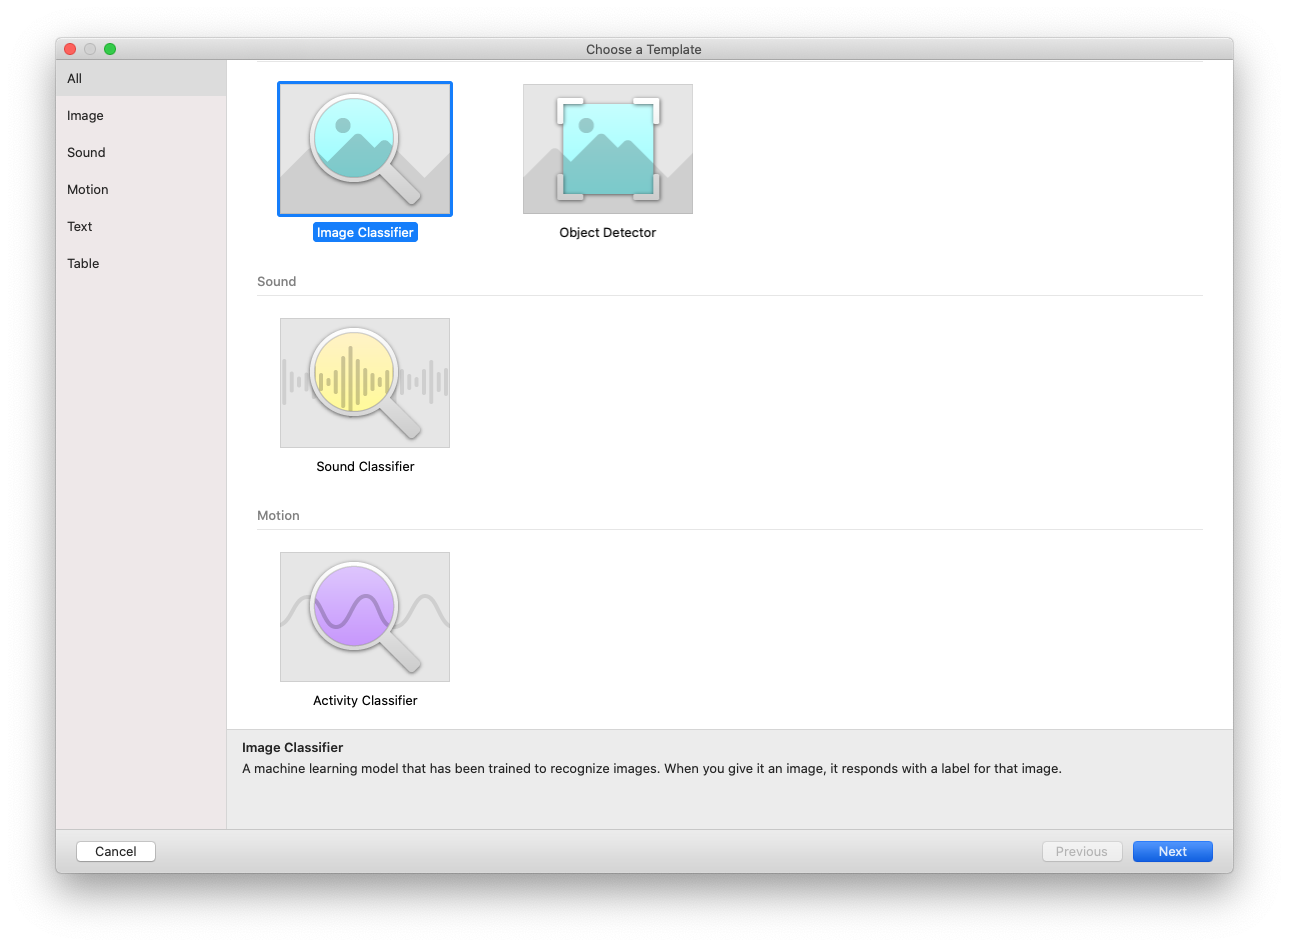
Figure 4-21. Selecting the Image Classifier option in the CreateML template picker
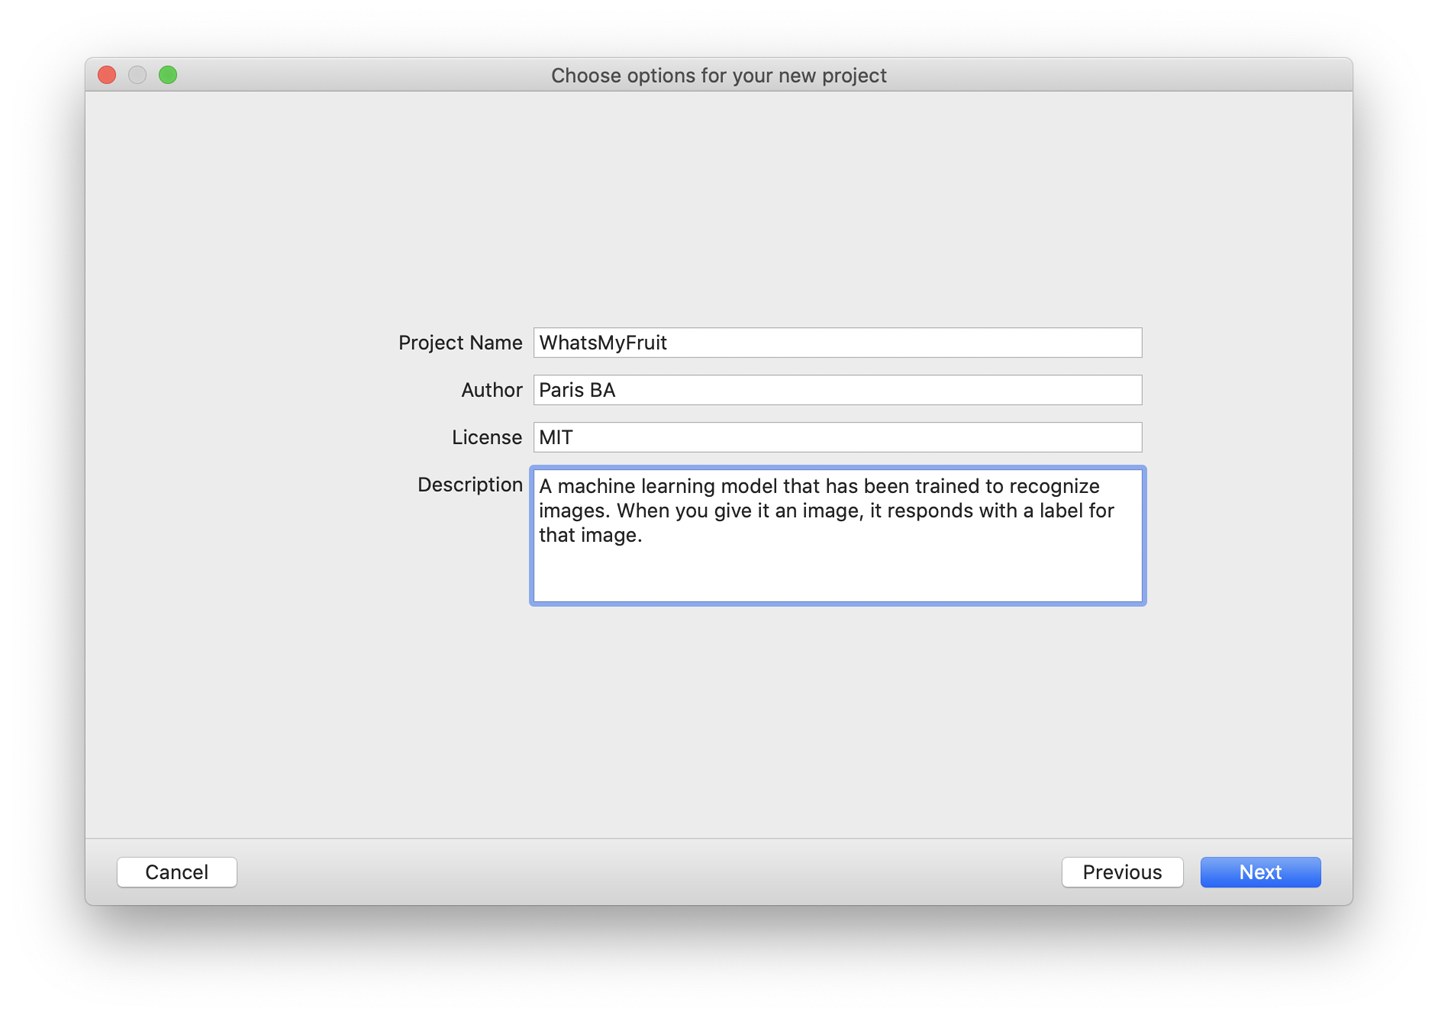
Figure 4-22. Setting the project options for your new CreateML model
You now have an empty CreateML project, ready to train an image classifier. It should look something like Figure 4-23.
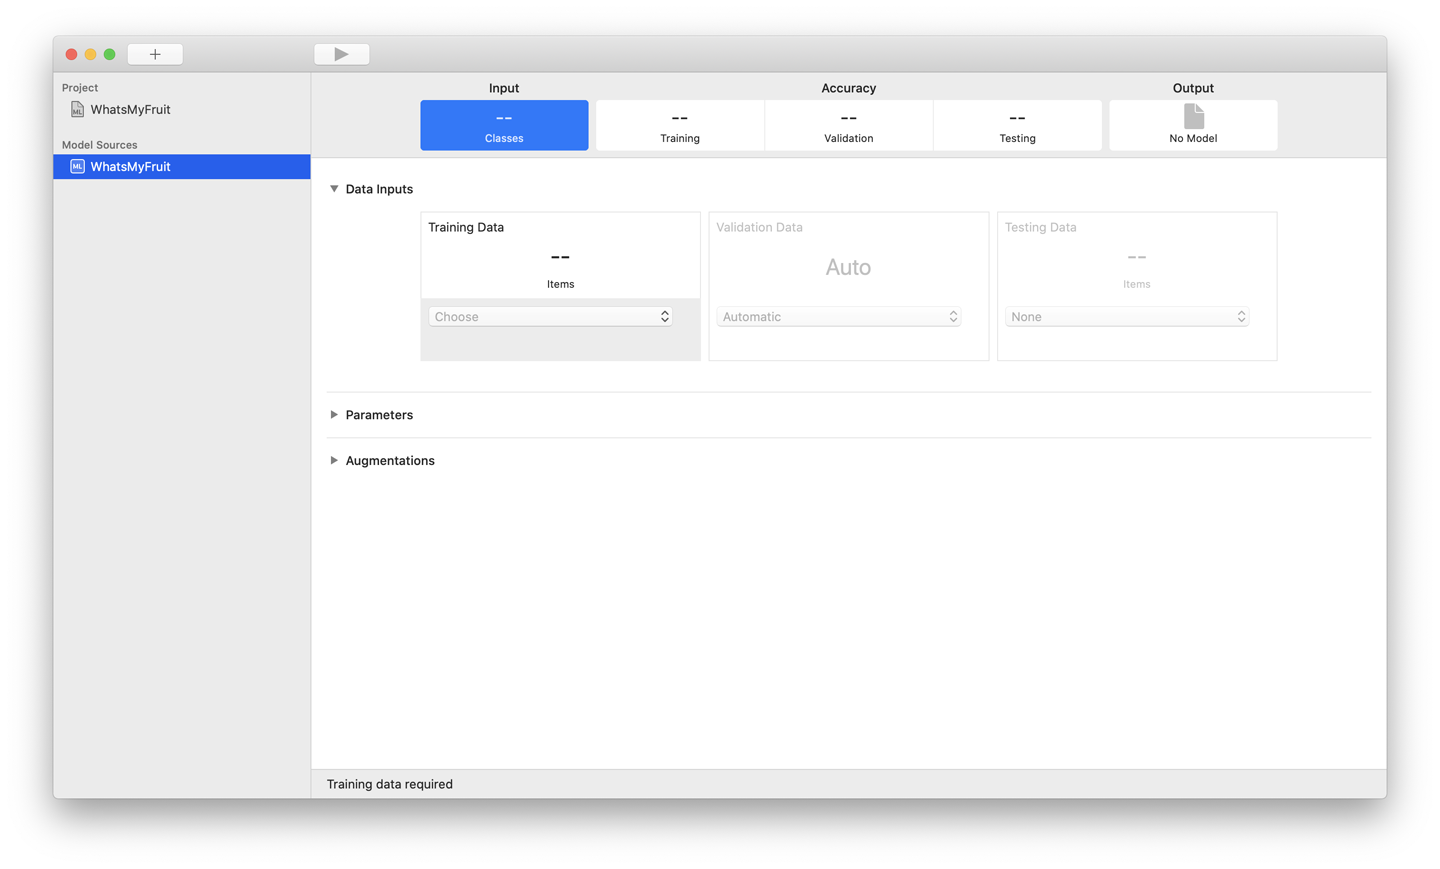
Figure 4-23. Your CreateML project is ready to take some images
-
Click the drop-down text box marked Training Data and browse to the folder where you saved the apple and banana images earlier. Select this folder.
-
In the top bar of the CreateML app, click the Play button, and then go watch some TV, play a videogame, or go for a walk. CreateML is going to get to work training your model for you! It should look something like Figure 4-24.
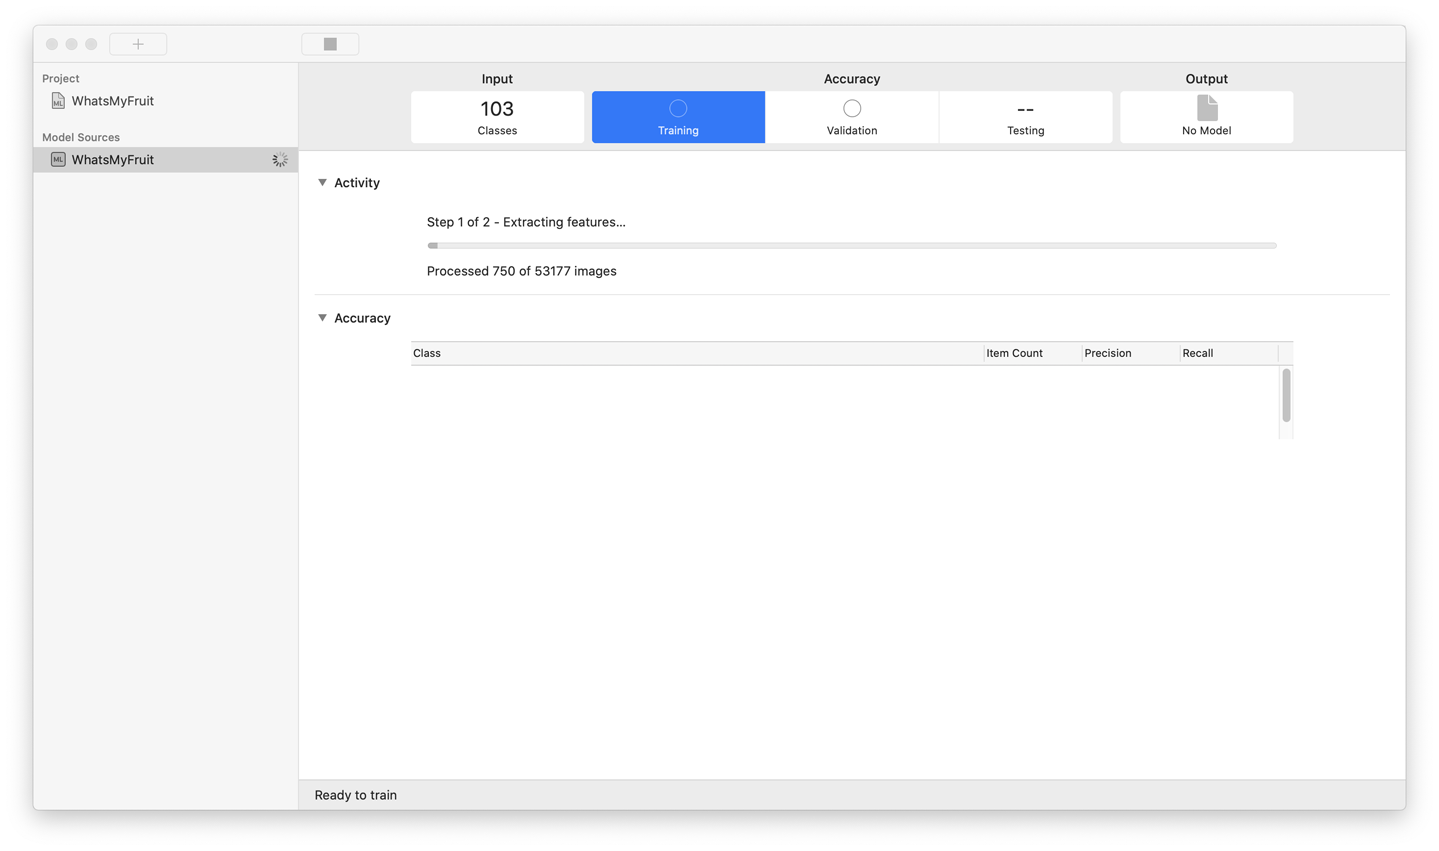
Figure 4-24. CreateML training our fruit classifier
Note
Don’t panic! This might take a while. It took about 47 minutes to train on our 8-core i9 MacBook Pro, but it will go faster with the more CPU cores you have in your machine. However, it will always take a while. On a MacBook Air or MacBook, this could take multiple hours. This is normal.
As training approaches completion, you’ll notice the application doing an accuracy and testing pass, showing some charts about how accurate the model is. We talk about these later. The testing phase can take a while, too.
When CreateML is done, you’ll be able to drag the model file out from the Output box in the upper-right corner of the window. Drag this file somewhere safe.
Note
You might notice that the file you dragged out has the extension .mlmodel. This is CoreML’s native model format, as discussed in “CoreML”.
Now that we’ve trained and tested a model that can identify fruit (well, more accurately, CreateML has done it for us), let’s put it to work in our app.
Tip
We talk more about what the training, validation, and testing phases of this process are later on in this chapter and throughout the rest of the book. Stay tuned. (The book is called practical artificial intelligence, after all!) Also visit our website https://aiwithswift.com for articles on the topic.
Incorporating the Model in the App
Now that we have our starting point app and a trained model, we’re going to combine them and make an app that can actually perform image classification.
You’ll need to have either built the starting point yourself, following the instructions in “Building the App”, or downloaded the code and the project named ICDemo-Starter from our website. We’ll be progressing from that point in this section.
If you don’t want to follow along and manually work with the app’s code to add the AI features, you can also download the project named ICDemo-Complete.
We’re going to need to change a few things to get the app working with our model:
-
Add a new variable,
classifieralongsideinputImageandclassification:privateletclassifier=VisionClassifier(mlmodel:BananaOrApple().model) -
Assign the new variable’s delegate to
selfat the end ofviewDidLoad(), and then callrefresh():classifier?.delegate=selfrefresh() -
At the end of the first
ifstatement of therefresh()function, add a call to disable theclassifyImageButton(so that if there’s no image present, you can’t click the button to ask the model for a classification, which matters now that there will be a model connected):classifyImageButton.disable() -
Replace the definition of
classifyImage()as follows, to actually do something instead of always saying “FRUIT!”:privatefuncclassifyImage(){ifletclassifier=self.classifier,letimage=inputImage{classifier.classify(image)classifyImageButton.disable()}}Next, add a new Swift file to the project, called Vision.swift:
-
Add the following code to it:
importUIKitimportCoreMLimportVisionextensionVNImageRequestHandler{convenienceinit?(uiImage:UIImage){guardletciImage=CIImage(image:uiImage)else{returnnil}letorientation=uiImage.cgImageOrientationself.init(ciImage:ciImage,orientation:orientation)}}classVisionClassifier{privateletmodel:VNCoreMLModelprivatelazyvarrequests:[VNCoreMLRequest]={letrequest=VNCoreMLRequest(model:model,completionHandler:{[weakself]request,errorinself?.handleResults(for:request,error:error)})request.imageCropAndScaleOption=.centerCropreturn[request]}()vardelegate:ViewController?init?(mlmodel:MLModel){ifletmodel=try?VNCoreMLModel(for:mlmodel){self.model=model}else{returnnil}}funcclassify(_image:UIImage){DispatchQueue.global(qos:.userInitiated).async{guardlethandler=VNImageRequestHandler(uiImage:image)else{return}do{tryhandler.perform(self.requests)}catch{self.delegate?.summonAlertView(message:error.localizedDescription)}}}funchandleResults(forrequest:VNRequest,error:Error?){DispatchQueue.main.async{guardletresults=request.resultsas?[VNClassificationObservation]else{self.delegate?.summonAlertView(message:error?.localizedDescription)return}ifresults.isEmpty{self.delegate?.classification="Don't see a thing!"}else{letresult=results[0]ifresult.confidence<0.6{self.delegate?.classification="Not quite sure..."}else{self.delegate?.classification="\(result.identifier)"+"(\(Int(result.confidence*100))%)"}}self.delegate?.refresh()}}} -
Add the following extension to the end of the Vision.swift file:
extensionUIImage{varcgImageOrientation:CGImagePropertyOrientation{switchself.imageOrientation{case.up:return.upcase.down:return.downcase.left:return.leftcase.right:return.rightcase.upMirrored:return.upMirroredcase.downMirrored:return.downMirroredcase.leftMirrored:return.leftMirroredcase.rightMirrored:return.rightMirrored}}}This code comes directly from Apple’s documentation on converting between
CGImageandUIImagetypes. We talked about the difference betweenCGImageandUIImageearlier in “Task: Barcode Detection”. -
Drag the WhatsMyFruit.mlmodel file into the root of the projects and allow Xcode to copy it in.
You can now launch the app in the simulator. You should see something that looks like Figure 4-25.
You can select an image (or take a photo if you’re running it on a real device), see the image appear in the image view, and then click tap the Classify Image button to ask the model we built for a classification. You should see the label update with the classification (or lack thereof).
Improving the App
You can, of course, make the app able to classify more than just bananas and apples. If you return to the dataset that we prepared earlier in “AI Toolkit and Dataset” and look at the complete Training folder, with all 103 different fruit classes (labels), you might be able to guess what we suggest trying next.
Train a new image classification model using Apple’s CreateML app, following the instructions in “Creating a model”, but instead, select the entire Training folder (giving you 103 different classes) from the Fruit-360 dataset.
Drop this model into your Xcode project, named appropriately, and then update the following line in ViewController.swift to point to the new model:
privateletclassifier=VisionClassifier(mlmodel:BananaOrApple().model)
For example, if your new model was called Fruits360.mlmodel, you’d update the line to resemble the following:
privateletclassifier=VisionClassifier(mlmodel:Fruits360().model)
You then can launch your app again and detect all 103 different kinds of fruit. Amazing. You’re now ready to play app-assisted “What’s My Fruit?”
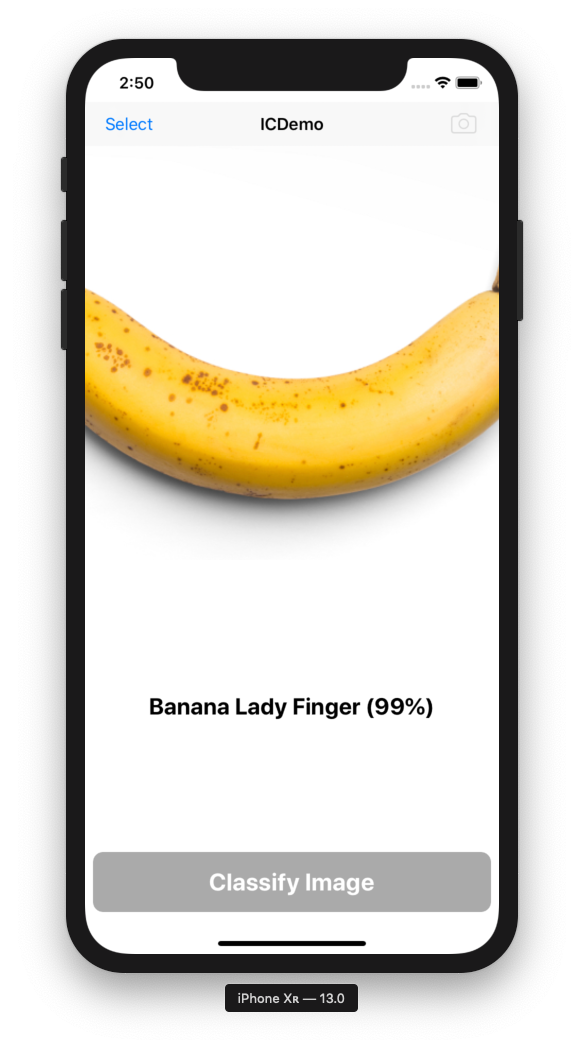
Figure 4-25. Our image classifer works
Task: Drawing Recognition
With the advent of the iPad Pro and the Apple Pencil, drawing on Apple’s mobile devices is more popular than ever (check out Procreate, an app built in the authors’ home state of Tasmania).
Classifying a drawing could be useful for all manner of reasons, from making a drawing-based game to figuring out what someone has drawn to turn it into an emoji, and beyond.
Problem and Approach
Drawings are fun, and it’s kind of magic to be able to draw something, even if it’s all scribbly and weird, and then have a computer tell you what you’ve drawn. It’s a fun feature that could be an app or game all on its own or form the basis of a feature that makes your app a little bit more magic.
In this task, we’re going to explore the practical side of drawing detection by the following:
-
Building an app that lets users take a photo of a drawing and have the app classify it
-
Finding or assembling the data and then training a model that can classify drawings from bitmap images
-
Exploring the next steps for better drawing classification
In this task, we build an app that can identify what we’ve drawn from a photo of a black-and-white scribbly-line drawing. Figure 4-26 illustrates what the final version of the app looks like.
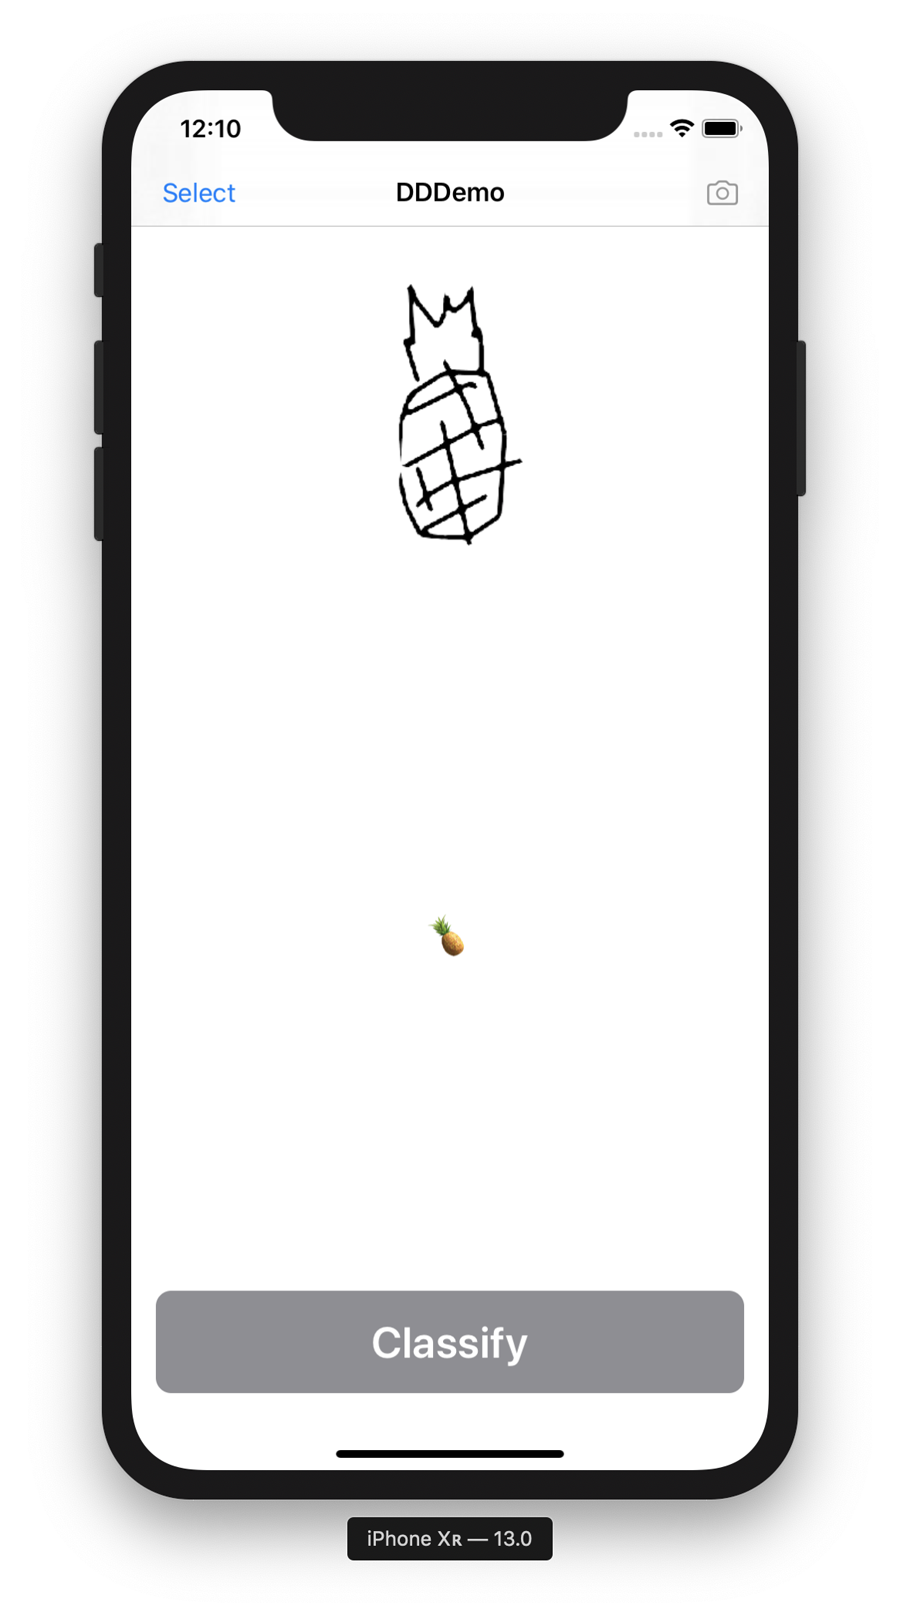
Figure 4-26. The final version of our bitmap drawing detector
AI Toolkit and Dataset
We’re going to look at our AI toolkit before we build the app for this task, because there’s really only one pass we need to do to build the app. The primary tools we’ll be using for this task are Turi Create, CoreML, and Vision. For a reminder on what these tools are, check back to Chapter 2 and “Apple’s Other Frameworks”.
First, let’s use Turi Create, Apple’s task-based Python toolkit for creating machine-learning models, to train a model that can classify drawings.
Then, we use CoreML and Vision to work with the model, classifying photos of drawings we allow the user to take photos of.
To make an app that can classify drawings, we need a dataset of drawings. We could draw a few million little sketches of different things that we might want the app to be able to identify, but that might take a while.
As you’ll find is often the case, the boffins have us covered. This time the boffins are from Google. The Quick Draw Dataset is a collection of more than 50 million sketchy drawings, categorized (345 categories), all drawn by users from around the world who were playing Google’s Quick, Draw! game online (Google is very good at getting people to contribute data), shown in Figure 4-27.
Tip
We’ve been made aware that those outside the United Kingdom and Australia might not know what a boffin is. Please consult this article for more details on boffins. As a wise thought leader once said: books are for learning. And now you know!
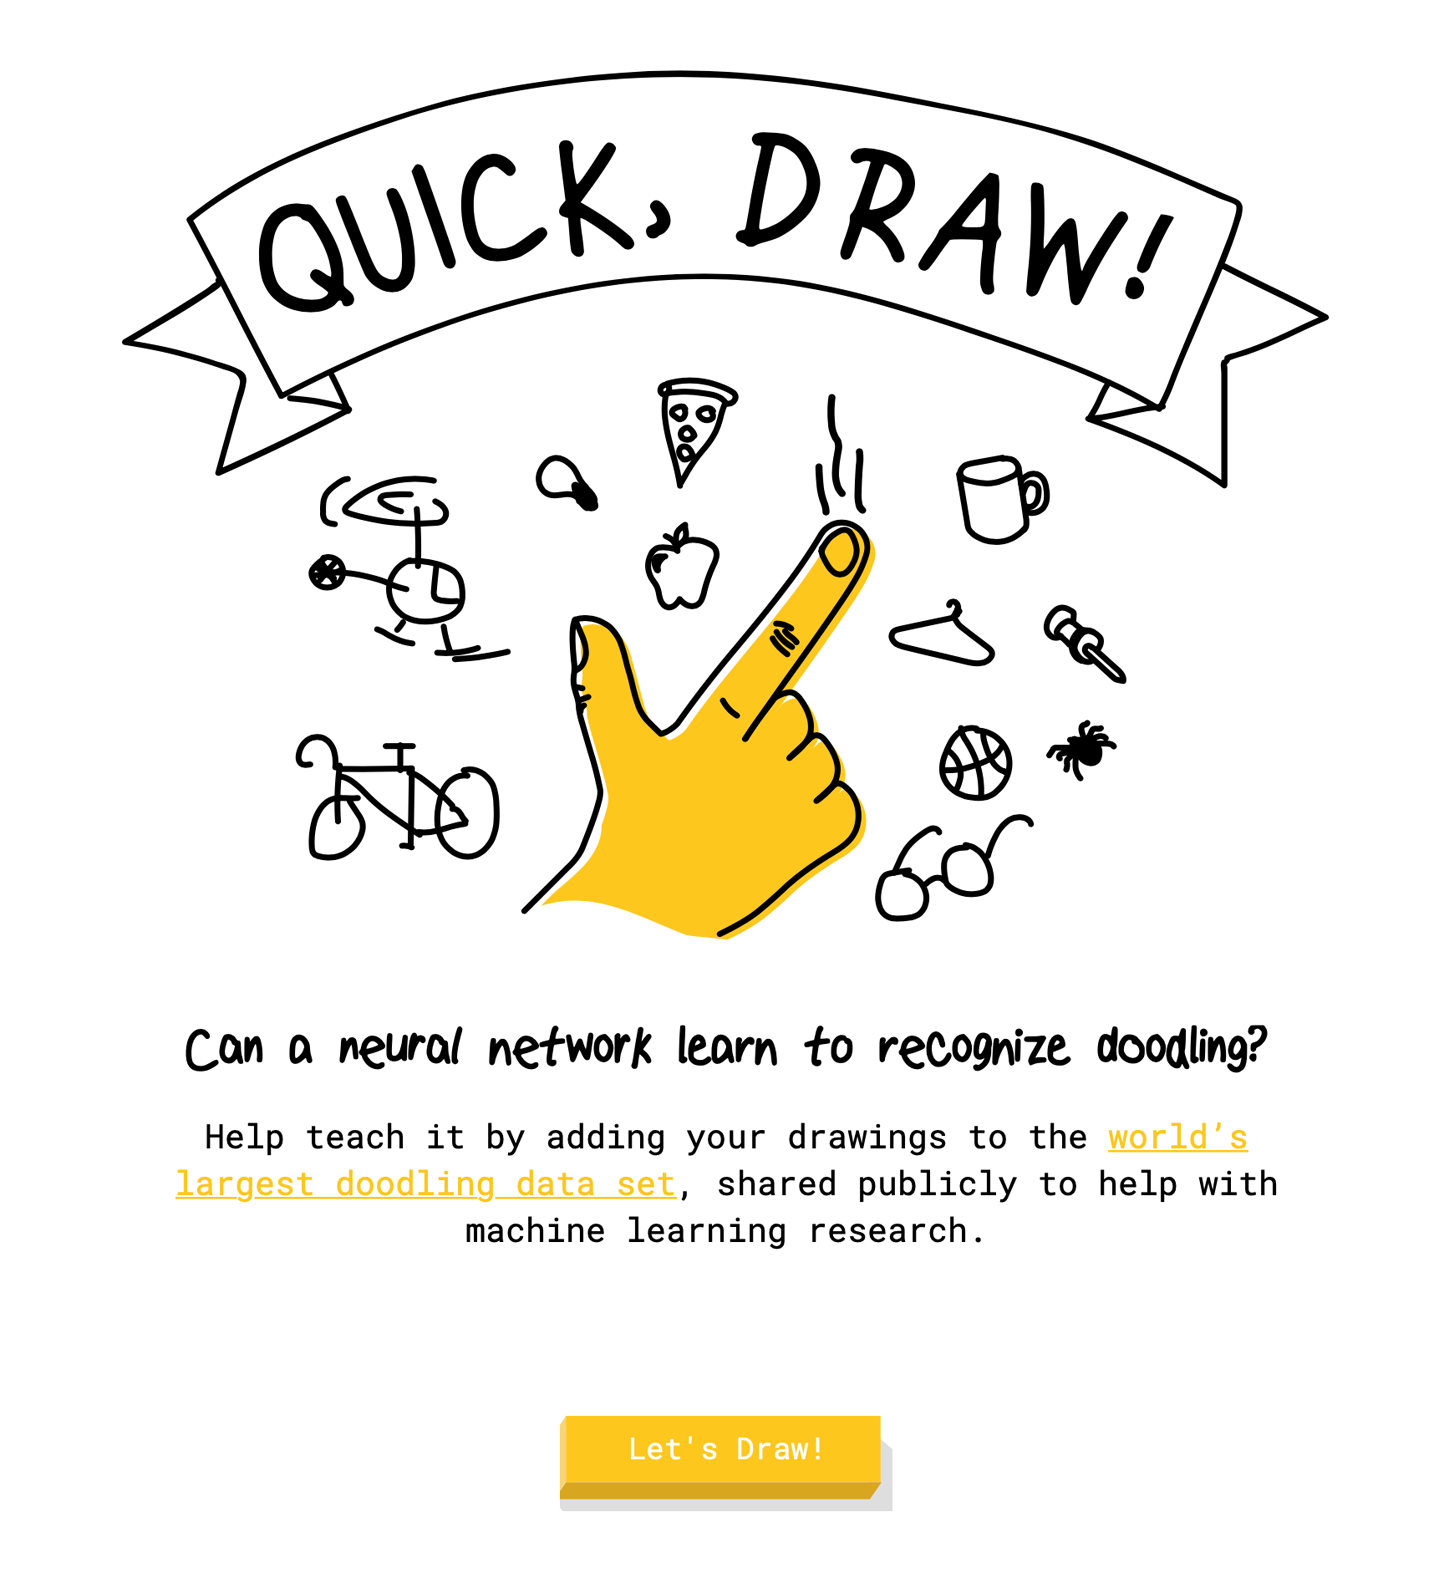
Figure 4-27. Google’s Quick, Draw! game
Because the Quick Draw Dataset has so many categories, and training a classifier with so many samples would take a while (feel free to modify our scripts and give it a go), we’re going to limit ourselves to the following 23 categories: apple, banana, bread, broccoli, cake, carrot, coffee cup, cookie, donut, grapes, hot dog, ice cream, lollipop, mushroom, peanut, pear, pineapple, pizza, potato, sandwich, steak, strawberry, and watermelon.
You can see an example of the sorts of drawings the app will be able to classify in Figure 4-28.

Figure 4-28. Examples of the images our drawing classifier will be able to work with
Note
You don’t need to download the Quick Draw Dataset; it’s very, very large. We download it as part of the script we make to train the model in “Creating a model”.
Creating a model
We’re going to use Apple’s Turi Create to train this model. This means that we’ll need a Python environment:
-
Set up a Python environment following the process that we outlined in “Python”, activate the environment, and use
pipto install Turi Create, as shown in Figure 4-29:conda create -n TuriCreateDrawingClassifierEnvironment python=3.6conda activate TuriCreateDrawingClassifierEnvironmentpip install turicreate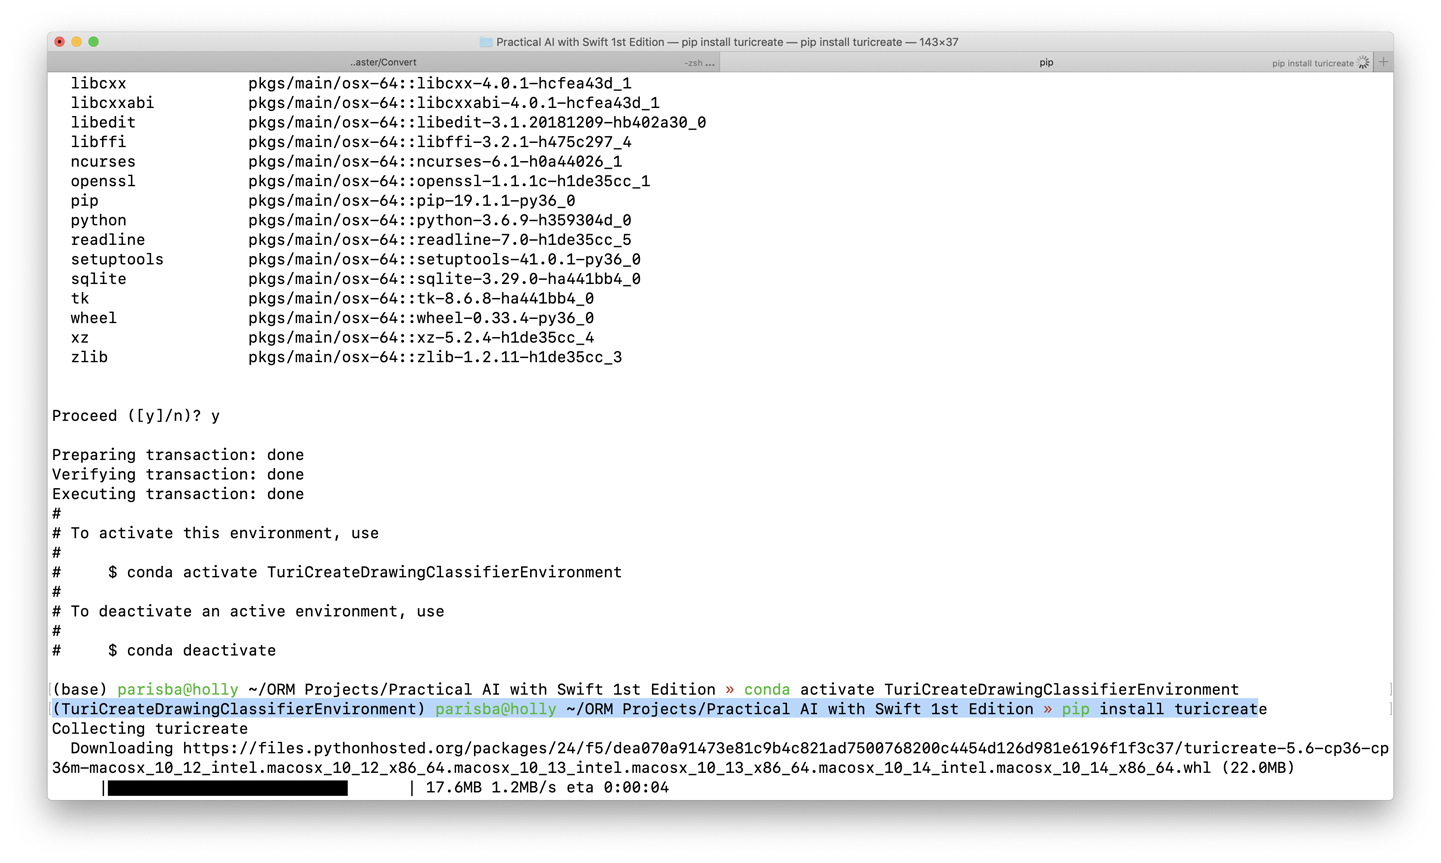
Figure 4-29. Creating our environment
-
Create a new Python script named train_drawing_classifier.py, and add the following:
#!/usr/bin/env pythonimportosimportjsonimportrequestsimportnumpyasnpimportturicreateastc -
Add some configuration variables, including a list of categories, that we want to train:
# THE CATEGORIES WE WANT TO BE ABLE TO DISTINGUISHcategories=['apple','banana','bread','broccoli','cake','carrot','coffee cup','cookie','donut','grapes','hot dog','ice cream','lollipop','mushroom','peanut','pear','pineapple','pizza','potato','sandwich','steak','strawberry','watermelon']# CONFIGURE AS REQUIREDthis_directory=os.path.dirname(os.path.realpath(__file__))quickdraw_directory=this_directory+'/quickdraw'bitmap_directory=quickdraw_directory+'/bitmap'bitmap_sframe_path=quickdraw_directory+'/bitmaps.sframe'output_model_filename=this_directory+'/DrawingClassifierModel'training_samples=10000 -
Add the following function to make directories in which to put the training data:
# MAKE SOME FOLDERS TO PUT TRAINING DATA INdefmake_directory(path):try:os.makedirs(path)exceptOSError:ifnotos.path.isdir(path):raisemake_directory(quickdraw_directory)make_directory(bitmap_directory) -
Fetch the bitmaps that we’re going to use to train:
# FETCH SOME DATAbitmap_url=('https://storage.googleapis.com/quickdraw_dataset/full/numpy_bitmap')total_categories=len(categories)forindex,categoryinenumerate(categories):bitmap_filename='/'+category+'.npy'withopen(bitmap_directory+bitmap_filename,'w+')asbitmap_file:bitmap_response=requests.get(bitmap_url+bitmap_filename)bitmap_file.write(bitmap_response.content)print('Downloaded%sdrawings (category%d/%d)'%(category,index+1,total_categories))random_state=np.random.RandomState(100) -
Add a function to make
SFrames from the images:defget_bitmap_sframe():labels,drawings=[],[]forcategoryincategories:data=np.load(bitmap_directory+'/'+category+'.npy',allow_pickle=True)random_state.shuffle(data)sampled_data=data[:training_samples]transformed_data=sampled_data.reshape(sampled_data.shape[0],28,28,1)forpixel_dataintransformed_data:image=tc.Image(_image_data=np.invert(pixel_data).tobytes(),_width=pixel_data.shape[1],_height=pixel_data.shape[0],_channels=pixel_data.shape[2],_format_enum=2,_image_data_size=pixel_data.size)drawings.append(image)labels.append(category)print('...%sbitmaps complete'%category)print('%dbitmaps with%dlabels'%(len(drawings),len(labels)))returntc.SFrame({'drawing':drawings,'label':labels}) -
Add something to save out those
SFrames to files:# Save intermediate bitmap SFrame to filebitmap_sframe=get_bitmap_sframe()bitmap_sframe.save(bitmap_sframe_path)bitmap_sframe.explore() -
Now, we actually train the drawing classifier:
bitmap_model=tc.drawing_classifier.create(bitmap_sframe,'label',max_iterations=1000) -
Export it to CoreML format:
bitmap_model.export_coreml(output_model_filename+'.mlmodel')Tip
If you want to make your drawing classifier capable of classifying different drawings than ours, check out the list of categories and pick some different ones.
-
Run the script:
python train_drawing_classifier.pyYou should see something that resembles Figure 4-30. As we mentioned earlier, you don’t need to download the Quick Draw Dataset manually, because the script does this.
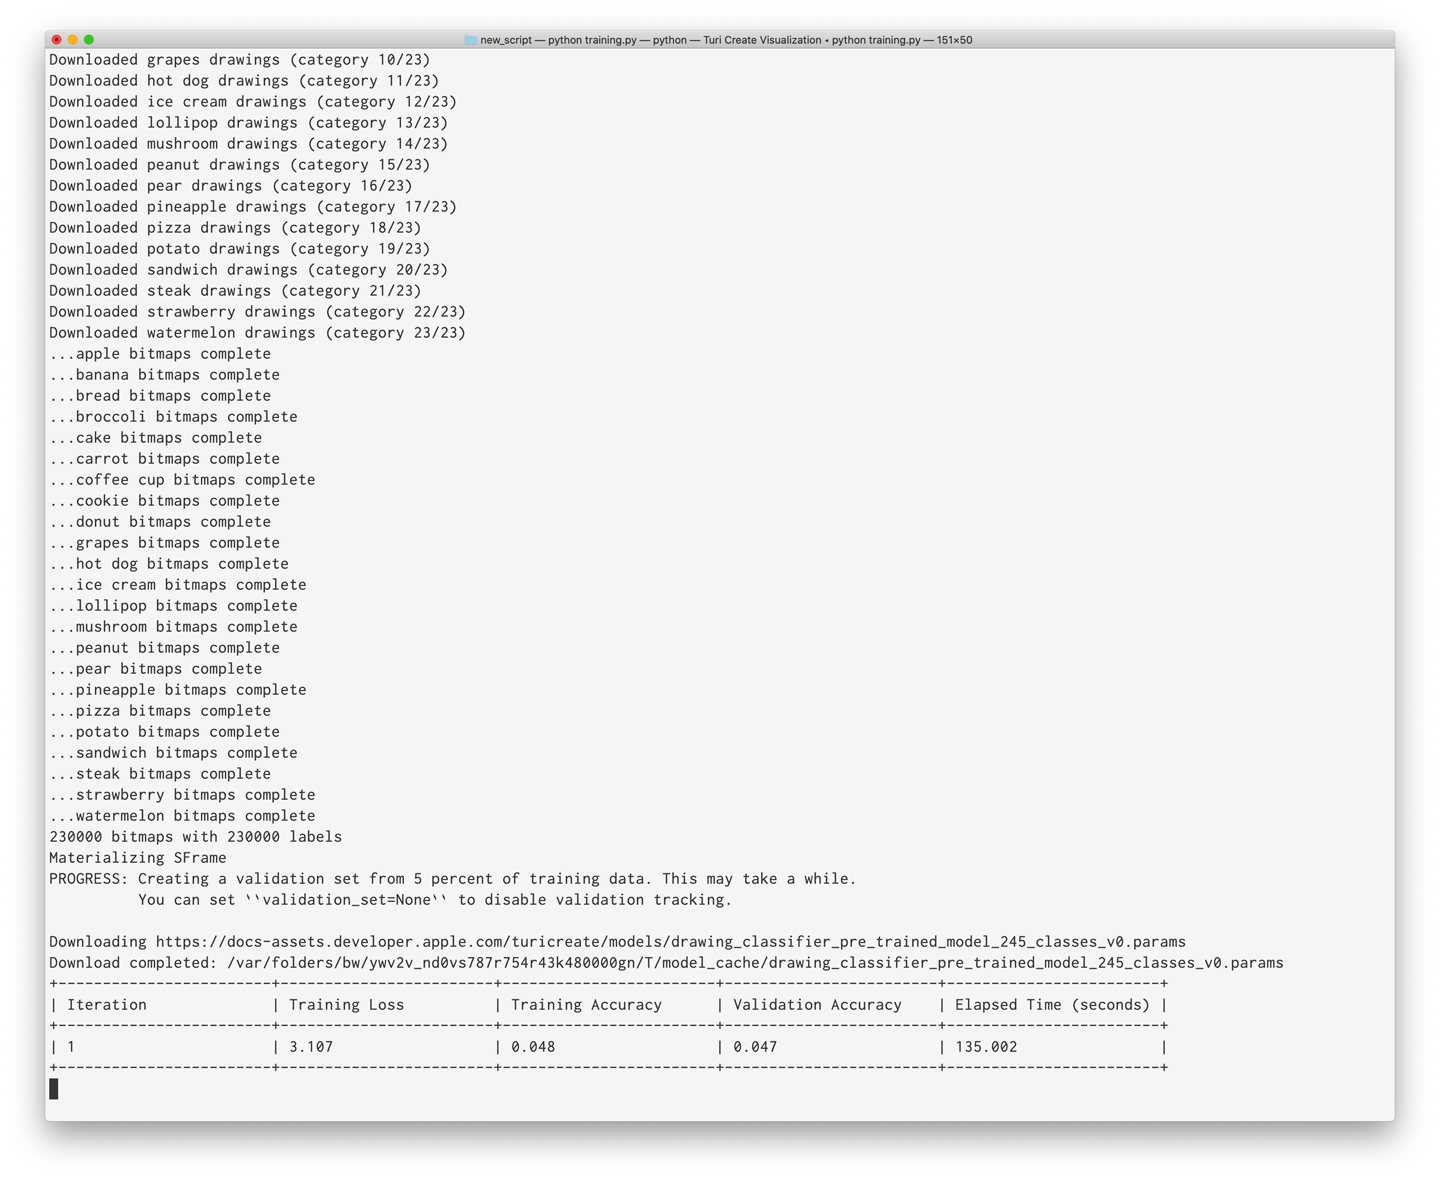
Figure 4-30. Training the drawing classifier
After it’s grabbed them and parsed them into the Turi Create internal format, you’ll see something like Figure 4-31 pop up for you to browse the images. You can check back to “Turi Create” for more information on Turi Create.
Feel free to poke around the visualization while it trains.

Figure 4-31. Turi Create’s visualization of the images
Note
This training might take a while. It took several hours on our modern MacBook Pro. Make a cup of tea, and go watch Person of Interest.
When the training is done, you can take a look in the folder where you did this work, and you’ll find a brand new DrawingClassifierModel.mlmodel, as shown in Figure 4-32. You can use this model just like any other CoreML we’ve worked with; conincidentally, this is exactly what we’ll be doing next, in “Building the App”.
Tip
We mentioned Turi Create’s visualization features earlier in “Understanding the pieces of Turi Create”. We also talked about the broad importance of getting to know your dataset in “Getting to Know a Dataset”.
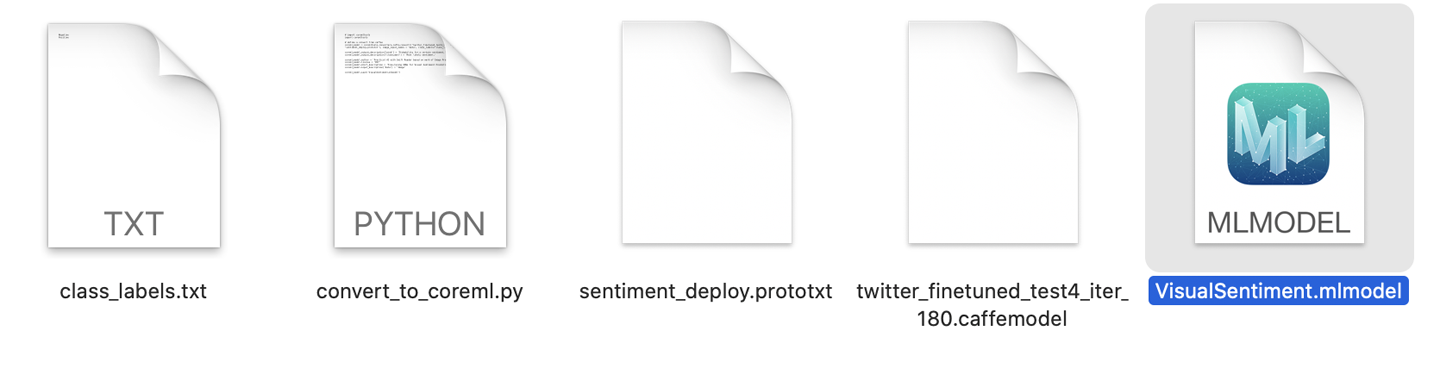
Figure 4-32. The final, converted, CoreML model
Building the App
Again, we’re going to be using Apple’s newest UI framework, SwiftUI, to build the interface for the drawing detection app.
The final form of the app we’re going to build to count faces can be seen earlier, in Figure 4-1; it consists of the following SwiftUI components:
-
A
NavigationViewin which to display the title of the app, as well as the button to select a photo -
An
Imageto display the chosen image (containing a drawing), which the app will attempt to classify -
A
Buttonto trigger the drawing classification -
Some
Textto display the count of faces
However, we construct this view out of multiple subviews, as we did for “Building the App”. If you don’t want to manually build the drawing detection iOS app, you can download the code from our website and look for the project named DDDemo.
After you have that, follow along through the rest of this section (we don’t recommend skipping it) and then meet us at “What’s Next?”.
Tip
You might note that this app is very similar in structure to some of the other SwiftUI apps that we build in the book. We’re trying to keep things consistent and as simple as possible. We really hope it helps you learn. Check our website for more tips and guides.
To make the drawing-detection iOS app yourself, you’ll need to do the following:
-
Fire up Xcode.
-
Create a new iOS app project, choosing the “Single View App” template. We use SwiftUI for this one, as mentioned.
-
Drag in the .mlmodel file we created earlier in “AI Toolkit and Dataset” and let Xcode copy it over as needed.
-
Add a new Swift file to the project called Image.swift. We use this to add an extension on
UIImage, so that we can filter it to be more useful for classification. -
First, we also need an extension on
CIFilter:extensionCIFilter{staticletmono=CIFilter(name:"CIPhotoEffectMono")!staticletnoir=CIFilter(name:"CIPhotoEffectNoir")!staticlettonal=CIFilter(name:"CIPhotoEffectTonal")!staticletinvert=CIFilter(name:"CIColorInvert")!staticfunccontrast(amount:Double=2.0)->CIFilter{letfilter=CIFilter(name:"CIColorControls")!filter.setValue(amount,forKey:kCIInputContrastKey)returnfilter}staticfuncbrighten(amount:Double=0.1)->CIFilter{letfilter=CIFilter(name:"CIColorControls")!filter.setValue(amount,forKey:kCIInputBrightnessKey)returnfilter}}This extension lets us create a
CIFilter, which is a Core Image filter that can manipulate an image, and request that it be mono, noir, or tonal. You can learn more about these filters and how to create your own hhttps://apple.co/2otBgGV[in Apple’s documentation]. -
The extension on
UIImagealso:extensionUIImage{funcapplying(filter:CIFilter)->UIImage?{filter.setValue(CIImage(image:self),forKey:kCIInputImageKey)letcontext=CIContext(options:nil)guardletoutput=filter.outputImage,letcgImage=context.createCGImage(output,from:output.extent)else{returnnil}returnUIImage(cgImage:cgImage,scale:scale,orientation:imageOrientation)}funcfixOrientation()->UIImage?{UIGraphicsBeginImageContext(self.size)self.draw(at:.zero)letnewImage=UIGraphicsGetImageFromCurrentImageContext()UIGraphicsEndImageContext()returnnewImage}varcgImageOrientation:CGImagePropertyOrientation{switchself.imageOrientation{case.up:return.upcase.down:return.downcase.left:return.leftcase.right:return.rightcase.upMirrored:return.upMirroredcase.downMirrored:return.downMirroredcase.leftMirrored:return.leftMirroredcase.rightMirrored:return.rightMirrored}}}This extension adds to two functions: one to apply a
CIFilter, and one to fix the orientation of an image. We also add the usual orientation fixes. -
Make another new Swift file called Drawing.swift and then add the following
imports:importUIKitimportVisionimportFoundation -
Add the following
enum:enumDrawing:String,CaseIterable{///Theseonlyincludethosethemodelwastrainedon.Forothersthat///canbeincludedinthetrainingphase,seethefulllistof///categoriesinthedataset:///https://raw.githubusercontent.com/googlecreativelab////quickdraw-dataset/master/categories.txtcaseapple,banana,bread,broccoli,cake,carrot,coffee,cookiecasedonut,grapes,hotdog,icecream,lollipop,mushroom,peanut,pearcasepineapple,pizza,potato,sandwich,steak,strawberry,watermeloninit?(rawValue:String){ifletmatch=Drawing.allCases.first(where:{$0.rawValue==rawValue}){self=match}else{switchrawValue{case"coffee cup":self=.coffeecase"hot dog":self=.hotdogcase"ice cream":self=.icecreamdefault:returnnil}}}varicon:String{switchself{case.apple:return"
"case.banana:return"
"case.bread:return"
"case.broccoli:return"
"case.cake:return"
"case.carrot:return"
"case.coffee:return"
"case.cookie:return"
"case.donut:return"
"case.grapes:return"
"case.hotdog:return"
"case.icecream:return"
"case.lollipop:return"
"case.mushroom:return"
"case.peanut:return"
"case.pear:return"
"case.pineapple:return"
"case.pizza:return"
"case.potato:return"
"case.sandwich:return"
"case.steak:return"
"case.strawberry:return"
"case.watermelon:return"
"}}}enumDrawing:String,CaseIterable{///Theseonlyincludethosethemodelwastrainedon.Forothersthat///canbeincludedinthetrainingphase,seethefulllistof///categoriesinthedataset:///https://raw.githubusercontent.com/googlecreativelab////quickdraw-dataset/master/categories.txtcaseapple,banana,bread,broccoli,cake,carrot,coffee,cookiecasedonut,grapes,hotdog,icecream,lollipop,mushroom,peanut,pearcasepineapple,pizza,potato,sandwich,steak,strawberry,watermeloninit?(rawValue:String){ifletmatch=Drawing.allCases.first(where:{$0.rawValue==rawValue}){self=match}else{switchrawValue{case"coffee cup":self=.coffeecase"hot dog":self=.hotdogcase"ice cream":self=.icecreamdefault:returnnil}}}varicon:String{switchself{case.apple:return""case.banana:return""case.bread:return""case.broccoli:return""case.cake:return""case.carrot:return""case.coffee:return""case.cookie:return""case.donut:return""case.grapes:return""case.hotdog:return""case.icecream:return""case.lollipop:return""case.mushroom:return""case.peanut:return""case.pear:return""case.pineapple:return""case.pizza:return""case.potato:return""case.sandwich:return""case.steak:return""case.strawberry:return""case.watermelon:return""}}}Our
enumlets us create aDrawing(which is what theenumis called) from aString(via theinit()we created). Each type of theDrawingenumhas an icon, which is an emoji, assigned to it. -
You also need an extension on
VNImageRequestHandler:extensionVNImageRequestHandler{convenienceinit?(uiImage:UIImage){guardletciImage=CIImage(image:uiImage)else{returnnil}letorientation=uiImage.cgImageOrientationself.init(ciImage:ciImage,orientation:orientation)}}This extension extends
VNImageRequestHandlerto add a convenience initializer allowing creation with aUIImageinstead of aCIImage. For a reminder on whatVNImageRequestHandlerdoes, check Apple’s documentation. -
Add another extension on
DrawingClassifierModelBitmap, which is the name of the model we made earlier (Xcode automatically creates a class from the model we dragged in):extensionDrawingClassifierModel{funcconfigure(image:UIImage?)->UIImage?{ifletrotatedImage=image?.fixOrientation(),letgrayscaleImage=rotatedImage.applying(filter:CIFilter.noir),// account for paper photography making everything dark :/letbrightenedImage=grayscaleImage.applying(filter:CIFilter.brighten(amount:0.4)),letcontrastedImage=brightenedImage.applying(filter:CIFilter.contrast(amount:10.0)){returncontrastedImage}returnnil}funcclassify(_image:UIImage?,completion:@escaping(Drawing?)->()){guardletimage=image,letmodel=try?VNCoreMLModel(for:self.model)else{returncompletion(nil)}letrequest=VNCoreMLRequest(model:model)DispatchQueue.global(qos:.userInitiated).async{iflethandler=VNImageRequestHandler(uiImage:image){try?handler.perform([request])letresults=request.resultsas?[VNClassificationObservation]lethighestResult=results?.max{$0.confidence<$1.confidence}print(results?.list??"")completion(Drawing(rawValue:highestResult?.identifier??""))}else{completion(nil)}}}}This large piece of code extends our model,
DrawingClassifierModel, adding aconfigure()function that takes aUIImageand returns a version of it that’s been filtered to grayscale, brightened, and had its contrast increased. It also adds aclassify()function that runs aVNCoreMLRequeston aDispatchQueueto attempt to classify the image (drawing) using aVNImageRequestHandlerand our model (which isselfin this context, as this is an extension on the model). -
Add one more extension on
Collection:extensionCollectionwhereElement==VNClassificationObservation{varlist:String{varstring=""forelementinself{string+="\(element.identifier): "+"\(element.confidence*100.0)%\n"}returnstring}}This extension on
Collections ofVNClassificationObservations (which are what you get back when you perform an image analysis using Apple’s Vision framework) adds avarcalledlist, of typeString, which allows us to get the identifier and confidence from theVNClassificationObservation. -
To add some custom views, add a file called Views.swift,
importSwiftUI, and then add the followingImagePickerstruct:structImagePicker:UIViewControllerRepresentable{typealiasUIViewControllerType=UIImagePickerControllerprivate(set)varselectedImage:UIImage?private(set)varcameraSource:Boolprivateletcompletion:(UIImage?)->()init(camera:Bool=false,completion:@escaping(UIImage?)->()){self.cameraSource=cameraself.completion=completion}funcmakeCoordinator()->ImagePicker.Coordinator{letcoordinator=Coordinator(self)coordinator.completion=self.completionreturncoordinator}funcmakeUIViewController(context:Context)->UIImagePickerController{letimagePickerController=UIImagePickerController()imagePickerController.delegate=context.coordinatorimagePickerController.sourceType=cameraSource?.camera:.photoLibraryimagePickerController.allowsEditing=truereturnimagePickerController}funcupdateUIViewController(_uiViewController:UIImagePickerController,context:Context){}classCoordinator:NSObject,UIImagePickerControllerDelegate,UINavigationControllerDelegate{varparent:ImagePickervarcompletion:((UIImage?)->())?init(_imagePickerControllerWrapper:ImagePicker){self.parent=imagePickerControllerWrapper}funcimagePickerController(_picker:UIImagePickerController,didFinishPickingMediaWithInfoinfo:[UIImagePickerController.InfoKey:Any]){print("Image picker complete...")letselectedImage=info[UIImagePickerController.InfoKey.originalImage]as?UIImagepicker.dismiss(animated:true)completion?(selectedImage)}funcimagePickerControllerDidCancel(_picker:UIImagePickerController){print("Image picker cancelled...")picker.dismiss(animated:true)completion?(nil)}}}As we did when we built a face-detection app using SwiftUI in “Building the App”, this fakes a ViewController in SwiftUI, allowing us to use UIKit features to get an image picker.
-
Add the following
TwoStateButtonview:structTwoStateButton:View{privatelettext:Stringprivateletdisabled:Boolprivateletbackground:Colorprivateletaction:()->Voidvarbody:someView{Button(action:action){HStack{Spacer()Text(text).font(.title).bold().foregroundColor(.white)Spacer()}.padding().background(background).cornerRadius(10)}.disabled(disabled)}init(text:String,disabled:Bool,background:Color=.blue,action:@escaping()->Void){self.text=textself.disabled=disabledself.background=disabled?.gray:backgroundself.action=action}}This
TwoStateButtonshould look pretty familiar at this point: it defines a SwiftUI view for aButtonthat can be disabled and have that visually represented. -
Add the following
MainViewView:structMainView:View{privateletimage:UIImageprivatelettext:Stringprivateletbutton:TwoStateButtonvarbody:someView{VStack{Image(uiImage:image).resizable().aspectRatio(contentMode:.fit)Spacer()Text(text).font(.title).bold()Spacer()self.button}}init(image:UIImage,text:String,button:()->TwoStateButton){self.image=imageself.text=textself.button=button()}}This
MainViewdefines aVStackwith anImage, aSpacer, someText, and aTwoStateButton. -
Next, open ContentView.swift, and then add the following
@Statevariables:@StateprivatevarimagePickerOpen:Bool=false@StateprivatevarcameraOpen:Bool=false@Stateprivatevarimage:UIImage?=nil@Stateprivatevarclassification:String?=nil -
And the following variables:
privateletplaceholderImage=UIImage(named:"placeholder")!privateletclassifier=DrawingClassifierModel()privatevarcameraEnabled:Bool{UIImagePickerController.isSourceTypeAvailable(.camera)}privatevarclassificationEnabled:Bool{image!=nil&&classification==nil} -
Add a function to perform the classification:
privatefuncclassify(){print("Analysing drawing...")classifier.classify(self.image){resultinself.classification=result?.icon}} -
Add a function to return control, after classification:
privatefunccontrolReturned(image:UIImage?){print("Image return\(image==nil?"failure":"success")...")// turn image right side up, resize it and turn it black-and-whiteself.image=classifier.configure(image:image)} -
Add a function to summon an image picker:
privatefuncsummonImagePicker(){print("Summoning ImagePicker...")imagePickerOpen=true} -
Add a function to summon the camera:
privatefuncsummonCamera(){print("Summoning camera...")cameraOpen=true} -
Add an extension on
ContentView, which returns the right views, as needed:extensionContentView{privatefuncmainView()->AnyView{returnAnyView(NavigationView{MainView(image:image??placeholderImage,text:"\(classification??"Nothing detected")"){TwoStateButton(text:"Classify",disabled:!classificationEnabled,action:classify)}.padding().navigationBarTitle(Text("DDDemo"),displayMode:.inline).navigationBarItems(leading:Button(action:summonImagePicker){Text("Select")},trailing:Button(action:summonCamera){Image(systemName:"camera")}.disabled(!cameraEnabled))})}privatefuncimagePickerView()->AnyView{returnAnyView(ImagePicker{resultinself.classification=nilself.controlReturned(image:result)self.imagePickerOpen=false})}privatefunccameraView()->AnyView{returnAnyView(ImagePicker(camera:true){resultinself.classification=nilself.controlReturned(image:result)self.cameraOpen=false})}} -
Update the
bodyViewto look as follows:varbody:someView{ifimagePickerOpen{returnimagePickerView()}ifcameraOpen{returncameraView()}returnmainView()}
You can now fire up your drawing classifier app, draw some things on paper, take a photo, and watch your app identify your drawings (well, as long as the drawings match the categories you trained the model with). Figure 4-33 presents some examples of the authors’ handiwork.
What’s Next?
This is just one way you could make a drawing classification feature. Drawings are often created on iOS devices, which means we’re going through some possibly unnecessary steps of taking or selecting a photo. Why not allow the user to draw directly in our app?
Later in Chapter 7, we look at creating a drawing classifier for drawings made on the device “Task: Gestural Classification for Drawing”.
Figure 4-33. The fabulous artwork of the authors being identified by our app
Task: Style Classification
For our final vision-related task, we modify the app that we built for image classification in “Task: Image Classification” to make it capable of identifying the style of a supplied image. We’re going to do this quickly, and in the most straightforward and practical way we know how: by converting a preexisting model into Apple’s CoreML format.
We need a model that can identify styles. Luckily, the boffins have us covered. The “Finetuning CaffeNet on Flickr Style” is a classifier model that’s been trained on many images of different categories and can identify a variety of image styles.
Note
The styles that the model can identify are Detailed, Pastel, Melancholy, Noir, HDR, Vintage, Long Exposure, Horror, Sunny, Texture, Bright, Hazy, Bokeh, Serene, Ethereal, Macro, Depth of Field, Geometric Composition, Minimal, and Romantic. The model we’re using here is based on this research paper.
Converting the Model
We need to use Python to convert the model to something that we can use:
-
Create a new Python environment following the instructions in “Python” and then activate it:
conda create -n StyleClassifier python=3.6conda activate StyleClassifier -
Install Apple’s CoreML Tools (we discussed this earlier, in “CoreML Community Tools”):
pip install coremltools -
Create a file called styles.txt with the following contents:
Detailed
Pastel
Melancholy
Noir
HDR
Vintage
Long Exposure
Horror
Sunny
Bright
Hazy
Bokeh
Serene
Texture
Ethereal
Macro
Depth of Field
Geometric Composition
Minimal
Romantic
-
Download the trained model we’re using, in Caffe format, from the Berkeleyvision website.
Save this model file (it’s a few hundred megabytes) next to the styles.txt file.
-
Download and save this file next to it. The deploy.prototxt file specifies the parameters for the model that we need in order to be able to convert it to the CoreML format.
-
Create a new Python script in the same folder (ours is called convert_styleclassifier.py), and then add the following code:
importcoremltoolscoreml_model=coremltools.converters.caffe.convert(('./finetune_flickr_style.caffemodel','./deploy.prototxt'),image_input_names='data',class_labels='./styles.txt')coreml_model.author='Paris BA'coreml_model.license='None'coreml_model.short_description='Flickr Style'coreml_model.input_description['data']='An image.'coreml_model.output_description['prob']=('Probabilities for style type, for a given input.')coreml_model.output_description['classLabel']=('The most likely style type for the given input.')coreml_model.save('Style.mlmodel')This code
imports the CoreML Tools, loads the Caffe converter that is supplied by CoreML Tools, and points to the finetune_flickr_style.caffemodel model that we downloaded. It’s also where to find the deploy.prototxt parameters file, which supplies some metadata and saves out a CoreML format model named Style.mlmodel.
Everything should look like Figure 4-34.
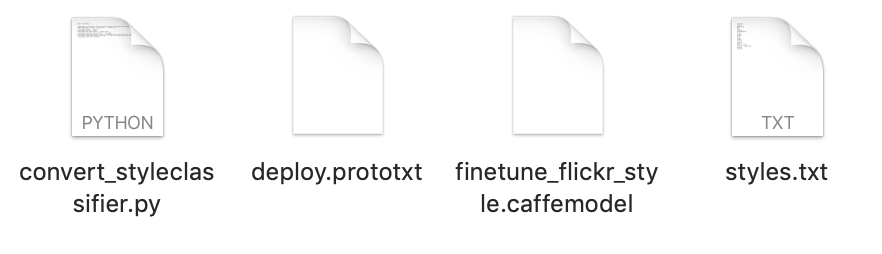
Figure 4-34. The files needed to convert the style classifier
-
Run the Python script:
python convert_styleclassifier.py
You’ll see something that looks like Figure 4-35, and you’ll end up with a Style.mlmodel file in the folder (Figure 4-36).

Figure 4-35. Converting the style classifier from Caffee to CoreML
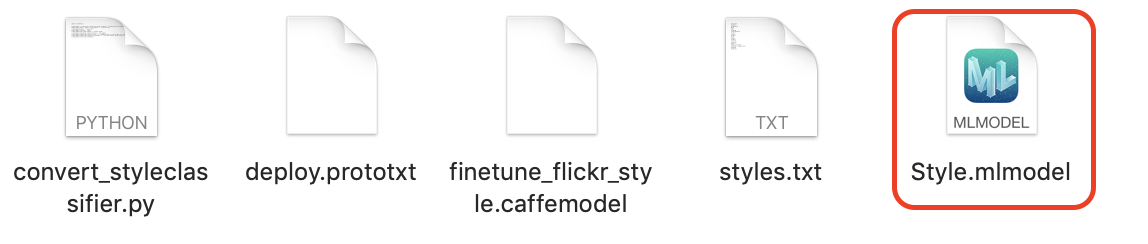
Figure 4-36. Our new CoreML style classifier model
Using the Model
First, you’ll want to duplicate the final version of the project we created for the classification task in “Task: Image Classification”. If you don’t want to, you can download ours from our website; look for the project named StyleClassifier.
To use the Style.mlmodel file we just converted, do the following:
-
Open the Xcode project that you duplicated (or downloaded from our resources).
-
Drag Style.mlmodel into the project, allowing Xcode to copy as needed.
-
In ViewController.swift, change the line that references the model from this
privateletclassifier=VisionClassifier(mlmodel:BananaOrApple().model)to this:
privateletclassifier=VisionClassifier(mlmodel:Style().model)Run the app. You can now select an image, tap the button, and receive a classification, as shown in Figure 4-37.
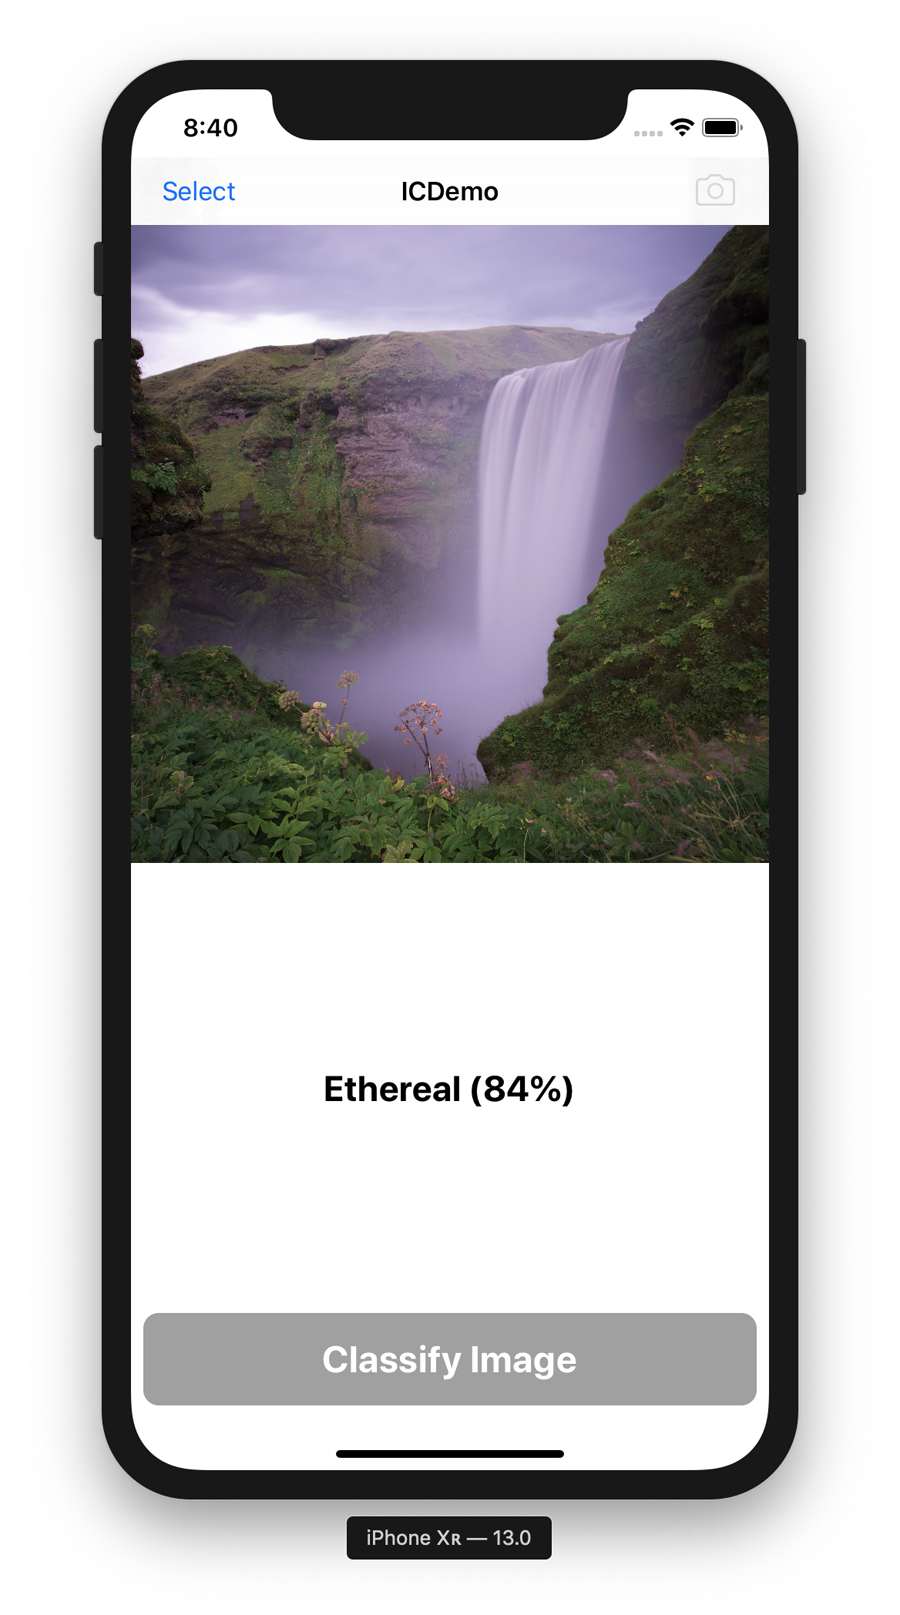
Figure 4-37. Our Style Classifier in action
We look at the use of CoreML Tools (“CoreML Community Tools”) to convert models more in later activities, such as in “Task: Image Generation with a GAN” and “Task: Using the CoreML Community Tools”.
Next Steps
That’s about it for our vision chapter. We’ve covered some common vision-related practical AI tasks that you might want to accomplish with Swift, and used a fairly wide variety of tools to do so.
We built seven apps and Playgrounds, exploring seven practical AI tasks related to vision:
- Face Detection
-
We used Apple’s new SwiftUI for the interface, and Apple’s provided framework, Vision, to detect faces and work with that information. We didn’t even need to train a model.
- Barcode Detection
-
We used Apple’s frameworks to find barcodes in images. Again, we didn’t need to train a model.
- Saliency Detection
-
In this task, we found the most salient area of an image using Apple’s frameworks. Still no model training!
- Image Similarity
-
We again used Apple’s new SwiftUI framework and again used Vision to build an app that lets us see how different (or similar) two images are. And no model training here, either.
- Image Classification
-
This time we used Apple’s UIKit framework to build the UI, trained our own image classification model using Apple’s CreateML app and an open source dataset of fruit photos, and built an app that can recognize different fruits from photos. Finally, we trained a model!
- Drawing Recognition
-
We again used SwiftUI to build a derivative app of our Face Detection app, creating our own drawing classification model using Apple’s Turi Create Python framework to build an app that allows users to identify what they’ve drawn on paper.
- Style Classification
-
We updated our Image Classification app to support identifying the style of a supplied image by converting a model built with another set of tools into Apple’s CoreML format.
Note
As we mentioned in “Apple’s Models”, if you want to solve a practical AI problem regarding vision, you can also check out Apple’s Core ML Models page and see what it offers in the way of pretrained CoreML models. If you can solve your problem without having to do as much work yourself, it’s probably worth it. We also recommend checking out the Awesome CoreML Models list.
In Chapter 11, we look at what might have happened under the hood, algorithm-wise, for each of the tasks we explored in this chapter. Just because that’s the end of the chapter named “Vision,” it doesn’t mean that we won’t be working with visual things in other chapters of the book. In Chapter 5, we look at audio, though—also a very exciting topic
For more vision-related practical AI tasks, check out our website.
Get Practical Artificial Intelligence with Swift now with the O’Reilly learning platform.
O’Reilly members experience books, live events, courses curated by job role, and more from O’Reilly and nearly 200 top publishers.

