Chapter 4. Software

4.0 Introduction

This chapter contains a number of recipes for using ready-made software on the Raspberry Pi.

Some of the recipes in this chapter are concerned with converting the Raspberry Pi into a single-use appliance, while others use specific pieces of software on a Raspberry Pi.

4.1 Making a Media Center

Problem

You want to convert your Raspberry Pi into a super-duper media center.

Solution

To use your Raspberry Pi as a media center, you should go for the superior performance of the Raspberry Pi 4 B, as video playing is very processor intensive.

You can set up your Raspberry Pi as a media center during the NOOBS (New Out Of the Box Software) installation process (Recipe 1.6). Instead of selecting Raspbian as the distribution to install, select LibreELEC_RPi4 (see Figure 1-9).

LibreELEC is a distribution that optimizes your Raspberry Pi as a media center. It incudes the Kodi media center software, which is based on the XBMC open source project that was originally developed to convert Xbox game consoles into media centers. The code has since been ported to many platforms, including the Raspberry Pi (Figure 4-1).

F0401
Figure 4-1. Raspberry Pi as a media center

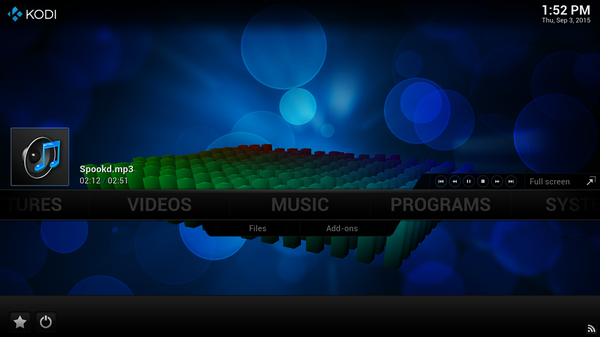
Raspberry Pi is perfectly capable of playing full HD video as well as streamed music, MP3 files, and internet radio.

Discussion

Kodi is a powerful piece of software with many features. Perhaps the simplest way to check whether it is working is to put some music and/or video files onto a USB flash drive or external USB hard disk and connect it to the Raspberry Pi. You should be able to play them from Kodi.

Since the Raspberry Pi is likely to be sitting near your TV, you might find that your TV has a USB port that can provide enough current to run the Raspberry Pi. If this is the case, you won’t need a separate power supply.

A wireless keyboard and mouse are a good idea because, if you buy them as a pair, they will use a single USB port for the dongle, which avoids the need for wires trailing all over the place. You can also buy minikeyboards with built-in trackpads that are useful in this situation.

A wired network connection is generally higher performance and better than a WiFi connection, but it is not always convenient to have the Pi near an Ethernet socket. If this is the case, you can set up XBMC to use WiFi.

Setting up Kodi is very intuitive, and you can find full instructions on using the software at http://kodi.wiki.

4.2 Using Office Software

Problem

You need to open word processor and spreadsheet documents on a Raspberry Pi.

Solution

Raspberry Pi is, after all, a Linux computer, and Raspbian includes a collection of LibreOffice programs direct from the Main menu (Figure 4-2).

Figure 4-2. LibreOffice software on Raspbian

Discussion

There is a choice of two word processors, AbiWord and LibreOffice Writer. LibreOffice Writer is part of the popular LibreOffice suite of software that offers a mostly very compatible set of alternatives to the Microsoft Office suite of programs. LibreOffice Writer will open and save Microsoft Word documents and is available for Windows, Mac, and other Linux computers.

A Raspberry Pi 4, 3, or 2 will run office applications much better than an older Raspberry Pi.

See Also

Visit https://www.libreoffice.org for more information on the LibreOffice suite of software.

6.8

If you just want to edit an unformatted text file, you can use the nano editor (Recipe 3.7).

4.3 Making a Webcam Server

Problem

You want to set up a Raspberry Pi as a webcam server.

Solution

You can use either a USB webcam or the Raspberry Pi Camera Module as a webcam that you can access from elsewhere on your network using a browser.

Download the motion software. This will allow you to set up a Raspberry Pi with a USB webcam connected to it so you can connect to a web page and view the webcam.

To install the software, enter the following command in a Terminal window:

$ sudo apt-get update
$ sudo apt-get install motion

You’ll need to make a few configuration changes. First, use the following command to edit the file /etc/motion/motion.conf:

$ sudo nano /etc/motion/motion.conf

This is quite a big configuration file. Near the top of the file, you will find this line:

daemon off

Change the line as follows:

daemon on

The other change is much further down the file. You need to change this line:

webcam_localhost = on

so that it reads like this:

webcam_localhost = off

There is one other file that you need to change. Enter the command:

$ sudo nano /etc/default/motion

Change:

start_motion_daemon=no

to:

start_motion_daemon=yes

Then change:

stream_localhost on

to:

stream_localhost off

To get the web service running, issue the command:

$ sudo service motion start

If you are using the Raspberry Pi Camera Module, there is an extra step. You need to edit the file /etc/modules using the following command:

$ sudo nano /etc/modules

Add the following line to the end of this file, then save and exit nano as usual:

bcm2835-v4l2

Reboot your Raspberry Pi and you should now be able to open your web browser and view the webcam. To do this, you will need to know the IP address of your Raspberry Pi (Recipe 2.2). You can also check that the webcam is working from the browser on your Raspberry Pi by going to http://localhost:8081.

From another computer on the same network, open a browser and go to the URL http://192.168.0.210:8081/. You will need to change the URL to match the IP address of your Raspberry Pi, but keep the :8081 port number on the end of the URL.

If all goes well, you should see something like Figure 4-3.

Figure 4-3. A Raspberry Pi webcam

Discussion

The motion software is really powerful. There are many other settings you can tweak to change how your webcam works.

By default, the webcam will be viewable only from within your network. If you want your webcam to be visible to the entire internet, you need to set up port forwarding on your home hub. This will require you to log in to the admin console for the hub, look for the port forwarding option, and enable it for port 8081 for the IP address of the Raspberry Pi.

You will then be able to view the webcam by using the external IP address allocated by your ISP. This is usually shown on the front page of your admin console. But be aware: unless you pay your ISP for a static IP address, this IP address is likely to change every time you restart your home hub modem.

Services such as No-IP can also be used to provide dynamic domain name service (DNS), so that you can register a domain name that automatically follows changes to your IP address.

See Also

There is thorough documentation on the Motion website.

You can find a list of webcams compatible with the Raspberry Pi at https://oreil.ly/_z4GH.

To fix the IP address of your Raspberry Pi webcam so you can always find it, see Recipe 2.3.

To use a webcam for computer vision projects, see Chapter 8.

See Recipe 3.17 for information on using apt-get.

4.4 Running a Vintage Game Console Emulator

Problem

You want to turn your Raspberry Pi into a vintage game console.

Solution

If you fancy rediscovering your misspent youth and playing Asteroids on an emulator for the Atari 2600 (Figure 4-4), the RetroPie project will appeal to you.

rpck 0408
Figure 4-4. Asteroids on the Stella Atari 2600 emulator

Many wonderful projects have been built that create custom consoles and game tables complete with retro games controllers.

Although you can install RetroPie on top of Raspbian, the easiest way to make your own console is to download a ready-made disk image and write it onto an SD card using Recipe 1.7.

Warning

It is worth noting that even though these games are ancient, they are still owned by someone. The ROM image files that you need to play the games on an emulator, although easy to find on the internet, are not necessarily yours to take. So please stick to the law.

Discussion

The emulator uses a surprisingly large amount of the Raspberry Pi’s meager resources, so you might find that you need to use a Raspberry Pi 4, 3, or 2.

In an internet search, you can find many people who have taken this basic setup and added a retro USB controller, like the widely available and quite low-cost controllers, and built the Pi and a monitor into a big arcade-style housing.

You can also buy a kit called the Picade from Pimoroni to make a lovely arcade machine (Figure 4-5).

Figure 4-5. The Pimoroni Picade Kit

See Also

Full RetroPie documentation is available on the RetroPie site.

4.5 Running Minecraft: Pi Edition

Problem

You want to run the popular game Minecraft on your Raspberry Pi.

Solution

Mojang, the original developers of Minecraft, have ported the game to the Raspberry Pi and Minecraft Pi, is preinstalled on the latest Raspbian distribution (Figure 4-6).

rpck 0409
Figure 4-6. Minecraft on Raspberry Pi

Discussion

To get Minecraft to fit on the Raspberry Pi, the developers made some shortcuts in the graphics code. This means that you can only play the game directly on the Raspberry Pi with the keyboard, mouse, and monitor connected directly to it. It will not work over a remote virtual network computing (VNC) connection.

The Pi edition of Minecraft is based on the mobile version of Minecraft and lacks some features, most notably Redstone.

See Also

Find out more about the Raspberry Pi port of Minecraft.

Minecraft Pi also includes a Python programming interface, and in Recipe 7.20, we’ll go over how to send commands to Python over a Secure Shell (SSH) connection to do automated building.

4.6 Raspberry Pi Radio Transmitter

Note

Be sure to check out the accompanying video for this recipe.

Problem

You want to convert your Raspberry Pi into a low-powered FM transmitter that will send a radio signal to a normal FM radio receiver (Figure 4-7).

Solution

Back in the early days of the Raspberry Pi, some clever folks at Imperial College, London, created some C code that allows you to do just this. The download even plays the Star Wars theme as a sample. This project will still work if you have an original Raspberry Pi 1. The code has not been updated since for newer versions of Raspberry Pi.

Fortunately, however, the project lives on in an altogether more advanced project called rpitx.

All you need is a short length of wire attached to general-purpose input/output (GPIO) pin 4. A 10 cm female-to-male header lead will work just fine for this. In fact, it should work with the radio right next to your Pi without any kind of antenna—such is the strength of the transmission.

rpck 0411
Figure 4-7. Raspberry Pi as an FM transmitter

The first step is to install the rpitx software using the following commands. Note that this installation will change some things about how your Raspberry Pi is configured, including the frequency at which the GPU (graphics process) works. So if this is your main Raspberry Pi, make sure you first back up anything precious. Here’s the code you need:

$ sudo apt-get update
$ git clone https://github.com/F5OEO/rpitx
$ cd rpitx
$ ./install.sh

You will now need to do something else for a good 15 minutes or so while the software installs. You might see what look like error messages and warnings, but these are normal. At the end of the installation, the installer script will ask:

In order to run properly, rpitx need to modify /boot/config.txt. Are you  
      sure (y/n)

Press Y, and the script will then confirm the changes it has made with the following message:

Set GPU to 250Mhz in order to be stable

If you need to reverse this change, edit /boot/config.txt by removing the last line that says gpu_freq=250, then reboot.

Next, find yourself an FM radio receiver and tune it to 103.0 MHz. If this frequency is already occupied by some other transmission, pick another frequency and make note of it.

Now run the following command (changing the frequency parameter from 103.0 if you had to change frequency):

sudo ./pifmrds -freq "103.0" -audio src/pifmrds/stereo_44100.wav

If all is well, you should hear the voice of the developer talking about left and right channels.

Discussion

You need to know that this project may not be legal in your country. The power output is higher than that of FM transmitters used with MP3 players.

Were you to put a Raspberry Pi in your vehicle, this would be a great way to output sound through the vehicle’s audio system.

See Also

To learn more about the rpitx project, see https://github.com/F5OEO/rpitx.

4.7 Editing Bitmap Images

Problem

You want to manipulate a photograph or other image.

Solution

Download and run the GNU Image Manipulation Program (GIMP; see Figure 4-8).

rpck 0412
Figure 4-8. GIMP on the Raspberry Pi

To install GIMP, open a Terminal session and type the following command:

$ sudo apt-get install gimp

Once GIMP is installed, you’ll find a new entry in your Main menu under the Graphics heading called GNU Image Manipulation Program.

Discussion

Despite being hungry for memory and processor power, GIMP is usable even on a Raspberry Pi 2 B, but there will be much less waiting around if you use a Raspberry Pi 4.

Raspbian also includes a simpler image manipulation program called ImageMagick. You will find this on the Start menu under Graphics. You also can use it from the command line to do things like change the resolution of images. Read more about it on the ImageMagick GitHub repo.

See Also

Find out more from the GIMP website.

GIMP has a lot of features and is a very sophisticated image-editing program, so it does take a little learning. You’ll find an online manual for the software at the GIMP website, under the Docs tab.

For editing vector images, see Recipe 4.8.

For more information on installing with apt-get, see Recipe 3.17.

4.8 Editing Vector Images

Problem

You want to create or edit high-quality vector drawings such as Scalable Vector Graphics (SVG).

Solution

Install Inkscape using the following commands:

$ sudo apt-get update
$ sudo apt-get install inkscape

Once Inkscape is installed, its icon will appear in the Graphics section of your Raspberry Pi Start menu.

Inkscape (Figure 4-9) is the most used open source vector image editor.

Figure 4-9. Inkscape on a Raspberry Pi

Discussion

Inkscape is a very powerful piece of software with very many features that can take some time to master, so don’t be disheartened if it won’t do what you want at first. You will probably need to run through a few tutorials.

Inkscape is another program best run with the extra power of a Raspberry Pi 4, 3, or 2.

See Also

For documentation on Inkscape, visit https://inkscape.org.

For editing bitmap images such as photographs, see Recipe 4.7.

4.9 Internet Radio

Problem

You want to be able to play internet radio on your Raspberry Pi.

Solution

Install the VLC media player by running the following command:

sudo apt-get install vlc

Once it’s installed, you can find VLC in the Sound & Video section of your Main menu.

Run the program and then, on the Media menu, select the Open Network Stream option. This opens a dialog box (see Figure 4-10) in which you can enter the URL of the internet radio station that you want to play.

You will need to plug headphones or amplified speakers into the audio socket on the Raspberry Pi.

rpck 0413
Figure 4-10. VLC on a Raspberry Pi

Discussion

You also can run VLC from the command line as follows:

$ vlc http://www.a-1radio.com/listen.pls -I dummy

VLC will probably produce a series of error messages but then play the audio just fine.

See Also

This recipe borrows heavily from this tutorial, in which Jan Holst takes things a step further and adds radio-style controls to the project.

For UK readers, you can find a list of the BBC radio stream URLs online.

Get Raspberry Pi Cookbook, 3rd Edition now with the O’Reilly learning platform.

O’Reilly members experience books, live events, courses curated by job role, and more from O’Reilly and nearly 200 top publishers.