Chapter XII. Shooting HDR Panoramas
By now you have seen that HDR photography is a ton of fun. You can add to that fun by creating HDR panoramas from bracketed sets of images. In doing so, as you might imagine, you also add to your shooting time and processing time.
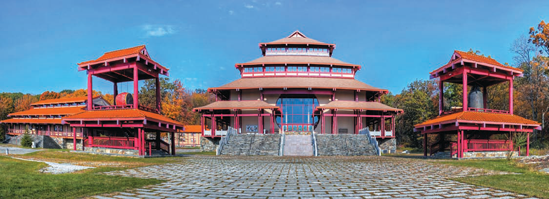
Here is one of my favorite HDR panoramas. It's an HDR image of the Buddhist temple near my home in Croton-on-Hudson, New York. It's a combination of 15 images: five sets of three bracketed images.
In this chapter I'll show you the process I used to create the panorama in Photoshop's Photomerge. I'll also share examples of HDR panoramas created from a single set of bracketed images (the way you usually create an HDR image).
Basic HDR Process Multiplied
The first step in shooting an HDR panorama is to take a set of bracketed exposures of each part of the scene.
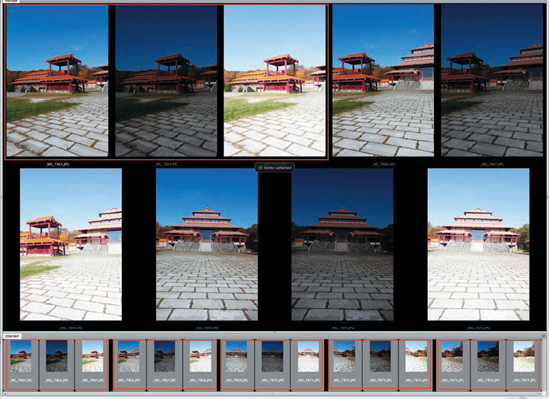
The next step is to put those images in a folder and then select that folder in Adobe Bridge.
This screen grab of the Adobe Bridge window shows you, at the bottom of the window, each set of images outlined in red. The first set of images that I took for my temple pano is outlined in red at the top right of the window.
All of the selected images are not shown in the big window simply because they don't fit. But again, my complete set of images has been selected and is shown ...
Get Rick Sammon's HDR Photography Secrets for digital photographers now with the O’Reilly learning platform.
O’Reilly members experience books, live events, courses curated by job role, and more from O’Reilly and nearly 200 top publishers.

