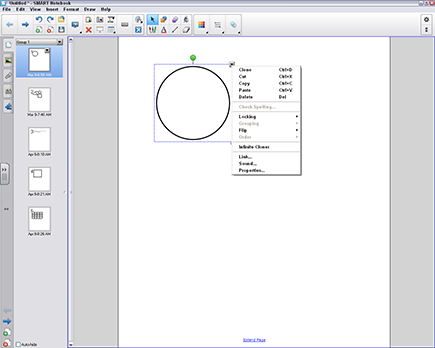
Figure 8-11: Selecting an object.
Working with Objects
Now that you understand how to create various objects and add them in your lessons or presentation, you need to be able to work with the objects. SMART Notebook software has a number of capabilities allowing you to be very creative with objects. In this section, I fill you in.
Selecting objects
When you add an object to your .notebook page, you have to select it before you can work with the object. SMART Notebook software allows you to select one object or multiple objects.
Selecting one object
To select one object, follow these steps:
1. Click the Select tool in the toolbar.
2. Click the object you want to select.
You see a rectangle around the object (see Figure 8-11).
The selected rectangle has three capabilities enabling you to manipulate the object:
• The green dot at the top of the selected rectangle allows you to rotate the object.
• The gray dot at the bottom-right corner of the rectangle allows you to resize the object.
• The drop-down arrow at the top-right corner of the rectangle displays the drop-down menu (see Figure 8-12).

Figure 8-12: The drop-down menu.
 You also can access the drop-down menu on ...
Get SMART Board Interactive Whiteboard For Dummies now with the O’Reilly learning platform.
O’Reilly members experience books, live events, courses curated by job role, and more from O’Reilly and nearly 200 top publishers.

