Adding tiles to our level
Let's take a look at the Palette option on the right-hand side of the screen, and you will see that the tiles that we imported in Chapter 3, Backgrounds and Tilesets, are now available for use within the scene, as shown in the following screenshot:
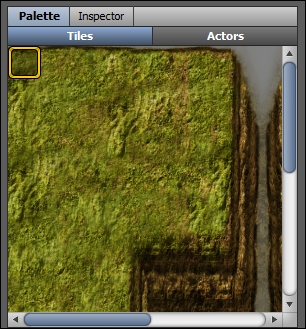
Notice that the top-left tile is highlighted with a yellow border. This indicates that it is the currently selected tile. You can create larger, rectangular selections of tiles by performing the following steps:
- Click on the top-left tile.
- Drag it to the bottom-right tile of your choice.
- Release the left mouse button.
Make the following selection of tiles, as shown in the following ...
Get Stencyl Essentials now with the O’Reilly learning platform.
O’Reilly members experience books, live events, courses curated by job role, and more from O’Reilly and nearly 200 top publishers.

