Many photographers have a hard time fighting the urge to jump directly into Photoshop once they find a photo or two they like. You may have that impulse now, after having identified your three- four-, and five-star images during the photo-editing process in Bridge. But stay with me here for a minute. Even though Photoshop is an amazing image editor, its place is later in the flow.
The bulk of your image editing will actually occur in another application known as Adobe Camera Raw. ACR is a plug-in that comes bundled with Photoshop CS4 and is hosted by either Photoshop or Bridge. To be perfectly candid, this is amazing software that has changed my approach to image processing. ACR lets you quickly fine-tune your photos using tools that are easy to recognize. For example, adjustments such as Exposure, Fill Light, Brightness, and Saturation are the sort of controls that you'll be working with. Even though the names of these controls sound familiar to you, that doesn't mean you get to skip this chapter. I'll show you how the Exposure slider lets you control the highlights, how you can use Brightness to control midtones, how you can recover shadow detail using Fill Light, and how Saturation affects color intensity. But you can see already that this conversation makes sense and the controls will be easy to remember.
To better understand the relationship between Photoshop and ACR, think about how you might paint a house. You'd use a sprayer or rollers for the larger surfaces, such as the walls. Then, you'd switch to a brush for the detail work and the finishing touches.
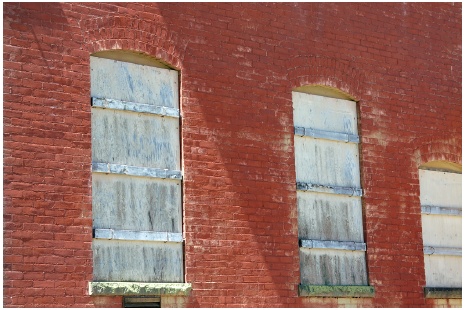
Figure 4-1. If you were to paint this wall, ACR would be your large-surface sprayer. Save Photoshop for the detail work.
Consider ACR as your large-surface sprayer and Photoshop as your detail brush. As Photoshop expert Katrin Eismann once remarked, "Adobe Camera Raw can make a lot of your pictures look great; Photoshop can make your best look perfect."
On the next few pages, I'll show you how to use some of the basic tools in ACR to quickly improve your three- and four-star images. For most pictures, these adjustments are all you'll ever need. In the next chapter, I'll show you a few of the advanced tools in ACR that you may want to use for specific images. But for now I want you to walk with me through the basic adjustments that you can apply to nearly any photograph.
It's worth understanding a few important advantages of ACR , if for no other reason than to motivate you to use this application more often.
First, ACR is a nondestructive environment. When you open an image in this application, it saves all our edits as metadata rather than editsto the image itself, so your master is always protected. In addition, those metadata instructions take up very little hard disk space, far less than saving an entire copy of the picture or multiple adjustment layers in Photoshop. So, ACR is as efficient as it is smart.
And finally, the software's editing tools are highly advanced. So when you're working in ACR, you're using the latest generation of image editing controls.
By now, ACR is probably starting to sound pretty good to you. But it gets better. For example, when you access ACR through Bridge, none of your Photoshop resources are tapped. In other words, you can set up a batch-process job in Photoshop, let it run in the background, and work on another batch of images using the Bridge and ACR workflow—all at the same time!
ACR also provides some nice batch processing tools. So, if you have a handful of images that require the same global adjustment, such as white balance, you can quickly correct them in ACR. I'll show you some of those advanced techniques in the next chapter, after we master the basic workflow in this one.
Get The Photoshop CS4 Companion for Photographers now with the O’Reilly learning platform.
O’Reilly members experience books, live events, courses curated by job role, and more from O’Reilly and nearly 200 top publishers.


