Chapter 1. Setting Up Your Environment
This chapter will guide you through setting up the environment used in the examples in this book. It includes a Linux Virtual Machine (VM) running on a Windows 10 machine, and a clone or download of a GitHub repository (repo). The VM in this setup will use the Red Hat Container Development Kit (CDK), which includes an image of Red Hat Enterprise Linux (RHEL), Oracle’s Virtual Box, and Vagrant.
Your Red Hat Account
Before you can download the RHEL image and the CDK, you need to register at the Red Hat Developer website. This is free; all you need is an email address and a password. You can opt out of the Red Hat Developers newsletter if you wish, but I suggest keeping it—at least initially.
This gives you access to all the tools and help, including the CDK (with RHEL), forums, knowledge base, and more.
Keep your username and password handy; you’ll need them every time you start your VM in order to register with Red Hat and enable your subscription.
Installing the CDK
The Red Hat CDK includes a copy of RHEL 7 that’s been preloaded with the docker command and OpenShift. It runs the RHEL VM using Vagrant and Virtual Box. Fortunately, if you’re not familiar with these technologies, the CDK makes the process of installing them transparent. Basically, you download, install, and run.
Once you’ve registered and logged in, select the TECHNOLOGIES menu and the Red Hat Container Development Kit option, as shown in Figure 1-1.
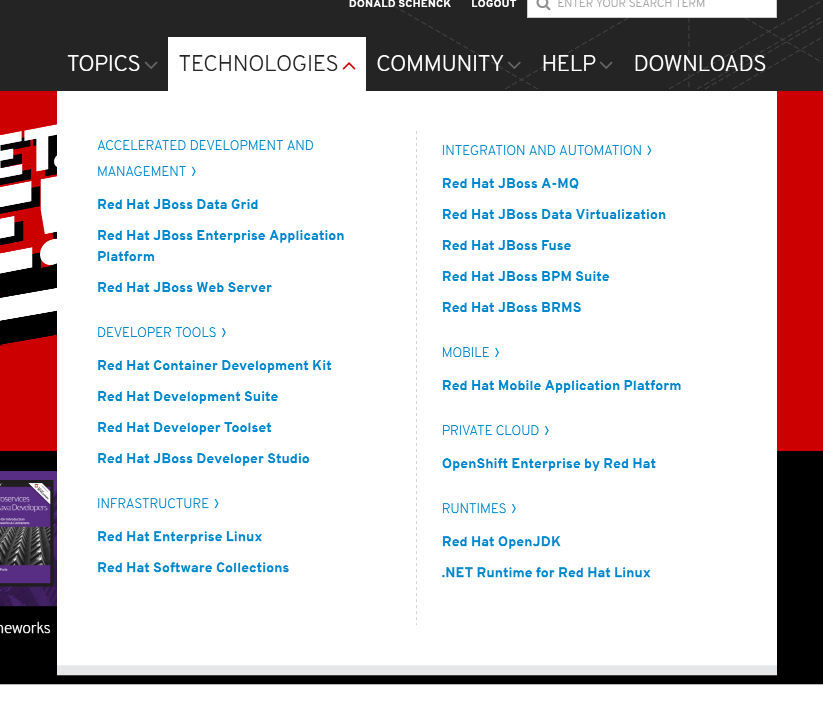
Figure 1-1. Select Red Hat Container Development Kit
This takes you to the Container Development Kit page.
At the top, click the GET STARTED button to reveal your choice of Windows or Mac/Linux assets. From there, simply follow the screen prompts to download the CDK, as shown in Figure 1-2.
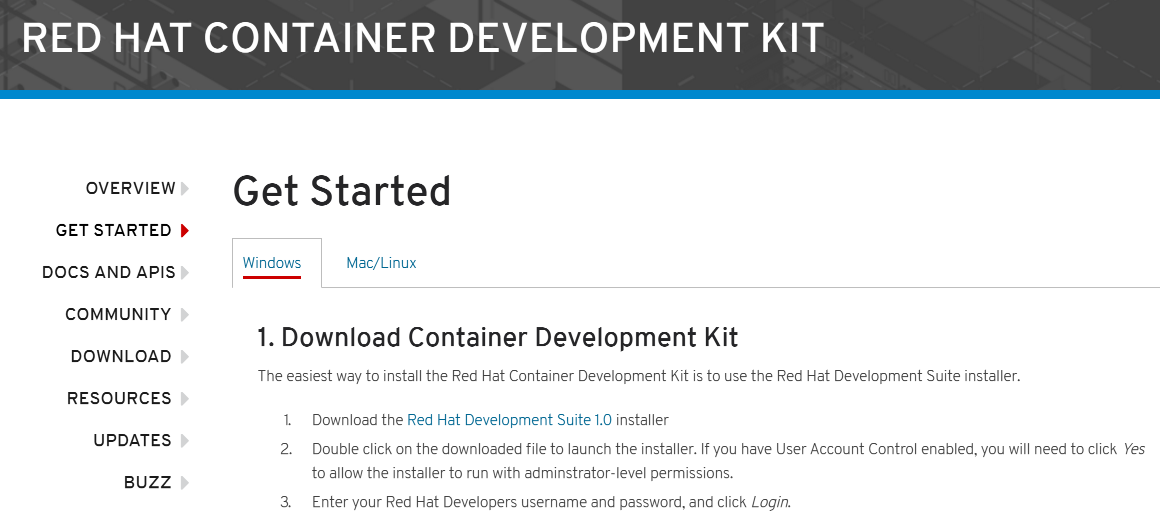
Figure 1-2. Container Development Kit download page
After the CDK installer is downloaded (the installer is development-suite-1.0.0-GA-bundle-installer.exe, which is about 1.4 GB in size), open it and follow the prompts to install the CDK on your Windows machine. You’ll need your Red Hat username and password to get started, as you can see in Figure 1-3.
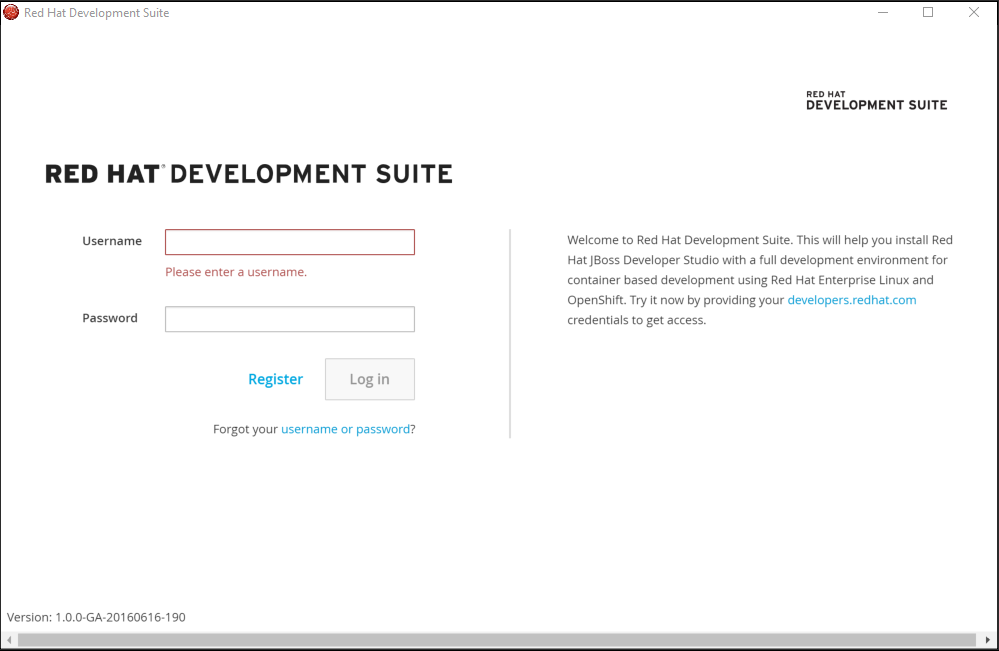
Figure 1-3. Sign in to start the CDK installation
Disable Hyper-V
Before you can use Vagrant, you’ll need to disable Hyper-V on your Windows machine. Use the Windows Features Control Panel applet to do this, as shown in Figure 1-4.

Figure 1-4. Disable Hyper-V
If you need to switch between enabling and disabling Hyper-V, there’s a helpful guide at Scott Hanselman’s blog.
Start Your VM
Now that you’ve installed everything, you can start the VM. Assuming that you used the default values during the installation, open a command prompt, navigate to the proper folder, and launch the VM using the vagrant up command:
PS C:\DevelopmentSuite\cdk\components\rhel\rhel-ose> vagrant up
Bringing machine 'default' up with 'virtualbox' provider...
==> default: Clearing any previously set forwarded ports...
==> default: Clearing any previously set network interfaces...
==> default: Preparing network interfaces based on configurat...
default: Adapter 1: nat
default: Adapter 2: hostonly
==> default: Forwarding ports...
default: 22 => 2222 (adapter 1)
==> default: Running 'pre-boot' VM customizations...
==> default: Booting VM...
==> default: Waiting for machine to boot. This may take a few...
default: SSH address: 127.0.0.1:2222
default: SSH username: vagrant
default: SSH auth method: password
default: Warning: Connection timeout. Retrying...
default: Warning: Remote connection disconnect. Retrying...
==> default: Machine booted and ready!
==> default: Registering box with vagrant-registration...
default: Would you like to register the system now (defau...
default: username: **redacted**
default: password:
[default] GuestAdditions 5.0.26 running --- OK.
==> default: Checking for guest additions in VM...
==> default: Configuring and enabling network interfaces...
==> default: Copying TLS certificates to C:/DevelopmentSuite/...
==> default: Rsyncing folder: /cygdrive/c/DevelopmentSuite/cdk/...
==> default: Mounting SMB shared folders...
default: C:/shared => /shared
==> default: Machine already provisioned. Run `vagrant provis...
==> default: flag to force provisioning. Provisioners marked...
==> default: Running provisioner: shell...
default: Running: inline script
==> default: Running provisioner: shell...
default: Running: inline script
==> default:
==> default: Successfully started and provisioned VM with 2...
==> default: To modify the number of cores and/or available...
==> default: VM_CPU respectively VM_MEMORY.
==> default: You can now access the OpenShift console on: https...
==> default:
==> default: To use OpenShift CLI, run:
==> default: $ vagrant ssh
==> default: $ oc login 10.1.2.2:8443
==> default:
==> default: Configured users are (<username>/<password>):
==> default: openshift-dev/devel
==> default: admin/admin
==> default:
==> default: If you have the oc client library on your host,...
PS C:\DevelopmentSuite\cdk\components\rhel\rhel-ose>
Run as Administrator
Get in the habit of opening the command prompt—I suggest using PowerShell—by using the “Run as Administrator” option because you’ll need administrator privileges later when you are editing and debugging from Windows.
Now you can use ssh to get into the VM. The easiest option is to use the vagrant ssh command, which will open an ssh session inside the VM, as shown in Figure 1-5.

Figure 1-5. Using vagrant SSH to start a bash session on the VM
At this point, the VM is set up and running and you’re ready to begin your transition to .NET on Linux.
Getting the Source Code
Once you are inside the VM, you can go ahead and fetch the source code associated with this book. You can do this by running the following command:
git clone https://github.com/donschenck/NetOnLinuxBook
You’ll now have a directory, NetOnLinuxBook, that contains subdirectories for this book.
Note
When applicable, at the beginning of each chapter, you will see a note directing you to the source code from the repo that is associated with that chapter.
Get Transitioning to .NET Core on Red Hat Enterprise Linux now with the O’Reilly learning platform.
O’Reilly members experience books, live events, courses curated by job role, and more from O’Reilly and nearly 200 top publishers.

