260 Using IBM Application Development Tools for z/OS and OS/390
6. We then press F3 (End) to return to the primary option menu.
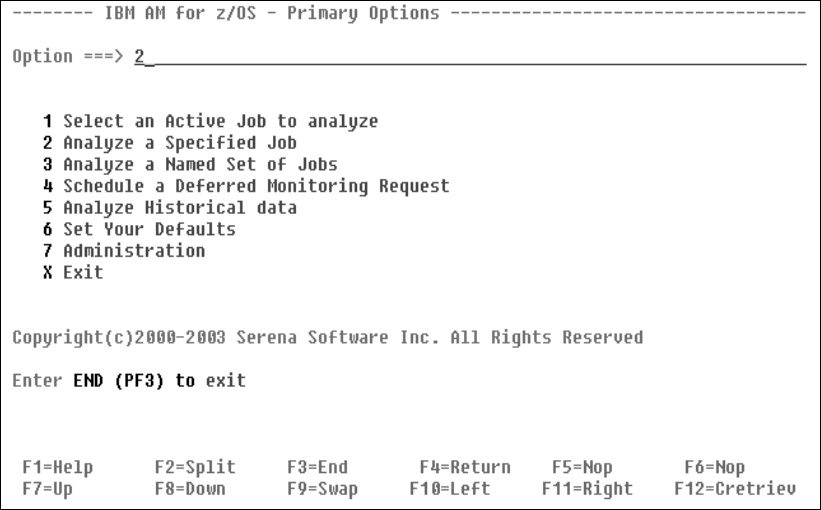
7. At the Primary Option menu, we select option 2 (Analyze a Specified Job). Again, there
are two ways to select this option:
a. Put ‘2’ on the Option line and press the Enter key as shown in Figure 9-4.
b. Put the cursor anywhere on the pale blue text describing option 2 and press the Enter
key.
9.3 Analyze a specified job
Figure 9-4 Going to analyze a specific job
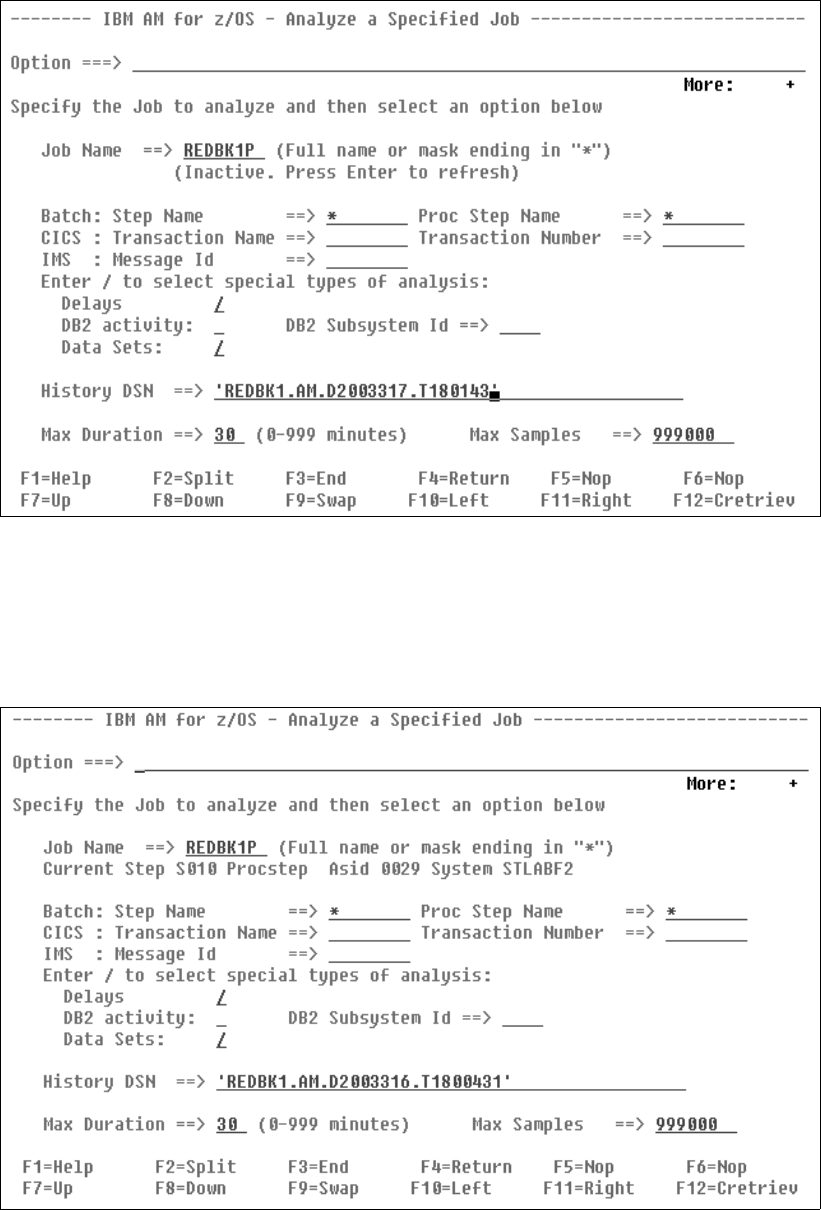
The Analyze a Specific Job panel as shown in Figure 9-5 has many fields. The critical field is
the Job name field. If the job name field is an asterisk (‘*’), then when the Enter key is
pressed, it will present the Select an Active Job for option 2 panel. This panel looks and
operates much like the first panel in option 1. You select a job simply by placing the cursor on
the job name and pressing the Enter key.
1. In our case the job has not yet been submitted, but we know its job name, so we fill it in.
2. We also select the fields for Delay information and Dataset Information and verify the
History DSN, Max Duration, and Max Samples fields.

Chapter 9. Application Monitor and PL/I 261
Figure 9-5 Preparing the Analyze a specific job
3. Notice the More flag in the upper right hand corner. When we page down (F8) we find that
we need to choose option 1 to start the analysis.
4. Before we start the analysis, we use F9 to swap to the other ISPF session and submit the
JCL for REDBK1P as shown in Figure 9-6.
Figure 9-6 Updating the job status on the Specified Job panel
Get Using IBM Application Development Tools for z/OS and OS/390 now with the O’Reilly learning platform.
O’Reilly members experience books, live events, courses curated by job role, and more from O’Reilly and nearly 200 top publishers.

