154
|
Chapter 5: Customizing Your Computer’s Hardware Devices
Optimizing Your Mouse Settings
You use the mouse pointer, trackball, or other input device every time you work with
your computer, but have you taken the time to optimize the way it works? Probably
not, because the mouse, like the keyboard, is another hardware component we tend
to take for granted. Let’s fix this by taking a few minutes to optimize your mouse.
Configuring your computer’s mouse settings
You can optimize your computer’s mouse settings by completing the following steps:
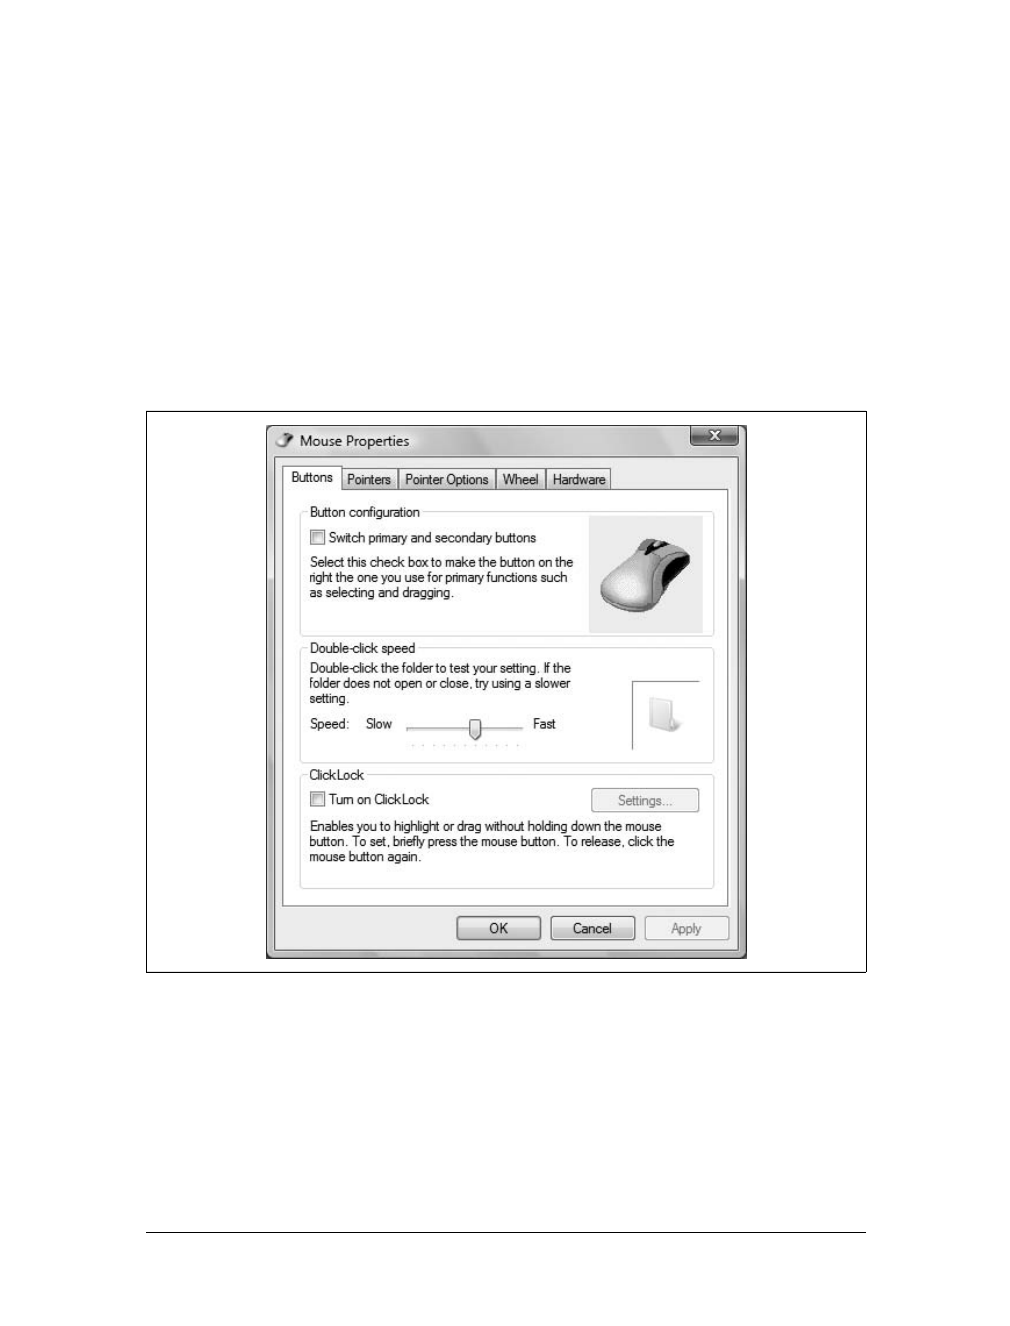
1. In the Control Panel, click Hardware and Sound and then click Mouse. This dis-
plays the Mouse Properties dialog box shown in Figure 5-14.
2. If your mouse is on the left side of your keyboard rather than the right side,
you’re probably left-handed and may want to switch the primary and secondary
mouse buttons by selecting “Switch primary and secondary buttons.” With the
buttons switched, the right button is for clicking and the left button displays the
shortcut menu. As a result, wherever you are instructed to right-click some-
thing, you would actually need to left-click it.
Figure 5-14. Configuring the mouse settings
Customizing Your Computer’s Input Devices, Regional Settings, and Date/Time
|
155
3. Use the “double-click speed” slider to adjust the way your computer recognizes
a double-click. If you move the slider to the left you increase the likelihood of
your computer recognizing a double-click whether you double-click fast or
slow. If you move the slider to the right you decrease the likelihood that your
computer will recognize double-clicks with longer pauses between clicks. Dou-
ble-click the folder provided to test your settings. If the test folder doesn’t open
and close as expected, change the settings until you get the desired effect.
4. Select “Turn on ClickLock” to select or drag without having to hold down the
mouse button. With ClickLock on, briefly press the mouse button to set the
lock, move the mouse without holding the button to drag, and then release the
click lock by clicking the mouse button again.
5. On the Pointer Options tab, use the Motion slider to set the pointer speed. In
most cases, you’ll want a relatively fast pointer. To allow the pointer to zip
across the screen, move the slider all the way to the right. To ensure that the
pointer doesn’t appear bouncy by increasing pointer precision, select “Enhance
pointer precision.” Enhancing pointer precision also lets you easily make small,
precise pointer movements even when the pointer speed is set all the way to
Fast.
6. Select “Automatically move pointer to the default button...” to have the pointer
automatically move to the default button in a dialog box.
7. Select the “Display pointer trails” checkbox if you sometimes have trouble see-
ing the pointer, and then use the slider to adjust the length of the pointer trail. If
you have trouble seeing the pointer sometimes and don’t like pointer trails,
select “Show location of pointer when I press the Ctrl key instead.”
8. Select “Hide pointer while typing” to hide the pointer (and get rid of an annoy-
ing distraction) while typing.
9. Click the Wheel tab.
10. By default, most computers scroll three lines at a time when you move the
mouse wheel one notch. You can use the “Vertical scrolling” options to set the
number of lines to scroll, or select “One screen at a time” to configure the mouse
wheel so that one notch scrolls a screen at a time.
11. If you have a mouse wheel with a tilt feature, you can use this to scroll left and
right a specified number of characters at a time. By default, the mouse horizon-
tally scrolls three characters at a time. Enter a different Horizontal Scroll in the
combo box provided, if desired.
12. Click OK to apply your settings.
Get Windows Vista Security: Praxisorientierte Sicherheit für Profis now with the O’Reilly learning platform.
O’Reilly members experience books, live events, courses curated by job role, and more from O’Reilly and nearly 200 top publishers.

