14
Editing and Laying Out Images
Once an image has been uploaded into WordPress, you have a lot of options for editing it and laying it out in your content. In this lesson, I show you ways to physically change the image and virtually change it from within the Text Editor, and the tools to lay out images for great-looking posts and pages.
THE WORDPRESS IMAGE EDITOR
Sometimes, after uploading an image into WordPress, you may decide that it isn't looking exactly the way you'd like it. Or you've just uploaded it raw from your camera, and it needs some fixing up (I don't recommend loading images that way because they'll be way too big for the Web, but sometimes it happens). In other cases, the image is fine, but the default way that WordPress creates thumbnails — taking the center area of the image — may not make for an effective thumbnail and you'd like to change it.
That's where the image-editing function comes in so handy. You can access it during the Upload/Insert process or later from the Gallery or the Media Library. It's a part of the image-editing popup window, though the button can sometimes get overlooked — it's highlighted in Figure 14-1.
Clicking this button reveals a set of tools that allow you to:
- Crop
- Rotate
- Flip
- Scale
The image-editing area is shown in Figure 14-2.
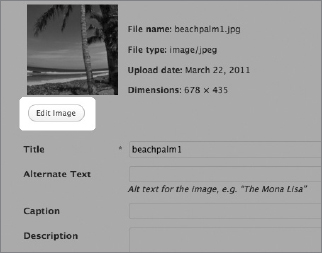
FIGURE 14-1
FIGURE 14-2
I'm going to leave the details of how the image editor works for one of the videos ...
Get WordPress® 24-Hour Trainer, Second Edition now with the O’Reilly learning platform.
O’Reilly members experience books, live events, courses curated by job role, and more from O’Reilly and nearly 200 top publishers.

