Chapter 4. Building a Documentation Site
While there are many different types of documentation sites—from hardware or software documentation to project or policy documentation—most of these sites share some common characteristics.
Characteristics of a Documentation Site
The first characteristic of a documentation site is that they tend to have multiple, and often numerous, contributors. In the case of project or policy documentation, contributors might exclusively be company employees. However, in a software world increasingly dominated by open source, many documentation sites have a large number of external contributors.
Second, a typical documentation site is fairly simple and straightforward in terms of features and design. Most of the time, the layout and design is intentionally simple and geared towards readability over style. Outside of things like comments or a runnable example, a documentation site rarely includes complex, dynamic functionality.
Third, most documentation sites change infrequently. Usually, a documentation site receives periodic significant updates with occasional minor ones in between.
While none of these characteristics is a requirement for choosing a static site, they do enable documentation sites to take advantage of the benefits of using a static site generator.
All that being said, there are some drawbacks to choosing a static site generator for building a documentation site. For one, it generally requires that a developer or development team be involved in the creation of the site and often in the regular build and deployment of updates. Also, there is no built-in authoring interface that would be comfortable for a nontechnical author/contributor. This can be a challenge if your documentation writers are used to authoring in WYSIWYG interfaces rather than markup languages like Markdown.
Choosing a Generator for Your Documentation Site
Pretty much any static site generator will work for creating a documentation site. In fact, many documentation sites, including well-known projects like PhoneGap and Kendo UI, already use Jekyll. Many smaller software projects choose Jekyll primarily because of the built-in integration into GitHub Pages. In this chapter, however, we will use Hugo, a Go-based static site generator that has been rapidly growing in popularity recently.
Why choose Hugo?
The primary reason I recommend Hugo for documentation sites is that the build process is extremely fast. While this can be insignificant for smaller sites, many documentation sites can grow very large and unwieldy, making the build process a bottleneck in updating and deploying the site.
The secondary reason is that Hugo does not come preconfigured for running a blog—a format that’s unsuitable for most documentation sites. This makes it easier to set up Hugo for whatever site structure you need for your documentation site without needing to restructure the default setup. In fact, Hugo even offers a number of community themes designed specifically for building a documentation site.
For the remainder of this chapter, we’ll look at how to build a basic documentation site using Hugo.
Our Sample Documentation Site
We’re going to build a documentation site for an esoteric programming language called LOLCode. Figure 4-1 shows the home page.
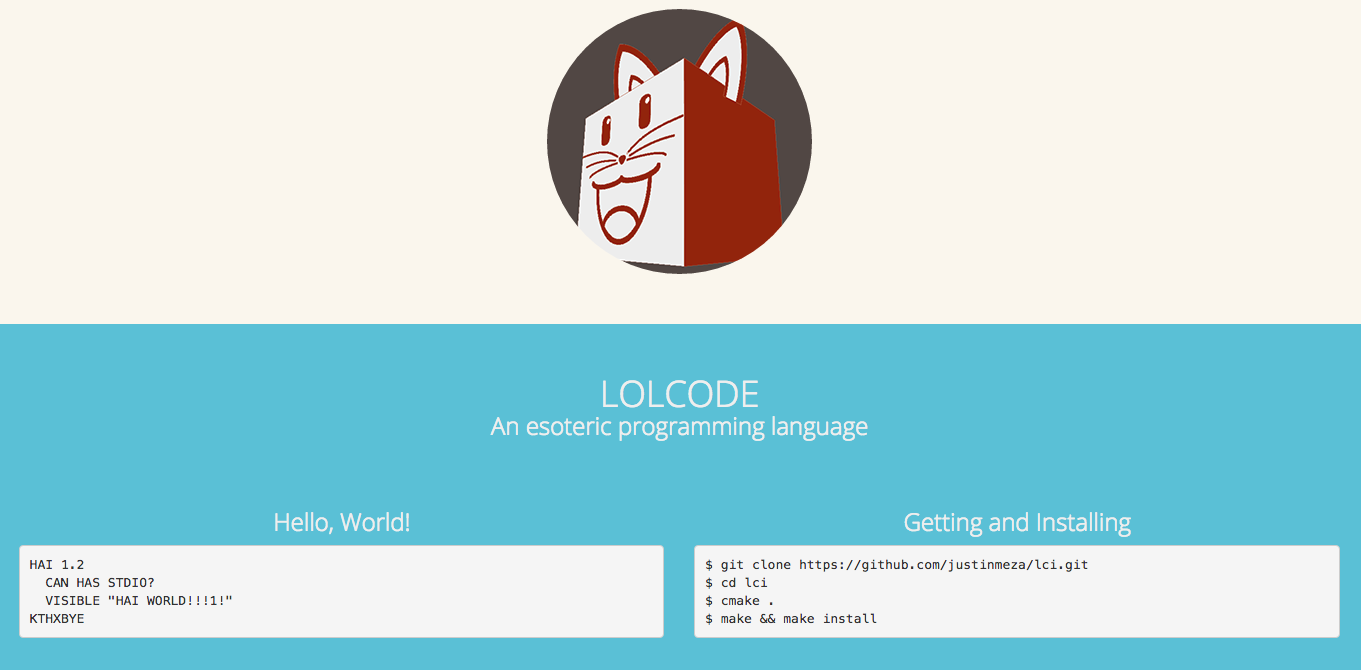
Figure 4-1. The LOLCode home page
While LOLCode is designed to be a humorous language with an intentionally difficult syntax to comprehend, it does have a full language specification. Right now, that language spec is a simple and boring plain-text page on GitHub, shown in Figure 4-2.
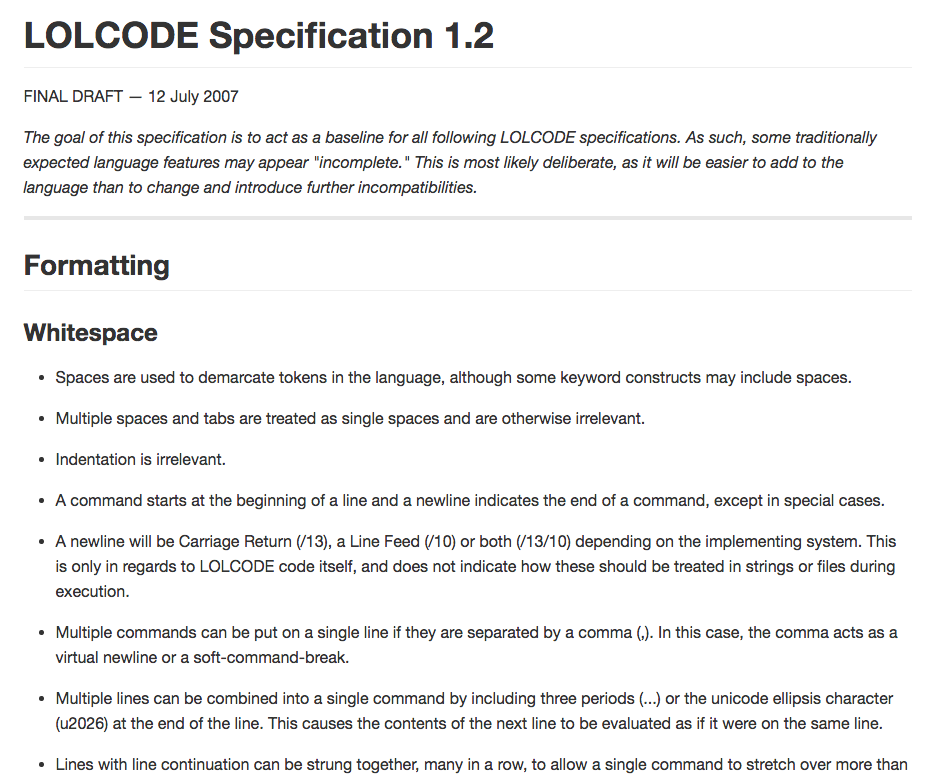
Figure 4-2. The existing LOLCode language specification
We’re going to borrow that language spec and spice it up a little bit. Using a real spec will allow us to build an example that meets a real-world use case, even if it is still relatively simple enough to remain useful as an example.
Now, those of you who know me know that I have no design skill whatsoever (though that may still be more than Ray). To overcome this obstacle, we’ll use a freely available design for a basic documentation site called DocWeb. Our completed site will look like Figure 4-3.
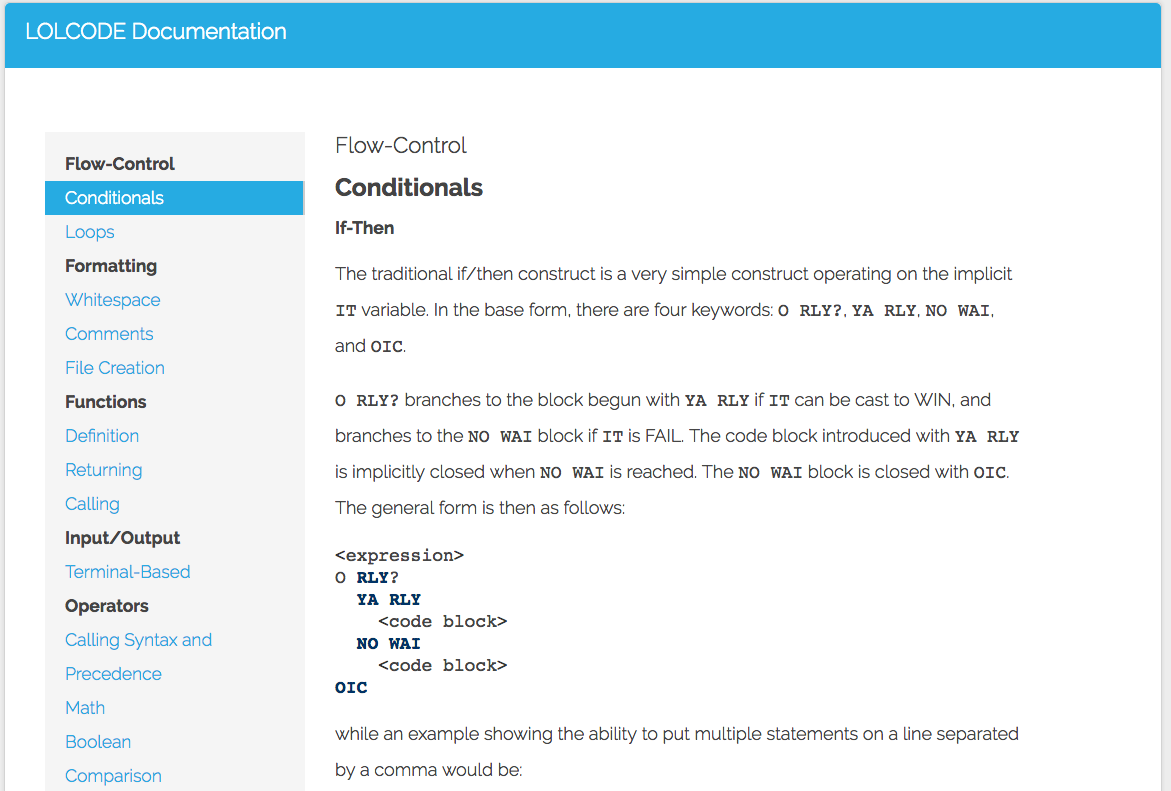
Figure 4-3. The LOLCode language spec site built with Hugo using the DocWeb template
The site itself is actually a single page with the navigation on the left being anchor links that will scroll to the appropriate section. The navigation will remain visible as the user scrolls through the long page, and the highlighted item will automatically change depending on which section the user has scrolled to.
This form of single-page documentation is common for things like language API docs or even “getting started” guides. However, even though this is a single page, it is comprised of many separate pieces of content, as we’ll see shortly. In fact, if you had a larger, more complex project to document, where a single page may be unsuitable, it would be relatively easy to convert this example to use a page-per-content item rather than a single page for the entire project.
Creating the Site
Now that we know what we’re building, let’s start building it!
Installing Hugo
On Mac OS
If you are on a Mac OS, the simplest way to install Hugo is via Homebrew. If you have Homebrew installed, enter the following into a terminal window.
brew update && brew install hugo
On Windows
On Windows, you’ll need to download the latest release as a zip file. (Note that the latest release as of this writing was version 0.15). Hugo is simply an executable file contained within the downloaded zip. However, to use it properly, you’ll need to add it to your PATH variable.
Start by creating a folder at C:\hugo\bin. Copy the executable into this folder (you’ll want to rename it to hugo.exe.
If you are using Windows 10, follow these instructions to install Hugo:
- Double-click the Start button and choose System.
- Click on the “Advanced system settings” option.
- Click the “Environment Variables...” button at the bottom of the window.
- Choose the “Path” variable and click the Edit button.
- Press the “New” button and type
C:\hugo\bin. - Click OK, then OK again and finally OK one last time to close all the windows.
Help with Installation
If you aren’t on Windows 10 or prefer not to use Homebrew, the Hugo documentation has you covered. For additional Windows options, see the "Installing on Windows" page. Likewise, for additional Mac options, see the "Installing on Mac" page.
To test that your installation is configured correctly, open the terminal or command prompt and type hugo help. You should receive a long list of commands and options similar to what is shown in Figure 4-4.
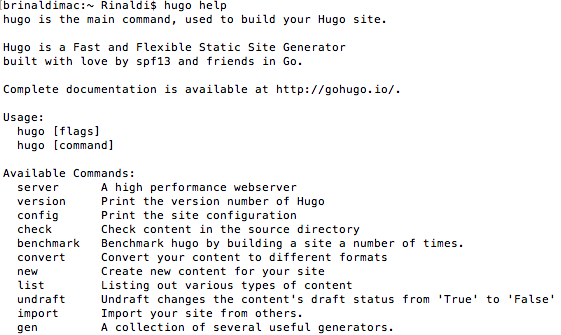
Figure 4-4. You can verify your install by typing the help command
Generating the Initial Site Files
Now that we’ve confirmed that we have Hugo installed, we can generate the initial site files using the command-line utility (CLI). Start by opening a terminal or command prompt in the folder where you would like your project to reside.
To create the folder structure and files needed to start our new Hugo site, type the following command (where docsite is the name of the folder that will be created):
hugo new site docsite
Hugo will generate the base files and directories necessary for a new site, as shown in Figure 4-5. Inside our docsite directory, we should see the following files and folders.

Figure 4-5. The default files and directories generated by Hugo
At the moment, all of the directories are empty. Unlike many other static site generators, Hugo does not generate a default theme/layout or any dummy content. Let’s start with configuring the site.
Configuring the Hugo Site
By default, Hugo uses TOML for configuration, but you can choose to use YAML if you prefer. The site configuration is located in the config.toml file within the root directory of the site. It contains only a few default values:
baseurl = "http://replace-this-with-your-hugo-site.com/"
languageCode = "en-us"
title = "My New Hugo Site"
These values should be fairly self-explanatory. Because we don’t have a real URL, we’ll just set the baseurl value to an empty string for local testing.
baseurl = ""
languageCode = "en-us"
title = "LOLCODE Documentation"
One important aspect of a documentation site for a language like LOLCode is code highlighting. There are multiple options for code highlighting in a Hugo site, but the standard solution is to do server-side code highlighting (i.e., the highlighting is added during the build phase) with Pygments.
To get Pygments working, we need to have Python installed. If you don’t already have it, you can download the proper version here (if you are on Windows, I suggest that you choose the option to add Python to your PATH during installation).
Once Python is installed, open a new terminal or command prompt window and install Pygments.
pip install Pygments
If you want to test that Pygments installed correctly, enter pygmentize -h via the command line. This should print out the Pygments command-line help documentation.
Now that Pygments is installed, let’s configure Hugo to use it. We’ll add the following to our config.toml file.
pygmentsStyle = "colorful"
pygmentsUseClasses = false
pygmentsCodeFences = true
The first option chooses one of Pygments’ default styles for the code coloring. The second tells Pygments to add the code colors directly rather than depend on the pygments.css file. The third will allow us to use GitHub style code fences in our Markdown to set code blocks and the language to use for highlighting. A GitHub style code block looks like this:
```javascript
// my JavaScript code here
```
Hugo offers more options for code syntax highlighting than we’re discussing here. For details on those, visit the Hugo syntax highlighting documentation.
Client-Side Code Coloring
One thing to consider, depending on the size of your site, is that the server-side code coloring shown here via Pygments can significantly impact build times. If this could be an issue for your site, you might consider using one of the client-side code coloring options like Highlight.js or Prism.
We’re done with what we need in the configuration file. Of course, there are a ton of other options available when building a site with Hugo. You can view the full list of configuration options in the Hugo configuration documentation. For now, however, let’s move on to adding content and creating a layout.
Adding Content
In my opinion, one of the benefits of Hugo is that it is not very prescriptive about how you organize or name your content. Content is typically in the /content folder, but beyond that, it’s up to you how you handle things from there. In our case, our final content will actually all be rendered in a single page, so the organization isn’t terribly important.
As with most static site generators, Hugo natively supports content written in Markdown. However, it also supports two other markup languages: AsciiDoc (via AsciiDoctor) and reStructuredText. For our documentation site, we’ll use Markdown.
Rather than have us write or convert all the LOLCode documentation here, I’ve provided a zip file containing all of the Markdown files. Simply download and unzip it within the /content folder of your Hugo site. All of the Markdown files should end up within a directory of /content/lolcode.
As is typical for static site generators, Hugo uses front matter at the beginning of each content document. Essentially, front matter is metadata about that particular piece of content, including everything from the title and publish date to the URL and categories. By default, front matter is written in TOML, but YAML and JSON are also allowed if you prefer.
The easiest way to create a new post and ensure that it has the necessary front matter is to use the command line. Assuming that you are in the root of your site, you can simply enter the following command to create a new post named “welcome to my blog.”
hugo new welcome-to-my-blog.md
The generated post will have front matter that looks like the following:
+++
date = "2016-06-07T19:30:29-04:00"
draft = true
title = "welcome to my blog"

+++
The date is a timestamp that will be used to determine the publish date of the post. The draft key indicates that this post is not yet published; you can set this to false or remove it to take the post out of draft status. Finally, the title is, obviously, the title of the blog post or content.
Since we’ve already added our content, we don’t need to create a new content item (so delete the post if you created it). But let’s take a look at the metadata in our documentation content, as it includes some items not in the default front matter.
+++
date = "2016-05-05T08:41:21-04:00"
draft = true
title = "Arrays"
categories = ["Types"]
categories_weight = 6
+++
We’ve already discussed the date, draft, and title values (as you can see, this is the documentation covering arrays in LOLCode). However, we’ve added some taxonomy via the categories value. This value can contain an array of categories, but in this case, we’ve only added one for Types. As you’ll see when we create the layout, we’re going to use this categories value to group our documentation (in this case, an Array is a data type, thus the category Types).
The categories_weight value also helps us to organize the way we will display the content on the page. In this case, we want certain content to come before other content within the Types category. The value here indicates that we want Arrays to be the sixth item in the order of the content within the Types category.
There are a lot of additional front matter metadata values that you can add to your Hugo content. Refer to the documentation for full details.
Required Front Matter in Hugo
There’s some discrepancy between the Hugo documentation on front matter and the reality of front matter. The documentation indicates that title, date, description, and taxonomies are all required. However, as we discussed, Hugo doesn’t include either description or taxonomies when it generates content for you, and I’ve never found Hugo to error when either of these keys is missing.
Creating the Layout
So, our site is configured and has content, but if we were to ask Hugo to serve it and open it in a browser, we’d get nothing. Why? Well, there is no layout to tell Hugo how to display the content.
As we discussed earlier, we aren’t going to use a prebuilt theme in this case but rather will create our own layout using DocWeb as a template. To start, we need to download that template and place the zip in a temporary location. So go ahead and do that.
Now that we’ve unzipped the DocWeb layout, let’s start moving some of the assets over to our LOLCode documentation site. First, let’s copy the css, img, and js folders into /static/assets within our Hugo site. Placing files in the static directory will copy them over to the generated site without processing them—essentially leaving them as is.
Next, copy index.html from the DocWeb files and place it under the /layouts directory within our Hugo site. At this point, we technically have a home page layout (and that will be the only page for this site), but it’s all in a single HTML file and the content in Hugo isn’t populating. Let’s fix that.
Go Templates
By default, Hugo uses the Go Template language for templates, but it also natively supports Amber and Ace templates. We’ll cover some of the basics of creating Go Templates here but if you want a full overview, the Hugo documentation provides a great introduction, or you can review the official Go Template documentation.
We’ll start by creating some partials, which are essentially includes. These allow us to break the template into reusable parts, making them easier to maintain.
Let’s create a new folder under /layouts called partials and create a file named head.html. Then take the <head> portion of index.html and copy it into the new head.html document. Back in index.html, place the following code where the <head> used to be.
{{ partial "head.html" . }}
Within layouts/partials/head.html, let’s add some dynamic site data. First, let’s clean the head up a bit by removing the <link> for RSS (of course, you can make an RSS file for your site using Hugo; we won’t do that here because our demo is a fixed set of documentation rather than a site with regular updates) and the stylesheet for prettify.css (Prettify is a code highlighting tool and we’ve already configured Hugo to handle our code highlighting).
Next, let’s replace the existing hardcoded site title with the site title we defined earlier in the site configuration file.
<title>{{ .Site.Title }}</title>
Finally, let’s modify the link to the stylesheet to reference the base URL of the site to ensure that the reference URL is always correct.
<linkrel="stylesheet"href="{{ .Site.BaseURL }}assets/css/style.css">
Both Title and BaseURL are site variables that Hugo makes available to use within our templates. You can find a full list of them in the Hugo documentation.
Your completed head.html partial should look something like this:
<head><title>{{ .Site.Title }}</title><metacharset="utf-8"><metaname="description"content=""><metaname="HandheldFriendly"content="True"><metaname="MobileOptimized"content="320"><metaname="viewport"content="initial-scale=1.0,minimum-scale=1.0,maximum-scale=1.0,user-scalable=no"><linkhref="http://fonts.googleapis.com/css?family=Raleway:700,300"rel="stylesheet"type="text/css"><linkrel="stylesheet"href="{{ .Site.BaseURL }}assets/css/style.css"></head>
It’s a good idea to split out portions of your site into partials such as this one, which can be easily reused within additional templates across your site. For example, we could also cut the footer portion of the template and place it into a layout/partials/footer.html file.
<sectionclass="vibrant centered"><divclass=""><h4>This documentation template is provided by<a href="http://www.frittt.com" target="_blank">Frittt Templates</a>. You can download and use this template for free. If you have used this template, please pay the developer's effort by Tweeting, sharing on Facebook, social mention or with a linkback. Enjoy! :)</h4></div></section><footer><divclass=""><p>©Copyright LOLCODE. All Rights Reserved.</p></div></footer>
In place of the footer above, we’ll add {{ partial "footer.html" }} within layouts/index.html.
Before we move on, let’s fix one last thing in our layouts/index.html file. At the very bottom of the page are some script tags. Let’s add the .Site.BaseURL to the ones we need (i.e., jquery.min.js and layout.js) and remove the two tags for prettify.js (again, we’re not utilizing this for code coloring). Our scripts should look like this now.
<scriptsrc="{{ .Site.BaseURL }}assets/js/jquery.min.js"></script><scriptsrc="{{ .Site.BaseURL }}assets/js/layout.js"></script>
Once you’ve done this, you’ll also want to open static/js/layout.js and remove the call to prettyPrint(); at the bottom of the file to avoid generating JavaScript errors.
Let’s create one last partial for our template to encompass the site navigation. This one will be a little more complex as we’ll want Hugo to dynamically populate the navigation based upon our content.
First, copy out the portion of HTML code in layouts/index.html, starting with the opening <ul class="docs-nav"> and ending with the closing </ul> tag, and place it into a new file named layouts/partials/nav.html. Make sure to add a {{ partial "nav.html" . }} where the <ul> block used to be in layouts/index.html.
As you can see by examining the code for the existing, hard-coded navigation items, there are two levels of navigation elements. There are section headers that are bolded, but not clickable. For example:
<li>Getting Started</li>
And navigation elements which are clickable. For example:
<li><ahref="#welcome"class="cc-active">Welcome</a></li>
If you recall, each of the content items we added had a category defined under categories in the front matter, as well as a categories_weight. We’ll use the categories as the section headers. Then we’ll place each content item within that category as a clickable navigation item, the order being determined by the categories_weight.
Start by deleting all but the first section header (i.e., Getting Started) and first navigation item (i.e., Welcome). Now, let’s loop through all of the available categories defined by our site content. Hugo has a site variable called .Site.Taxonomies.categories that contains a structure (technically called a map in the Go language) of all of the site’s categories. To loop through this structure, we’re going to use the range keyword. Here’s what the loop looks like.
<ulclass="docs-nav">{{ range $name, $taxonomy := .Site.Taxonomies.categories }}<li><strong>{{ $name | title }}</strong></li><li><ahref="#welcome"class="cc-active">Welcome</a></li>{{ end }}</ul>
In this code, $name is the key value from the map (.Site.Taxonomies.categories) and $taxonomy is the value, which, in this case, will be another map containing all the content within that category. Within the section header list element, we are outputting the value of the key.
The use of the pipe is something special in Go templates. In this case, we are saying to use a Hugo template function to title-case the value of the $name variable.
Pipes in Hugo
Pipes can be utilized in more complex fashions, which you can learn about in the Hugo documentation.
Now let’s loop through and create the links to the pages within each category.
<ulclass="docs-nav">{{ range $name, $taxonomy := .Site.Taxonomies.categories }}<li><strong>{{ $name | title }}</strong></li>{{ range $taxonomy.Pages }} {{ if ne .Title "" }}<li><ahref="#{{ .LinkTitle | urlize }}"class="cc-active">{{ .Title }}</a></li>{{ end }} {{ end }} {{ end }}</ul>
The $taxonomy variable makes a number of useful information available to output on our page. In this case, we are interested in iterating over .Pages, which has all of the pages in each given category. Within that loop, we are making sure the value of any given page’s title is not empty (i.e., if ne .Title "" where ne indicates “not equal”). This is because there is one piece of content that we want to output on the page (about_types.md) that we do not want included in the navigation, so we’ve left the title off.
Since our final template will be a single page, each navigation item links to an anchor rather than a separate page. Thus, we’ve used another Hugo template function, urlize, to convert any spaces in the page variable .LinkTitle to dashes. Finally, within the link, we output the title of the content via .Title.
Now, let’s try to run our site to see what we’ve done so far. Make sure that you’ve saved all the files, including nav.html. Open a terminal or command prompt window within the folder of the documentation site and enter:
hugo server --buildDrafts
The --buildDrafts flag is necessary because all of our posts are still in draft mode (i.e., draft = true in the front matter). It tells Hugo to build all our posts, including those in draft mode.
Changing the Draft Status
You can manually take a post out of draft simply by changing the draft flag in the front matter. However, you can also do so via the command line. For example, the following command will take the arrays post out of draft status:
hugo undraft content/lolcode/arrays.md
Opening http://localhost:1313 (the default server URL for Hugo) in a browser, we should now see a site that looks like Figure 4-6:
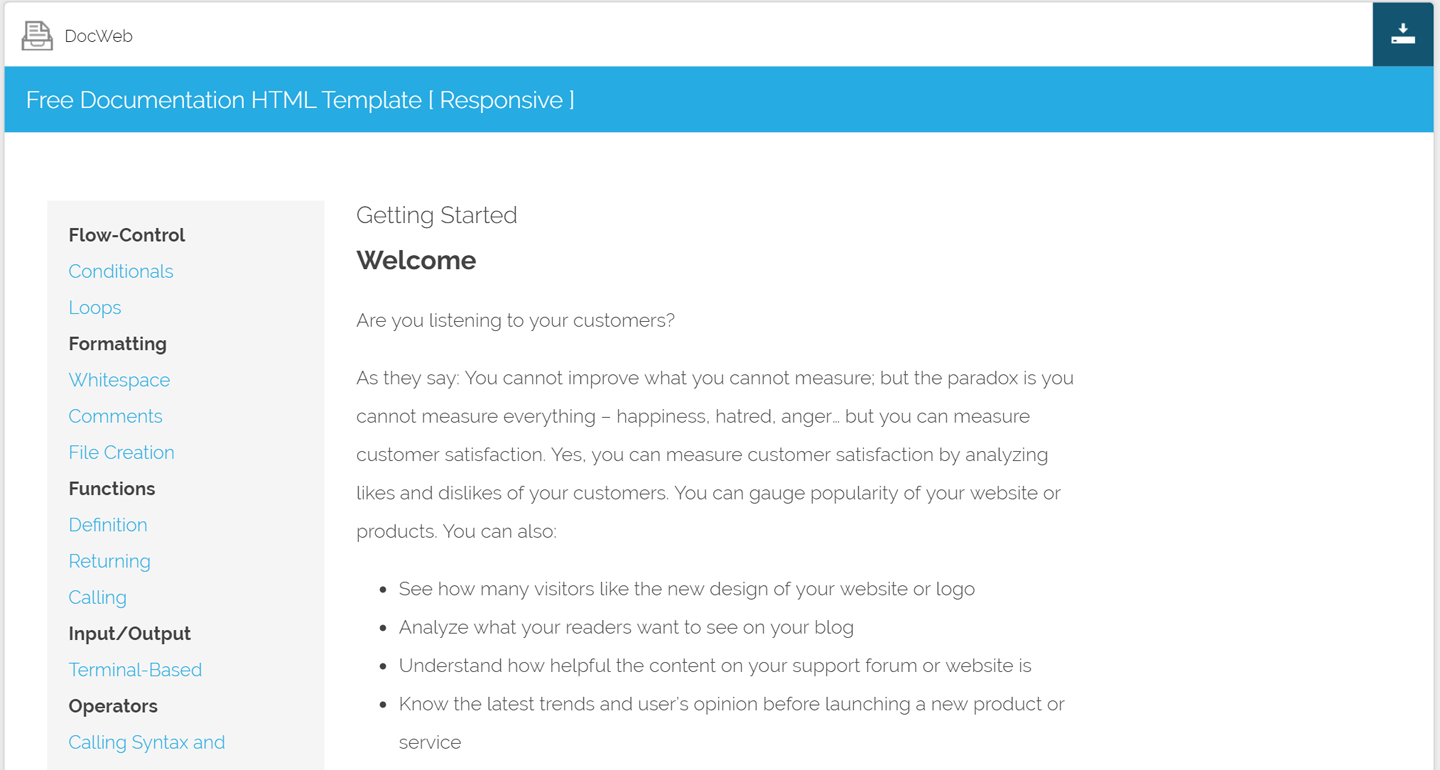
Figure 4-6. Our documentation site with dynamic navigation added
Our navigation is now outputting correctly, but the links don’t lead anywhere because we still only have hardcoded content. Let’s fix that (but, go ahead and leave the site open in your browser; Hugo will automatically refresh it as you save changes).
Open layouts/index.html. Within the <div class="docs-content"> block, erase all but the first few lines. You should be left with the following:
<divclass="docs-content"><h2>Getting Started</h2><h3if="welcome">Welcome</h3><p>Are you listening to your customers?</p></div>
We’ll do the same loop here as we did for the navigation, but, in this case, we’ll actually output the full content (i.e., .Content) of each post. The only other difference here is that we did not include the if statement that skipped content without a title, as we now want that content outputted.
<divclass="docs-content">{{ range $name, $taxonomy := .Site.Taxonomies.categories }}<h2>{{ $name | title }}</h2>{{ range $taxonomy.Pages }}<h3id="{{ .LinkTitle | urlize }}">{{ .Title }}</h3>{{ .Content }}<hr>{{ end }} {{ end }}</div>
Once you save this page, Hugo will automatically regenerate the site files and refresh the open browser window with your finished site (Figure 4-7).
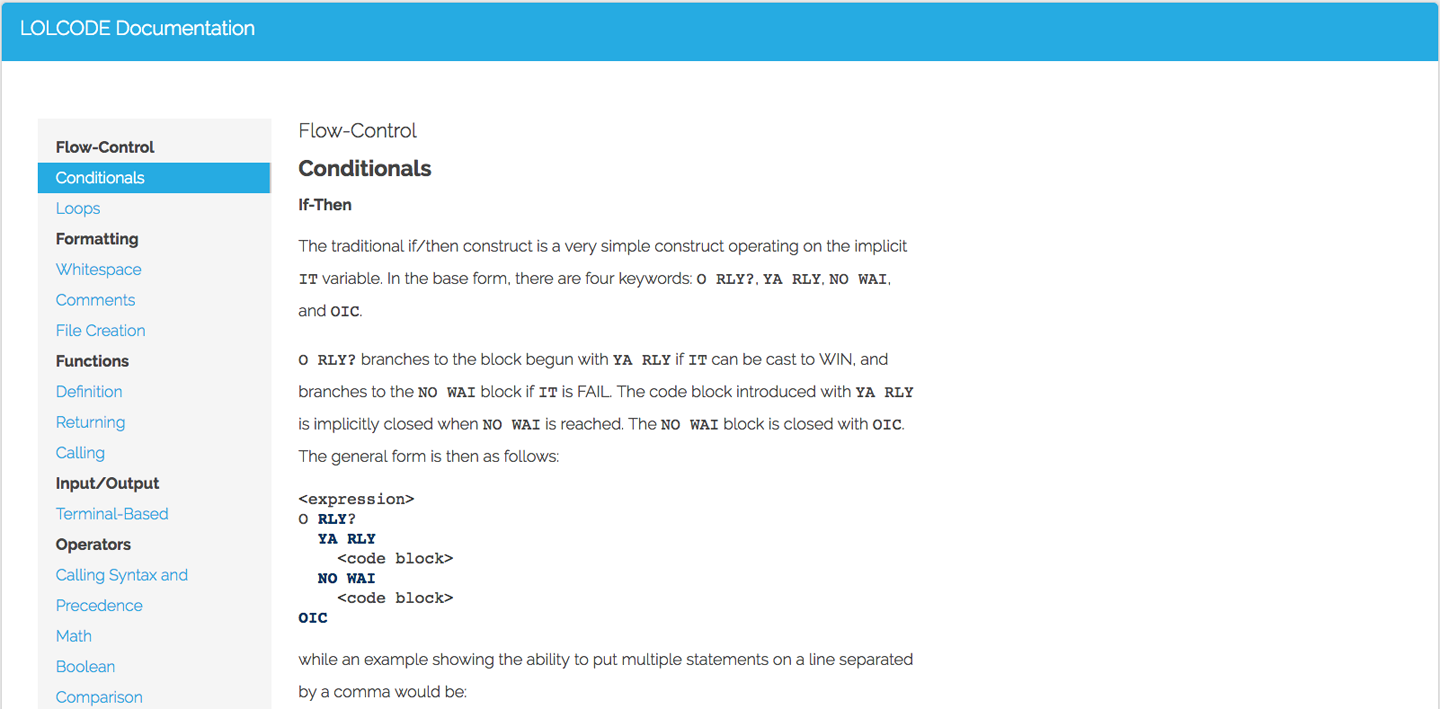
Figure 4-7. The completed LOLCode documentation site
Clicking on any of the links in the navigation should now correctly scroll to the appropriate section of the page. You should also notice that code blocks are appropriately colored.
Congrats! You’re done with your first documentation site built with Hugo. The completed code for this sample can be found on the GitHub repository for this book.
The Scrolling Navigation
If you’ve tested the page we built, you may notice that some of the navigation items fall off the page and aren’t visible until the entire page is scrolled to the bottom. This has to do with some JavaScript code in static/js/layout.js that is designed to have the navigation remain statically positioned as the user scrolls the page. Obviously, this is a bit of a flaw in the design of the DocWeb template when utilized for longer single-page documentation sites. The completed demo of this mitigates this issue through some tweaks to the JavaScript, though it can still be improved, in particular to account for the speed of the user’s scroll.
To generate the completed site files, use the command line (note that we’re still using the buildDrafts flag since our content is still in draft mode):
hugo --buildDrafts
Going Further
Obviously, there are many different formats you can use for a documentation site. In this particular sample project, the documentation was made up of primarily short content, which made it a very good candidate for a single page with anchors. However, if your project has long-form documentation, it would make more sense to use individual content pages. To do this, you need to add a template for the individual posts as layouts/_default/single.html. Of course, you could reuse the partials for the head, navigation, and footer, making it easier to build this template quickly.
One thing worth noting here for anyone looking to convert an existing documentation project to Hugo is that there are a number of converters available. These include converters from popular static site generators like Jekyll but also from dynamic site engines and content management systems like WordPress, Ghost, and Drupal.
Honestly, the toughest challenge you’re likely to run into when choosing to use Hugo, or any static site generator for your documentation site, is writing content in Markdown. While developers may be comfortable writing in Markdown, many documentation writers are unfamiliar with it. Fortunately, the support for Markdown in existing or standalone tools keeps getting more robust, even if it is typically not the WYSIWYG experience many writers will be most comfortable in. Also, it’s worth noting that there are a number of third-party frontends for Hugo that aim to create an experience more similar to writing in WordPress or other content management systems.
Finally, there’s a lot more that you can do with Hugo than was covered in this chapter. Thankfully, Hugo has extensive and detailed documentation (among the best of any static site generator, in my opinion).
Get Working with Static Sites now with the O’Reilly learning platform.
O’Reilly members experience books, live events, courses curated by job role, and more from O’Reilly and nearly 200 top publishers.

