Google Workspace SSO with SAML
Please reach out to your customer success manager to get started. Then follow the steps below to implement SSO for the O’Reilly learning platform using Google Workspace with SAML.
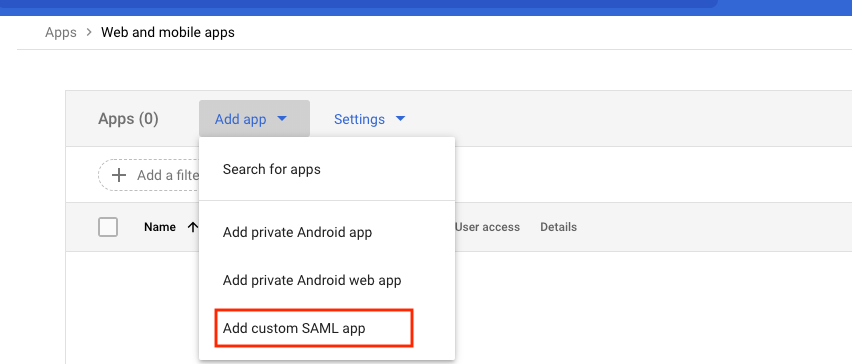
- In your Google Admin console (admin.google.com), click Apps in the left-hand navigation menu and select Web and mobile apps. Once there, click the Add app dropdown and select Add custom SAML app.
-
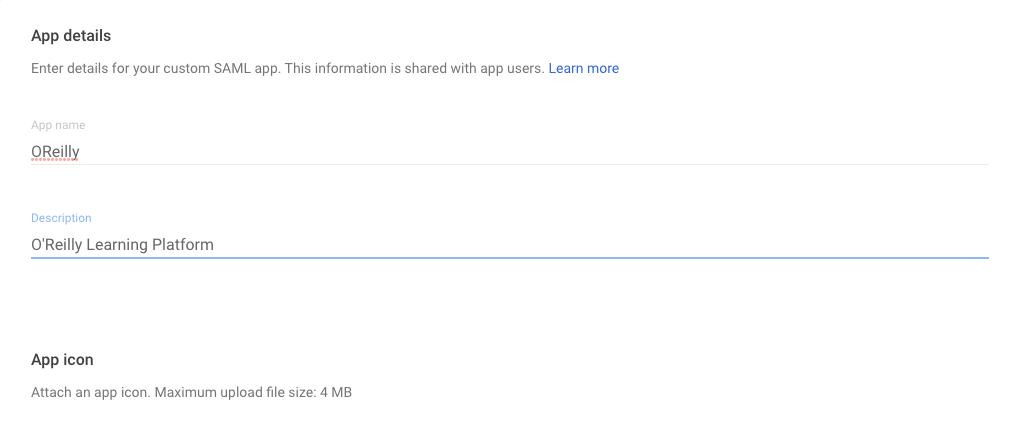
In App details, enter “OReilly” in the App name field. (Note that you can’t include the apostrophe in O’Reilly.) You can also provide a description (optional). Click Continue.
-
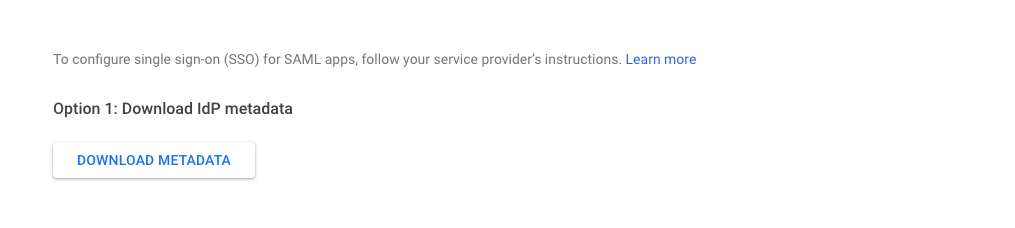
In Google Identity Provider details, download the metadata and save it. (You’ll need this in Step 6.) Click Continue.
-
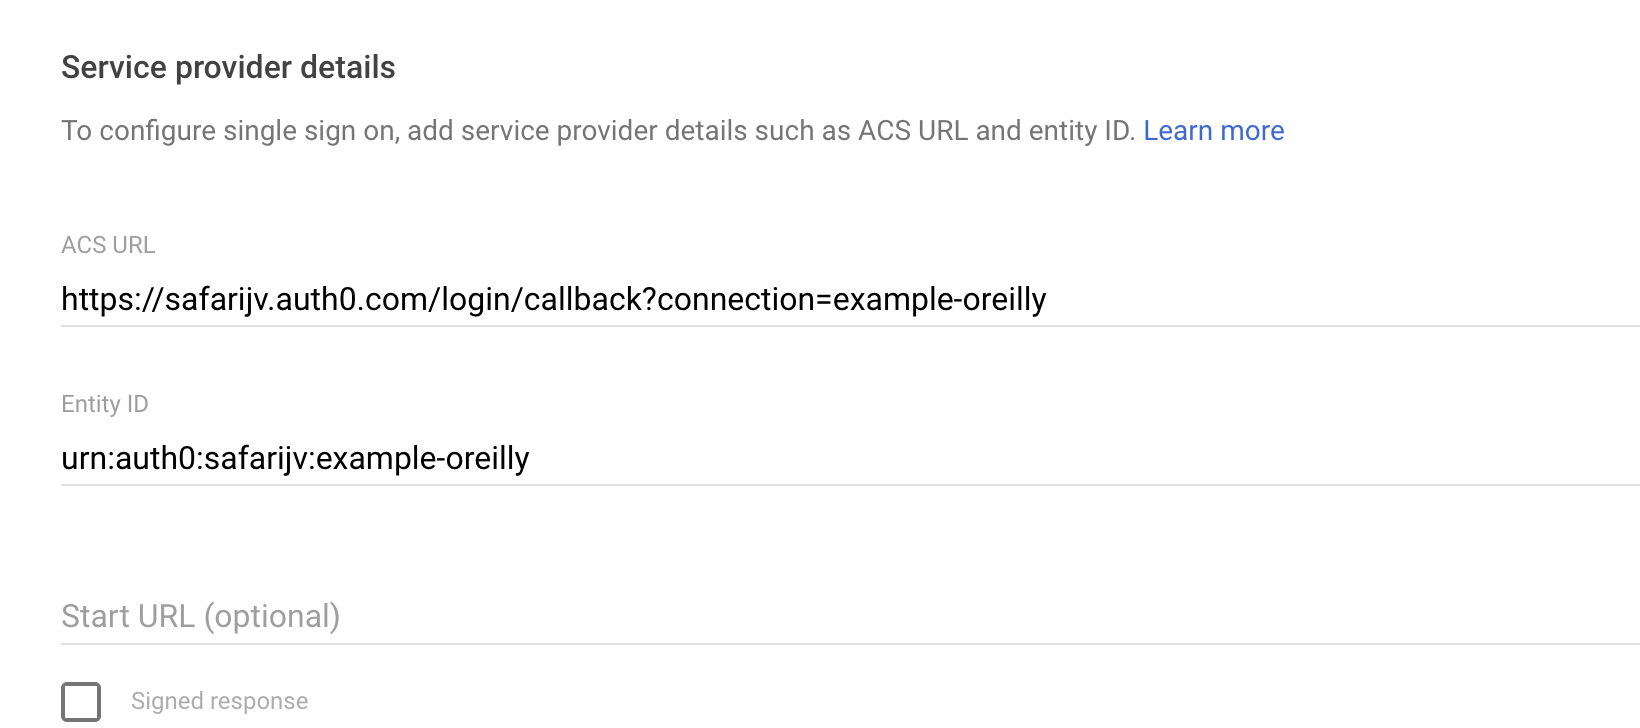
In Service provider details, enter the ACS URL and Entity ID with the details provided by the O’Reilly platform integration team. Under Name ID, you’ll see the default is set to primary email. This will work, but we recommend using something less likely to change, such as employee ID (if available). Click Continue.
-
In Attribute mapping, add the required attributes (email, given_name, family_name), plus any additional optional attributes you’d like to include. Click Finish.
In this example, we’ve added “Department” as an optional attribute.

-
Send the metadata file you downloaded in step 3 to the O’Reilly platform integration team member you’re working with. They’ll use details from your metadata to update the O’Reilly side of the SSO integration.