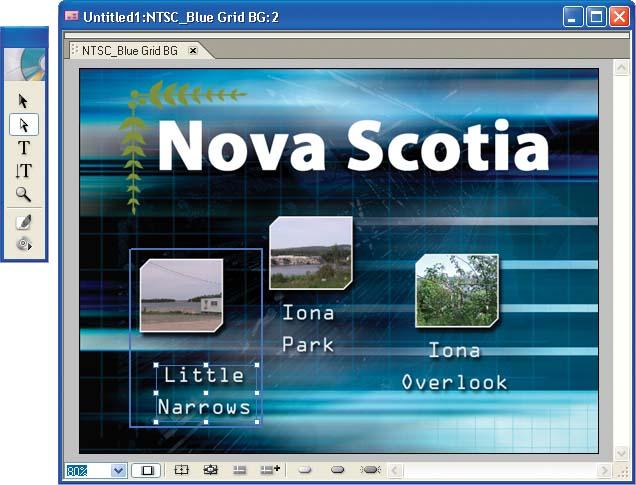
Let’s stop for a minute and talk about what Encore has done behind the scenes. Believe it or not, Encore performed a lot of magic when it created these buttons.
In these three button graphics, Encore has:
Composited the button graphic over the menu background—this means that it blended two elements together so that it appears that they are the same graphic. Note that the button has a nonrectangular shape. (The default button we used for the clips was the Angled Box button in the Corporate set of the Library palette.)
Included a text field as part of the button, making it easy to enter a button title that identifies the associated clip.
At this point, click the second Direct Select button in the toolbox (with the outlined arrow) to experiment with selecting and adjusting each individual element within the button, such as the position of the video “thumbnail” button or the button text. If you just end up making things worse, as we did in Figure 1-23, use Undo to restore it to its default alignment.
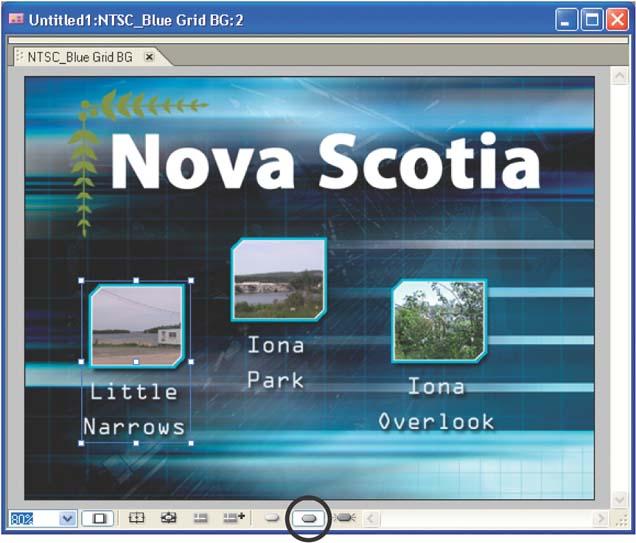
Something interesting also happened with the button highlights: Encore added highlight graphics over the button (in this case, a light blue outline) to indicate a selected button. You probably didn’t see this because you haven’t previewed the menu yet. However, if you want to see what each button will look like when it is selected, click the Show Selected Subpicture Highlight button at the bottom of the Menu Editor window, as shown in Figure 1-24.
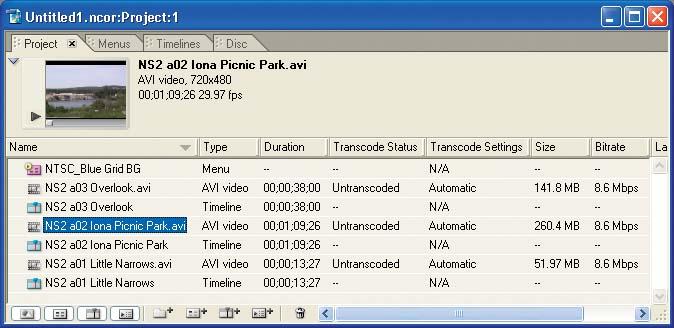
When you dragged the AVI asset from the Project tab to the Menu Editor window, Encore also created a Timeline element in the Project tab. This tab is used to associate the video and audio tracks and add navigational links from the menu and back:
Encore linked the button to the clip. This involved creating a Timeline element for the clip with the video and audio from the AVI file. In addition, Encore also created a return link from the Timeline element back to the menu when it finishes playing.
The Project tab shown in Figure 1-25 now lists each Timeline element created from the clips. Click the “Type” heading to sort the list by AVI Video, Menu, and Timeline, or click the “Name” heading to see each clip listed with its associated original AVI video file and timeline.
To modify the columns, right-click in the heading row and choose Hide This to hide a column, or select and unselect fields under the Columns menu item to add or delete columns. You also can resize the columns, and drag-and-drop the headings to reorder them.
As mentioned earlier, each button includes a video thumbnail from the target AVI file above the text. Here is what Encore did:
Encore automatically extracted a frame of video from each clip and inserted it into the button as a thumbnail image. As we will see later, you then can use the Properties palette to specify that the buttons themselves be motion video clips, and if so, set the duration, looping, and other attributes. You even can specify which frame of the clip is used for the thumbnail in the Timeline window.
Much of the power of Encore is that you can take advantage of this drag-and-drop ease for creating simple discs quickly, and yet still drill down to perform any of these individual actions for more sophisticated designs.
Get Adobe Encore DVD: In the Studio now with the O’Reilly learning platform.
O’Reilly members experience books, live events, courses curated by job role, and more from O’Reilly and nearly 200 top publishers.


