Recipe 3.2 Customizing the ListView
By default, the ListView allows one item to be selected. To enable multiple items to be selected, you can configure the ListView to display a checkbox next to each item.
Solution
To configure the ListView, you first need to get a reference to the ListView. If your activity is extending the ListActivity base class, you can use the getListView() method to return an instance of the ListView in your activity. Once you obtain an instance of the ListView, you can call the setChoiceMode() method to set the display mode of the ListView:
@Override
public void onCreate(Bundle savedInstanceState) {
super.onCreate(savedInstanceState);
setContentView(R.layout.activity_main);
ListView lstView = getListView();
//lstView.setChoiceMode(ListView.CHOICE_MODE_NONE);
//lstView.setChoiceMode(ListView.CHOICE_MODE_SINGLE);
lstView.setChoiceMode(ListView.CHOICE_MODE_MULTIPLE);
setListAdapter(new ArrayAdapter<String>(this,
android.R.layout.simple_list_item_checked, presidents));
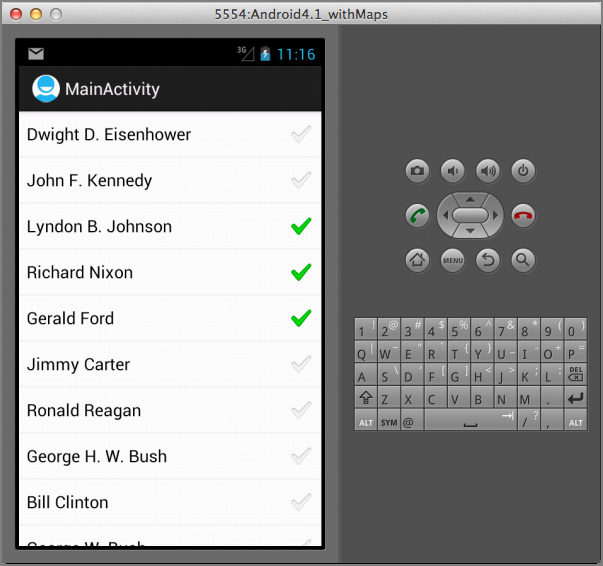
}The ListView.CHOICE_MODE_MULTIPLE constant displays a checkbox next to each item in the ListView (see Figure 3-2). As the user selects each item, the onListItemClick() method is called.
To determine whether an item in the ListView is checked or unchecked, ...
Get Android Application Development Cookbook: 93 Recipes for Building Winning Apps now with the O’Reilly learning platform.
O’Reilly members experience books, live events, courses curated by job role, and more from O’Reilly and nearly 200 top publishers.

