Make sure you know where you’re pointing.
We’re always surprised by how many astronomers are unfamiliar with as basic a procedure as aligning the finder scope. At one public observation, we spoke with a visitor who had had his scope for months and was ready to give up the hobby. Why? Because he couldn’t find anything.
At first, we assumed that this gentleman was merely undergoing the “newbie blues,” unable to locate objects because he hadn’t yet learned to star hop [Hack #21] or to use geometric location methods [Hack #20]. So we decided to show him how to find the Messier open clusters in Auriga, M36, M37, and M38. We pointed the finder where M37 should have been, expecting to see it in the finder. It wasn’t visible, which we wrote off to the small aperture of his 6X30 finder. But when we looked in a wide-field eyepiece, M37 was nowhere to be seen. Hmmm.
We swung the scope down to get a distant antenna beacon light centered in the wide-field eyepiece, and then looked in the finder, expecting it to be off a bit. Holy cow! Not only wasn’t the beacon centered in the crosshairs of the finder, it wasn’t even within the field of view at all. No wonder this guy couldn’t find anything. He had no idea where his scope was pointing.
When we asked him how he aligned his finder, we learned that he’d never aligned it and didn’t realize that finder alignment was a necessary step. He’d unpacked his scope from the shipping carton, attached the finder, and let it go at that. The mechanics of the finder mount and bracket ensured that the finder was pointed generally in the right direction, but that was about it. So we showed him how to align his finder scope, and explained that he should check the alignment every time he set up his scope.
Aligning a finder is easy enough to do. It may take a few minutes the first time you do it, but after that it should take only a few seconds to check the alignment when you set up your scope and tweak it if necessary.
To begin aligning your finder, select a distant object as an alignment target. During daylight, use a distant telephone pole, church steeple, radio tower, or similar object. For accurate alignment, the object should be at a distance of at least 500 times the focal length of the scope. For typical amateur scopes, that translates to between 1/8 mile and 5/8 mile.
Tip
Make sure the object you choose is unique and easily identified. We once (mis)aligned our finder by pointing the finder at one telephone pole while, unbeknownst to us, the telescope was pointing at a different telephone pole. The best objects are therefore those that are easily and unambiguously identifiable, such as a church steeple on a distant ridge or a radio tower with a blinking light.
At night, you may have no alternative but to align on a bright star or planet. The advantage to using a celestial object is that there is no question that your target is sufficiently distant. The disadvantages are that it can be very hard to be certain that you have the same star in the finder and telescope eyepiece, and that most stars drift across the field of view because of the earth’s rotation, so you’re trying to align on a moving object. The easy solution, at least if you are in the Northern hemisphere, is to use Polaris as your alignment star. Because it is located only about 0.75° from the north celestial pole, Polaris has little apparent motion.
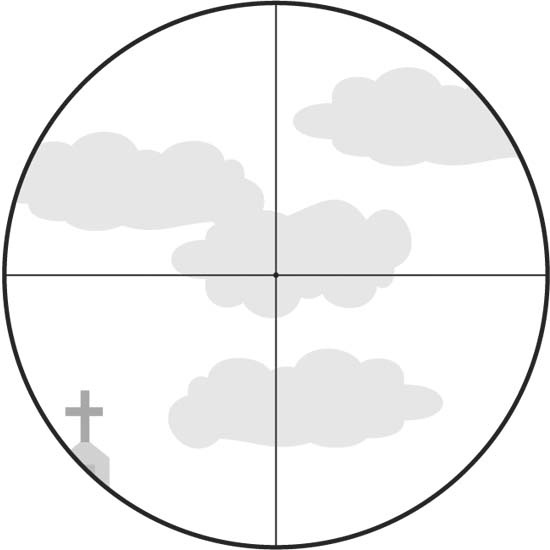
After you’ve selected an alignment target, center the object in your telescope’s eyepiece, as shown in Figure 4-25. Use your lowest power eyepiece to make it easier to locate the object, and simply pan the scope around until the object appears in the field of view. If your finder is already roughly aligned, you can use it to get you approximately on target. Otherwise, you may have to scan around for quite a while to get the object in your eyepiece field of view.
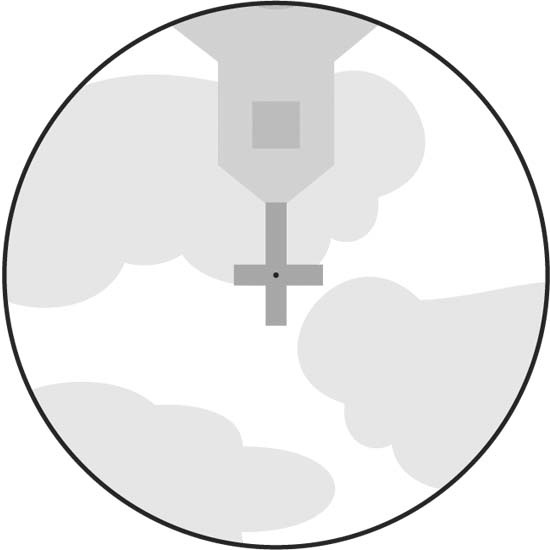
Depending on the type of telescope you have, the image in your eyepiece may be erect or inverted, and correctly oriented or flipped left-to-right. That part isn’t important. All that matters is that you have the alignment object centered in the field of view of the telescope eyepiece. Once you have done that, without moving the telescope, look through your finder. You’ll probably see something like Figure 4-26.
Unless the finder is badly misaligned, the alignment target should be visible somewhere in the field of view of the finder. If it is not, loosen the screws that secure the finder mounting bracket to the scope, move the finder until the object is within its field of view, and then retighten the mounting screws. You’ll almost certainly have moved the scope enough during this procedure to decenter the alignment object in the scope eyepiece, so recenter the alignment target in the scope’s eyepiece before you proceed.
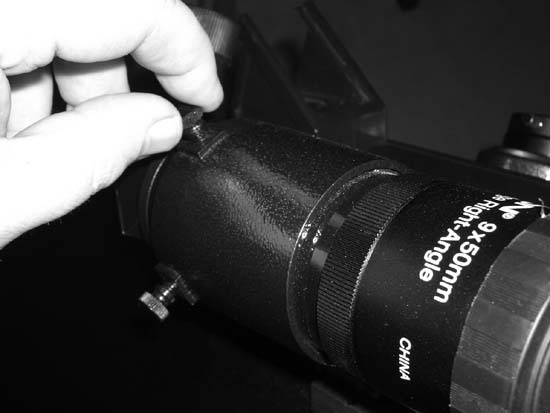
Finder mounts differ in the provisions they make for aligning the finder scope. The best type of finder mount, shown in Figure 4-27, supports the finder within a collar, with a rubber O-ring seal at the front. At the rear of the collar are two adjustment screws and a third, spring-loaded post that bears against the finder. Aligning the finder with such a mount usually takes only seconds. Also, the finder tends to stay in alignment because the screws are a fixed reference point and the spring-mounted post always forces the finder into the correct position against these screws.
Another type of finder mount, which is despicable and unfortunately common, uses two rings, each with three adjustment screws spaced 120° apart. To align the finder with this type of finder mount, you have to back out some screws as you tighten down other screws. Because the front rings and back rings define two planes of alignment, getting the finder aligned in such a mount is often an exercise in frustration. Also, such mounts tend not to hold alignment well, so it’s often necessary to realign the finder from scratch each time you set up the scope. Conversely, the collar-based, two-screw mount described earlier usually requires minor tweaking at most.
If your scope has one of the hateful two-ring finder mounts, we recommend replacing it with a collar-based finder mount. You can buy such mounts from Orion and other astronomy specialty vendors.
Tip
If you have a refractor, your finder mount probably has a dovetail base that mates to a corresponding slot on the left side of the focuser body. You can thank Vixen, a Japanese optical company with otherwise sane engineers, for that stupid arrangement. They originated that design and nearly every other refractor maker copied it.
If you are right-eyed or ambivisual, you probably don’t understand the problem. But if you are left-eyed, the problem is evident the first time you try to use the finder. The scope body and focuser tube are so close to the finder eyepiece that there’s insufficient room to use your left eye. You’re forced willy-nilly to use your right eye, whether you can focus through the finder with it or not.
Some finderscopes have adjustable focus, so you may be able to focus the finder to suit your right eye. If the finderscope is not focusable or the range of adjustment is insufficient to accommodate your vision, the best solution is to substitute a finder mount with a much longer stalk. That replacement may or may not have a dovetail foot that fits that slot on the finder base. If not, you’ll have to remove the focuser and objective lens cell and drill mounting holes in the optical tube itself. Be certain there are no bits of metal left in the tube before you reinstall the focuser and objective lens cell.
If you’re going to replace the finder mount, consider replacing the finderscope itself at the same time. Most refractors are supplied with inadequate, small finders, often 6X30 or less. A proper optical finder, even for a small refractor, has at least a 50mm objective.
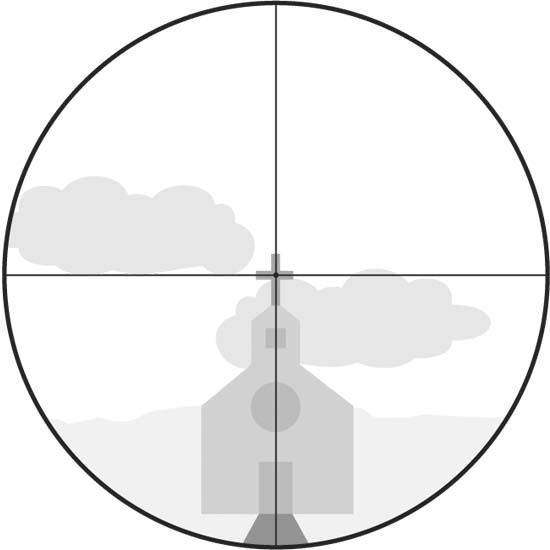
Once you have the alignment target within the finder field of view, use the finder adjustment screws to center the finder crosshairs on the alignment target, making sure not to jiggle the scope. The goal is to have the intersection of the crosshairs covering the center of the alignment target exactly, as shown in Figure 4-28.
Ordinarily, it’s sufficient to align the finder with a low-power eyepiece and “eyeball it” to decide when the object is centered in the telescope eyepiece. If you have a crosshair eyepiece for your telescope, by all means use it for aligning the finder, but it’s ordinarily good enough just to judge by eye when the object is properly centered.
For very critical work, it may be desirable to fine-tune finder alignment using a high-power eyepiece in the scope. To do that, first do a rough alignment using the low-power eyepiece. Once the finder crosshairs are as close to being exactly aligned as you can judge with the low-power eyepiece, simply replace the eyepiece with a higher power eyepiece and repeat the process.
Get Astronomy Hacks now with the O’Reilly learning platform.
O’Reilly members experience books, live events, courses curated by job role, and more from O’Reilly and nearly 200 top publishers.

