DISPLAYING SECTIONS
In addition to displaying a series of rows in a Table view, you can group items into sections and then create a header for the related items in each section. In the following Try It Out, you learn how to use the Table view from within a Master-Detail Application project and group the items into sections. At the same time, you learn how to display items stored in a property list, as opposed to an array.
TRY IT OUT: Displaying Sections in a Table View
![]()
- Using Xcode, create a new project and select the Master-Detail Application project template and click Next (see Figure 8-11).
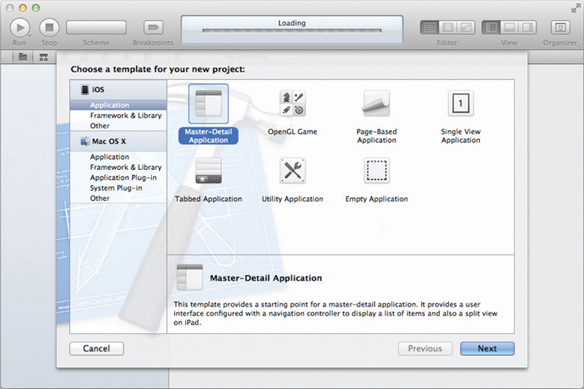
FIGURE 8-11
- Name the project TableView and click Next and then Finish (see Figure 8-12). Leave the Class Prefix empty and ensure that you have the Use Automatic Reference Counting option unchecked.
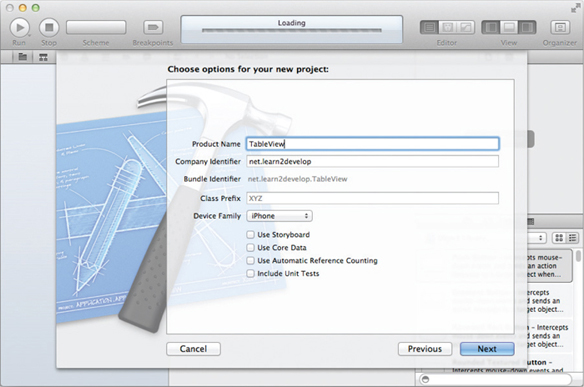
FIGURE 8-12
- Select the MasterViewController.xib file to edit in Interface Builder. This file represents the first View window that will be loaded when your application starts.
- Notice that in the MasterViewController.xib window you now have a TableView item instead of the usual View item (see Figure 8-13).
FIGURE 8-13
- Examine the MasterViewController.h file and note that the MasterViewController ...
Get Beginning iOS 5 Application Development now with the O’Reilly learning platform.
O’Reilly members experience books, live events, courses curated by job role, and more from O’Reilly and nearly 200 top publishers.

