Understanding Texture Mapping
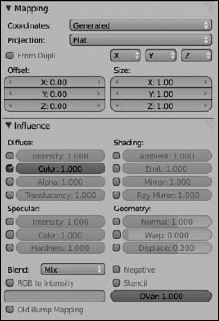
After you create your texture, be it procedural or image-based, you're going to have to relate that texture to your material and, by extension, the surface of your object. This process is called mapping. Mapping basically consists of relating a location on a texture to a location on the surface of an object. Mapping controls are located in Texture Properties in the Mapping and Influence panels, as shown in Figure 8-4.
The Mapping panel
The Mapping panel controls how the texture is mapped to the object, defining how the texture coordinates are projected on it. The most important button is the drop-down menu labeled Coordinates. The following list explains the types of coordinate mapping available:
Figure 8-4: The Mapping and Influence panels in Texture Properties.
- Global: Choosing this option uses the scene's coordinates to define the texture space. So if you have an animated object with a texture mapped this way, the texture will seem to be locked in place as the object moves across it. Global coordinates produce kind of a strange effect, but it's helpful in a few situations, such as faking shadows on a moving character.
- Object: This neat option allows you to use a different object's location as a means of placing a texture on your object. To tell Blender which object you want to use, pick or type its name in the Object field. For example, you can ...
Get Blender For Dummies®, 2nd Edition now with the O’Reilly learning platform.
O’Reilly members experience books, live events, courses curated by job role, and more from O’Reilly and nearly 200 top publishers.

