Chapter 1. Setup and First Run
I know you want to start writing apps as soon as possible, but there are three things you need to know first:
- I don’t assume you already know how to program.
You don’t need to have existing experience with Objective-C, Cocoa, Xcode, or even C. If you have some familiarity with a computer language (even HTML), it will help you. You do need to be a reasonably proficient Mac user. If you show up with the desire to learn Mac programming, I’ll walk you through what you need to know.
- The chapters are modular.
If you know C and object-oriented concepts, but not Objective-C specifically, you can skip to Chapter 5 after learning about Xcode in this chapter. If you’ve already dabbled in Mac or iPhone programming, and know your way around Objective-C and some basic Cocoa topics, you can probably jump to Chapter 7. Otherwise, start right here.
- You need a Mac running Snow Leopard.
All of the chapters assume that you’re running Mac OS X 10.6 Snow Leopard, which runs only on Intel-based Macs.
All set? Good, let’s get Xcode running.
Download and Install Xcode
You can either get Xcode from the Mac OS X install DVD or download it from the official Mac Dev Center website. The version on the website will always be the newest one, but the download may take several hours. If you want to get started right away, you can install from the DVD.
Tip
If you’re running Snow Leopard and already have the iPhone SDK installed, you have everything you need to write Mac apps. You can skip ahead to Your First Application.
To download the newest version of Xcode, go to http://developer.apple.com and click on Mac Dev Center. The layout of the site changes regularly, but you should look for a link that says “Register” to create an account. There is a paid membership that offers access to prerelease software and training videos, but you can start with the free membership, which requires you only to fill out some basic contact information. After you’ve registered, return to http://developer.apple.com and log in. Once you’re logged in, look for a link for downloading Xcode.
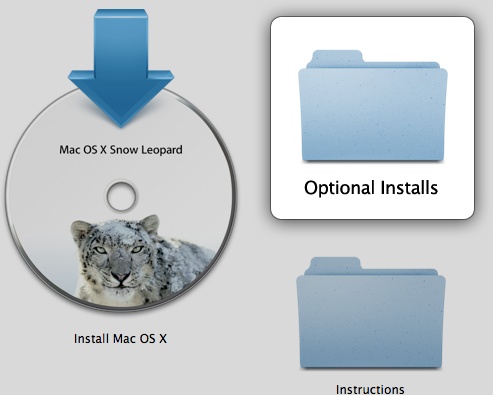
If you have a slow Internet connection and want to save yourself a few hours, put the Snow Leopard Install DVD in the drive and open the folder called Optional Installs as shown in Figure 1-1.
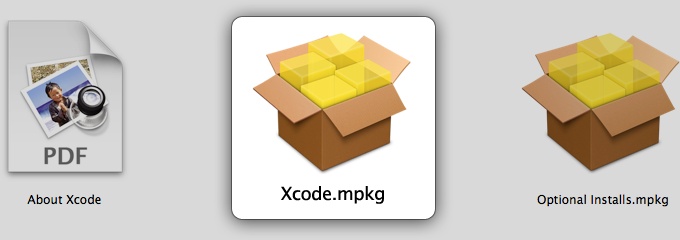
Inside the Optional Installs folder is a package called Xcode.mpkg. Double-click it to open the installer (see Figure 1-2).
Warning
The version of Xcode on the DVD is usually older than what is available on the developer site, so you should upgrade Xcode as soon as you have the time to download it. The Xcode download at the Mac Dev Center will show you the version number that’s available. When you run Xcode, the version number is displayed on the Welcome window below “Welcome to Xcode.”
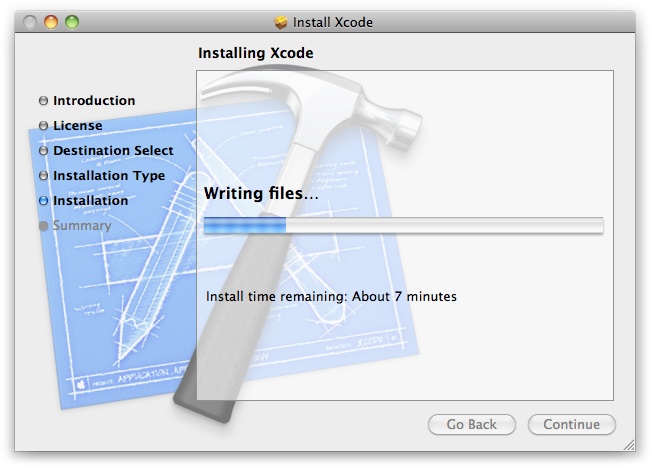
Once the installer is running, you can just accept all of the default options. You will likely need several gigabytes free for installation. Figure 1-3 shows the installer running.
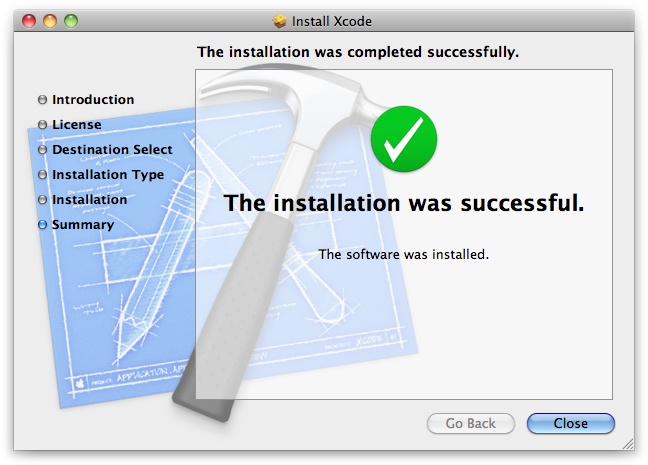
Once the window says installation is complete (see Figure 1-4), go ahead and close the window.
Your First Application
Launch Xcode. You can find it by clicking on your hard drive icon in the Finder sidebar and navigating to Developer → Applications. This is separate from the general Applications folder that holds things like Safari and iTunes. You can also search for it using Spotlight.
Tip
It’s probably a good idea to add Xcode to your Dock since it’s a few levels down. In theory, this is for easy access, but it’s also a good conversation starter if someone sees it on your Mac.
If Xcode asks you for any initial configuration preferences, simply accept the defaults. Each time Xcode runs you will see a Welcome window that looks something like Figure 1-5.
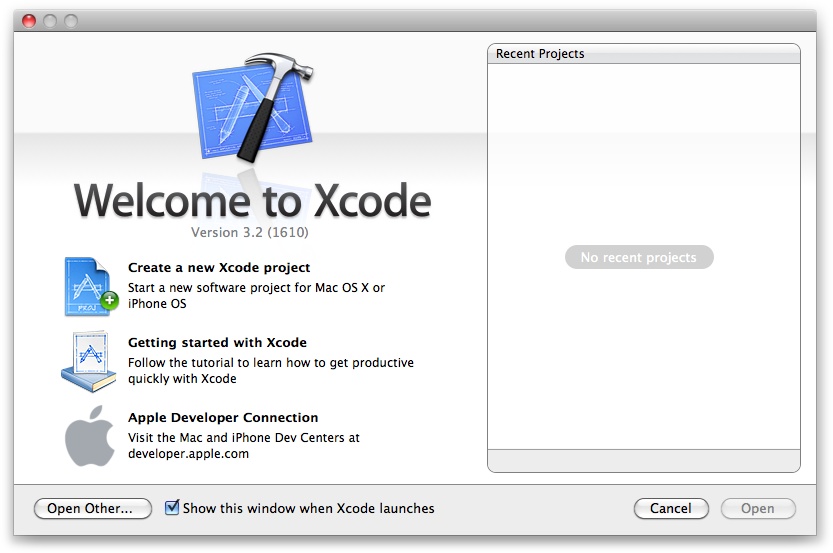
The left side of the window has a few items to help you get started, and the right side lists projects that you’ve used recently. The list will be empty the first time you run Xcode. Click on “Create a new Xcode project” to get started.
Tip
If you closed the Welcome window, you can start a new project by choosing File → New Project from the menu. You can open the Welcome window again by choosing Help → Welcome to Xcode.
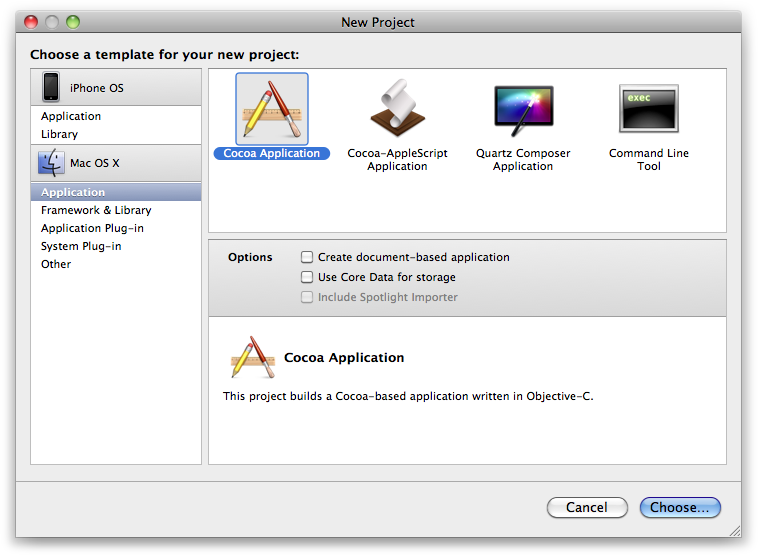
In the New Project window, click on Application under the Mac OS X section and select the Cocoa Application icon as shown in Figure 1-6.
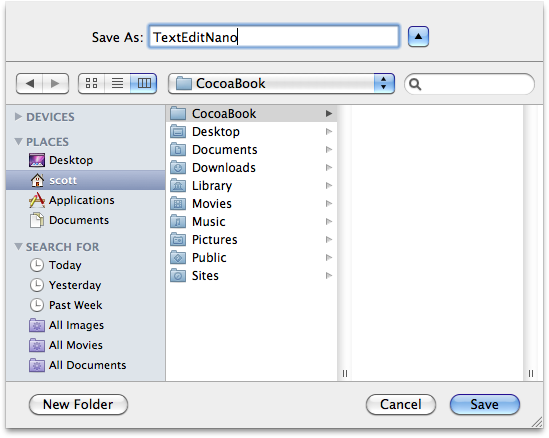
Click the Choose button, and you’ll be asked to select a location for the project. Go to your home folder and create a folder called CocoaBook (you can do this within the Save dialog). Select the CocoaBook folder as the save location and enter “TextEditNano” as the project name (see Figure 1-7).
Tip
The layout of the New Project window has changed significantly in the 3.x releases of Xcode. If your window doesn’t look similar to the screenshot in Figure 1-6, download a newer version of Xcode from http://developer.apple.com.
After you click Save, you’ll see the main Xcode window come up, which looks like Figure 1-8.

Go ahead and click the Build and Run icon in the toolbar to try the app out. You should see a blank window come up, as shown in Figure 1-9.
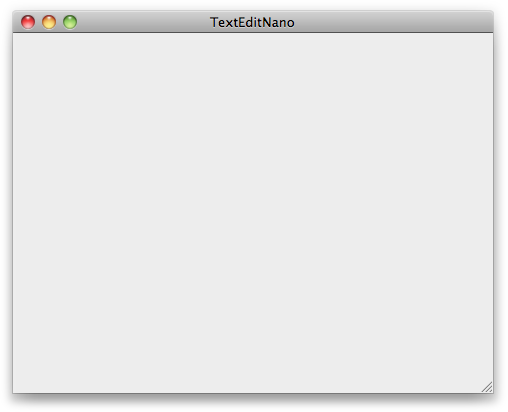
This obviously isn’t a useful window, but if it shows up, you know Xcode is working and you’re ready to start writing Mac apps. Close the application and return to the main Xcode window.
To close an app that’s running inside of Xcode, you can either choose Quit from the application’s menu, or just click the Tasks stop sign toolbar icon in Xcode, which is shown in Figure 1-10.

It’s called Tasks because you may have several things going on in Xcode, and if you click and hold on this icon, you can select which task you want to stop.
Tip
If your application crashes or stops responding, you won’t be able to use Quit from the application menu. If that happens, just use the Tasks toolbar item. This is equivalent to a Force Quit, so the application won’t have a chance to save any data or preferences before closing.
Create the Interface
At the heart of every great Mac app is a great user interface. You might design the interface in an image editing program, on a napkin, or just in your head, but eventually you’ll want to make it real. In Cocoa, there are two ways to create a user interface.
You can manually enter configuration details for controls in your application code (you’ll learn more about writing code in the next chapter), or you can visually arrange controls in Interface Builder. In my experience, novice programmers usually jump at the chance to work visually, but experienced developers sometimes take a bit more convincing.
Some new programmers think that writing software the hard way makes you a better programmer, but expert Mac developers measure success by how quickly they can deliver great results. Interface Builder is not training wheels for Cocoa; it’s a tool to reduce the amount of “busy work” you have to do when setting up your user interface (UI), which means you can work more quickly and avoid trivial errors. That leaves you free to focus on the real work.
Tip
Eliminating busy work is the most important idea in Cocoa. A programmer who doesn’t need to waste time on tedious tasks is free to focus on creating features that make her app unique.
Xcode includes an Interface Builder document with each new project, but as you’ve seen from the blank window, there’s not much to it. In the main Xcode window, click the disclosure triangle to the left of the blue TextEditNano project icon in the sidebar to display its contents. Now open the Resources group and double-click the MainMenu.xib file to open it in Interface Builder. You’ll see a window that looks something like Figure 1-11.
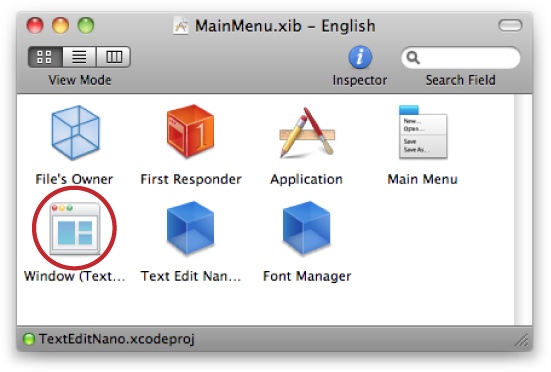
Double-click the Window icon (circled) to open the main window for the TextEditNano application. It should look exactly like the blank window you saw when you first ran the application. This window is your canvas. You can add any UI elements here that you want to use in your application.
Interface Builder works differently than some other visual development tools. It doesn’t generate Objective-C code. Instead, it takes snapshots of the state of the objects. The configuration of all of the controls, including all of their positioning information, is saved in the MainMenu.xib file and loaded by Cocoa when your app is launched.
Tip
The .xib file format is an XML version of the standard .nib format that was Interface Builder’s native format in earlier versions of Mac OS X. The XML version is easier to use in version control systems, but when Xcode builds your app, it actually converts XIB files into NIB files. The original XIB file is preserved, though.
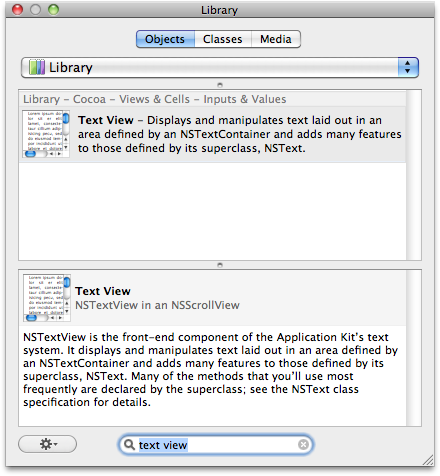
Open Interface Builder’s Library window by choosing Tools → Library from the menu. The Library window contains ready-to-use UI elements that are built into Cocoa. You can also download third-party plug-ins or create your own. Type “text view” into the search field at the bottom of the window to bring up the Text View item, as shown in Figure 1-12.
Tip
If nothing shows up when you search for the text view, make sure that the Objects tab is selected at the top of the window, and the Library item is selected in the drop-down menu below it.
Drag the Text View item from the Library window into the application window. This might be obvious, but you need to drag it to your “prototype” application window that appeared when you double-clicked on Window in Interface Builder (Figure 1-13), not the real one from the running application (which you hopefully already closed).
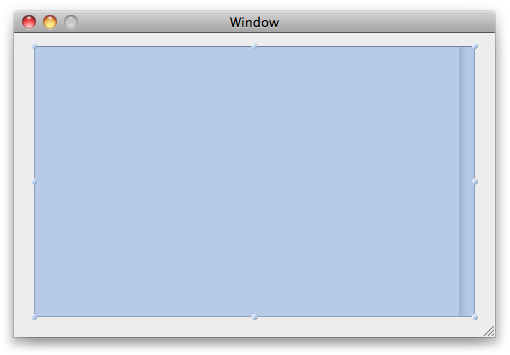
Move the text view so that it’s near the top-left edge of the window. Use the handles around the outside to resize it so it nearly fills the window, but leave a little bit of space at the bottom. The exact size isn’t important—just do whatever you think looks right.
Select File → Simulate Interface from the menu, or press Command-R. This will display the window in Interface Builder’s simulator test mode. The application isn’t actually running, but you can see a preview of what it will look like and can even type in the text field. If you try to resize the window, though, you can see that the text view doesn’t resize with it. Press Command-Q to close the simulator, and we’ll fix this.
Set sizing properties
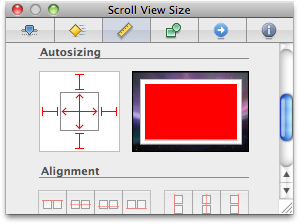
Select the text view by clicking on it in the prototype window, and choose Tools → Size Inspector from the menu, or press Command-3. The Inspector window’s title is “Scroll View Size,” but that’s OK (you may have expected it to be named “Text View Size”). The scroll view is wrapped around the text view to provide scrolling support for long runs of text.
The Autosizing section of the Inspector controls resizing. The outer anchors control which edges the view moves with, and the inner arrows control which edges the view resizes with. That may not make sense when you read it, but fortunately the Inspector window shows you a live preview as you make changes. You can turn each anchor on or off by clicking it. Click both sets of internal arrows so the view resizes with the window. It should look Figure 1-14 when you’re done.
Run the test mode again by pressing Command-R. If you resize the window, the text view should now resize with it. Press Command-Q to close the simulator, then Command-S to save the MainMenu.xib file. Switch back to Xcode.
Run the Finished Application
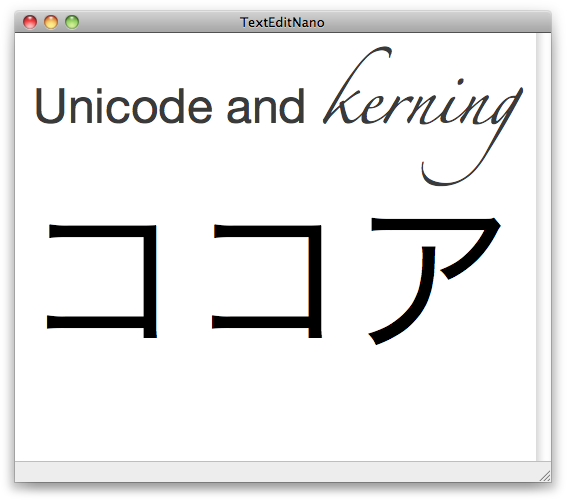
Back in Xcode, click the Build and Run icon in the toolbar (or just press Command-R) to build the application and run it. This time when the window comes up, you should see the text view you added. Choose Format → Font → Show Fonts to choose a font, then type something in the text field (see Figure 1-15).
Even though you haven’t written a single line of code yet, you already have a real Cocoa application. It can’t save files, but it uses Cocoa’s built-in text view so you can use fonts, colors (Shift-Command-C), international text, and spellchecking. It also supports drag-and-drop, text search (try Command-F), and many other features.
You can also create PDFs from the text and even print. Choose File → Print to bring up the standard print dialog, and click Preview to convert the text into a PDF as shown in Figure 1-16.
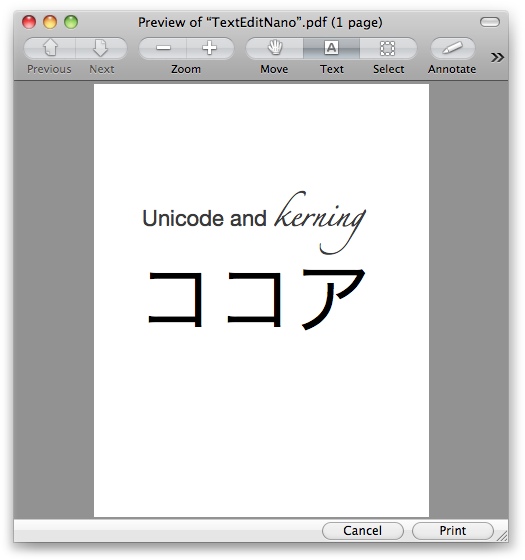
The document can use features like any other PDF, including text selection, searching, and annotation. Remember, this is your application that you just made from scratch.
Get Cocoa and Objective-C: Up and Running now with the O’Reilly learning platform.
O’Reilly members experience books, live events, courses curated by job role, and more from O’Reilly and nearly 200 top publishers.

