Assessing the Situation
Let's assume that the client wants to increase the size of an image to meet the billboard specifications. To start things off, calculate the final size of the printed creative and convert it into inches, since the specifications are typically supplied in feet, and Photoshop needs at the very least inches when typing in variables.
Now open the image to be scaled in Photoshop. Let's assume that the file is a typical CMYK file that is 8.5 x 11 inches at 300 dpi, which works out to be about 32 megabytes. Go into the Image Size dialog box in Photoshop (Image → Image Size), shown in Figure 7-3, and click off the Resample Image checkbox, change the resolution to 50 pixels per inch (assuming that the requirements are for a 50 dpi resolution at final size), and then let the document width and height adjust themselves to see what the size works out to be. In this case, the file will have a new height and width of 51 x 66 inches. This may still be a far cry from the 20 feet wide we'll need, but it will give us some indication of where we currently stand with the image.
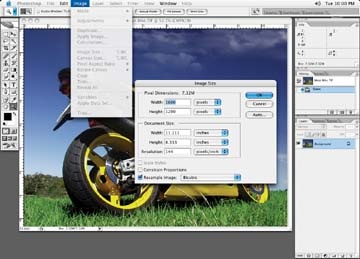
Figure 7-3. The Photoshop Image Size dialog box
Of course, the image's megabyte size doesn't change when you make these resolution changes in the Image Size dialog box—only the physical dimensions do. Once the image is sized in this manner, inform the client the status of the image and let them know just how ...
Get Commercial Photoshop Retouching: In the Studio now with the O’Reilly learning platform.
O’Reilly members experience books, live events, courses curated by job role, and more from O’Reilly and nearly 200 top publishers.

