This section will walk you through building your first iOS application using Adobe Flash Builder 4.5. If you don’t have Flash Builder 4.5, you can get a trial from Adobe at http://www.adobe.com/products/flashbuilder/.
Now that you have Flash Builder 4.5 installed, open it and let’s get started.
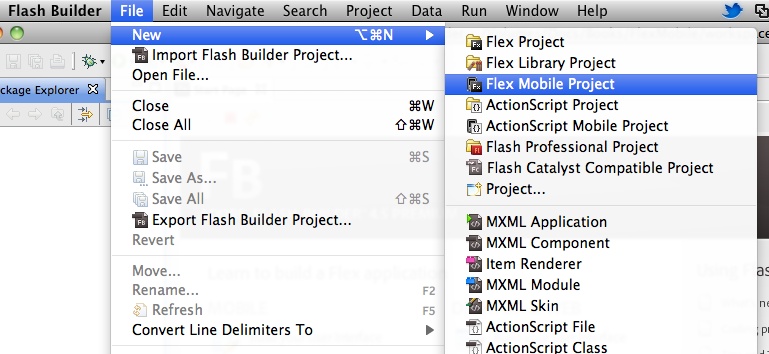
Create a new Flex Mobile Project by choosing File→New→Flex Mobile Project, as shown in Figure 1-1.
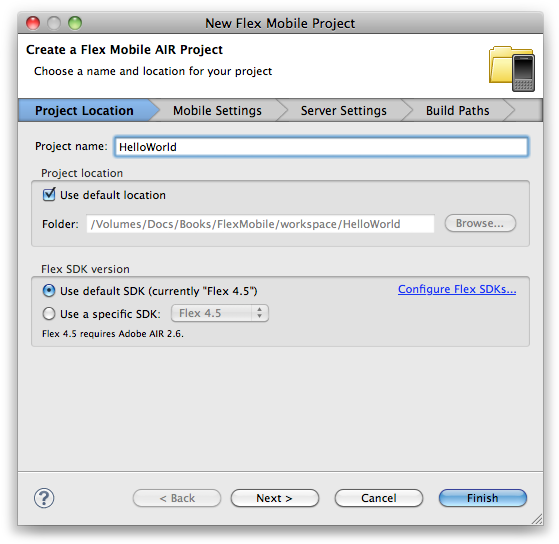
This will open the New Flex Mobile Project wizard, which will walk you through the rest of the project creation process. The first screen you will be presented with will allow you to set the project name, location, and Flex SDK. Enter the name HelloWorld as the Project name and leave the other settings to their defaults. Click Next, as shown in Figure 1-2.
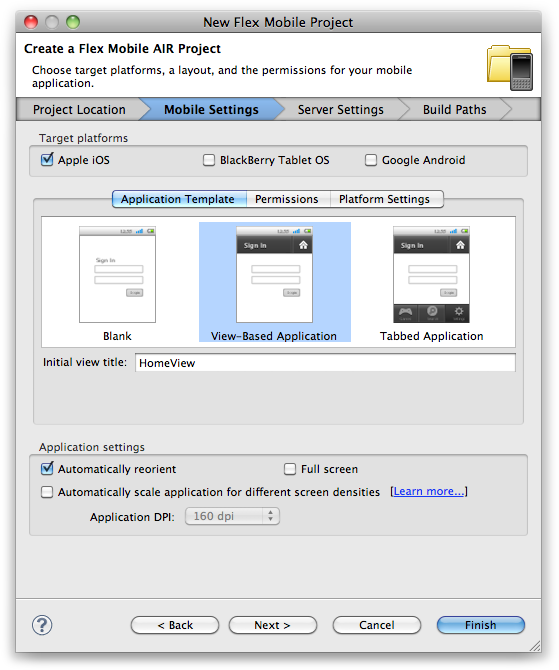
The second screen in the new project wizard is where you can select settings specific to the target platform. You will see the options for Apple iOS, BlackBerry Tablet OS, and Google Android. Please select Apple iOS. You also have the option of three different application types, which are Blank, View-Based Application, and Tabbed Application. For this first project, please select View-Based Application, as shown in Figure 1-3, and leave the other settings to their defaults.
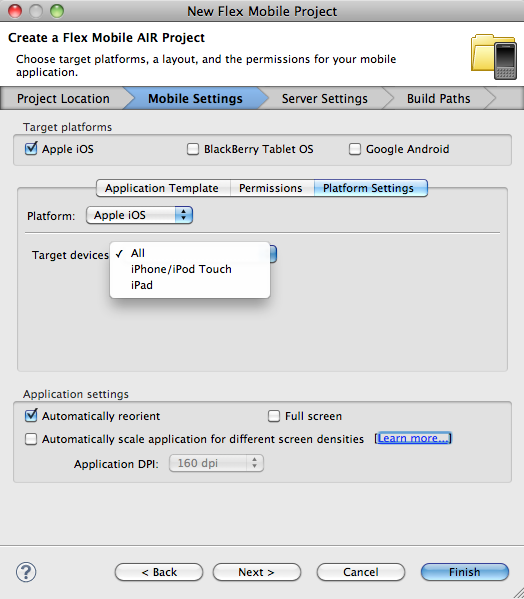
Next, click on the Platform settings tab. Within this tab, you will be able to select the iOS platform that your application will target. For the purposes of this exercise, leave the Target devices as All, as shown in Figure 1-4. Click Next.
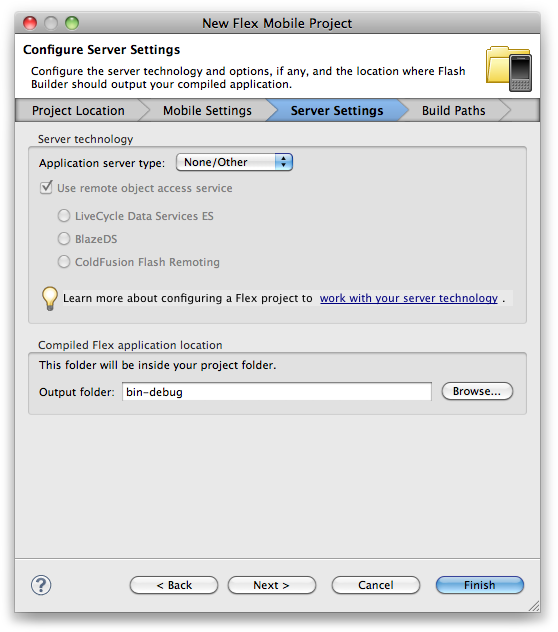
The next screen allows for the configuration of an application server and output folder. For this project we will not be using an application server, so leave it set to None/Other, and click Next as shown in Figure 1-5.
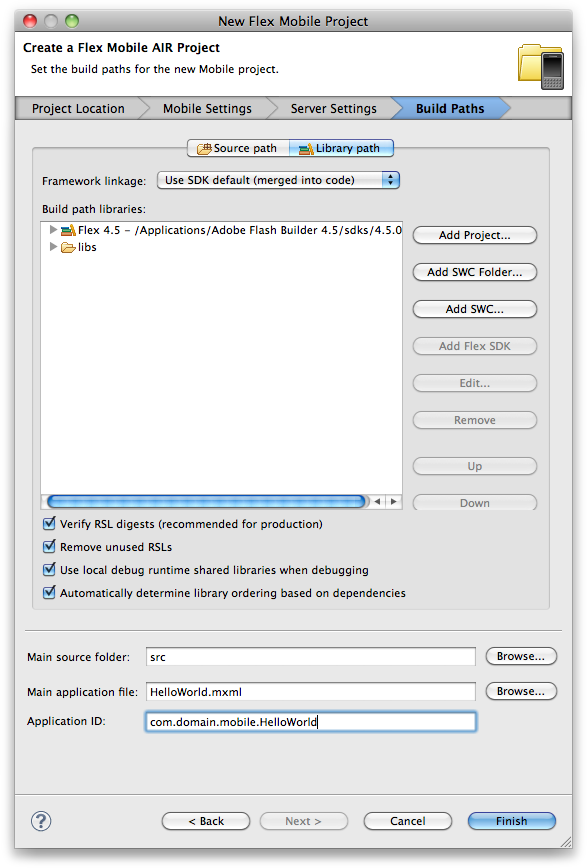
The last screen that you will see is the Build Paths screen where you will be able to set your Application ID. This setting is very important, as this will identify your application in the App Store. To ensure that your application has a unique identifier, the reverse domain naming convention works best. Figure 1-6 shows the value of com.domain.mobile.HelloWorld as the application ID. By replacing the word domain with a domain that you own, you can ensure that your application ID is unique. Complete this step and click Finish.
Flash Builder will now create your new project, and by default the HelloWorldHomeView.mxml will be created and opened in the workspace along with the HelloWorld.mxml main application file. This is shown in Figure 1-7.
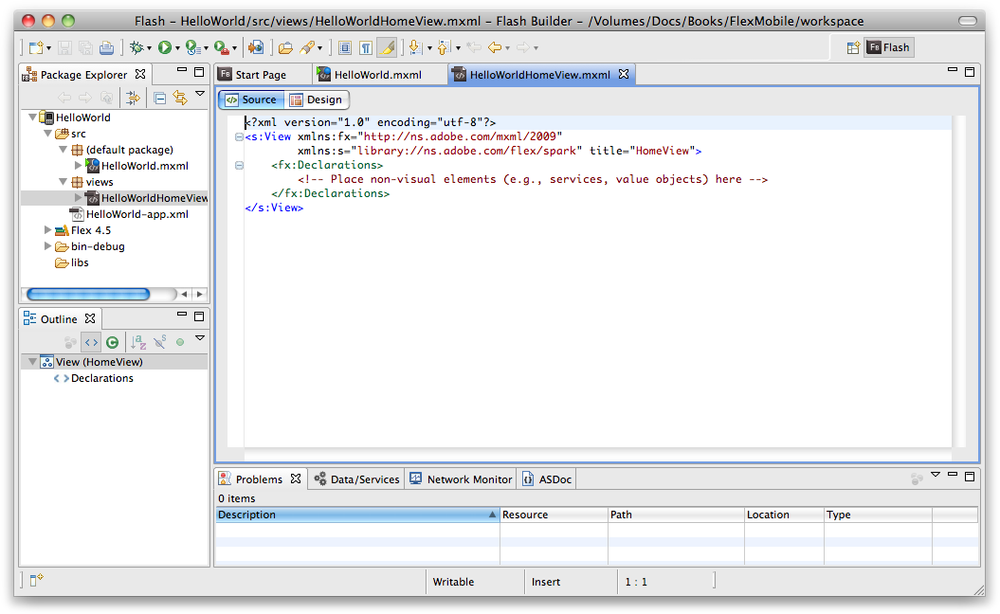
Let’s update the contents of the HelloWorldHomeView.mxml by adding a
Label:
<?xml version="1.0" encoding="utf-8"?>
<s:View xmlns:fx="http://ns.adobe.com/mxml/2009"
          xmlns:s="library://ns.adobe.com/flex/spark" title="HomeView">
    <fx:Declarations>
          <!-- Place non-visual elements (e.g., services, value objects) here -->
    </fx:Declarations>

    <s:Label text="Hello World" fontSize="24"
                horizontalCenter="0" verticalCenter="0"/>

</s:View>
Before running an application for the first time, you will need to set up either a simulator environment or a device for your testing.
You can test some basic functionality of your application within Flash Builder using the adl simulator—however, for full testing and packaging of your iOS application, you will need to purchase an Apple developer certificate and an Apple device. In this example, I will be using an iPod touch running the latest iOS operating system.
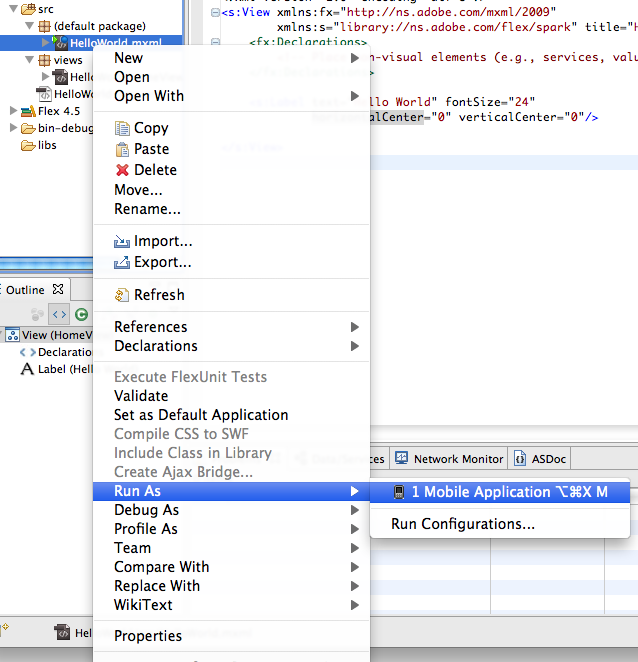
To test with adl, simply click on the play button and choose Run As Mobile Application, as shown in Figure 1-8. Next, select Apple iOS as the target platform; and On desktop and Apple iPhone 3GS as the Launch Method, as shown in Figure 1-9. Now click Run and you will see the application running within adl, as shown in Figure 1-10.
To test on an iOS device, you will first need to purchase a developer certificate from Apple for $99 by visiting https://developer.apple.com.
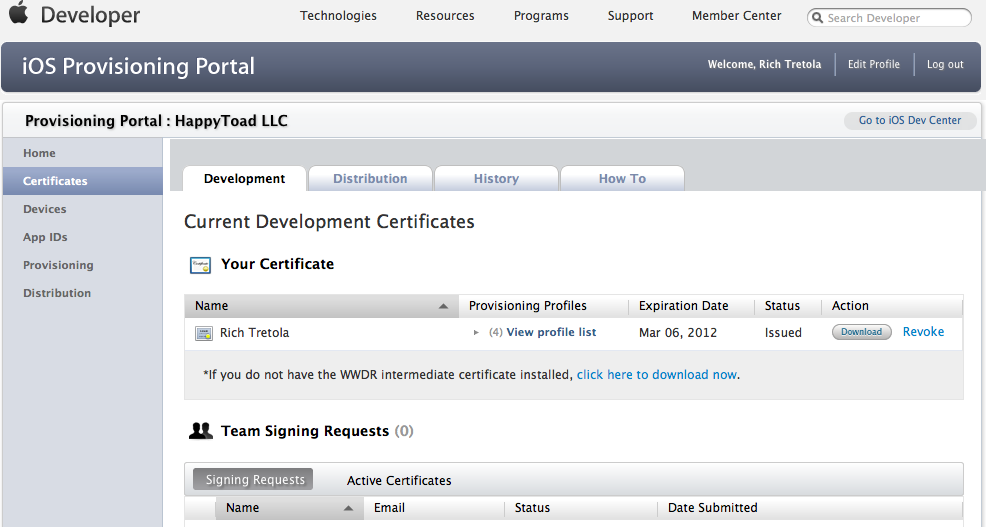
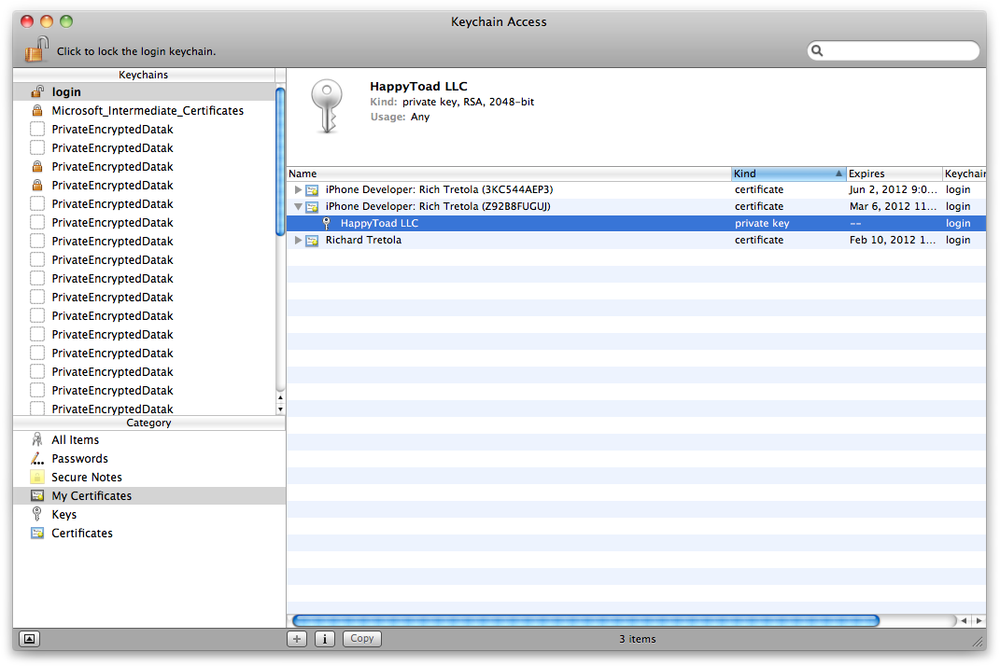
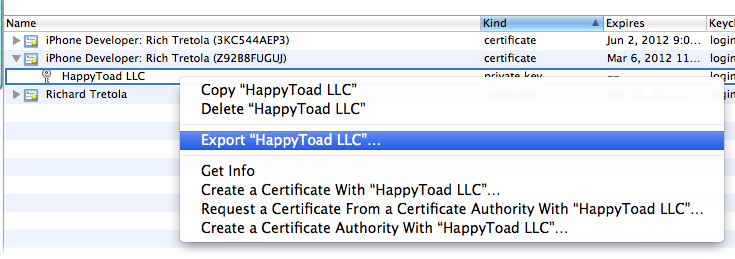
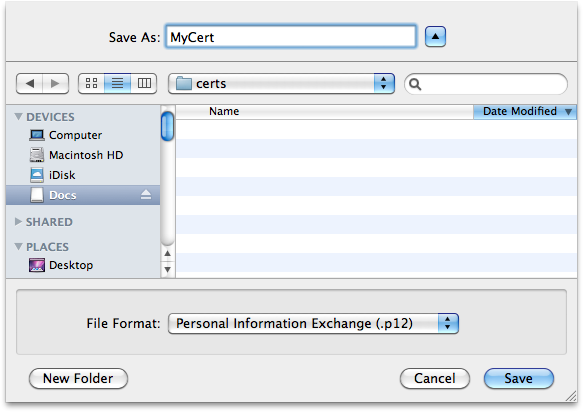
Once you have your certificate, you can download the developer_identity.cer file from the iOS Provisioning Portal, as shown in Figure 1-11, and import it. On OSX, you can import into Keychain Access application by double clicking on the developer_identity.cer as shown in Figure 1-12. Now, simply right-click on the private key within Keychain Access and export the certificate as a .p12, as shown in Figures 1-13 and 1-14.
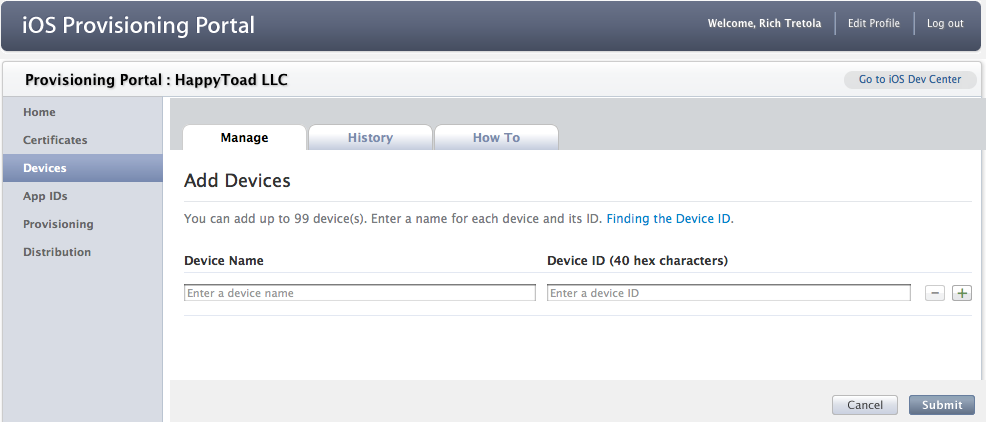
You will also need to have a device registered with Apple. You can add a device by registering it within the Devices section of the iOS Provisioning Portal, as shown in Figure 1-15.
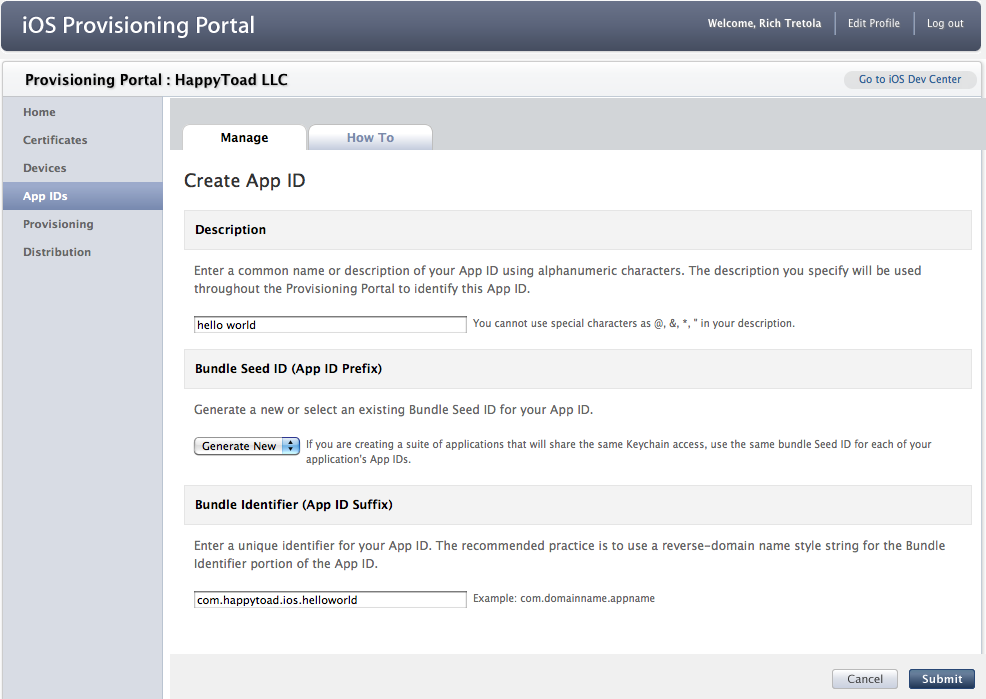
Now that you have a device added, you will need to create a new App ID within the App IDs area of the iOS Provisioning Portal. Click on the App IDs menu on the left side of the iOS Provisioning Portal, and then click on the New App ID button and complete the form, as shown in Figure 1-16.
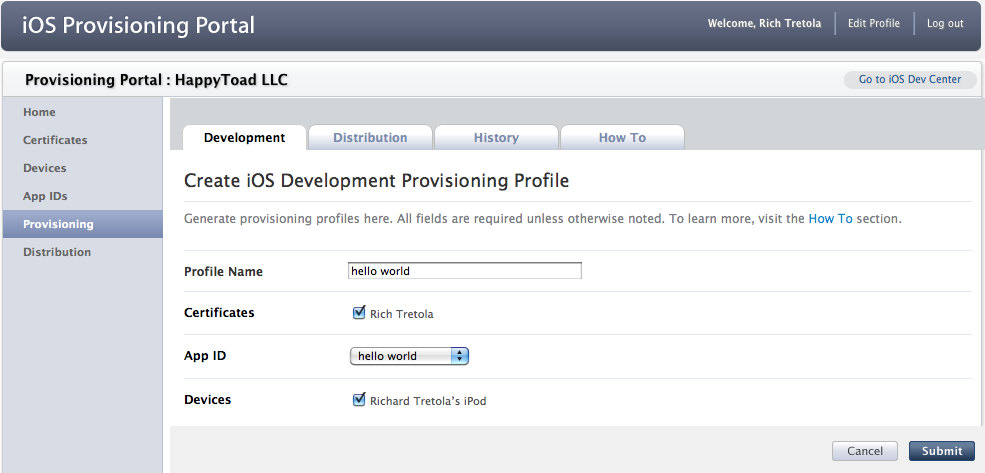
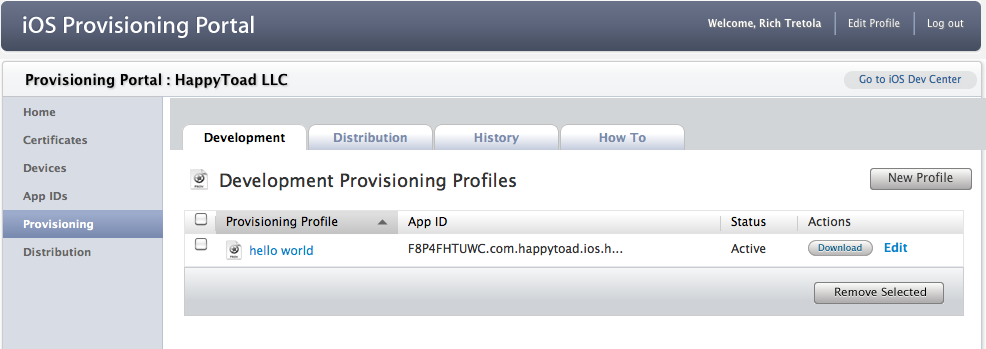
To create a provisioning certificate, click on the Provisioning link on the left side of the iOS Provisioning Portal and then click on the New Profile button. Complete the form and click the Submit button, as shown in Figure 1-17. Next, download the newly created certificate as shown in Figure 1-18 (note that you may need to refresh your browser to get the download button enabled).
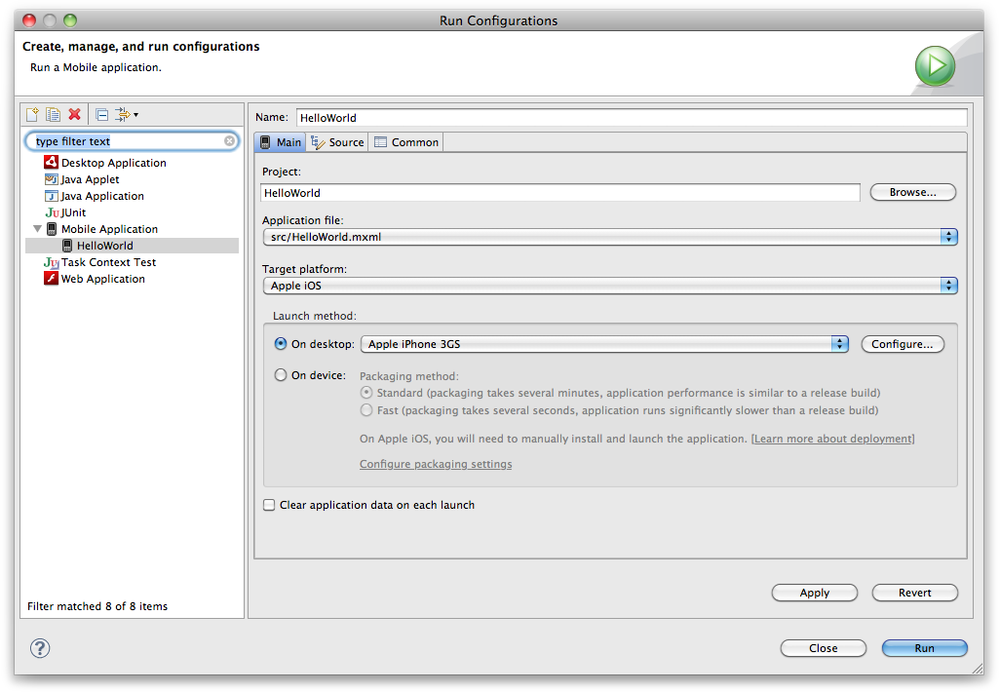
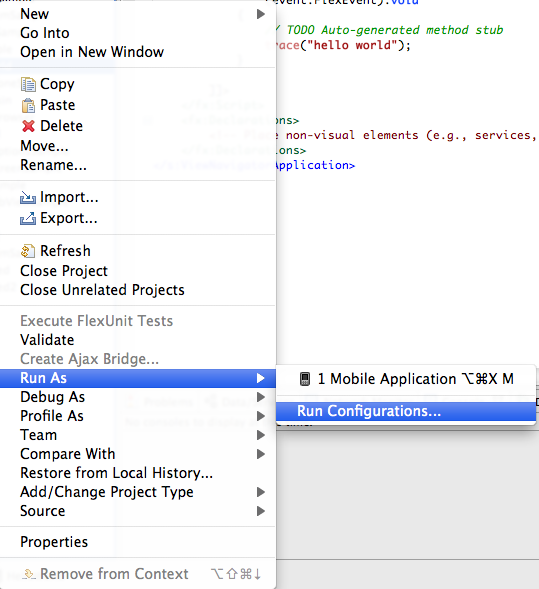
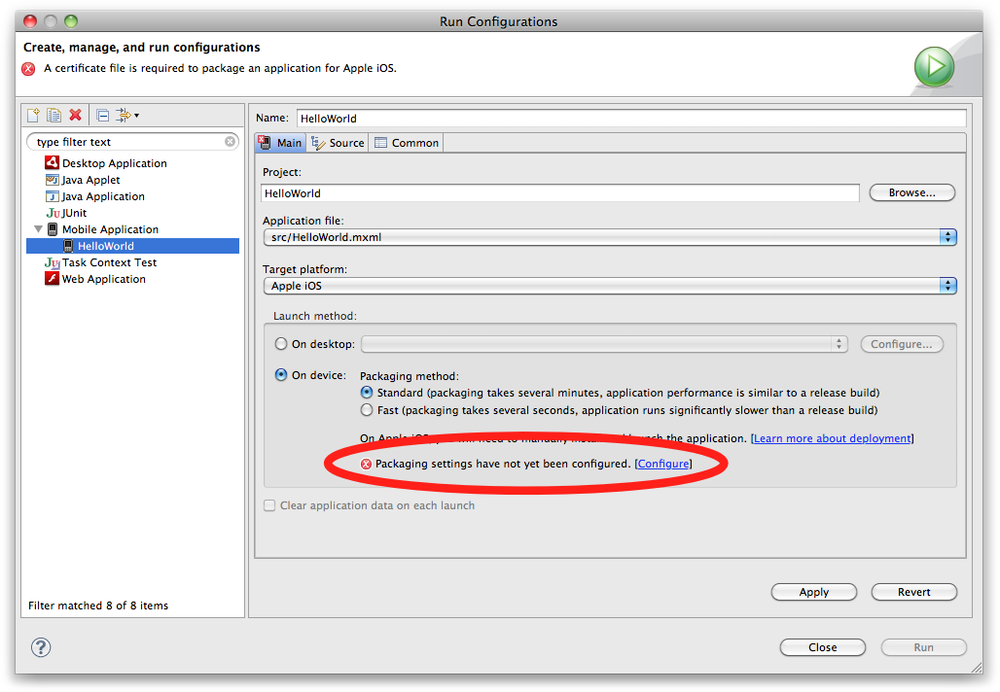
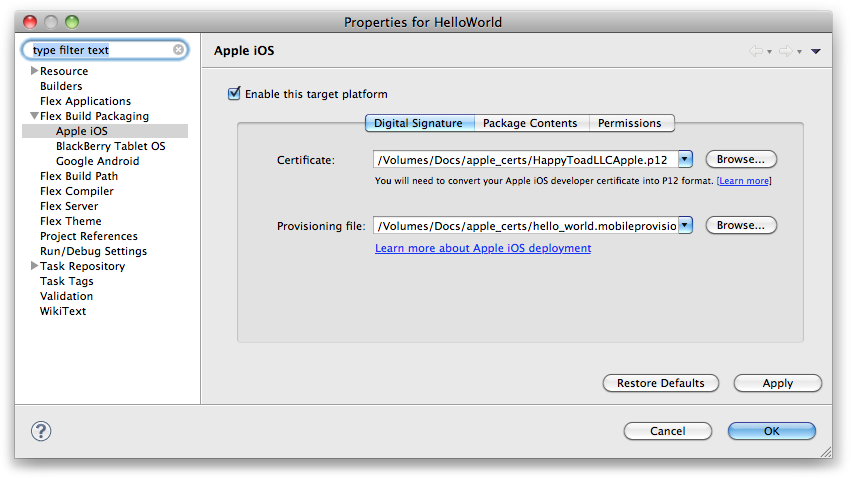
If you have completed the steps to create a certificate and provisioning certificate, you can now test your application on an iOS device. To do this, right-click on your project name and choose Run As→Run Configurations to open the configuration dialog box, as shown in Figure 1-19. Once the dialog box opens, set the Target Platform as Apple iOS and choose “On device” as the Launch method. You will now need to configure the package settings by clicking on the Configure link, as shown in Figure 1-20, and selecting your p12 certificate file and mobileprovisioning files, as shown in Figure 1-21.
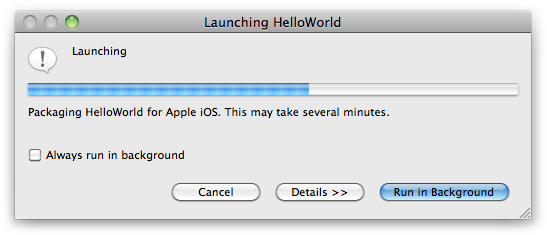
Now that you have your certificates defined, you can click the Run button, which will compile your application to an .ipa file for installation on an iOS device.
Note
Adobe has provided two options for your testing. You can either choose Standard or Fast as your Packaging method.
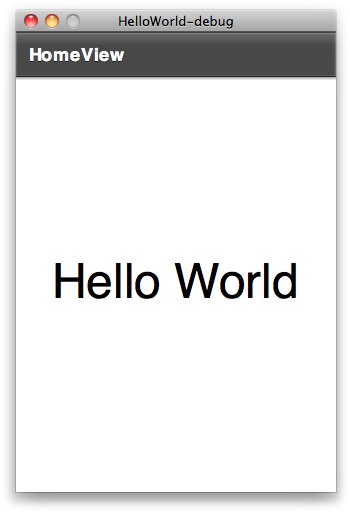
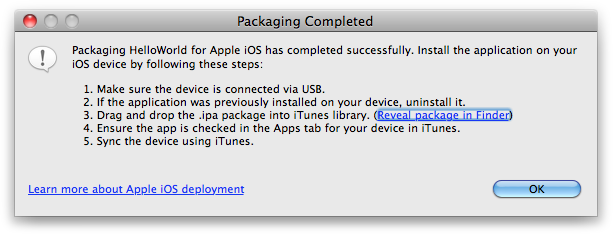
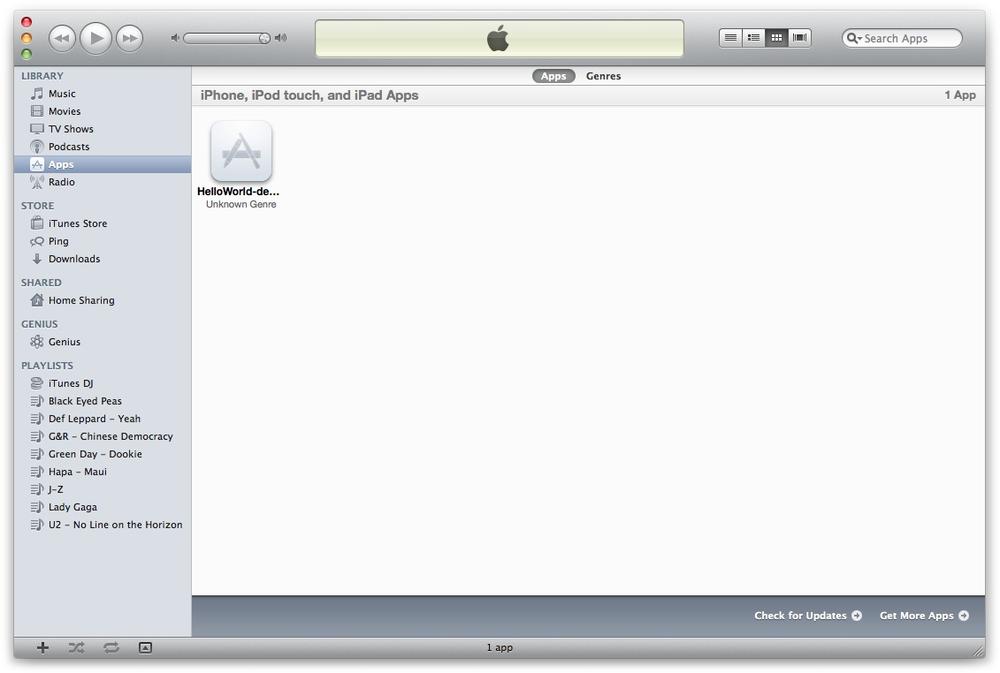
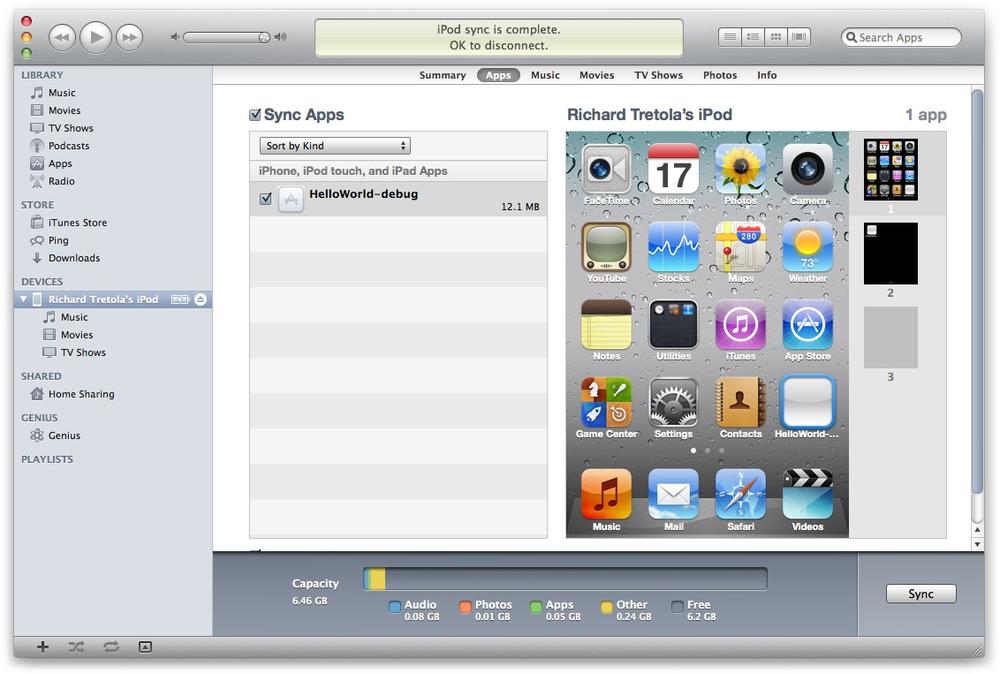
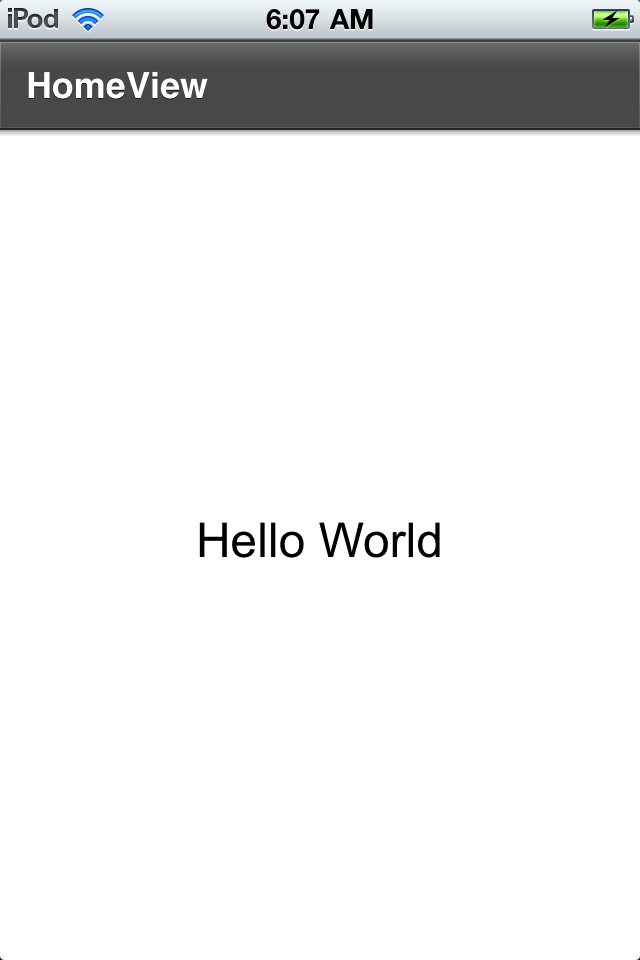
Figure 1-22 shows the application being compiled. Once the compile has completed, click on the link shown in Figure 1-23 to show the new compiled file and then click on that file to load the application via iTunes. Figure 1-24 shows the HelloWorld-debug application loaded into iTunes, and Figure 1-25 shows HelloWorld-debug installed on an iPod. Figure 1-26 shows the application running on an iPod.
Now that you have created your Hello World application and run it via the Run Configurations window, you may wish to debug your application. Fortunately for you, the workflow for debugging a Flex Mobile application is the same as debugging any other Adobe Flex or Adobe AIR application.
Update the HelloWorld.mxml file to include a creationComplete handler as shown below:
<?xml version="1.0" encoding="utf-8"?>
<s:ViewNavigatorApplication xmlns:fx="http://ns.adobe.com/mxml/2009"
xmlns:s="library://ns.adobe.com/flex/spark"
firstView="views.HelloWorldHomeView"
creationComplete="viewnavigatorapplication1_creationCompleteHandler(event)">
<fx:Script>
<![CDATA[
import mx.events.FlexEvent;
protected function viewnavigatorapplication1_creationCompleteHandler(event:FlexEvent):void
{
// TODO Auto-generated method stub
trace("hello world");
}
]]>
</fx:Script>
<fx:Declarations>
<!-- Place non-visual elements (e.g., services, value objects) here -->
</fx:Declarations>
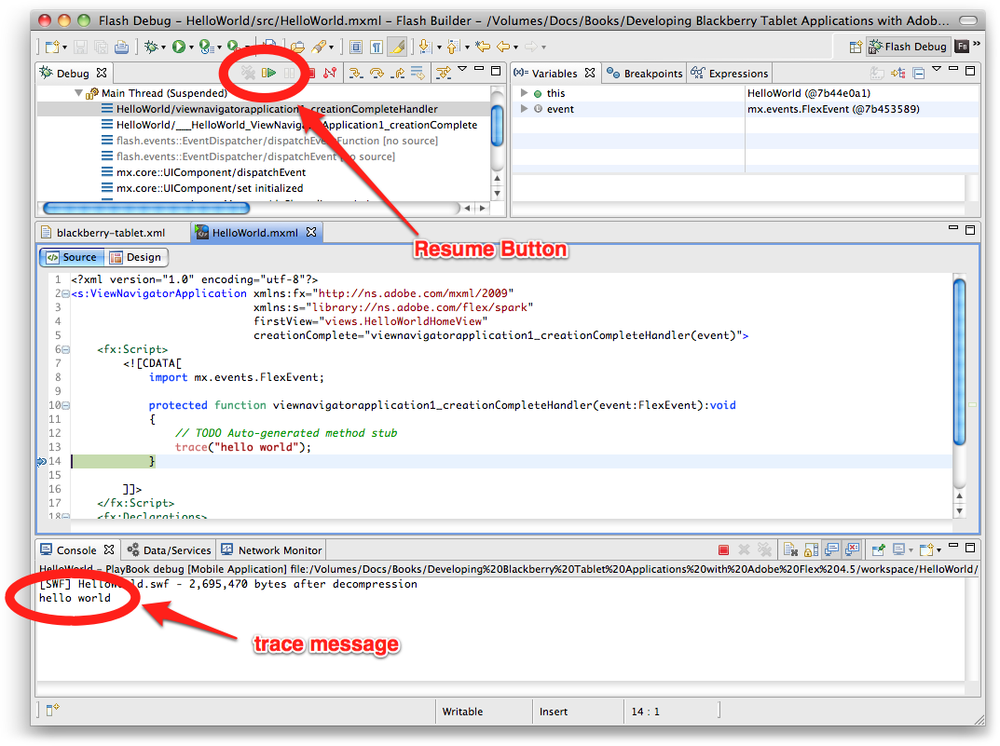
</s:ViewNavigatorApplication>We will now need to toggle a breakpoint within the application on line 14 to demonstrate a debugging session. To do this, right-click on line 14 within Flash Builder and select Toggle Breakpoint from the context menu. Figure 1-27 shows this process. A small blue dot will appear in the gutter, showing the breakpoint is enabled.

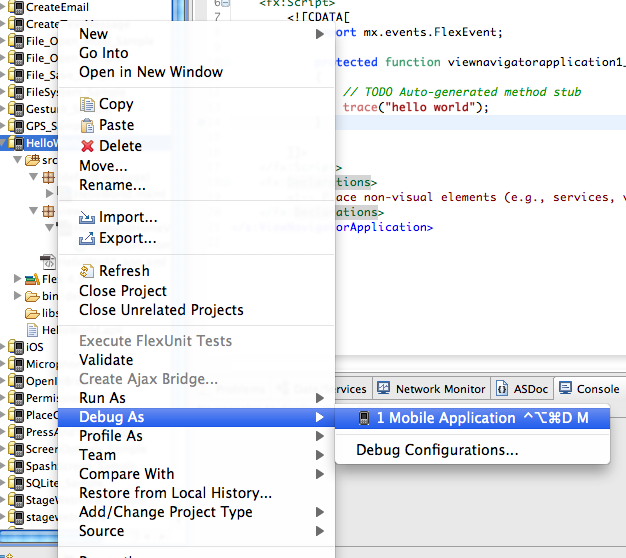
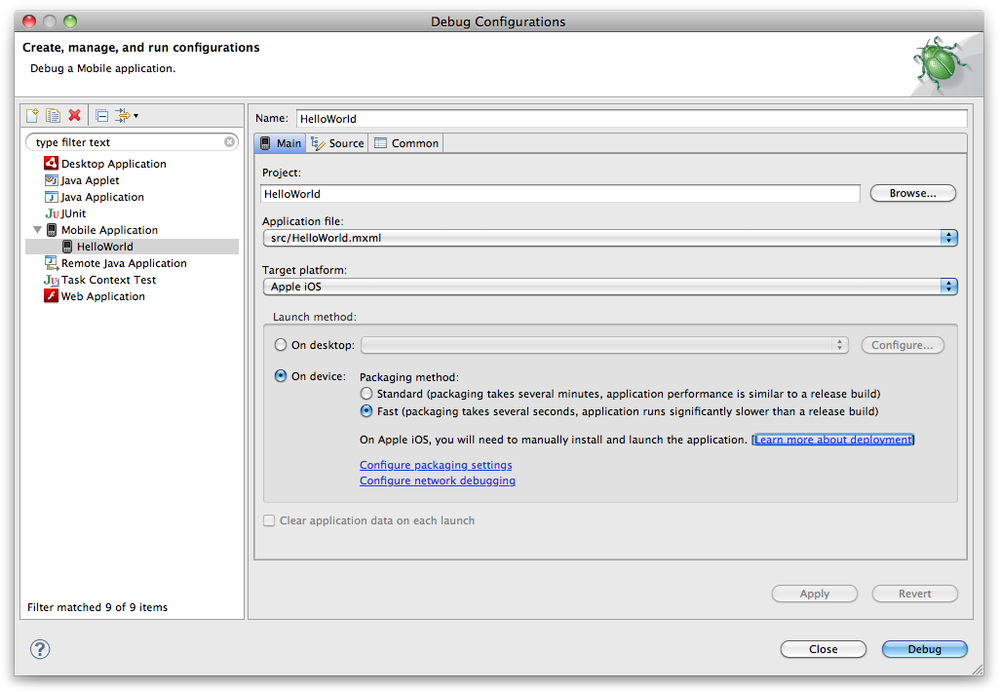
We are now ready to debug this application. To do this, right-click on the HelloWorld.mxml file within the Package Explorer and select Debug As→Mobile Application, as shown in Figure 1-28. Since this is the first time debugging this application, the Debug Configurations window will open. To debug this using the Flash builder emulator, select “On device” as the Launch method and select a device from the dropdown menu, as shown in Figure 1-29.
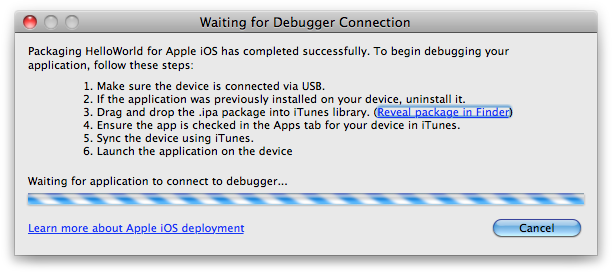
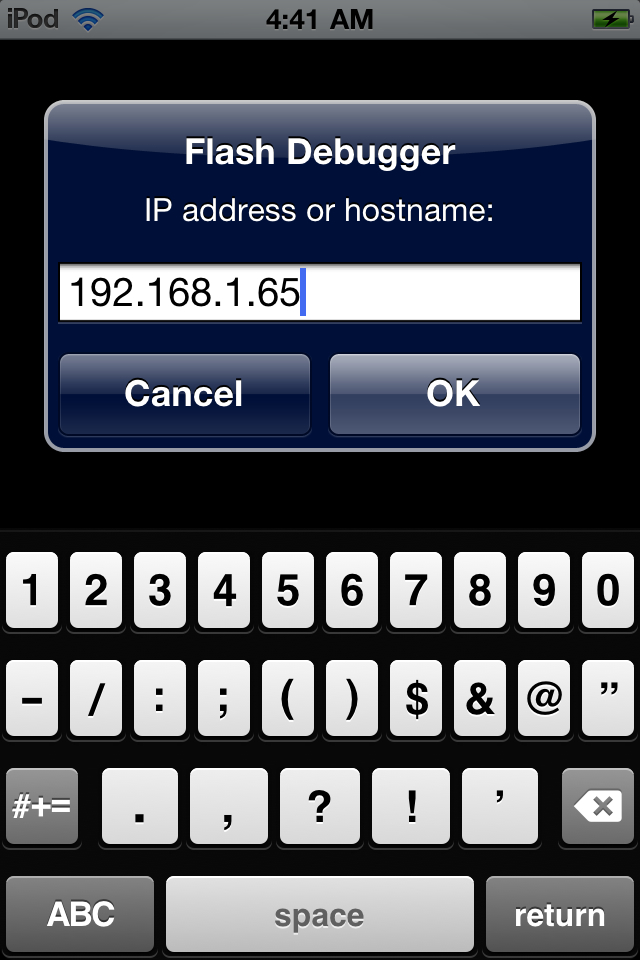
Just as before when you ran your application, your application will compile to an .ipa file, which you will need to load to your device via iTunes. Flash Builder will wait while you load the application on the device. Once you have loaded the application and launched it, you will need to enter the IP address of your host machine where Flash Builder is running. See Figures 1-30 and 1-31. Once the application is running, Flash Builder will ask you to switch to the debug perspective.
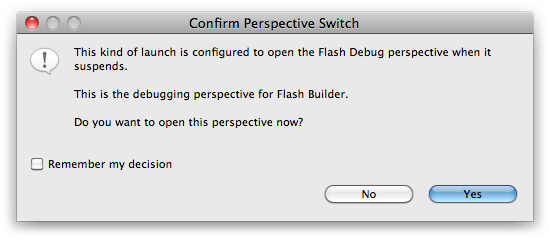
When asked if you would like to switch to the Flash Builder debug perspective, select “Yes” (see Figure 1-32.) Figure 1-33 shows the application paused on line 14 within Flash Builder’s debug perspective. You can see the trace message within the console panel. To allow the application to complete, click the Resume button.
Congratulations, you have just completed your first Flash Builder debug session for an iOS Flex Mobile application.
Get Developing iOS Applications with Flex 4.5 now with the O’Reilly learning platform.
O’Reilly members experience books, live events, courses curated by job role, and more from O’Reilly and nearly 200 top publishers.

