Netduino is an electronics platform. Using Netduino, hobbyists and programmers can create electronics projects (and electronics-based art projects) with ease. Several Netduino boards are available, which I explore in detail later in this chapter.
Netduino apps use the .NET Micro Framework. This programming framework from Microsoft is easy to get started with; for beginners, writing .NET code is as easy as creating simple JavaScript animations for a web page. And for the millions of programmers who already write .NET code, the .NET Micro Framework provides an incredibly powerful set of features (such as events, threading, and line-by-line debugging).
Traditional microcontroller code consists of a fixed loop where code checks conditions and performs actions based on those conditions. In contrast, the .NET Micro Framework empowers you to break your app’s tasks into simpler routines. You can execute those routines after a certain amount of time or in response to hardware actions. You can even multitask! These features let you build very sophisticated apps using easy-to-understand code.
Microsoft provides free software tools to create Netduino apps. All you need to get started is a Netduino, a computer, and your imagination. As you progress through the projects in this book, I’ll introduce expansion shields and electrical components that you can add to your Netduino to create larger projects.
Tip
If you use a Mac or a Linux computer, the Mono project provides an alternative set of .NET programming tools. While the examples in this book use Microsoft’s Visual Studio Express tools, Appendix B explains how you can program a Netduino using Mono on a Mac or Linux computer.
Finally, the Netduino community is made up of tens of thousands of tinkerers, many of whom share their projects and help each other out on the Netduino community forums (http://forums.netduino.com).
As you get started with Netduino, I invite you to join this growing community.
Tip
Netduino is also open source. This means that the source code for the Netduino firmware is provided (Apache 2.0 and BSD open source licenses). The hardware design files—including schematics and engineering layout files—are also provided (Creative Commons-Attribution license). Many engineers will prototype new electronics products using Netduino—and then create custom hardware designs based on these open source files. And many software programmers will add to the source code to create new features for Netduino—and then share those enhancements with friends.
The Netduino family consists of three electronics boards: Netduino, Netduino Plus, and Netduino Mini.
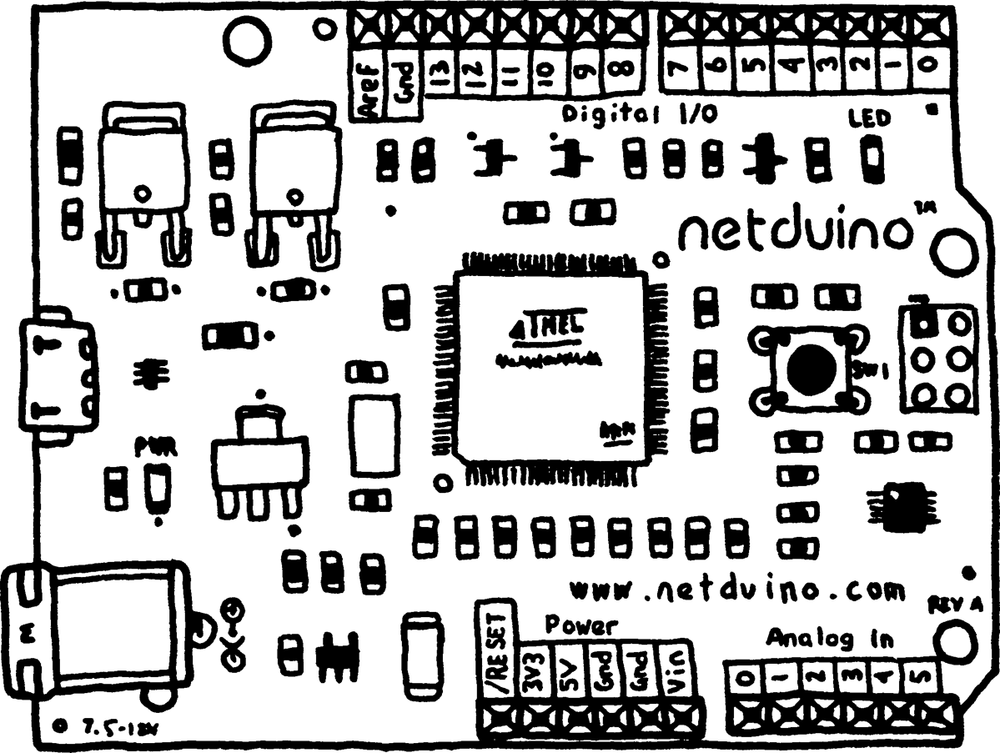
Netduino (shown in Figure 1-1) is the entry-level board in the Netduino family.
The Netduino board is made up of several electronic components and connectors, most notably:
- Atmel ARM microcontroller
This is the main processor, and it contains the code storage space and RAM used by your Netduino app. The microcontroller’s pins are wired to the blue pin headers, enabling your Netduino app to connect to external components and expansion shields.
- 6 Analog Input headers
You can plug sensors into these headers (light, temperature, motion, pressure, etc.).
Analog Input headers can also operate in digital I/O mode (explained next).
- 14 Digital Input/Output headers
You can plug on/off inputs into these headers (switches, pushbuttons, on/off sensors).
You can plug on/off outputs into these headers (LEDs, relay switches, etc.).
Several Digital I/O headers can communicate using standard communication protocols: I2C, SPI, UART (serial).
Some Digital I/O headers can pulse electricity to change the speed of motors, control the intensity of LEDs, and more.
- Pushbutton
By default, the pushbutton resets the Netduino and restarts your Netduino app. This can be useful to restart the sequence of actions taken by your app.
Alternatively, the pushbutton can be used as an input: when pressed, your app can then take various actions.
Finally, holding down the pushbutton while powering up your Netduino will temporarily put the microcontroller into programming mode (for firmware updates).
- Power and user LEDs
The white power LED is illuminated while the Netduino is powered.
The blue user LED turns on briefly when the Netduino is first powered and then shuts off to let you know that the board has booted. You can turn this LED on and off in your Netduino app.
- Power barrel jack
The Netduino may be powered by an AC-to-DC power adapter with a standard 5.5mm (outer)/2.1mm (inner) plug. Allowable voltages are from 7.5V to 12V, and the plug polarity must be center pole positive.
To help protect you in case you accidentally connect a “center negative”adapter instead of a “center positive” adapter, the board has an integrated reverse voltage protection fuse. This fuse will auto-reset once it cools down.
- Power regulation circuitry
Onboard power regulators convert incoming higher voltage into the 3.3V needed by the microcontroller. They also provide power to the 5V and 3.3V pin headers, for use by external components and expansion shields.
- MicroUSB port
The MicroUSB port connects the Netduino to your computer’s USB port.
You can also power the Netduino from your computer (or USB power supply) over the MicroUSB port.
By default, the MicroUSB connection is used to deploy apps to your Netduino and to interactively debug those apps.
Alternatively, the MicroUSB connection can be used to turn your Netduino into a USB device (keyboard, mouse, bi-directional communication device, etc.).
- Erase pad
The erase pad is a small gold square located directly underneath digital pin 0.
By connecting a wire between the 3.3V header and the erase pad, you will erase your Netduino completely. Netduino is designed to be hacker-friendly and the erase pad lets you start over from scratch or repurpose your Netduino as an ARM microcontroller development board.
By erasing your Netduino, you can install alternative operating systems, write native C++ code on your Netduino, flash the Netduino firmware from scratch, and so forth.
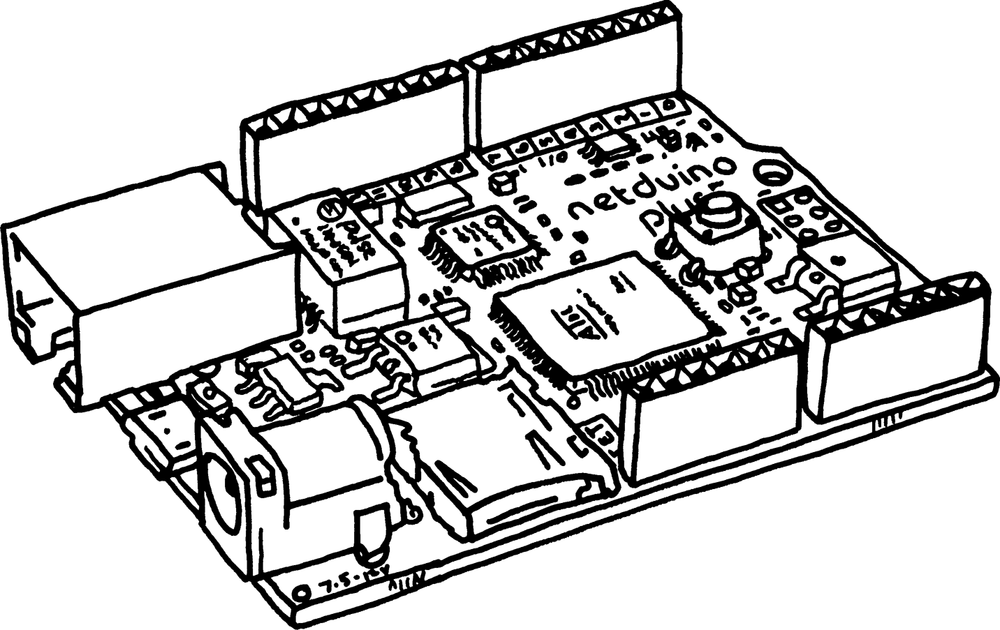
Netduino Plus (see Figure 1-2) is an enhanced version of the Netduino, adding storage and networking features.
The Netduino Plus board adds the following components:
- Ethernet jack
The Ethernet jack allows your Netduino Plus to connect to the Internet through a network router.
After connecting your Netduino Plus to the Internet, you can post sensor data to Twitter, interact with a mobile phone app, communicate with far-away Netduinos, etc.
- MicroSD slot
The MicroSD slot lets you add persistent storage to your Netduino app. You can log environmental data, store web pages (to serve to the Internet), and much more.
Advanced users can store compiled code on MicroSD cards, for execution by the Netduino Plus or a Netduino with an add-on card reader.
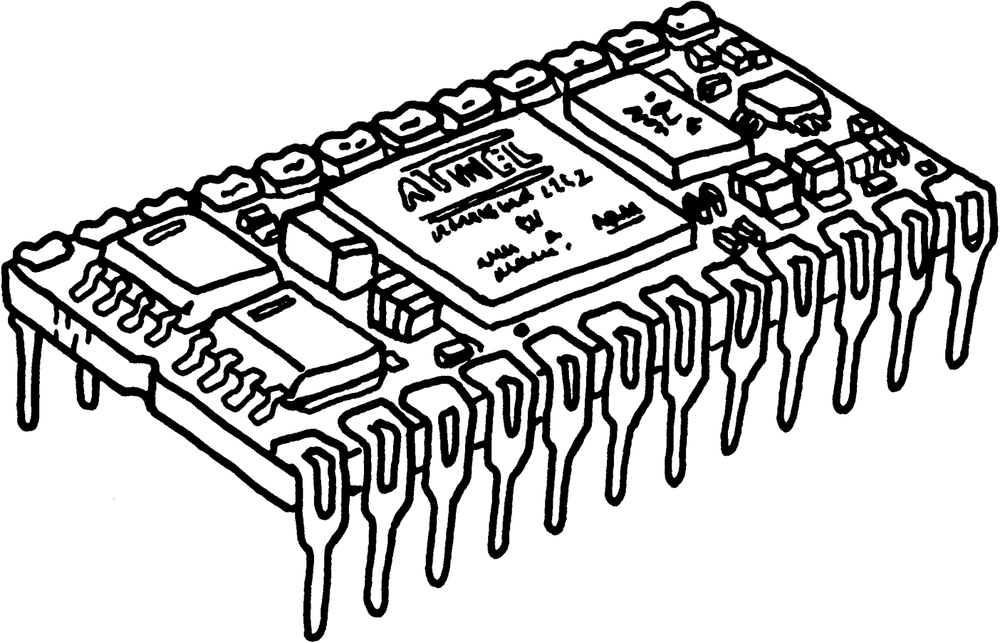
Netduino Mini (Figure 1-3) is basically a tiny, scaled down, breadboard-friendly version of the Netduino:
Netduino Mini is 0.72 square inches (4.65 cm2) small.
Netduino Mini has four analog pins instead of six, and has two fewer digital pins than Netduino.
Netduino Mini is designed for industrial temperature ranges (-40 to 185F, -40 to 85C).
Netduino Mini is programmed via a serial cable (RS232 or TTL) instead of via USB.
Get Getting Started with Netduino now with the O’Reilly learning platform.
O’Reilly members experience books, live events, courses curated by job role, and more from O’Reilly and nearly 200 top publishers.


