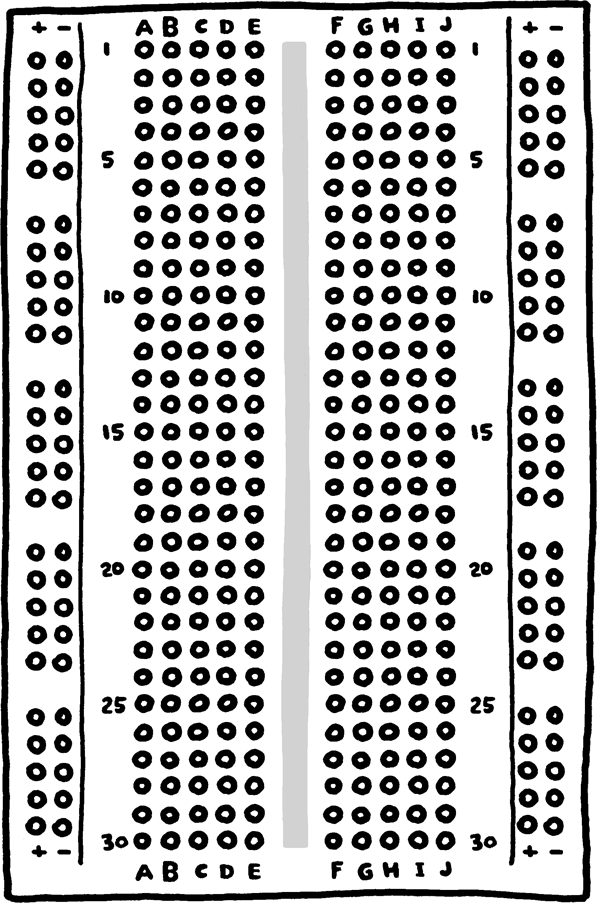
Another way to connect components to your Netduino is by using a breadboard or by plugging components directly into the Netduino’s digital and analog pins.
If you’re new to electronics, the first thing you need to know is that a breadboard, shown in Figure 4-5, has nothing to do with cutting bread. Rather, a breadboard is a nifty piece of plastic with columns and rows of holes in it. Internally, each hole is electrically connected to all the other holes in its row. This way when you push wires or legs of components into these holes, they’re automatically connected to their adjacent partners.
Note
OK, maybe a breadboard has a little to do with cutting bread. The breadboard gets its name from the wooden breadboards that, at one time, radio makers would nail components and connectors to.
Breadboards provide a good way to quickly prototype circuits without needing to solder or make circuit boards. If you decide to make your prototyped project more permanent, you can easily pick up a prototyping PCB (a kind of “permanent breadboard”) and solder each component into it instead.
If you’re just plugging a component or two into your Netduino to test it, you can poke that component’s leads directly into the digital or analog pin header holes on the Netduino itself.
You can use a number of electronic components in your projects, such as switches, LEDs, and motors. And often these components need a little help from other components like resistors and capacitors (see Figure 4-6).
Get Getting Started with Netduino now with the O’Reilly learning platform.
O’Reilly members experience books, live events, courses curated by job role, and more from O’Reilly and nearly 200 top publishers.


