May 2012
Beginner
88 pages
2h 4m
English
In the world of programming, “Hello World” is the traditional first program that anyone writes when learning a new programming language. In the case of Gadgeteer, where we are concerned with hardware, we will make our first program turn an LED on and off when we press a button.
Start Visual Studio by launching the “Microsoft Visual C# 2010 Express” shortcut in your Start menu, which will be found inside All Programs→Microsoft Visual C# 2010 Express.
When Visual Studio has started up, you will see a welcome screen with the options “New Project…” and “Open Project…”. Select New Project; the new project screen will appear as shown in Figure 1-14.
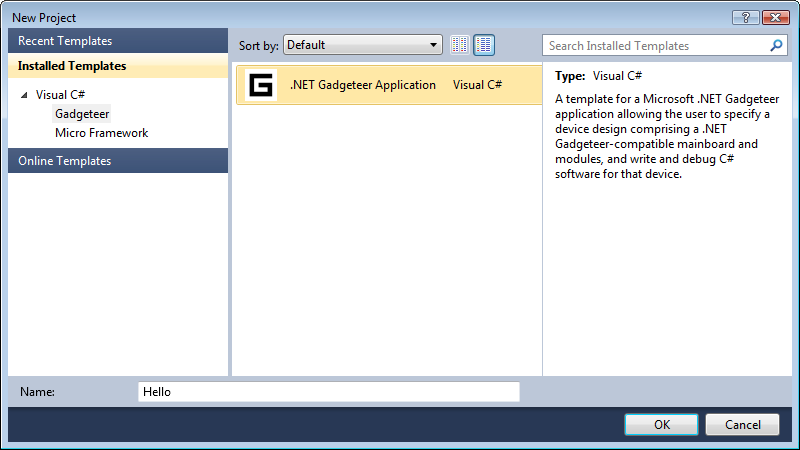
Figure 1-14. Visual Studio New Project Screen
On the left-hand side, you will see a folding tree view where you can select the type of project that you want to create. Visual Studio is a general purpose integrated development platform, so we have to specify that we want a Gadgeteer project by selecting the Gadgeteer option within Visual C#.
We also need to provide the project with a name, which is done at the bottom of the window. We can just call the project “Hello”. When you have done this, click OK, and Visual Studio will construct the basic framework of a new project for us. When it has finished, Visual Studio will look something like Figure 1-15.
Figure 1-15. A New Project
This view of Visual ...
Read now
Unlock full access


