Chapter 4. Storage: Cloud Storage
Google Cloud Storage provides the ability to store binary large objects (a.k.a. BLOBs) in the cloud. You can read or write BLOBs from anywhere on the Internet, subject to access control that you can define, including from any Compute Engine instance, no matter which zone it is in. Your BLOBs are also stored in a durable, available, and secure way, and are served by a massively scalable distributed infrastructure.
This makes Cloud Storage ideal for two key scenarios:
-
Storing and retrieving unstructured data from any Compute Engine instance in any zone
-
Storing and retrieving unstructured data from both inside and outside Compute Engine (e.g., for sharing data with your customers)
A particularly important special case of the second scenario is importing or exporting large quantities of data into and out of Google’s Cloud Platform.
Note
It is important to understand the difference between durability and availability when it comes to storage. Roughly speaking, durability is defined by the probability that an object will not be permanently and irrevocably lost, whereas availability is defined by the probability that an object can be retrieved at a particular point in time. Cloud Storage provides a service-level agreement (SLA) that clearly specifies what level of availability the customer should expect and what sort of compensation the customer will receive if that SLA is not met. Cloud Storage offers multiple classes of storage, at different prices, with different SLAs. However, in all the current offerings, the data is stored in a highly durable way, which means that even if you can’t access your data right now, it is not lost forever. It will become available again at some point in the (not too distant) future. Google does not provide an estimate of durability. In practice, with multiple copies of your data stored in multiple data centers, the probability of losing every copy of your data is extremely low, making the theoretical durability incredibly high.
Understanding BLOB Storage
BLOB has become a common industry term for a file of any type. While formats such as ASCII or Unicode are not generally considered binary files, they are made up of ones and zeros just like JPEG images, MPEG movies, Linux-executable files, or any other type of file. Cloud Storage is considered a BLOB Storage system because it treats all files as unstructured binary data.
Similarly, there’s no particular reason why a BLOB needs to be particularly large. Cloud Storage is perfectly happy to store an object that has zero bytes of content. BLOBs in Cloud Storage can be up to 5 TB in size.
At this point, you might be saying to yourself, “A BLOB sounds a whole lot like a file to me.” And you would be exactly correct. However, one reason the industry has taken to referring to this style of storage as a “BLOB store” instead of “filesystem,” and thus calling the contents “BLOBs” or “objects” instead of “files” is because the word “filesystem” implies a great deal of functionality that so-called “BLOB stores” typically do not provide. Not providing certain filesystem features offers some useful scalability tradeoffs. After we’ve taken a tour of Cloud Storage, we’ll return to this topic and examine it in more detail; but for now, just keep in mind that while Cloud Storage may look and feel a whole lot like a filesystem, particularly when viewed through the lens of some higher-level tools (e.g., gsutil, Cloud Console), in the end, it’s not a traditional filesystem, and if you expect it to behave exactly like the filesystems you are accustomed to, you may get some surprises. For example, Cloud Storage does not have directories, in the traditional sense.
Getting Started
Go to http://cloud.google.com/console and select the project you created in the “Creating a Compute Engine Project” section in Chapter 1. In the lefthand navigation bar, click Storage > Cloud Storage > Storage browser. Assuming you have not used this project to access Cloud Storage before, you should see a welcome message, as shown in Figure 4-1.
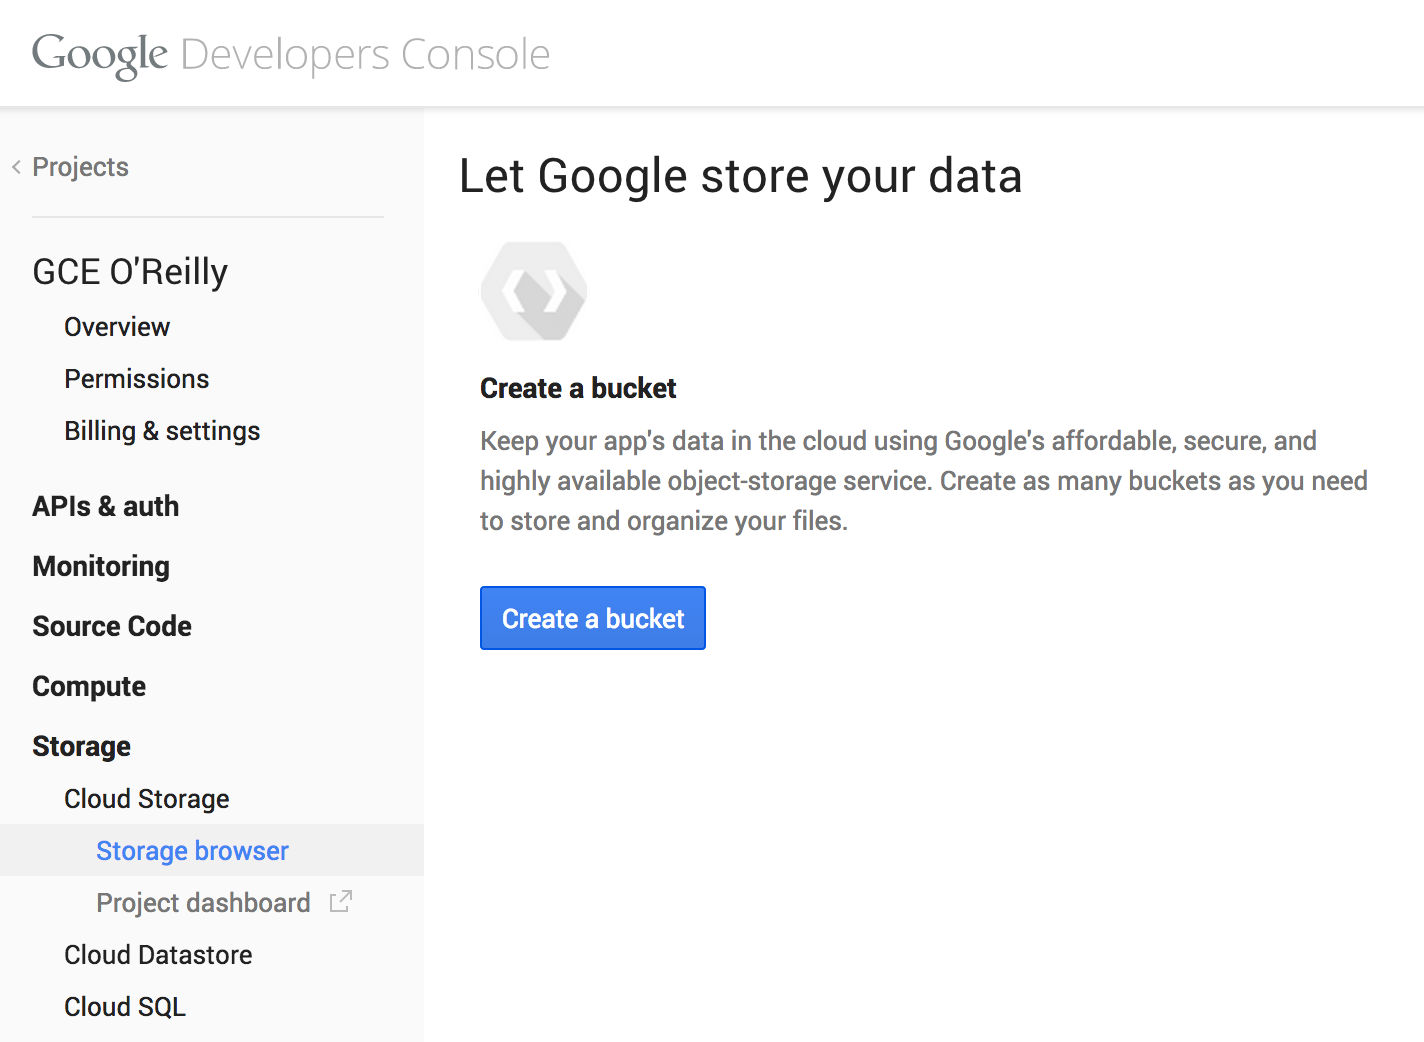
Figure 4-1. Cloud Storage welcome screen
Note
If you have not yet completed the steps from the “Creating a Compute Engine Project” in Chapter 1, you may be prompted to enter billing information.
As the UI suggests, your first act should be to create a new bucket. A bucket is a container for objects. Press the “Create a bucket” button, and enter a name for your new bucket. Normally, bucket names may contain only lowercase letters, dashes, and underscores. Also, bucket names must be globally unique across the entire Cloud Storage service, so if you choose something obvious, like “test,” there’s a good chance you’ll get an error, because someone else already created a bucket with that name.
Note
As mentioned earlier, Cloud Storage does not support the concept of directories in the traditional sense. While a bucket is a container for objects, similar to how a directory is a container for files, you cannot nest buckets within buckets, the way you can nest subdirectories into parent directories in a hierarchy like most filesystems provide.
If you’ve created a bucket, then congratulations! Your project is set up to use Cloud Storage. You can use the Storage browser in the Cloud Console to create and delete buckets, upload objects, download objects, delete objects, and adjust object permissions and metadata. If you’re only working with a handful of objects, this is probably the quickest and easiest way to do what you need. However, just as with Compute Engine, there are several ways to use Cloud Storage, including an API and a command-line tool, gsutil, which we examine next.
Introducing gsutil
In earlier chapters, you have been using the gcloud compute command to interact with Compute Engine. gsutil is the equivalent command for Cloud Storage. Let’s create a Compute Engine instance called test-vm so we can take gsutil for a spin. Note the use of the --scopes flag, which was introduced in Chapter 2:
$ gcloud compute instances create test-vm \
    --zone us-central1-a --scopes storage-full
[..]
Now we can ssh into your new instance to take gsutil for a spin:
$ gcloud compute ssh test-vm --zone us-central1-a
[..]
The gsutil ls command gives you a list of your buckets, and we can see the bucket we created using the Cloud Console Web UI in the previous section. Note that because of the global bucket namespace, your bucket name will be different than the bucket name shown in this sample output:
test-vm$ gsutil ls
gs://gce-oreilly-example/
gsutil uses a URI syntax to allow the user to express, “This is a local file” (e.g., file://path/to/local/file), versus, “This is an object in Google Cloud Storage” (e.g., gs://bucket/object), versus, “This is an object in another cloud storage system” (e.g., s3://bucket/object). If you don’t specify a scheme on the URI, gsutil assumes you mean a local file.
Now let’s create our first object. Be sure to use your bucket name with these commands, not the bucket name shown in this example:
test-vm$ echo 'Hello Cloud Storage!' > hello
test-vm$ gsutil cp hello gs://gce-oreilly-example
Copying file://hello [Content-Type=application/octet-stream]...
test-vm$ gsutil ls gs://gce-oreilly-example
gs://gce-oreilly-example/hello
test-vm$ gsutil cat gs://gce-oreilly-example/hello
Hello Cloud Storage!
You have now stored and retrieved an object in Cloud Storage. If you go back to the Cloud Console Web UI page you were using earlier and click your bucket name, you should now see the hello object there.
There’s a fair bit going on here, so let’s break it down. First of all, you’ll notice that you did not need to install gsutil. The images provided by Compute Engine already have a version of gsutil installed and ready to go.
Note
There are many occasions where you’ll want to use gsutil outside of a Compute Engine instance. For example, perhaps you have files on your development workstation that you want to upload to a Cloud Storage bucket, so you can then operate on that data from Compute Engine. Fortunately, if you followed the instructions in Chapter 1 to install the Cloud SDK, you already have a copy of gsutil installed on your workstation.
Next, you’ll notice that you didn’t need to provide any credentials to gsutil: no OAuth flow, no editing configuration files. Somehow, it obtained appropriate credentials to act on Cloud Storage. As we discussed in Chapter 2, this particular piece of magic is enabled via the --scopes flag that you passed to gcloud compute when you asked it to create the instance. What you did with that flag is tell Compute Engine that you want programs running on this instance to be able to use the service account that was automatically created when you created your project. The storage-full part of that flag tells it what services you want those programs to be able to use (in this case, Cloud Storage). Finally, gsutil understands that it is running in a Compute Engine instance configured this way and automatically acts as the project’s service account, because that’s obviously what you intended if you created the instance using the --scopes flag.
This is why you were able to ssh into your freshly created Compute Engine instance and immediately issue the gsutil ls command and see a list of the buckets owned by the project that owns the Compute Engine instance. If you signed into a different instance owned by a different project, you would see that project’s buckets instead.
gsutil is a very powerful tool that exposes every significant feature provided by Cloud Storage. Because this book is about Compute Engine and not Cloud Storage, there’s a lot we don’t have space to cover. However, spending some quality time with gsutil’s extensive built-in help is highly recommended. The gsutil help command is your starting point.
Note
One of the many useful features of gsutil is that it can transparently work with local files (e.g., /tmp/my-local-file), objects in Cloud Storage (e.g., gs://my-bucket/my-object), or objects in Amazon’s S3 service (e.g., s3://my-s3-bucket/my-s3-object). This means the following gsutil command is legal and does exactly what you might expect (copy all the objects in an S3 bucket to a Cloud Storage bucket):
$ gsutil cp s3://my-s3-bucket/* gs://my-gcs-bucket
If the bucket is large, you’ll probably want to use the -m (multithreaded) command-line switch as well. -l (log) and -n (noclobber) are also very handy for this sort of operation, as is the gsutil rsync command. gsutil help can tell you more about those options and commands.
Using Cloud Storage from Your Code
As useful as the Cloud Console and gsutil can be, there may come a time when you need to perform some operations on your objects or buckets in the context of a larger program. Shelling out to gsutil is always an option, but may not always be the best option. Fortunately, Cloud Storage provides a full featured API that your programs can use to interact directly with your objects and buckets. In fact, it provides two APIs: an XML-oriented one and a JSON-oriented one.
The two APIs provide almost all the same functionality, but with different styles. If you’re starting from scratch, the JSON API is probably the one you want to use and is the one we will demonstrate here. It is consistent in style and structure with other Google APIs such as Google Maps, Google+, and Google Analytics. This makes it possible for Google to provide helpful client libraries in many different languages and useful tools such as the Google Plugin for Eclipse. The consistency between Google APIs makes is easier for a developer who is familiar with one Google API to be immediately productive with a different Google API.
The XML API, not coincidentally, closely resembles Amazon’s S3 REST API, making it easy for developers to add support for Cloud Storage to existing tools, libraries, and other code that was originally written for use with S3. If you have some existing code that works with S3 and you want to migrate to Cloud Storage, the XML API makes that easier.
Before writing any code, you need to install the Google APIs Client Library for Python. These Python libraries make it easier to work with many different Google APIs, not just Cloud Storage. pip is a great tool for installing Python packages and is available via apt-get on Debian-based Compute Engine instances. ssh into the test-vm instance you created earlier and run these commands:
test-vm$ sudo apt-get update
[..]
test-vm$ sudo apt-get install python-pip
[..]
test-vm$ sudo pip install --upgrade google-api-python-client
Downloading/unpacking google-api-python-client
[..]
Successfully installed google-api-python-client httplib2
Cleaning up...
The following command downloads a simple Python program that demonstrates how to access an object in Cloud Storage:
test-vm$ gsutil cp gs://gce-oreilly/hello_cloud_storage.py .
Copying gs://gce-oreilly/hello_cloud_storage.py...
Here is the content of hello_cloud_storage.py:
importhttplib2fromapiclient.discoveryimportbuildfromoauth2clientimportgce# These two lines take care of all the often tricky authorization# steps by getting us an Http object that automatically adds the# appropriate Authorization: header to our requests, using the# service account associated with the project that owns the Compute# Engine instance on which this program is running. Note that for# this to work, the --scopes=storage-full flag must be specified to# gcloud compute when the instance was created.credentials=gce.AppAssertionCredentials(scope='https://www.googleapis.com/auth/devstorage.read_write')http=credentials.authorize(httplib2.Http())# The Google APIs library dynamically builds a Python object that# understands the operations provided by Cloud Storage. Every API# has a name and a version (in this case, 'storage' and 'v1').# Depending on when you are reading this, you may find there is a# newer version of the 'storage' API available.storage=build('storage','v1')# Google APIs expose collections, which typically expose methods that# are common across many APIs, such as list(), or get(). In the case# of Cloud Storage, the get() method on the objects collection gets# an object's metadata, and the get_media() method gets an object's# data.request=storage.objects().get_media(bucket='gce-oreilly',object='hello')# Also note that get_media(), and other methods, do not perform the# action directly. They instead return an HttpRequest object that can# be used to perform the action. This is important, because it gives# us the opportunity to authorize our request by passing in the Http# object we created earlier that knows about our service account.request.execute(http=http)# The previous call to get_media() fetched the object's data. This# call to get() will fetch the object's metadata. The Google API# libraries conveniently take care of converting the response from# the JSON used on the network to a Python dictionary, which we can# iterate over to print the object's metadata to the console.request=storage.objects().get(bucket='gce-oreilly',object='hello')metadata=request.execute(http=http)forkey,valueinmetadata.iteritems():key+"="+str(value)
When you run this through the Python interpreter, you should see the contents of gs://gce-oreilly/hello (in URI parlance) and the metadata associated with the object:
test-vm$ python hello_cloud_storage.py
Hello Cloud Storage!
kind=storage#object
contentType=application/octet-stream
name=hello
etag=CLDgk+KZhrwCEAI=
generation=1389995772670000
md5Hash=ocbFPgjShy+EHAb+0DpjJg==
bucket=gce-oreilly
[..]
size=21
While dumping the contents and metadata of a single object to the console is obviously the simplest possible Cloud Storage programming task, this nonetheless demonstrates several key points. First, Compute Engine makes it easy to use Cloud Storage via the built-in service account support. Second, using the Cloud Storage JSON API means you do not need to laboriously assemble correctly formatted custom HTTP requests. The Google APIs client library understands the operations available and how to formulate the appropriate requests. Third, the Google APIs library handles translating JSON responses into convenient native Python dictionaries.
Configuring Access Control
Up to this point, we have seen how to create buckets and objects and read their contents using the Cloud Console Web UI, gsutil, and your own custom Python code. We have always been acting either as ourselves as an owner of our project, or as the automatically created project service account, which is also a member of the project. Unsurprisingly, owners and members of the project have, by default, the appropriate access rights to create buckets owned by that project, and create and read objects in those buckets. Where access control gets interesting, and where Cloud Storage gets particularly useful, is when you want to give specific rights to people or service accounts that are not part of your project. This is also where we will start to see some of the significant differences between Cloud Storage and traditional filesystems.
Every object in Cloud Storage has an access control list (ACL). You can use gsutil acl get to see the ACL applied to an object.
Note
What’s an ACL? An ACL is a list of people or groups that you’re granting permission to perform specific operations on an object. ACLs are more explicit and flexible than the permission bits you may be accustomed to working with on UNIX-style filesystems, which only allow you to specify permissions for the file’s “owner,” “group,” and “everyone else,” because you are not limited to granting permissions only to a single individual (the owner) and a single group.
If you are not already logged into your test-vm, use the gcutil ssh command to do so and try the following example (using your bucket name instead of the one shown here, of course):
test-vm$ gsutil acl get gs://gce-oreilly-example/hello
[
  {
    "entity": "project-owners-1342[..]",
    "projectTeam": {
      "projectNumber": "1342[..]",
      "team": "owners"
    },
    "role": "OWNER"
  },
  {
    "entity": "project-editors-1342[..]",
    "projectTeam": {
      "projectNumber": "1342[..]",
      "team": "editors"
    },
    "role": "OWNER"
  },
  {
    "entity": "project-viewers-1342[..]",
    "projectTeam": {
      "projectNumber": "1342[..]",
      "team": "viewers"
    },
    "role": "READER"
  },
  {
    "entity": "user-00b4[..]145f",
    "entityId": "00b4[..]145f",
    "role": "OWNER"
  }
]
How to read this? Notice that “entities” are being assigned “roles.” In this particular case, the first three entities are groups that correspond to the various team members of your project whom you’ve added with “Is Owner,” or “Can Edit,” or “Can View” permissions. This is what Cloud Storage calls a project-private “canned” ACL. There are other so-called canned ACLs that are useful for common scenarios. The project-private canned ACL is a reasonable default ACL for many situations, giving the project team members reasonable default rights, while making sure that no one outside the project can access the object. You can apply a different canned ACL via gsutil. For example, if you want to make the object completely private to yourself, the private canned ACL will do the trick:
test-vm$ gsutil acl set private gs://gce-oreilly-example/hello
Setting ACL on gs://gce-oreilly-example/hello...
test-vm$ gsutil acl get gs://gce-oreilly-example/hello
[
  {
    "entity": "user-00b4[..]145f",
    "entityId": "00b4[..]145f",
    "role": "OWNER"
  }
]
You’re now the only one in the world who can access this particular object. You have the right to modify the ACL because you are the OWNER of the object. Similarly, if you want to share your object with everyone, you can use the public-read canned ACL:
test-vm$ gsutil acl set public-read gs://gce-oreilly-example/hello
Setting ACL on gs://gce-oreilly-example/hello...
test-vm$ gsutil acl get gs://gce-oreilly-example/hello
[
  {
    "entity": "user-00b4[..]145f",
    "entityId": "00b4[..]145f",
    "role": "OWNER"
  },
  {
    "entity": "allUsers",
    "role": "READER"
  }
]
You can now see that the entity allUsers has READER role for this object. Objects that give allUsers the READER role do not require authentication to be accessed. This means that anyone in the world can navigate a web browser to http://storage.googleapis.com/gce-oreilly-example/hello, and will be able to fetch the object. If you want this to work the way most users would expect, you may want to set an appropriate Content-Type (a.k.a. MIME type) on your object, so the browser will know what to do with it. If you do not set the Content-Type, Cloud Storage uses the default of binary/octet-stream. Most browsers will interpret binary/octet-stream as a file to be downloaded and ask users where they want to save the file. If your object contains HTML data, this is probably not the behavior you want. gsutil helps you out by looking at the extension of the local filename and inferring what type it should be. For example, if you upload hello.txt, gsutil will automatically apply a Content-Type of text/plain. You can set the Content-Type (and a few other useful headers) on Cloud Storage objects via the gsutil setmeta command.
Note
You are not allowed to set arbitrary headers on your objects. See gsutil help metadata for the current list of allowed headers.
Another thing you might want to do is share an object with a particular person, or group of people, who are not part of the project team. For example, you may wish to share an object with a set of your customers or end users. The most efficient way to do this is to first create a Google group, add the individuals to that group, and grant that group permission to the object.
You can create a new Google group by going to http://groups.google.com and clicking Create Group. Because you’re using this group to manage access to resources, you’ll want to make sure that people can’t add themselves to it without your permission. The group settings for this example are shown in Figure 4-2. Note that “Only invited users” is selected for who can join the group.
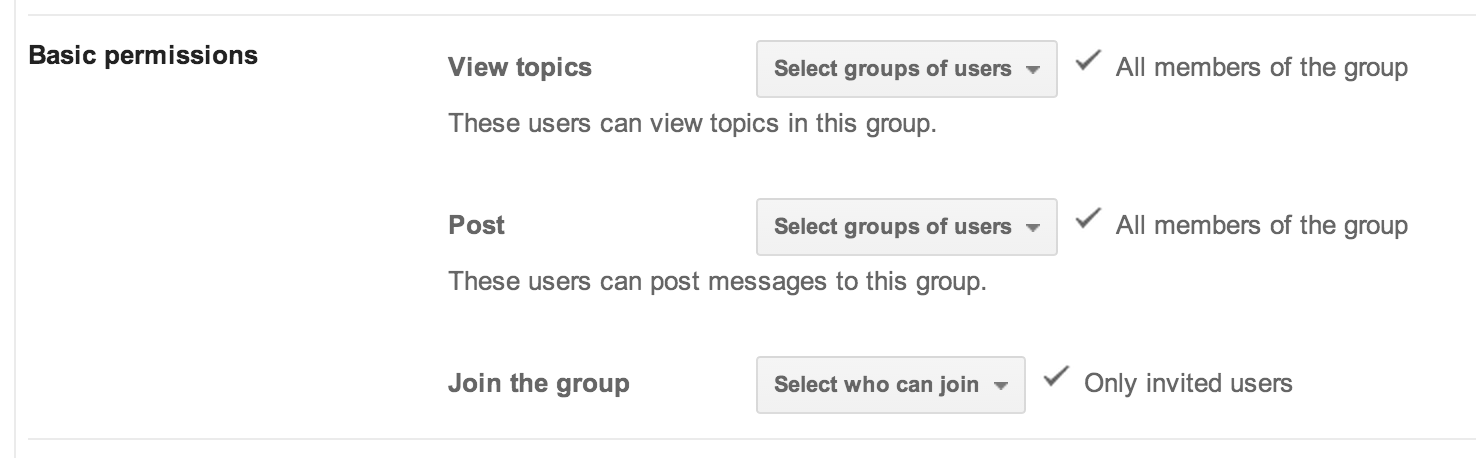
Figure 4-2. Example Google Group settings
Now that we have a group, we can grant it read permission to the object. First we restore the private canned ACL, then we use the gsutil acl ch (change ACL) command to selectively add a read permission for the group:
test-vm$ gsutil acl set private gs://gce-oreilly-example/hello
Setting ACL on gs://gce-oreilly-example/hello...
test-vm$ gsutil acl ch -g gce-oreilly-example@googlegroups.com:r \
           gs://gce-oreilly-example/hello
Updated ACL on gs://gce-oreilly-example/hello
test-vm$ gsutil acl get gs://gce-oreilly-example/hello
[
  {
    "entity": "user-00b4[..]145f",
    "entityId": "00b4[..]145f",
    "role": "OWNER"
  },
  {
    "email": "gce-oreilly-example@googlegroups.com",
    "entity": "group-gce-oreilly-example@googlegroups.com",
    "role": "READER"
  }
]
The group now has read access to the object. Just to reiterate, while you can add individual users to an object’s ACL, it’s a best practice to only add groups, so that when people join and leave teams, you can simply add or remove them from the group, instead of having to update the ACL on potentially millions of objects.
Understanding ACLs
So far we have only been looking at object ACLs. And you’ll also notice that we’ve only seen two roles: OWNER and READER. That’s because those are the only two roles that an object can have, and they are concentric (i.e., OWNER implies READER). The meaning of READER is pretty self-explanatory—it means you’re allowed to fetch the content of the object. OWNER means that, in addition to being able to fetch the object, you also have the right to modify the ACL.
You’re probably wondering where the WRITER role for objects is. This is one of the differences between a BLOB storage system and a traditional filesystem. If you think about what WRITER means in a filesystem, it means you can open the file and modify its contents. There is no such operation in Cloud Storage, as objects in Cloud Storage are immutable. Once an object is written to Cloud Storage, you can’t append more data to it, or change just a few bytes in the middle of it. You can only delete the object or overwrite it with a completely new object. Thus, there is no WRITER role for objects to determine who has permission to perform a write operation, because it is impossible to perform a write operation on an object.
Instead, the WRITER role exists at the bucket level in Cloud Storage. Having the WRITER role on a bucket means that you are allowed to create, delete, or overwrite objects in that bucket.
Note
The overwrite operation in Cloud Storage is atomic and strongly consistent. Putting this in terms of gsutil operations, if you run:
gsutil cp hello.html gs://mybucket/hello.html
to copy a new version of hello.html to your bucket, overwriting the version of hello.html that’s already there, no clients will ever see a partially written hello.html. Before the gsutil command completes, they will see the old version, and after the gsutil command completes, they will see the new version, and at no time will they see a “Not Found” error or partially written data.
It’s also important to understand that having the READER role on a bucket does not give you the right to read the content of the objects in the bucket. That privilege is granted by having the READER role on the object itself, as already discussed. Instead, having the READER role on the bucket gives you the right to get a list of the objects contained in that bucket.
Finally, the OWNER role on a bucket gives you the right to modify the ACL on the bucket and also to modify something called the “default object ACL,” which we will discuss in the next section.
Note
In this book, we use the ACL terminology from the Cloud Storage JSON API, which assigns “roles” with “entities.” If you’re using the Cloud Storage XML API, you’ll be assigning “permissions” to “scopes,” but the functionality is the same.
Using Default Object ACLs
The default object ACL is a very useful feature of Cloud Storage, and is worth understanding well. In the case that the project-private canned ACL is the ACL you want for any object you add to a bucket, the default behavior demonstrated earlier is exactly what you want. But let’s say you instead want to make all the objects in the bucket have an ACL that gives a specific group READ permission?
Associating a custom default object ACL with the bucket solves this problem in a clean and convenient way. What you’re telling Cloud Storage with a default object ACL is “Please apply this ACL to every object that is written to this bucket, unless the ACL is explicitly overridden.” In fact, every bucket has a default object ACL, and the “default” default object ACL is of course, project-private, which is why the first object we created had the project-private ACL. Now let’s change the default object ACL on our test bucket to a custom default object ACL that provides READ access to a specific group:
test-vm$ gsutil defacl get gs://gce-oreilly-example
[
  {
    "entity": "project-owners-1342[..]",
    "projectTeam": {
      "projectNumber": "1342[..]",
      "team": "owners"
    },
    "role": "OWNER"
  },
  {
    "entity": "project-editors-1342[..]",
    "projectTeam": {
      "projectNumber": "1342[..]",
      "team": "editors"
    },
    "role": "OWNER"
  },
  {
    "entity": "project-viewers-1342[..]",
    "projectTeam": {
      "projectNumber": "1342[..]",
      "team": "viewers"
    },
    "role": "READER"
  }
]
test-vm$ gsutil defacl ch -g gce-oreilly-example@googlegroups.com:r \
           gs://gce-oreilly-example
Updated default ACL on gs://gce-oreilly-example/
test-vm$ gsutil defacl get gs://gce-oreilly-example
[
  {
    "entity": "project-owners-1342[..]",
    "projectTeam": {
      "projectNumber": "1342[..]",
      "team": "owners"
    },
    "role": "OWNER"
  },
  {
    "entity": "project-editors-1342[..]",
    "projectTeam": {
      "projectNumber": "1342[..]",
      "team": "editors"
    },
    "role": "OWNER"
  },
  {
    "entity": "project-viewers-1342[..]",
    "projectTeam": {
      "projectNumber": "1342[..]",
      "team": "viewers"
    },
    "role": "READER"
  },
  {
    "email": "gce-oreilly-example@googlegroups.com",
    "entity": "group-gce-oreilly-example@googlegroups.com",
    "role": "READER"
  }
]
We can use gsutil’s defacl get, defacl set, and defacl ch commands to view and modify the bucket’s default object ACL exactly like we’ve been using acl get, acl set, and acl ch to view and modify object and bucket ACLs. This sequence of commands also demonstrates that the “default” default object ACL is indeed project-private, and then shows how it can be modified. It is interesting to notice that the updated default object ACL does not mention the object’s owner like we saw when we ran a similar sequence of commands on the hello object. This is because we don’t know, in advance, who will create a particular object, and therefore don’t know who the owner of that object will be. The owner of an object always has the OWNER role on an object, and the default object ACL specifies which permissions should be added in addition to the OWNER role.
The default object ACL on the bucket is only applied to newly created objects. To see this in action, first we ensure that the existing hello object is project-private:
test-vm$ gsutil acl set project-private gs://gce-oreilly-example/hello
Setting ACL on gs://gce-oreilly-example/hello...
Now we can create a second object and see that the default object ACL is applied to it:
test-vm$ gsutil cp hello gs://gce-oreilly-example/hello2
Copying file://hello [Content-Type=application/octet-stream]...
test-vm$ gsutil acl get gs://gce-oreilly-example/hello2
[
  {
    "entity": "project-owners-1342[..]",
    "projectTeam": {
      "projectNumber": "1342[..]",
      "team": "owners"
    },
    "role": "OWNER"
  },
  {
    "entity": "project-editors-1342[..]",
    "projectTeam": {
      "projectNumber": "1342[..]",
      "team": "editors"
    },
    "role": "OWNER"
  },
  {
    "entity": "project-viewers-1342[..]",
    "projectTeam": {
      "projectNumber": "1342[..]",
      "team": "viewers"
    },
    "role": "READER"
  },
  {
    "email": "gce-oreilly-example@googlegroups.com",
    "entity": "group-gce-oreilly-example@googlegroups.com",
    "role": "READER"
  },
  {
    "entity": "user-00b4[..]145f",
    "entityId": "00b4[..]145f",
    "role": "OWNER"
  }
]
Note how the default object ACL has been expanded to include an owner, and that owner has been given full control of the new object.
We can confirm that changing the default object ACL on the bucket does not modify any existing object ACLs by examining the old hello object:
test-vm$ gsutil acl get gs://gce-oreilly-example/hello
[
  {
    "entity": "user-00b4[..]145f",
    "entityId": "00b4[..]145f",
    "role": "OWNER"
  },
  {
    "entity": "project-owners-1342[..]",
    "projectTeam": {
      "projectNumber": "1342[..]",
      "team": "owners"
    },
    "role": "OWNER"
  },
  {
    "entity": "project-editors-1342[..]",
    "projectTeam": {
      "projectNumber": "1342[..]",
      "team": "editors"
    },
    "role": "OWNER"
  },
  {
    "entity": "project-viewers-1342[..]",
    "projectTeam": {
      "projectNumber": "1342[..]",
      "team": "viewers"
    },
    "role": "READER"
  }
]
Understanding Object Immutability
As was mentioned a bit earlier, all objects in Cloud Storage are immutable. This means they cannot be changed. You can overwrite an existing object with a new one, but unlike what you may be accustomed to in a traditional filesystem, you cannot “open” an object, “seek” to an arbitrary offset in the object, “write” a series of bytes, and “close” the file. If you want to overwrite an object, you have to upload a new object, from the first byte to the last byte.
Note
Cloud Storage does allow you to compose existing objects into new objects, which can be used to simulate a very limited form of “writing” to the middle or end of an existing object. Search the Cloud Storage documentation for “composite objects” for more details.
A corollary to the fact that all Cloud Storage objects are immutable is that you cannot read a partially written object. An object doesn’t exist in Cloud Storage until you have uploaded the last byte and received a 200 OK response from the service.
Understanding Strong Consistency
Cloud Storage provides a strong “read after write” consistency guarantee when you finish writing an object. This means that if you write an object and get a 200 OK response, you can be sure that anyone, anywhere in the world who is authorized to read that object will be able to do so and will see the data you just finished writing (not some previous version you may have just overwritten). This stands in contrast to some cloud storage systems where one user could write an object, receive a 200 OK response, and then another user who attempts to read that object, perhaps from a different location, could receive a 404 “Not Found” response, or worse, read a previous, out-of-date, version of that object.
However, there are two caveats to the strong consistency of Cloud Storage. First, it does not apply to listing the contents of a bucket, or listing the buckets that belong to a project. Putting this in gsutil terms, if you gsutil cp an object into a bucket, it may take a few seconds or longer for that object to appear in the results of a gsutil ls <bucket> command, but if you know the name of the object, you are guaranteed to be able to gsutil stat that object. Similarly, when you create a bucket, it may take some time before it shows up in the results of gsutil ls.
The second caveat is that the statements on strong consistency do not apply if you allow your object to be cached using normal HTTP caching mechanisms. If you’ve allowed your object to be cached, which also implies it is publicly readable, then you may receive an out-of-date cached copy of an object instead of the one you just wrote, or you may still receive a copy of the object from a cache after it has been deleted from Cloud Storage. This is expected HTTP behavior. For more details, look up the Cache-Control header, both in the Cloud Storage documentation and in the HTTP specifications.
Summary
In this chapter, we learned that Cloud Storage is a BLOB storage system, and what exactly that means. Then we saw how to use Cloud Storage to create buckets and objects via the Cloud Console UI, the gsutil command-line tool, and via your own Python code using the Cloud Storage JSON API. We discussed the Cloud Storage ACL model in detail, and touched on the concepts of object immutability and strong consistency.
Up Next
Now that we’ve learned about the relatively unstructured storage mechanisms available to Compute Engine, namely Persistent Disk and Cloud Storage, we’ll explore the more structured storage mechanisms of Cloud SQL and Cloud Datastore.
Get Google Compute Engine now with the O’Reilly learning platform.
O’Reilly members experience books, live events, courses curated by job role, and more from O’Reilly and nearly 200 top publishers.

