Getting Your Pictures into iPhoto
Double-click the iPhoto icon to launch the program. After you dismiss the “Welcome to iPhoto” dialog box (which contains a quick recap of the program’s benefits), iPhoto checks to see if you have an older version, and if so, offers to convert its photo library (Figure 6-1).
Finally, you arrive at the program’s main window, the basic elements of which are shown in Figure 6-2.
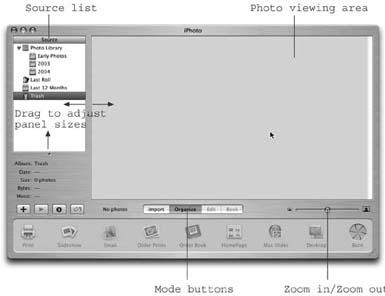
Figure 6-2. Here’s what iPhoto looks like when you first open it. The large photo-viewing area is where thumbnails of your imported photos will appear. The pane at the bottom of the window changes depending on which of iPhoto’s four modes you’re in—Import, Organize, Edit, or Book.
If you’ve been taking digital photos for some time, you probably have a lot of photo files already crammed into folders on your hard drive or on Zip disks or CDs. If you shoot pictures with a traditional film camera and use a scanner to digitize them, you’ve probably got piles of JPEG or TIFF images stashed away on disk already, waiting to be cataloged using iPhoto.
This section explains how to transfer files from each of these sources into iPhoto itself.
Connecting with a USB Camera
Every modern digital camera can connect to a Mac using the USB port. If your Mac has more than one USB jack, you can use any of them for your digital camera.
Plugging a USB-compatible camera into your Mac is the easiest way to ...
Get iLife '04: The Missing Manual now with the O’Reilly learning platform.
O’Reilly members experience books, live events, courses curated by job role, and more from O’Reilly and nearly 200 top publishers.

