Adding Movies
When you get right down to it, all iDVD really does is add window dressing—menus, buttons, and so on—to movies, music, and photos created in other programs.
Take movies, for example. You already know that you can transfer an iMovie project into iDVD by sharing your iMovie (that’s what Chapter 15’s all about). But that’s just the beginning of the ways you can add movies to your iDVD projects. You can also:
Use the File → Import command.
Drag movies into the iDVD window from the desktop.
Choose movies from the Media palette.
Drag clips or entire movies directly in from iMovie—a new feature in iLife ’06.
The following pages take you through these additional methods.
The Import Command
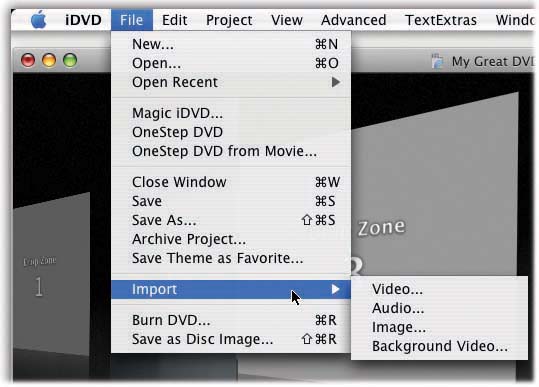
iDVD’s File → Import command lets you install video, audio, pictures, and background movies onto whatever menu screen you’re editing; see Figure 16-3.

Figure 16-3. When you choose File → Import → Video, the Open File dialog box appears, so that you can navigate to a movie and select it. (You can’t select more than one movie to import at a time.) When you click Open, iDVD loads the movie and adds it to the current menu screen.
The Finder
Another great way to install a movie into an iDVD menu screen is to drag it there, either right off the desktop or from an open folder window. Figure 16-4 tells all.
The Movies Media Pane
Dragging files in from the Finder is great, but it assumes that you know where ...
Get iMovie 6 & iDVD: The Missing Manual now with the O’Reilly learning platform.
O’Reilly members experience books, live events, courses curated by job role, and more from O’Reilly and nearly 200 top publishers.

