If you followed the instructions in Recipe 4.1 and are now running your app on the iPhone Simulator, you’ll see just a white screen with no navigation bar across the top. The reason is that the initial view controller of our storyboard file is a view controller, as opposed to a navigation controller. In order to add a navigation controller to your storyboard-based app, simply follow these steps:
Click on the iPhone storyboard that Xcode created for you. I have named my project
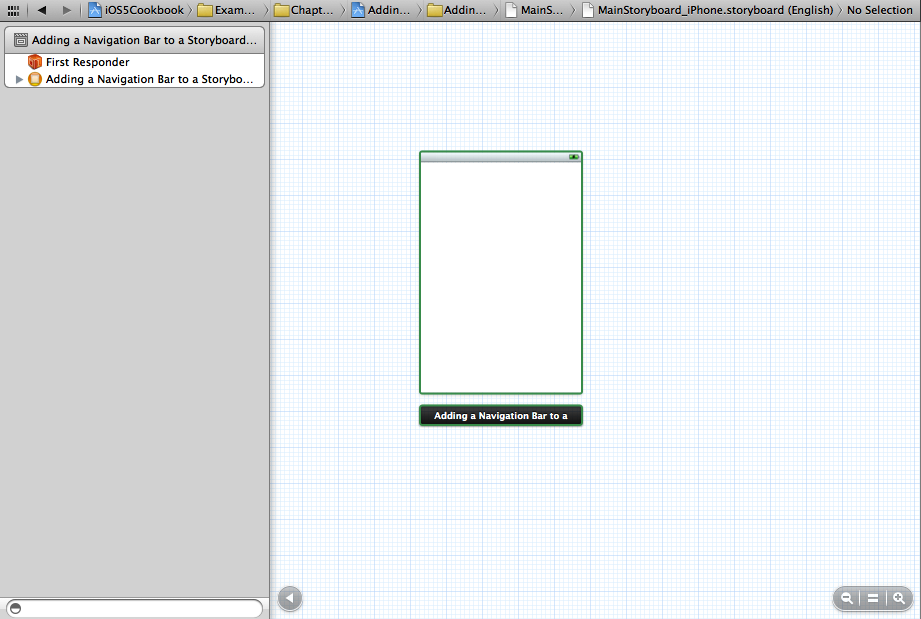
Adding a Navigation Bar to a
            Storyboard
. My iPhone storyboard file is MainStoryboard_iPhone.storyboard (the name of the default storyboard file created by Xcode, depending on the version of Xcode you are using, does not have to have any connection to the name of your project). Once you click on this file, Interface Builder will display its contents.Once the storyboard file is open in IB (Interface Builder), simply double-click on an empty space on the storyboard’s canvas and you will see the content shrink in size and give you more free space to play with, as you can see in Figure 4-6.
Under the View menu, select Utilities→Show Object Library.
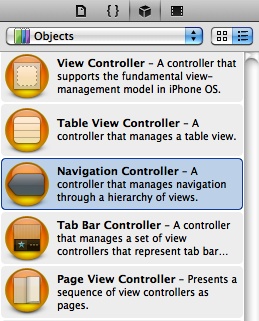
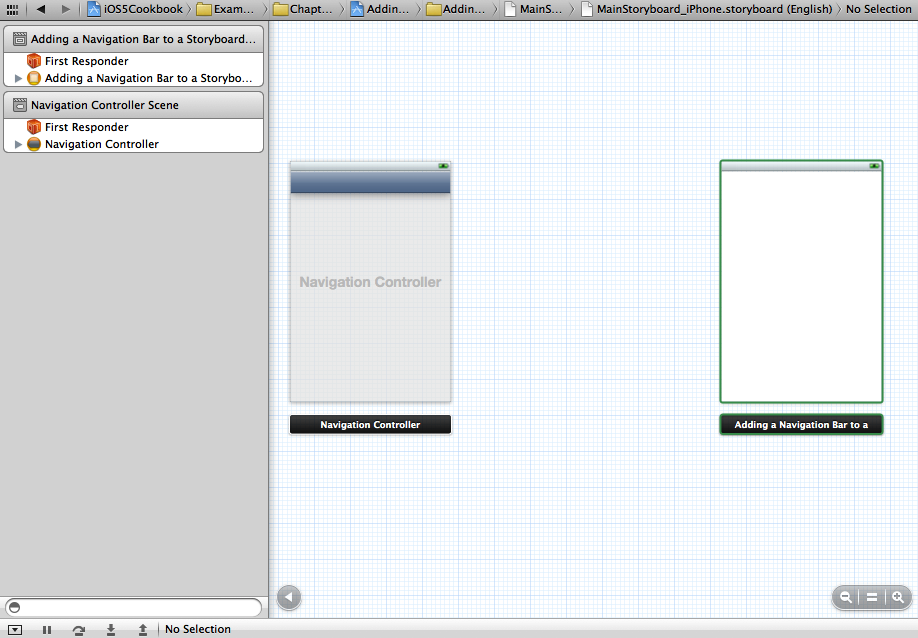
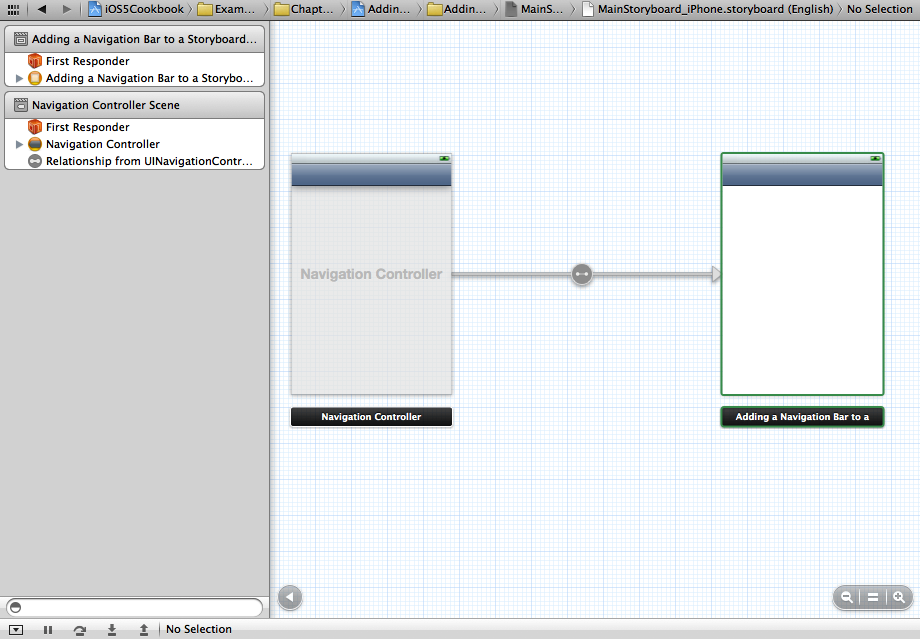
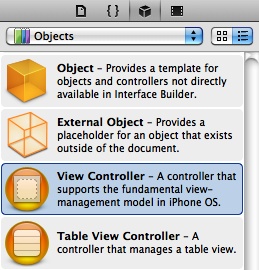
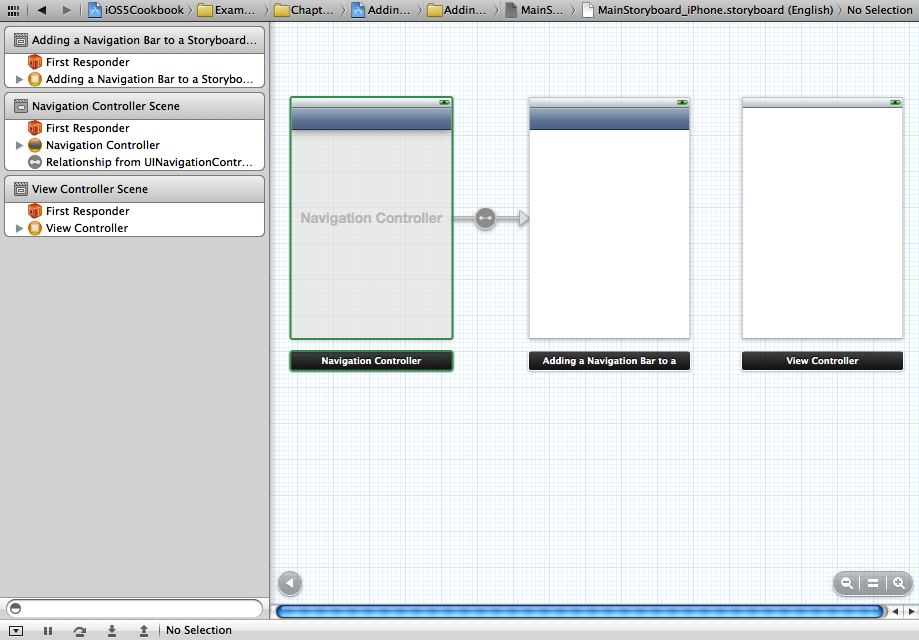
In the Object Library, find the Navigation Controller object (see Figure 4-7) and drag and drop it into the storyboard, to the left side of your existing view controller (Figure 4-6). Now you will see something similar to Figure 4-8.
As you can see in Figure 4-8, the navigation controller has now added another view controller to our UI. What you need to do is to simply delete this view controller. Do so by selecting it and then pressing the Delete button on the keyboard. Now you are left with the navigation controller and your original view controller, as you can see in Figure 4-9.

Note
The project that we set up in Recipe 4.1 is a Single View Application. This type of application does not come with a navigation controller by default, for the obvious reason that it is a Single View Application. Therefore, to change this structure, we will need to add the navigation controller to our storyboard file manually.
Now click once on the navigation controller object on the storyboard. Once the navigation controller object is selected, hold down the Control key on your keyboard and the left button on your mouse and drag your mouse over to the view controller (on the right) that was originally on your storyboard. This will draw a line from the navigation controller all the way to the view controller, as you can see in Figure 4-10.
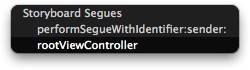
Now release your mouse button, at which point you will be presented with a dialog asking you what type of connection you want to create between the navigation and the view controller. Select the
rootViewControlleritem from the list by simply clicking on it (see Figure 4-11).After this is done, the storyboard will show that your navigation controller is connected to the original view controller, as you can see in Figure 4-12.
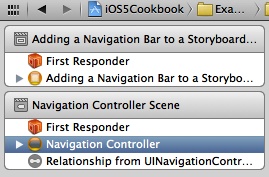
The last but perhaps most important step is to make your navigation controller the initial/root view controller. If you don’t do this, the storyboard will use the view controller that it initially assigned as the initial view controller. Have another look at Figure 4-12. Can you see that the view controller on the right side has a colorful border around it? That indicates an initial view controller. To make your navigation the initial view controller, simply select the Navigation Controller under the Navigation Controller Scene panel in Interface Builder, as you can see in Figure 4-13. Now select the View menu in Xcode and choose View→Show Attributes Inspector. Once the attributes inspector is opened, under the View Controller category, check the Is Initial View Controller checkbox (see Figure 4-14).

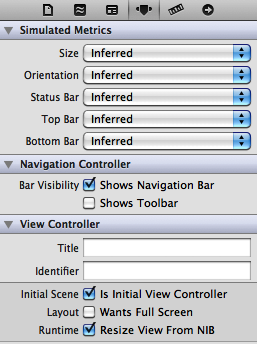
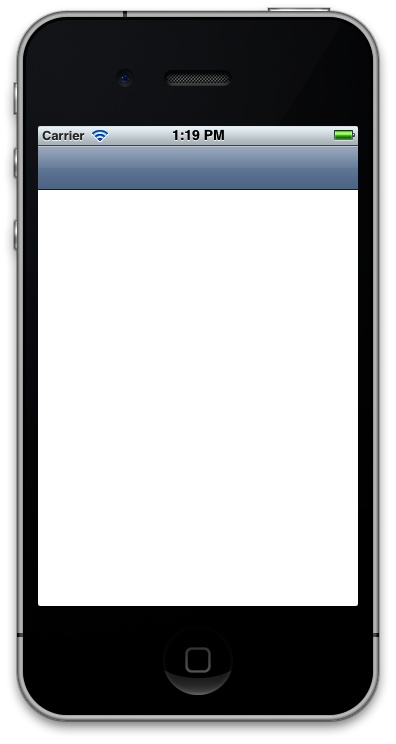
As you can see, your navigation controller now has a border around it instead of the right-hand view controller. Now if you run your application, you will notice that the initial view controller has a navigation bar on top, indicating that this view controller now has a navigation controller (Figure 4-15). In the next recipes, we will see how we can make use of the navigation controller to display new scenes on the screen.
We now have a navigation controller with a view controller inside it, but our objective now is to trigger an action and then move from one view controller to another—what Apple calls a segue. All right then; let’s place a button on our view controller and push a view controller into the stack once the user presses the button. Sounds good? Do it as follows:
Go back to your .storyboard file.
In the Object Library, find the View Controller object (see Figure 4-16) and drag and drop it onto the storyboard, on the right side of your existing view controller, as shown in Figure 4-17.
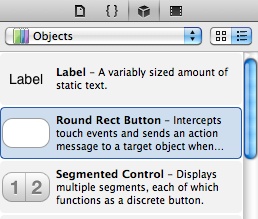
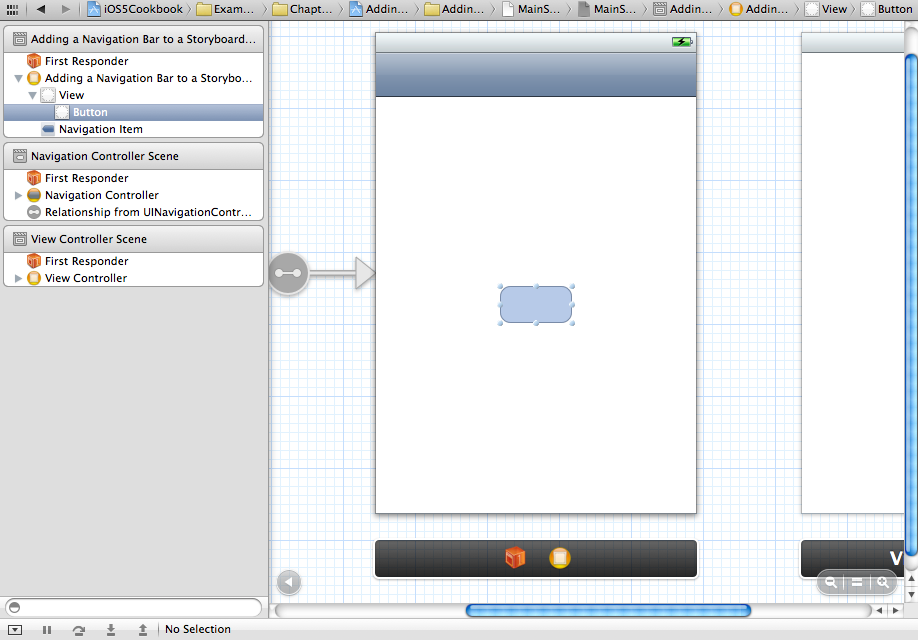
In Object Library, find the Button object (see Figure 4-18) and drag and drop it into the first view controller (see Figure 4-19). Note that if you are zoomed out, Interface Builder will not allow you to drop a button onto a view controller. You need to double-click on an empty space on your storyboard to zoom into it before Interface Builder allows you to drop UI components onto your view controllers.
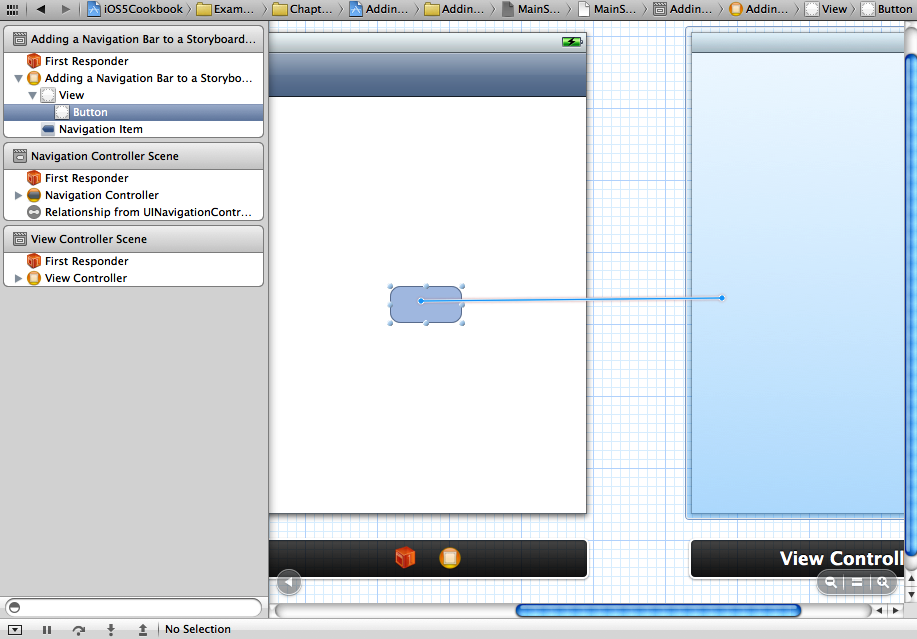
Now to select the button, hold down the Control key on your keyboard and the left mouse button over the button, and drag it all the way to the second view controller (see Figure 4-20).
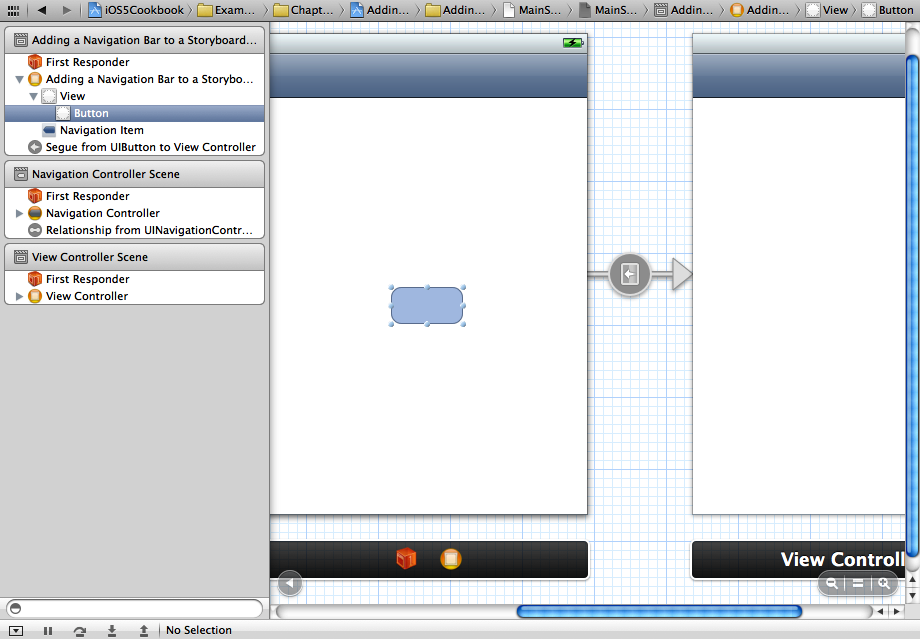
Now lift your fingers off the mouse button and the Control key on your keyboard. You will now be presented with a dialog similar to that shown in Figure 4-21. Click on the
performSegueWithIdentifier:sender:item.

Now if you have a look at your storyboard, you will see that the first view controller is connected to the second view controller, as shown in Figure 4-22.
Now if you run your app and tap on the button on the first view controller, you’ll see that the second view controller will automatically get pushed onto the stack of view controllers. Once the second view controller is presented, you will see a back button on the navigation bar. If you press that button, you will be sent back to the first view controller.
Get iOS 5 Programming Cookbook now with the O’Reilly learning platform.
O’Reilly members experience books, live events, courses curated by job role, and more from O’Reilly and nearly 200 top publishers.

