Simply plug your device into your computer using the USB cable that comes with your device. Follow the steps in Recipe 1.4 to make sure you have selected the right project in Xcode. Instead of choosing the simulator (as shown in Recipe 1.4) in the Scheme breadcrumb button, choose your device, go to Product, and press Run.
Each version of Xcode supports a series of iOS versions. By support I mean that the latest version of Xcode, for instance, may not be capable of compiling and running an iOS app on a second-generation iPod touch with iOS 3.0 installed on it. The reason is that the utilities built for each version of Xcode allow you to run your iOS apps on a limited number of versions of iOS on devices. The same is true for iOS Simulator. If you download the latest version of Xcode, you will notice that you might only be able to simulate your apps on iOS Simulator 5.0 and nothing before that.
The way to detect whether Xcode has detected your device is to plug in your device, wait a few seconds for the sync to happen, and see whether the name of your device appears in the right half of the Scheme breadcrumb button.
If you’ve waited for the device to sync and still the Scheme button is showing iOS Device in its list instead of the name of your device, you need to make sure that your device can be used for development purposes. Simply follow these instructions:
Select the Window menu.
Under the Window menu, select Organizer.
On top of Organizer, make sure the Devices item is selected, as shown in Figure 1-14.
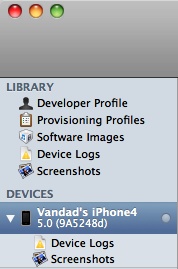
On the left side of Organizer’s Devices screen, make sure you’ve selected your device by clicking on it (Figure 1-15).
As you can see, the device has a gray light instead of green. The gray light tells us that this device is not ready for development. After clicking on the device in the list, you will then see a button on the right side of the screen labeled Use for Development. Press that button. Once you press this button, you will see a progress bar appear on the screen and Xcode will start detecting this device.
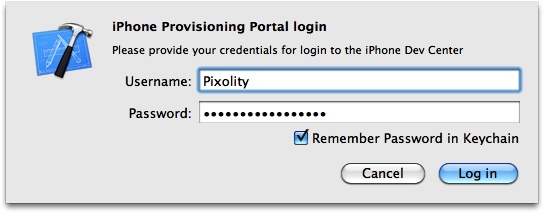
At this stage, Xcode might show a Login screen. This screen asks for your iOS Developer Portal’s credentials. This means that Xcode wants to detect whether the UDID (Unique Device ID) of your device has already been added to your portal or not. If it has not been added, Xcode will add it for you. So just go ahead and provide your iOS Portal credentials to Xcode (see Figure 1-16) and then press the Login button.
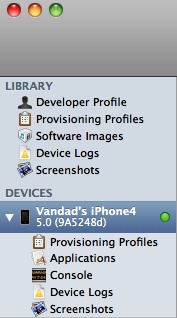
If everything goes fine and Xcode detects that the iOS version on your device is something that it can support, it will display the green light next to your device on the left-hand side of Organizer’s Devices screen, as shown in Figure 1-17.
Now close Organizer and come back to Xcode. If you now click on the right side of the Scheme breadcrumb button, you will be able to see your device listed there, as shown in Figure 1-18.
If Xcode cannot detect the version of iOS installed on your device, it will display an amber light next to it. In this case, you either need to get a version of Xcode that does support your device’s iOS version, or you need to change the version of iOS on your device to match what Xcode supports. Xcode will display the list of iOS versions that it supports after displaying the amber light next to your device. Xcode, in fact, will give you the reason why it cannot run iOS apps on your device. If the reason stems from the version of iOS on your device, the supported versions of iOS will certainly be displayed in Organizer’s Devices section.
Get iOS 6 Programming Cookbook now with the O’Reilly learning platform.
O’Reilly members experience books, live events, courses curated by job role, and more from O’Reilly and nearly 200 top publishers.


