You want to pack a set of related functionalities into a reusable entity for immediate or later use.
Let’s say you want to write a calculator program. You are creating the user interface and you want each button on the calculator to have a black background, white text and have a bump user interface, just like a real button. Aren’t these all common traits among all the buttons you want to place on your UI? You got it! It’s best that we create a class to represent all our buttons and write the code once to reuse multiple times.
Classes in objective-C are normally represented with the following code:
- Header file
This is where you define what your class basically does: accept user input, rotate a shape, or whatever. But the header file does not implement any of that functionality. Header files have a .h extension.
- Implementation file
After defining the functionality of your class in the header file, here you write the actual code for all that functionality. Implementation files have a .m extension.
Let’s go a bit more into detail by going ahead and creating a class. Follow these steps:
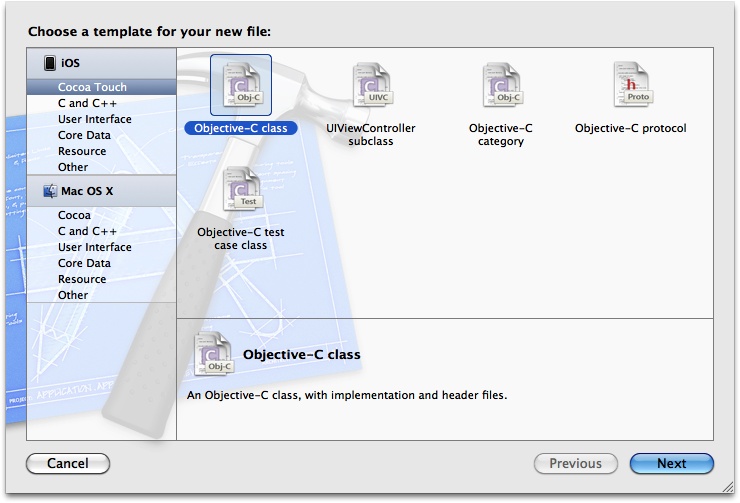
In Xcode, go to the File menu and then select New File.
A dialog will appear, similar to that shown in Figure 1-23. Here simply select Objective-C class from the list to the right. Make sure iOS is selected on the lefthand side. After this, press the Next button.
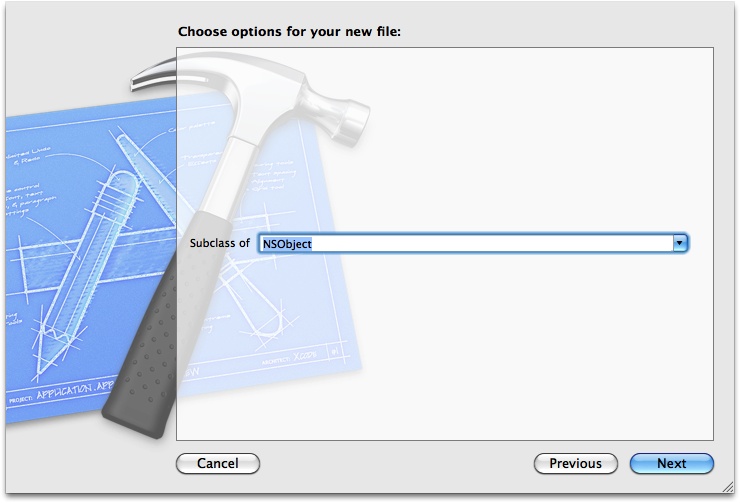
In the next screen, make sure the Subclass of text box says
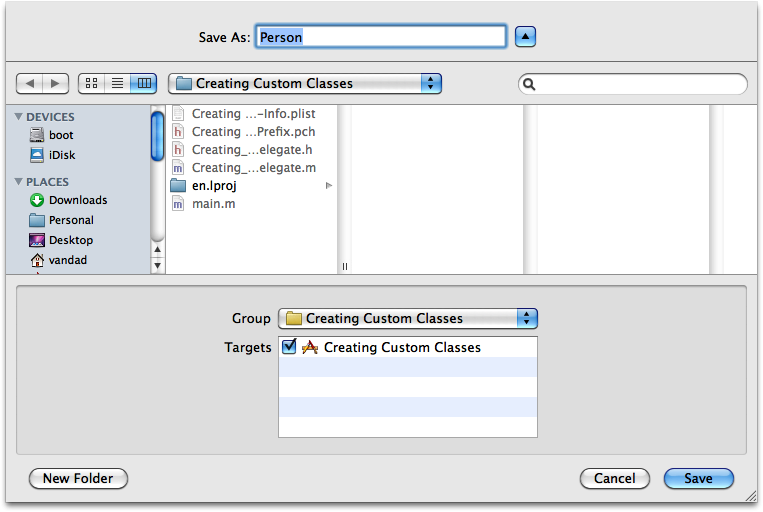
NSObject. Now press the Next button (Figure 1-24).In the next screen, as shown in Figure 1-25, make sure that the Save As text box says Person, which is what we’ll name our class. On the bottom of this dialog, make sure that you are saving your class in the correct group/folder.
Now two files will get added to your project. One is called Person.h and the other Person.m. The first one is the header and the second one is the implementation. Let’s have a look at the contents of the Person.h file:
#import <Foundation/Foundation.h>@interfacePerson:NSObject@end
How about the contents of Person.m?
#import "Person.h"@implementationPerson-(id)init{self=[superinit];if(self){// Initialization code here.}returnself;}@end
We can see that Xcode has prepopulated these files with some content. We still don’t really know what this content is, but it’s a start to our code. Now we have a class named Person. Where did we get this name? It’s not the name of the file itself, but Xcode took the file name in Figure 1-25 and used it as the class name. If you have a look at the contents of the Person.h again, you will notice this line of code:
@interfacePerson:NSObject
In short, what comes after the @interface keyword is your class name in this case. If you don’t like this
name, simply right-click on it and then select Refactor and then Rename.
This will guide you through a refactoring process through which you can
rename your class. Xcode will make sure that the name of your class will
be changed throughout your code, if you have referred to it
anywhere.
Get iOS 6 Programming Cookbook now with the O’Reilly learning platform.
O’Reilly members experience books, live events, courses curated by job role, and more from O’Reilly and nearly 200 top publishers.

