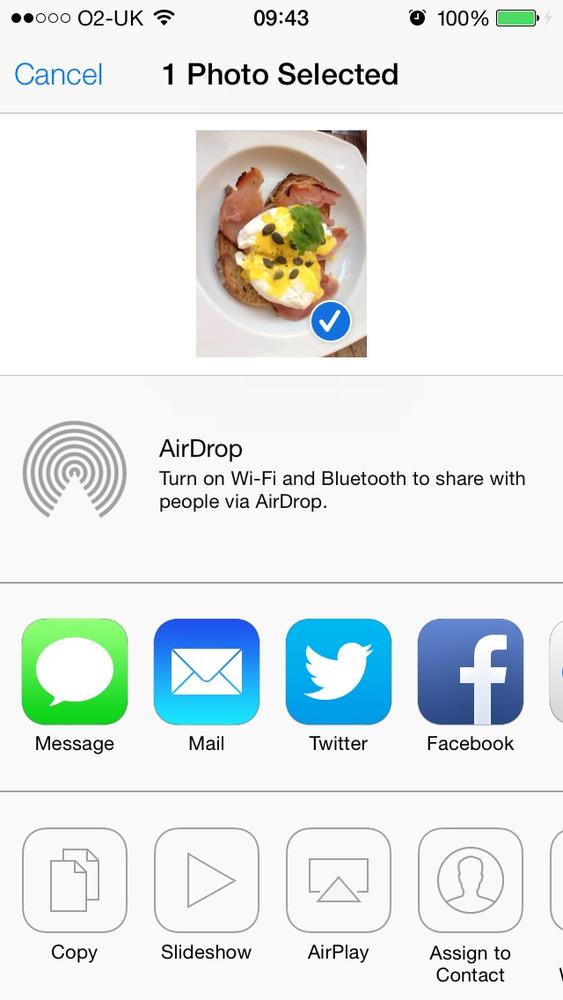
You want to be able to allow your users to share content inside your apps with their friends, through an interface similar to that shown in Figure 1-27 that provides different sharing options available in iOS, such as Facebook and Twitter.
Create an instance of the UIActivityViewController class and share your
content through this class, as we will see in the Discussion section of
this recipe.
Note
The instances of UIActivityViewController must be presented
modally on the iPhone and inside a popover on an iPad. For more
information about popovers, refer to Recipe 1.29.
There are many sharing options inside iOS, all built into the core of the OS. For instance, Facebook and Twitter integration is now an integral part of the core of iOS, and you can share pretty much any content from anywhere you want. Third-party apps like ours can also use all the sharing functionalities available in iOS without having to think about the low-level details of these services and how iOS provides these sharing options. The beauty of this whole thing is that you mention what you want to share, and iOS will pick the sharing options that are capable of handling those items. For instance, if you want to share images and text, iOS will display many more items to you than if you want to share an audio file.
Sharing data is very easy in iOS. All you have to do is
instantiate the UIActivityViewController class using its
initWithActivityItems:applicationActivities:
initializer. Here are the parameters to this method:
initWithActivityItemsThe array of items that you want to share. These can be instances of
NSString,UIImage, or instances of any of your custom classes that conform to theUIActivityItemSourceprotocol. We will talk about this protocol later in detail.applicationActivitiesAn array of instances of
UIActivitythat represent the activities that your own application supports. For instance, you can indicate here whether your application can handle its own sharing of images and strings. We will not go into detail about this parameter for now and will simply passnilas its value, telling iOS that we want to stick to the system sharing options.
So let’s say that you have a text field where the user can
enter text to be shared, and a Share button right near it. When the user
presses the Share button, you will simply pass the text of the text
field to your instance of the UIActivityViewController class. Here is our
code. We are writing this code for iPhone, so we will present our
activity view controller as a modal view controller.
Because we are putting a text field on our view controller, we
need to make sure that we are handling its delegate messages, especially
the textFieldShouldReturn: method of
the UITextFieldDelegate protocol.
Therefore, we are going to elect our view controller as the delegate of
the text field. Also, we are going to attach an action method to our
Share button. Once the button is tapped, we want to make sure there is
something in the text field to share. If there isn’t, we will simply
display an alert to the user telling him why we cannot share the content
of the text field. If there is some text in the text field, we will pop
up an instance of the UIActivityViewController class. So let’s begin
with the implementation file of our view controller and define our UI
components:
@interfaceViewController()<UITextFieldDelegate>@property(nonatomic,strong)UITextField*textField;@property(nonatomic,strong)UIButton*buttonShare;@property(nonatomic,strong)UIActivityViewController*activityViewController;@end...
After this, we will write two methods for our view controller, each of which is able to create one of our UI components and place it on our view controller’s view. One will create the text field, and the other will create the button next to it:
-(void)createTextField{self.textField=[[UITextFieldalloc]initWithFrame:CGRectMake(20.0f,35.0f,280.0f,30.0f)];self.textField.translatesAutoresizingMaskIntoConstraints=NO;self.textField.borderStyle=UITextBorderStyleRoundedRect;self.textField.placeholder=@"Enter text to share...";self.textField.delegate=self;[self.viewaddSubview:self.textField];}-(void)createButton{self.buttonShare=[UIButtonbuttonWithType:UIButtonTypeRoundedRect];self.buttonShare.translatesAutoresizingMaskIntoConstraints=NO;self.buttonShare.frame=CGRectMake(20.0f,80.0f,280.0f,44.0f);[self.buttonSharesetTitle:@"Share"forState:UIControlStateNormal];[self.buttonShareaddTarget:selfaction:@selector(handleShare:)forControlEvents:UIControlEventTouchUpInside];[self.viewaddSubview:self.buttonShare];}
Once we are done with that, we just have to call these two methods
in the viewDidLoad method of our view
controller. This will allow the UI components to be placed on the view
of our view controller:
-(void)viewDidLoad{[superviewDidLoad];[selfcreateTextField];[selfcreateButton];}
In the textFieldShouldReturn:
method, all we do is dismiss the keyboard in order to resign the text
field’s active state. This simply means that when a user has been
editing the text field and then presses the Return or Enter button on
the keyboard, the keyboard should be dismissed. Bear in mind that the
createTextField method that we just
coded has set our view controller as the delegate of the text field. So
we have to implement the aforementioned method as follows:
-(BOOL)textFieldShouldReturn:(UITextField*)textField{[textFieldresignFirstResponder];returnYES;}
Last but not least is the handler method of our button. As you
saw, the createButton method creates
the button for us and elects the handleShare: method to handle the touch down
inside action of the button. So let’s code this method:
-(void)handleShare:(id)paramSender{if([self.textField.textlength]==0){NSString*message=@"Please enter a text and then press Share";UIAlertView*alertView=[[UIAlertViewalloc]initWithTitle:nilmessage:messagedelegate:nilcancelButtonTitle:@"OK"otherButtonTitles:nil];[alertViewshow];return;}self.activityViewController=[[UIActivityViewControlleralloc]initWithActivityItems:@[self.textField.text]applicationActivities:nil];[selfpresentViewController:self.activityViewControlleranimated:YEScompletion:^{/* Nothing for now */}];}
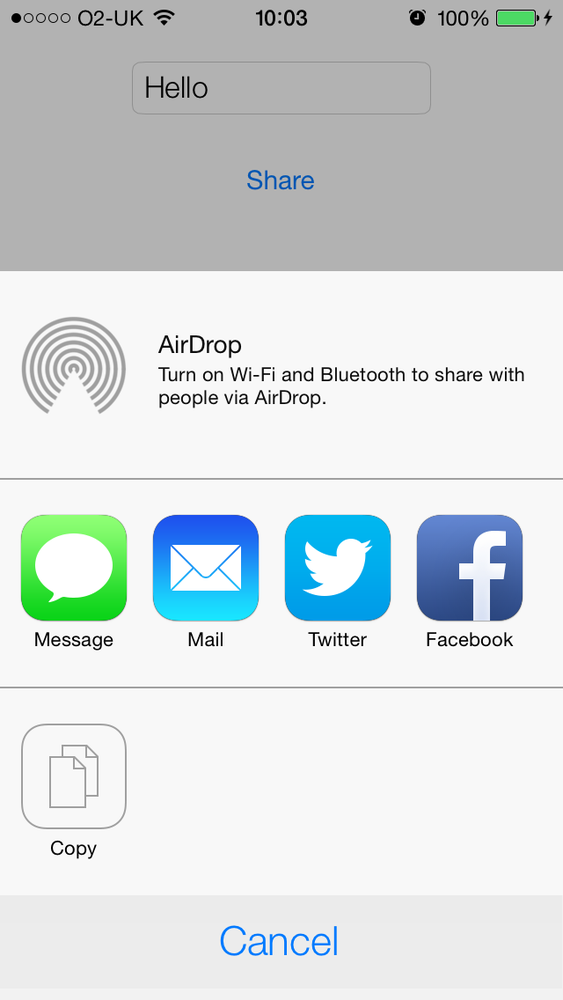
Now if you run the app, enter some text in the text field, and then press the Share button, you will see something similar to Figure 1-28.
You can also have sharing options displayed as soon as your view
controller is displayed on the screen. The viewDidAppear method of your view controller
will be called when the view of your view controller is displayed on the
screen and is guaranteed to be in the view hierarchy of your app,
meaning that you can now display other views on top of your view
controller’s view.
Warning
Do not attempt to present the activity view controller in the viewDidLoad method of your view controller. At that stage in
the app, your view controller’s view is still not attached to the view hierarchy of the
application, so attempting to present a view controller on the view will not work. Your
view must be present in the hierarchy of the views for your modal views to work.
For this reason, you need to present the sharing view controller in the viewDidAppear method of your view controller.
Get iOS 7 Programming Cookbook now with the O’Reilly learning platform.
O’Reilly members experience books, live events, courses curated by job role, and more from O’Reilly and nearly 200 top publishers.


