You would like to allow your users to move from one view controller to the other with a smooth and built-in animation.
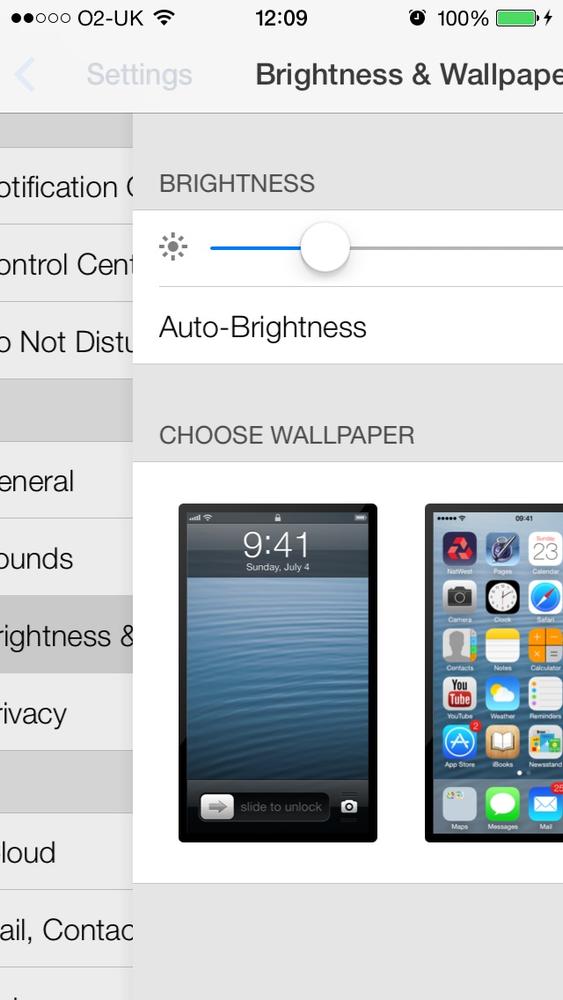
If you’ve used an iPhone, iPod Touch, or iPad before, chances are that you have already seen a navigation controller in action. For instance, if you go to the Settings app on your phone and then press an option such as Wallpaper (Figure 1-32), you will see the Settings main screen get pulled out of the screen from the left and the Wallpaper screen pushing its way into the screen from the right. That is the magic of navigation controllers. They allow you to push view controllers onto a stack and pop them from the stack. The view controller on top of the stack is the top view controller and is the one seen by the user at that moment. So only the top view controller gets displayed to the user and is changed either by popping (removing) it or by pushing another view controller onto the stack.
Now we are going to add a navigation controller to our project, but we need a project first. Please follow the instructions in Recipe 1.9 to create an empty application with a simple view controller. In this recipe, we will expand on Recipe 1.9. Let’s start with the .m file of our app delegate:
#import "AppDelegate.h"#import "FirstViewController.h"@interfaceAppDelegate()@property(nonatomic,strong)UINavigationController*navigationController;@end@implementationAppDelegate...
Now we have to initialize our navigation controller using its
initWithRootViewController: method
and pass our root view controller as its parameter. Then we will set the
navigation controller as the root view controller of our window. Don’t
get confused here. UINavigationController is actually a subclass
of UIViewController, and our window’s
rootViewController property accepts
any object of type UIViewController,
so if we want the root view controller of our window to be a navigation
controller, we simply set our navigation controller as the root view
controller of the window:
-(BOOL)application:(UIApplication*)applicationdidFinishLaunchingWithOptions:(NSDictionary*)launchOptions{FirstViewController*viewController=[[FirstViewControlleralloc]initWithNibName:nilbundle:nil];self.navigationController=[[UINavigationControlleralloc]initWithRootViewController:viewController];self.window=[[UIWindowalloc]initWithFrame:[[UIScreenmainScreen]bounds]];self.window.rootViewController=self.navigationController;self.window.backgroundColor=[UIColorwhiteColor];[self.windowmakeKeyAndVisible];returnYES;}
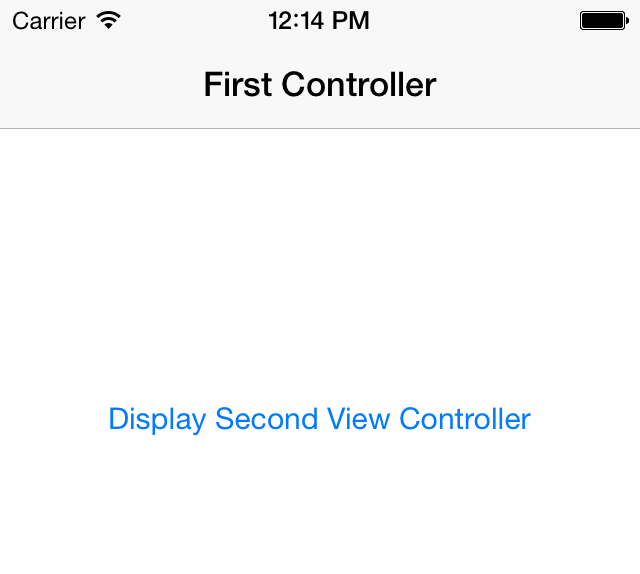
Now let’s run our app in the simulator, as shown in Figure 1-33.
Note
The root view controller’s implementation file is creating the button in the center of the screen (shown in Figure 1-33). We will get to the implementation of that file soon.
The first thing you might notice in Figure 1-33 is the bar on top of the screen. The screen isn’t plain white anymore. What’s the new widget? A navigation bar. We will be using that bar a lot for navigation, placing buttons there, and so forth. That bar is also capable of displaying a title. Each view controller specifies a title for itself, and the navigation controller will automatically display that title once the view controller is pushed into the stack.
Let’s go to our root view controller’s implementation file,
inside the viewDidLoad
method, and set the title
property of our view controller to First
Controller. We’ll also create our button there. When the
user presses this button, we want to display the second view controller
on the screen:
#import "FirstViewController.h"#import "SecondViewController.h"@interfaceFirstViewController()@property(nonatomic,strong)UIButton*displaySecondViewController;@end@implementationFirstViewController-(void)performDisplaySecondViewController:(id)paramSender{SecondViewController*secondController=[[SecondViewControlleralloc]initWithNibName:nilbundle:NULL];[self.navigationControllerpushViewController:secondControlleranimated:YES];}-(void)viewDidLoad{[superviewDidLoad];self.title=@"First Controller";self.displaySecondViewController=[UIButtonbuttonWithType:UIButtonTypeSystem];[self.displaySecondViewControllersetTitle:@"Display Second View Controller"forState:UIControlStateNormal];[self.displaySecondViewControllersizeToFit];self.displaySecondViewController.center=self.view.center;[self.displaySecondViewControlleraddTarget:selfaction:@selector(performDisplaySecondViewController:)forControlEvents:UIControlEventTouchUpInside];[self.viewaddSubview:self.displaySecondViewController];}@end
Now let’s go and create this second view controller,
without a .xib
file, and call it SecondViewController.
Follow the same process that you learned in Recipe 1.9. Once
you are done creating this view controller, give it a title of
Second Controller.
#import "SecondViewController.h"@implementationSecondViewController-(void)viewDidLoad{[superviewDidLoad];self.title=@"Second Controller";}
Now what we want to do is “pop” from the second view controller
back to the first view controller, five seconds after the second view
controller is displayed to the screen. For that we are using the
performSelector:withObject:afterDelay: method
of NSObject to call our new method,
goBack, five seconds after our second
view controller successfully displays its view. In the goBack method, we are simply using the
navigationController property of our
view controller (this is built into UIViewController and is
not something that we coded) to pop back to the
instance of FirstViewController,
using the popViewControllerAnimated: method of our
navigation controller that takes a Boolean as a parameter. If this
Boolean value is set to YES, the transition back to
the previous view controller will be animated, and if
NO, it won’t be. When the second view controller is
displayed on the screen, you will see something similar to that shown in
Figure 1-34.
#import "SecondViewController.h"@implementationSecondViewController-(void)viewDidLoad{[superviewDidLoad];self.title=@"Second Controller";}-(void)goBack{[self.navigationControllerpopViewControllerAnimated:YES];}-(void)viewDidAppear:(BOOL)paramAnimated{[superviewDidAppear:paramAnimated];[selfperformSelector:@selector(goBack)withObject:nilafterDelay:5.0f];}@end
You can see that the navigation bar is displaying the title of the top view controller and even sports a back button that will take the user back to the previous view controller. You can push as many view controllers as you like into the stack, and the navigation controller will work the navigation bar to display the relevant back buttons that allow the user to back through your application’s UI, all the way to the first screen.
So if you open the app in the simulator now and press the button on the first view controller, you will see that the second view controller will automatically get displayed on the screen. Wait five seconds now on the second view controller and it will automatically go back to the first view controller.
Get iOS 7 Programming Cookbook now with the O’Reilly learning platform.
O’Reilly members experience books, live events, courses curated by job role, and more from O’Reilly and nearly 200 top publishers.


