The UIImageView is one of the
least-complicated classes in the iOS SDK. As you know, an image view is
responsible for displaying images. There are no tips or tricks involved.
All you have to do is instantiate an object of type UIImageView and add it to your views. Now, I
have a picture of a MacBook Air, and I would like to display it in an
image view. Let’s start with our view controller’s implementation
file:
#import "ViewController.h"@interfaceViewController()@property(nonatomic,strong)UIImageView*myImageView;@end@implementationViewController
Go ahead and instantiate the image view and place the image in it:
-(void)viewDidLoad{[superviewDidLoad];UIImage*macBookAir=[UIImageimageNamed:@"MacBookAir"];self.myImageView=[[UIImageViewalloc]initWithImage:macBookAir];self.myImageView.center=self.view.center;[self.viewaddSubview:self.myImageView];}
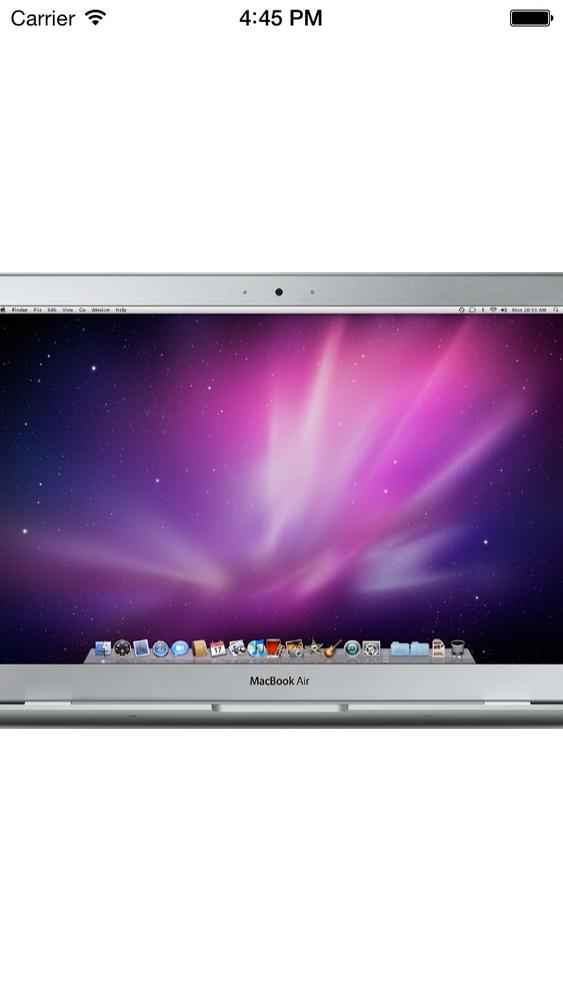
Now if we run the app, we will see something similar to Figure 1-60.
I should mention that the MacBook Air image that I’m loading
into this image view is 980×519 pixels, and as you can see, it certainly
doesn’t fit into the iPhone screen. So how do we solve this problem?
First, we need to make sure that we are initializing our image view
using the initWithFrame: method,
instead of the initWithImage: method,
as the latter will set the width and height of the image view to the
exact width and height of the image. So let’s remedy that first:
-(void)viewDidLoad{[superviewDidLoad];UIImage*macBookAir=[UIImageimageNamed:@"MacBookAir"];self.myImageView=[[UIImageViewalloc]initWithFrame:self.view.bounds];self.myImageView.image=macBookAir;self.myImageView.center=self.view.center;[self.viewaddSubview:self.myImageView];}
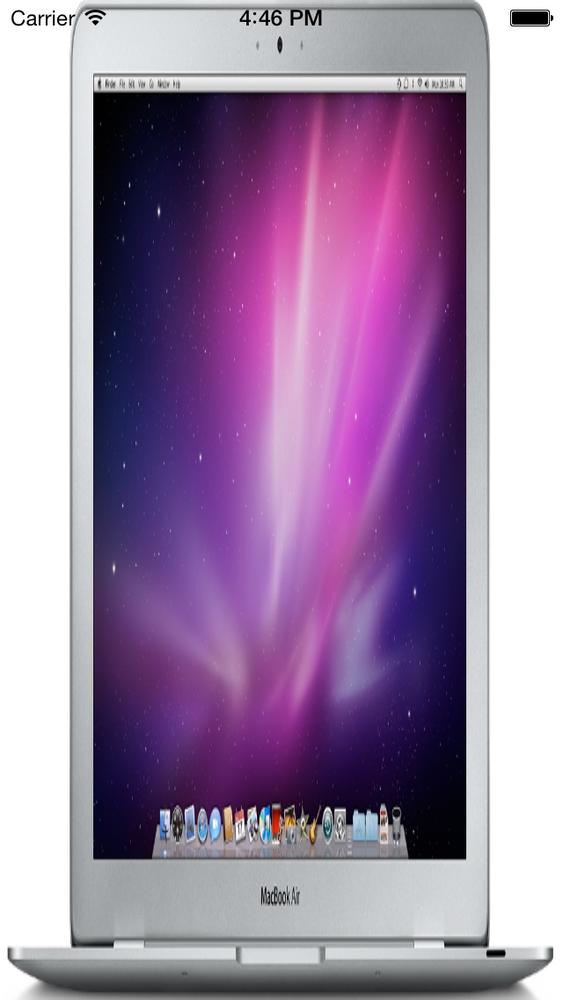
So how does the app look now? See Figure 1-61.
This isn’t really what we wanted to do, is it? Of course, we got
the frame of the image view right, but the way the image is rendered in
the image view isn’t quite right. So what can we do? We can rectify this
by setting the contentMode property
of the image view. This property is of type UIContentMode:
typedefNS_ENUM(NSInteger,UIViewContentMode){UIViewContentModeScaleToFill,UIViewContentModeScaleAspectFit,UIViewContentModeScaleAspectFill,UIViewContentModeRedraw,UIViewContentModeCenter,UIViewContentModeTop,UIViewContentModeBottom,UIViewContentModeLeft,UIViewContentModeRight,UIViewContentModeTopLeft,UIViewContentModeTopRight,UIViewContentModeBottomLeft,UIViewContentModeBottomRight,};
Here is an explanation of some of the most useful values in
the UIViewContentMode
enumeration:
UIViewContentModeScaleToFillThis will scale the image inside the image view to fill the entire boundaries of the image view.
UIViewContentModeScaleAspectFitThis will make sure the image inside the image view will have the right aspect ratio and fits inside the image view’s boundaries.
UIViewContentModeScaleAspectFillThis will makes sure the image inside the image view will have the right aspect ratio and fills the entire boundaries of the image view. For this value to work properly, make sure that you have set the
clipsToBoundsproperty of the image view toYES.
Note
The clipsToBounds property of
UIView denotes whether the subviews
of that view should be clipped if they go outside the boundaries of
the view. You use this property if you want to be absolutely certain
that the subviews of a specific view will not get rendered outside the
boundaries of that view (or that they do get rendered outside the
boundaries, depending on your requirements).
So to make sure the image fits into the image view’s boundaries
and that the aspect ratio of the image is right, we need to use the
UIViewContentModeScaleAspectFit
content mode:
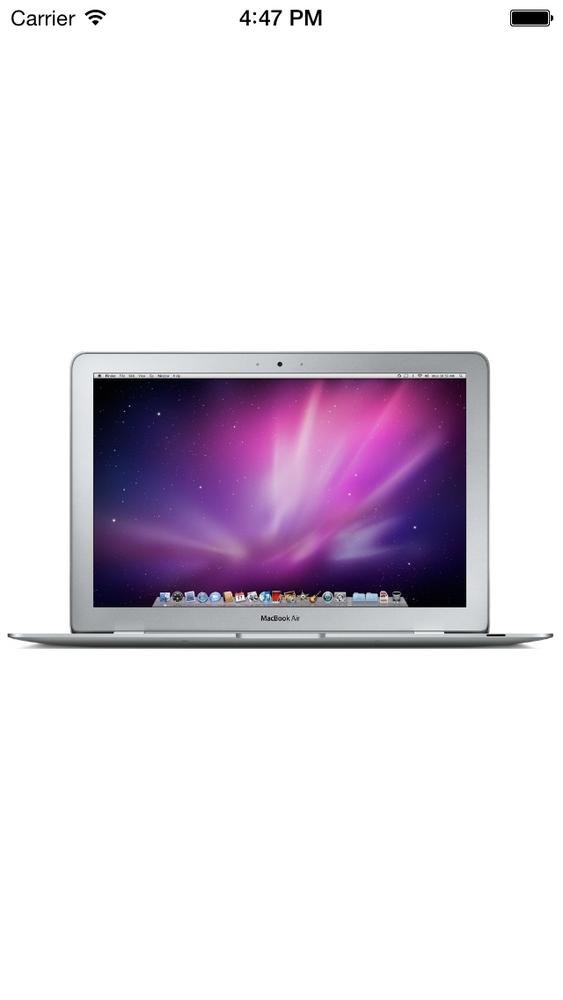
-(void)viewDidLoad{[superviewDidLoad];UIImage*macBookAir=[UIImageimageNamed:@"MacBookAir"];self.myImageView=[[UIImageViewalloc]initWithFrame:self.view.bounds];self.myImageView.contentMode=UIViewContentModeScaleAspectFit;self.myImageView.image=macBookAir;self.myImageView.center=self.view.center;[self.viewaddSubview:self.myImageView];}
And the results will be exactly what we expected (Figure 1-62).
Get iOS 7 Programming Cookbook now with the O’Reilly learning platform.
O’Reilly members experience books, live events, courses curated by job role, and more from O’Reilly and nearly 200 top publishers.


