The iPhone is one of the most distinctive game platforms currently available. The touch screen, integration with iTunes, programming in Objective-C, low development cost, and ease of publishing all make for a very strange but promising new development opportunity. As the newest kid on the block, the iPhone instantly captured a noticeable portion of the mobile phone market and inspired a wave of copycat devices by makers such as Motorola, Samsung, and LG.
As a programmer, you might not be impressed with sales figures and market shares, but you should be interested in the viability of the iPhone as a whole. If no one owns an iPhone, no one will buy the games you make for it. The good news is that even in the face of the 2009 economic downturn, iPhones continued to sell.
To get started with the iPhone, you’ll need to get a free Apple developer account. Next you’ll download the iPhone SDK on your Mac, which also contains the Xcode IDE and Interface Builder tool for laying out screens. (Apple doesn’t provide a toolkit for Windows or any other non-Mac platform.) And because the iPhone API requires you to write in Objective-C, you will need to read a primer on the language if you do not already understand it. This chapter takes you step by step through all of these tasks.
The first step in setting up your iPhone development environment is to register an Apple developer account. Signing up for an account is free and gives you access to Apple’s online documentation, tutorial videos, and the SDK download:
Click the Register link, and then click Start Now. Choose the option to create a new Apple ID, or to log in using an Apple ID from an iTunes or App Store account.
Once you have registered, you can log in to the iPhone Dev Center.
Apple may already have emailed you a link to download the free SDK, or you may choose to download the SDK using the link from the website. Note that you should not download Xcode separately because it is included within the SDK download package (and the version of Xcode that comes with the SDK may be newer than what is otherwise available).
Once downloaded, install the SDK, which will make Xcode and Interface Builder accessible to you in the /Developer/Applications folder on your hard drive (you can also activate Spotlight and search for Xcode and Interface Builder to launch either application quickly).
The free developer account will allow you to build applications and run them in a simulator on your Mac. However, to load your application onto a phone, you will also need to sign up for the paid developer program. This requires a small annual fee, so even if you are a private developer, it won’t hurt your wallet too much:
You will have two options: Standard Program and Enterprise Program. If you are writing games for the general public, you probably do not want the Enterprise Program. If you read closely, you will notice the Enterprise Program is actually for creating applications that only you and your company will use internally. If you plan to create games that will be sold via the App Store, rest assured that the Standard Program is the correct choice for you.
Select Enroll Now and log in if necessary.
You now have another choice: enroll as an individual or as a company. If you choose Individual, you will not be able to add other programmers or quality assurance members to your account, which is necessary to distribute your application to others during the development and testing process. However, if you select Company, you will be required to provide detailed information about your company.
Continue through the website, selecting the appropriate information, until you arrive at a screen that says “Thank you for submitting your enrollment.” Now you must wait for an email from Apple (which may take on the order of a month to arrive).
Note
Signing up for the paid developer program will also give you access to beta releases of future versions of the iPhone OS and SDK, but only during the times at which Apple chooses to make them available.
It is good to get your paid developer account enrollment going as soon as possible so that it will be available when you actually need it.
When you build an application using Xcode, the end result is called an application bundle. In Mac OS X and the iPhone, an application bundle is a special type of directory that holds an executable file and the resources needed to run it. This includes an icon to represent the application, files with special information about the application, and any images or sounds the application uses.
Note
In the Finder, an application bundle simply appears as its application icon; right-click or Ctrl-click on it and select View Package Contents from the menu to see what’s inside.
Although you can’t do this on the iPhone, you can find iPhone applications in the iPhone Simulator. If you have the iPhone SDK installed, you can use Spotlight to search for the MobileSafari.app file. Show this file in the Finder (don’t try to run it on your Mac), and view its package contents (some of which appears in the following list).
A typical iPhone application bundle might have the following structure:
- Executable
(Required.) This is the compiled code executable; it will typically have the same name as your application. In MobileSafari.app, this is the file named MobileSafari.
- Info.plist
(Required.) This is a collection of properties, in key-value pair form, that specifies important information about your application. Notable properties listed here are the display name of your application, the version number, and a unique ID number. These files use a binary format that can’t be read in a text editor, but you can use the Property List Editor located in /Developer/Applications/Utilities to view them.
- icon.png
(Required.) This is a 57×57 pixel icon used to represent your application on the iPhone’s home screen. Glossy button effects will be added on top of this image automatically, so it should be flat-colored.
- Various resources
(Optional.) All common resource files, such as images, sounds, and binary data, used by your application will be placed in the same folder as the executable. The only subfolders present in an iPhone application bundle are for localized resources.
- Localization folders
(Optional.) If your application supports multiple languages, you may add subfolders to the bundle, which contain resources that cater to individual languages. The folder names will have a language name or an ISO language abbreviation followed by “.lproj”; for example, English.lproj, French.lproj, German.lproj, and uk.lproj would each contain resources specific to English, French, German, and UK English languages, respectively.
- Settings.bundle
(Optional.) You will create this file if you want your application to provide user preference options in the Settings application that comes with the iPhone.
- Icon-Settings.png
(Optional.) If you added a Settings.bundle file, this image is used to represent the application in the Settings application. The image should be 29×29 pixels. However, if you do not add this image, the Icon.png image will be scaled and used automatically.
- MainWindow.nib
(Optional.) Created by the Interface Builder application, MainWindow.nib contains code and resources necessary to draw your application as it starts up. More .nib files can be loaded after this one, but it will always be the first in memory.
- Default.png
(Optional.) This image is displayed as the application is loading the MainWindow.nib file. It should be full screen, which is 480×320 pixels on the iPhone. If this image is close to what the user will see when the application is finished loading, the load process will appear to take less time.
- iTunesArtwork
(Optional.) If you are distributing the application outside the App Store, this artwork is used to display your application when loading onto a handset using iTunes. More on this later.
As you will see in the next section, when you’re creating your application, Xcode and Interface Builder will create most of these files for you.
If you are unfamiliar with Xcode, you may be reluctant to learn a new IDE at first. However, the way iPhone development works, you pretty much have to. Fortunately, once you get used to it, you’ll see that Xcode is pretty good at what it does. It has all the features you would expect from an industry-standard IDE: it jumps to the line of compile errors, auto-completes complicated API methods, and has integrated SDK references.
And it gets better: Xcode supports on-device debugging, a full-featured iPhone Simulator, useful project wizards, refactoring tools, and even direct integration with Subversion revision control repositories.
An Xcode project contains all the code, resources, certificates, and configurations you need to create an iPhone application. To get acquainted with the environment, open your Xcode IDE and follow these steps to create a typical “Hello World” application:
Open Xcode.
Select File→New Project.
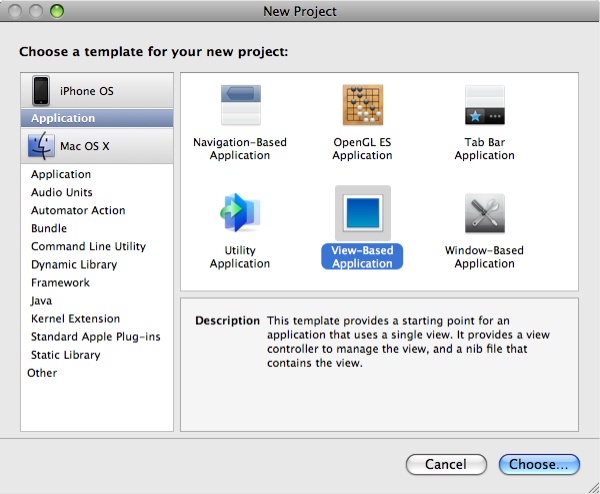
In the dialog that opens, select iPhone OS, then View-Based Application (see Figure 1-1), and click Choose.
Name the project “HelloWorld” and click Save.
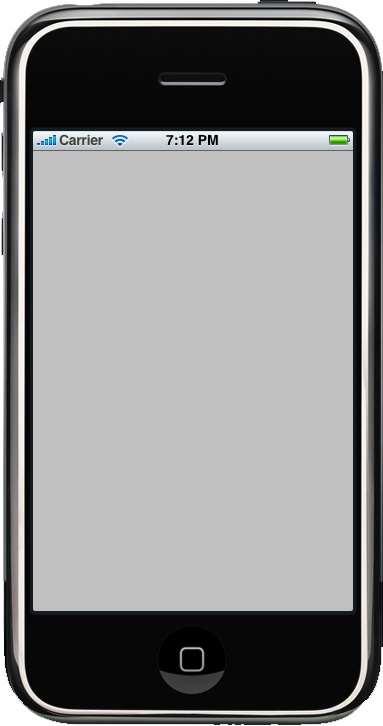
At this point, you can build and run (click the Build and Go icon in the toolbar). The HelloWorld application shows only a blank gray screen when run in the Simulator, as shown in Figure 1-2.
Not very interesting yet, is it? Before we go on to make this a proper “Hello World” application, here is a quick rundown of the files that were generated when you created the project:
- HelloWorldAppDelegate.m, HelloWorldAppDelegate.h
The class held in these files can be considered the main code entry point of the application. The app delegate controls the main window and main View Controller, and is responsible for setting them up for display.
- HelloWorldViewController.m, HelloWorldViewController.h
This class in these files holds the main view, and is responsible for showing the horribly uninteresting gray screen. We will be editing it to say “Hello World” soon.
- MainWindow.xib
This Interface Builder file results in a .nib file that is placed in your application bundle when the project is compiled. When loaded, it creates the app delegate, and loads the main window and View Controller.
- HelloWorldViewController.xib
This file lays out the design for the
HelloWorldViewController’s view.
Note
NIB stands for NeXTSTEP Interface Builder, and XIB stands for Xcode Interface Builder. NIB files are dense compiled binary files; XIB files are human-readable XML files. As we mentioned earlier, Xcode compiles XIB files into NIB files. The XIB format was created specifically to solve issues with merging NIB files in projects under source control, since you can diff XML files more easily than binary files.
Now we need to draw the “Hello World” text. We can go about this in several ways:
Add a Cocoa
UILabelby writing code directly in HelloWorldViewController.m.Add a Cocoa
UILabelin Interface Builder to HelloWorldViewController.xib.Define a subclass of
UIView, and use a Quartz font rendering indrawRect.Create a texture-mapped font in OpenGL ES to render with.
Let’s start with the first method: adding a UILabel by writing
code in HelloWorldViewController.m.
A stub method named viewDidLoad is
already inside HelloWorldViewController.m, which is a good
place to add our code. This method will be called after .nib file loading is done, but before
rendering begins:
Replace the
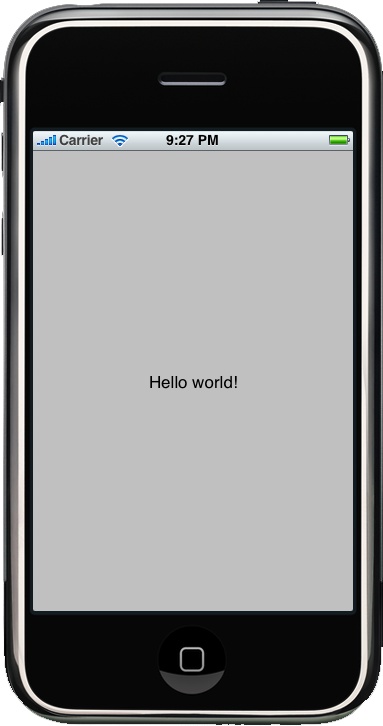
viewDidLoadfunction in HelloWorldViewController.m with the following (this function is commented out by default, so be sure to remove the/*that precedes it and the*/that follows it):- (void) viewDidLoad { [super viewDidLoad]; //draw "Hello World" using Cocoa UIKit. //grab the screen dimensions int w = self.view.frame.size.width; int h = self.view.frame.size.height; //create a text label: the size 100,50 here is arbitrary // but it must be large enough to fit the "Hello World" text. UILabel* label = [[UILabel alloc] initWithFrame:CGRectMake(0, 0, 100, 50)]; //put the label at the center of the screen label.center = CGPointMake(w/2, h/2); //align the text to the center of the label (default is left) label.textAlignment = UITextAlignmentCenter; //don't draw the label's background (default is white) label.backgroundColor = [UIColor clearColor]; label.text = @"Hello world!"; //add label to our view, so that it can be rendered [self.view addSubview:label]; //since we alloc'd label in this method we need to release label here [label release]; }Build and run the project (if you haven’t quit the Simulator from its previous run, you’ll be prompted to stop it). The app should now display your text (see Figure 1-3).
Now let’s go over the second method, adding a UILabel to HelloWorldViewController.xib using Interface Builder. You must undo your changes if you
followed the preceding example:
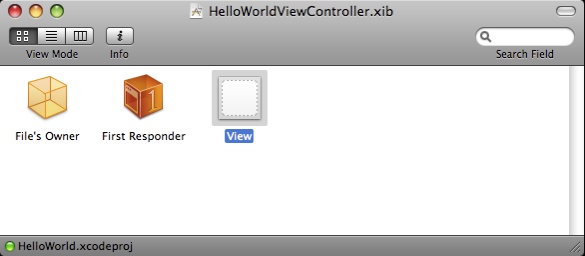
Open the HelloWorldViewController.xib file in Interface Builder by double-clicking it from the list of project files in Xcode.
Double-click the View object to begin editing it (Figure 1-4).
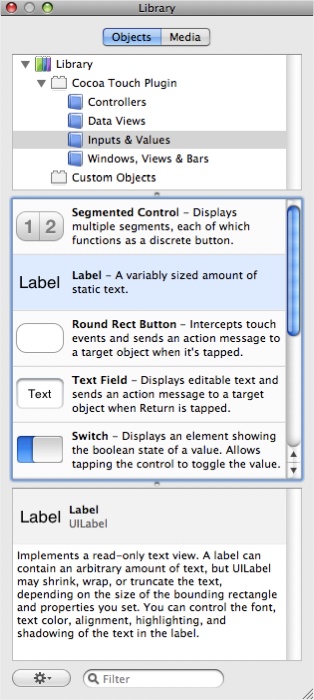
Find the Label object in the Library panel (open the panel by selecting Tools→Library Panel, if it is not already open). See Figure 1-5.
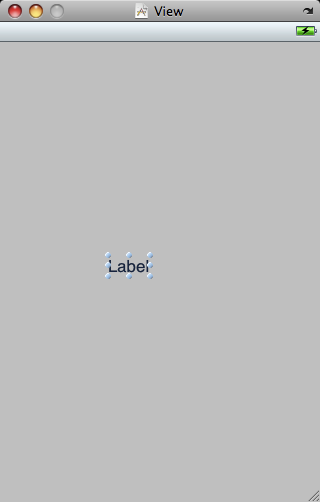
Drag the label into the View editing window, as shown in Figure 1-6.
Double-click the new label and edit the text to say “Hello World”. You can also edit it from the Attributes Inspector (Tools→Attributes Inspector).
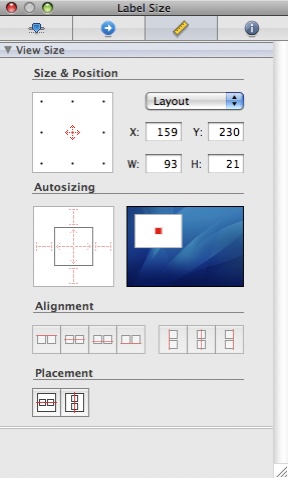
In the Label Size Inspector (Tools→Size Inspector), click both of the Placement buttons to center the label horizontally and vertically, as shown in Figure 1-7.
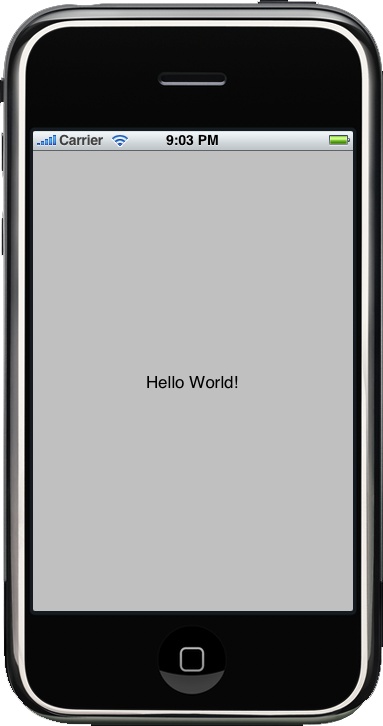
Save the .xib file and return to Xcode. Building the application will update the .nib file, which will cause the changes to appear when the application is run, as shown in Figure 1-8.
When the .nib file is loaded, it creates and displays the
UILabel. If our code needs access to read or modify the created label, we can link it to anIBOutletin our code. In HelloWorldViewController.h, replace the stub definition ofHelloWorldViewControllerwith the following:@interface HelloWorldViewController : UIViewController { IBOutlet UILabel* myLabel; }An
IBOutletis a code tag that enables Interface Builder to recognize possible handles in code that can be linked to.
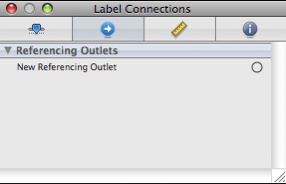
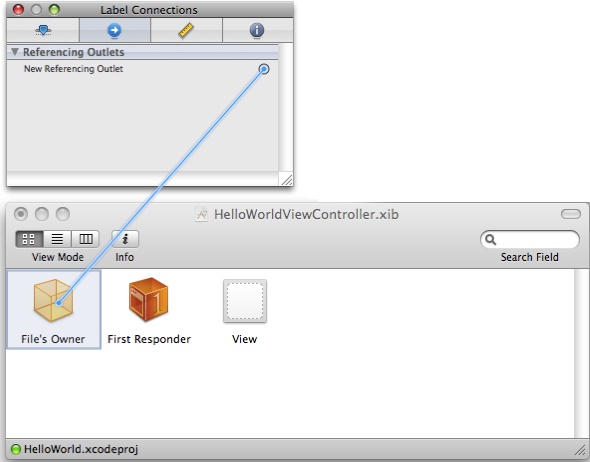
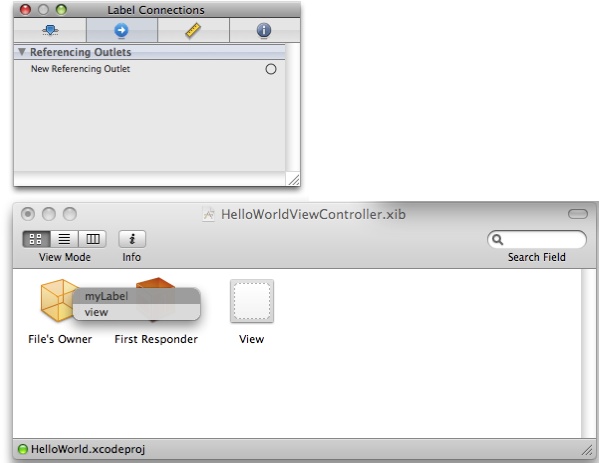
To link the .nib’s label to the outlet, open HelloWorldViewController.xib in Interface Builder and open the Connections Inspector (Tools→Connections Inspector). Then, click to select the label, drag the label’s New Referencing Outlet to the File’s Owner object, release, and click on the “myLabel” text that shows up in the pop-up menu (see Figures 1-9 through 1-11). Because we set the Referencing Outlet, the two objects will be linked together when the .nib is loaded. Specifically, when HelloWorldViewController.nib is loaded in the application, it will know to set the variable
myLabelto point at theUILabelwe just linked to.Save HelloWorldViewController.xib and quit Interface Builder.
Now our code has access to the label through myLabel. This linking process is used
frequently in Interface Builder to specify outlets, actions, delegates,
and data sources. Any interaction between visible elements of the
interface and your code is made via Interface Builder links.
The UIView class represents
a View object in the iPhone SDK. Views are visible rectangular portions of the screen that handle
drawing and animation, event handling, and subview management. If you
look at the iPod application that comes with your iPhone, you’ll see
that the navigation bar at the top, the tab bar at the bottom, and the
content area in the middle are three separate views.
When creating a view-based application in the New Project Wizard, start with a single View Controller and a single View. You may want more Views as your application becomes more complex. For example, you may have one View for your game, another for a Main menu, one for a Settings screen, and another for an online High Score screen.
If your Views share a lot of the same code, it makes sense to add those Views to the same View Controller, along with the shared code. In the preceding example, we may want to put the Main menu and the Settings in the same View Controller, but put the main Game state and High Score screen each in their own View Controller. Nothing is stopping us from putting them all in one View Controller, or using a different View Controller for each one; it’s purely an organizational consideration.
Follow these steps to add a new View and View Controller to an existing window:
In Xcode, create a new class that extends
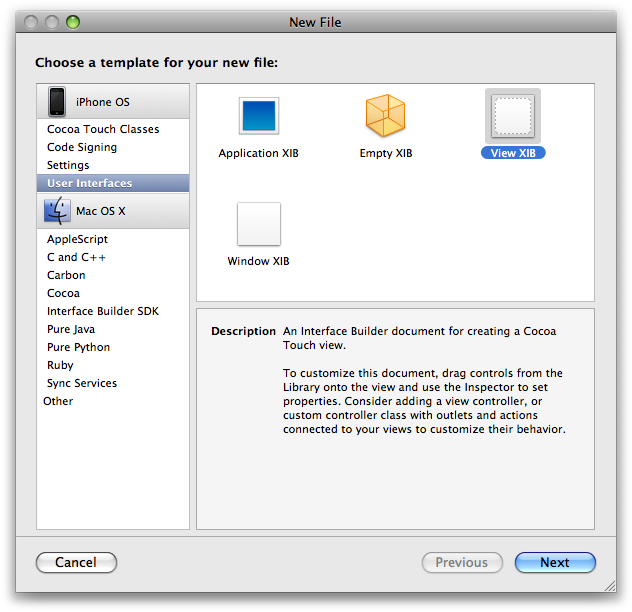
UIViewController. We are calling oursTestViewController.Create a new XIB file by selecting File→New File and choosing View XIB from the User Interfaces section, as shown in Figure 1-12.
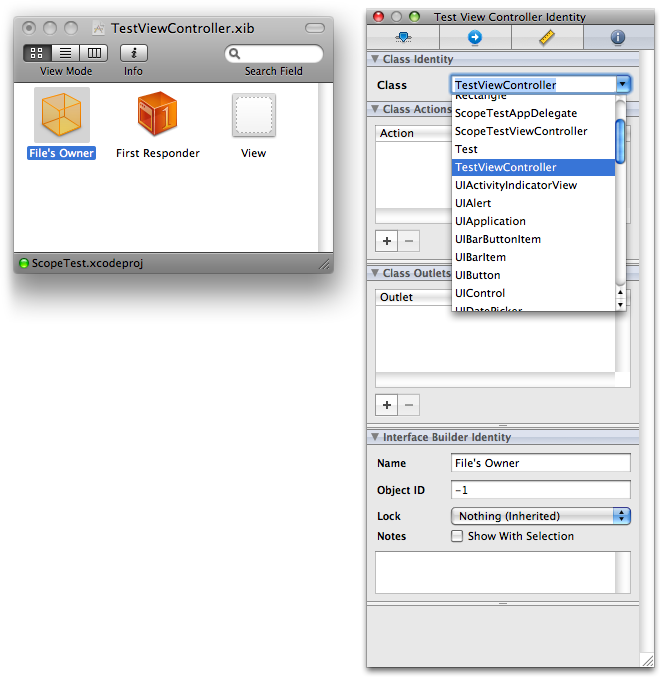
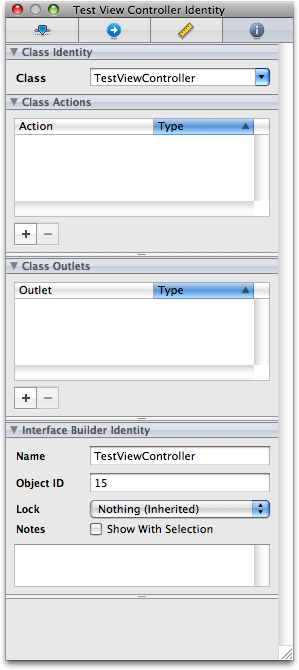
In Interface Builder, select the File’s Owner icon. In the Identity Inspector, set the Class Identity to TestViewController. If the Identity Inspector window is not open, you can access it from Tools→Identity Inspector. See Figure 1-13.
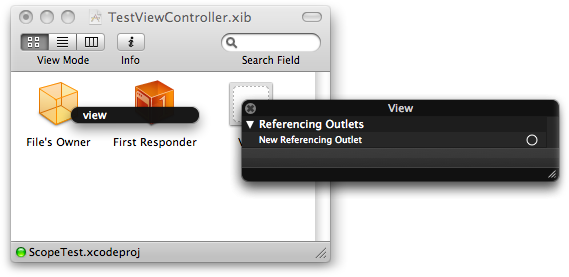
Set the View’s Referencing Outlet to the File’s Owner view, the same way we did in the Hello World example earlier (Figure 1-14).
Add a
TestViewControllerinstance to your code and label it as anIBOutlet. We are putting it in the app delegate class,TestAppDelegate. In TestAppDelegate.h, the new code will look like this:IBOutlet TestViewController* testViewController;
Edit your main window’s XIB file and add a
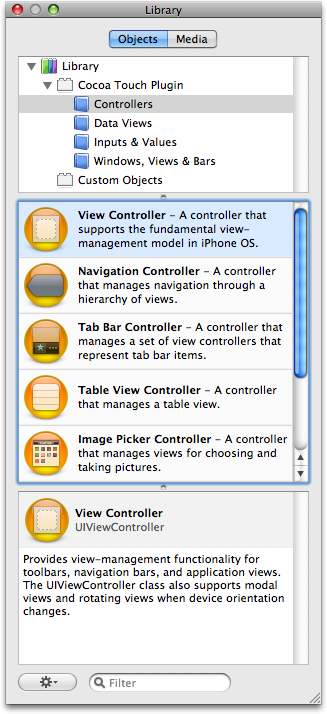
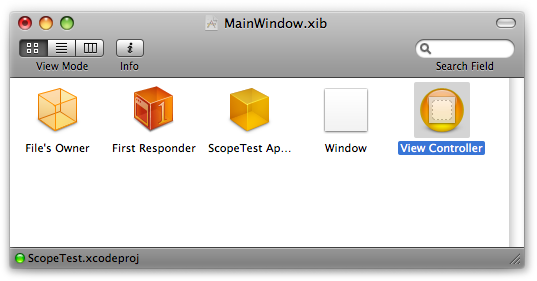
ViewControllerobject by dragging it from the Library window into the MainWindow.xib window. You can find the ViewController object in the Library under Library→Cocoa Touch Plugin→Controllers, as shown in Figures 1-15 and 1-16.
Edit this object to change the name of the class and the NIB to load to “TestViewController”. Do this by selecting the
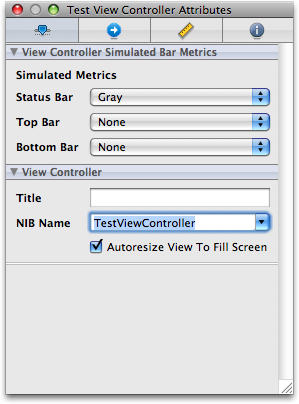
ViewControllerobject in the MainWindow.xib window and editing the class name in the Identity Inspector window. Next, select the Attributes button in the same window to switch it from the Identity Inspector to the Attributes Inspector. Finally, edit the NIB name in the Attributes Inspector (Figures 1-17 and 1-18).Link this object’s Referencing Outlet to the
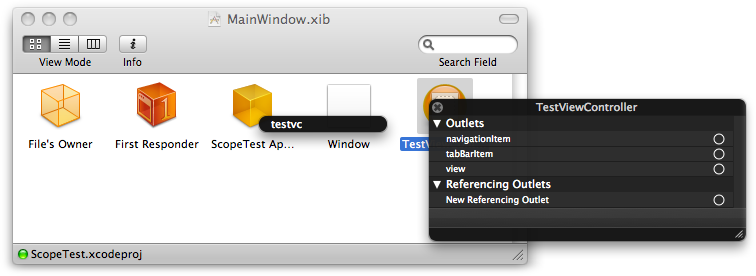
IBOutletinTestAppDelegatethat we created earlier:testViewController. See Figure 1-19.Use the following code to add the
Viewobject to theWindowobject before it can be displayed:[window addSubview:testViewController.view];
Once the
Viewobject has been added to theWindowobject, activate it by calling:[window bringSubviewToFront: testViewController.view];
Note that only one View can be active at any time. Calling
bringSubviewToFront will remove the
currently active View from the responder chain. It will not show up on
the foreground or receive input events until you call bringSubviewToFront on it again.
Follow these steps to add a new View to an existing View Controller:
Open the View Controller’s .h file in Xcode and add an
IBOutlet UIViewpointer for the new View. Ours is namedsecondView. The code will look like this:IBOutlet UIView* secondView;
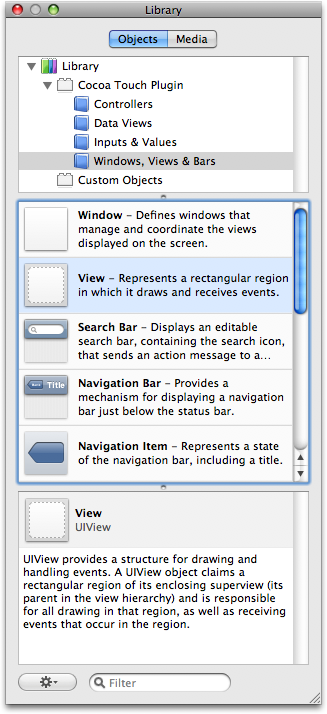
In Interface Builder, open the View Controller’s XIB file window and add a
UIViewobject from the Library. You can findUIViewunder Library→Cocoa Touch Plugin→Windows, Views & Bars, as shown in Figure 1-20.Set the
UIView’s Referencing Outlet to theIBOutletyou created earlier,secondView.For organizational purposes, you may wish to name the
UIViewobject in the View Controller’s XIB file window.To switch to the new View, somewhere in the View Controller, call this:
self.view = secondView;
Since we are overwriting the View Controller’s view property here, we will want to make
sure we have another reference to the old View in case we want to
switch back to it. We typically put each UIView into its own IBOutlet, and additionally assign the
initial startup UIView into the
view property. You can have more
than one Reference Outlet for any UIView, so the initial View will have
outlets named initialView and view.
Objects inside the NIB have access to properties inside the File’s Owner class. To access properties
outside the NIB, you need to use Proxy objects. The Proxy has an associated class name and proxy
name, but it does not create an instance of the associated class. You
have to pass in a Proxy instance
yourself when initializing the NIB file:
//Instead of auto-loading the view controller from the main window NIB,
// load it manually so that we can set up the proxy object.
viewController = [[HelloWorldViewController alloc] init];
//We want viewController to be able to access IBActions in
// HelloWorldViewController and in HelloWorldAppDelegate.
// The File's Owner will be the View Controller,
// and the Proxy named AppDelegate will be the app delegate [self].
NSDictionary*    proxies = [NSDictionary
                     dictionaryWithObject:self forKey:@"AppDelegate"];
                     //link proxy object name to app delegate instance
NSDictionary*    options = [NSDictionary
                     dictionaryWithObject:proxies
                     forKey:UINibProxiedObjectsKey];
                     //set up options with our proxy
[[NSBundle mainBundle] loadNibNamed:@"HelloWorldViewController"
                     owner:viewController options:options];
Get iPhone Game Development now with the O’Reilly learning platform.
O’Reilly members experience books, live events, courses curated by job role, and more from O’Reilly and nearly 200 top publishers.
