Chapter 12. Creating and Removing Elements and Attributes
12.0. Introduction
The existing Document Object Models provide a plethora of methods you can use to create new web document elements. Most of the methods I use in this chapter and in the following chapters are from the DOM Levels 1 and 2 and, since most of the examples in this chapter are specific to HTML or XHTML documents, the methods and objects described inherit functionality from both Core and HTML DOM specifications.
There is one older property, innerHTML, from the nonstandard DOM Level 0,
that I’ll also demonstrate, primarily because it’s so popular, and also
because of new support in HTML5.
Most of the methods and associated properties are available with all of the modern browsers. I’ll make a note where a method or property isn’t supported by one or more browsers.
See Also
See the Introduction to Chapter 11, for a more in-depth look at the Document Object Model and the DOM levels.
12.1. Using innerHTML: A Quick and Easy Approach to Adding Content
Problem
You want to add a couple of paragraphs with text to a div element, and you want to do so quickly and
easily.
Solution
Use the innerHTML property to
overwrite an element’s existing contents, with new material:
var div = document.getElementById("target");
div.innerHTML = "<p>This is a paragraph</p><p>This is a second</p>";
Discussion
The innerHTML property has been
around for a very long time, and is part of what is known as DOM Level
0—the first de facto API developed by the browser companies. It can be
much faster when you’re making complex additions to the web page,
because its processing is handled by the HTML parser, rather than the
DOM engine.
Because innerHTML was never
part of a standard, there are some variations in how it’s implemented.
For instance, not all browsers support the use of innerHTML with tables, so you won’t want to
use the property for adding table rows. The use of innerHTML isn’t standard with XML formats,
such as XHTML, as there’s no way to ensure that what is appended into
the page is well formed. In earlier years, the use of innerHTML wasn’t even supported with XHTML
documents.
Now, though, innerHTML is
becoming officially blessed by being defined within the HTML5 effort. In
addition, the outerHTML property has
also been formally defined in the HTML5 specification. It differs from
innerHTML in that outerHTML represents both the element and the
element’s contents, while innerHTML
only represents the element’s contents.
Note
Currently, the HTML5 specification states that the use of
innerHTML will abort the current
X/HTML parsing process. And not all browsers allow innerHTML to be set until after the page is
finished loading. Based on these restrictions, it’s best to not use
innerHTML until after the page is
completely loaded.
12.2. Inserting Elements Before Existing Page Elements
Solution
Use the DOM method createElement to create a new div element. Once created, attach it to the
web page before an existing element, using another DOM method, insertBefore:
// get the existing element
var refElement = document.getElementById("sister");

// get the element's parent node
var parent = refElement.parentNode;

// create new div element
var newDiv = document.createElement("div");

// attach to page before sister element
parent.insertBefore(newDiv, refElement);
Discussion
Adding a web page element is uncomplicated, as long as you keep in mind the tree-like structure of the web page. If you’re interested in attaching a web page element before another element, you’ll not only need to access this element, but also the target element’s parent element, in order to create the actual placement.
The reason you need the parent element is that there is no
functionality to insert an element before another, given just the target
element. Instead, you have to access the target element’s parent
element, and use the insertBefore
method to insert the new element before the existing one.
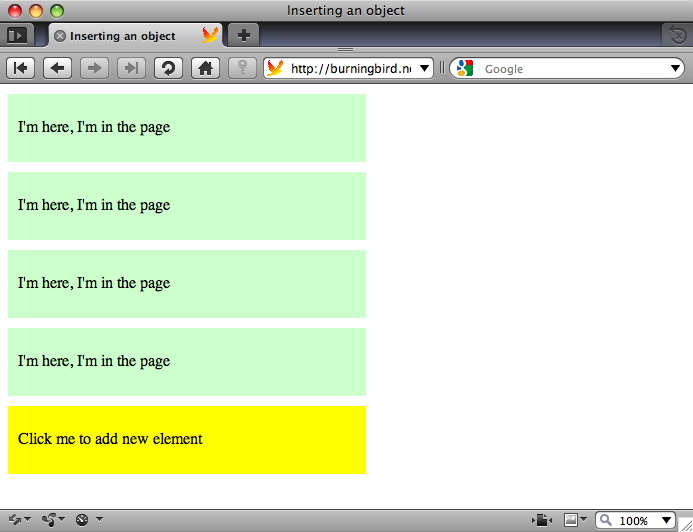
In Example 12-1, the
solution for this recipe is embedded into a web page that originally
consists only of one named div
element. When this element receives a click event, a new sister div element is created and inserted into the
document before the existing element.
<!DOCTYPE html>

<head>
<title>object detection</title>
<style type="text/css">
div
{
  width: 50%;
  height: 20px;
  padding: 10px;
  margin: 10px 0;
}

#div1
{
  background-color: #ffff00;
  }

.divclass
{
  background-color: #ccffcc;
}

</style>
<script type="text/javascript">

window.onload=function() {
  document.getElementById("div1").onclick=addDiv;
}

function addDiv() {

  // get parent
  var parent = this.parentNode;

  // create new div
  var newDiv = document.createElement("div");
  newDiv.className = "divclass";
  newDiv.innerHTML = "<p>I'm here, I'm in the page</p>";

  // add to page
  parent.insertBefore(newDiv,this);
}
</script>
</head>
<body>
  <div id="div1">
     <p>Click me to add new element</p>
  </div>
</body>
In the example, since the event is attached to the original
div element, a reference to it can be
accessed using this within the event
function, because the element is the owner of the onclick event handler function. You can then
get the element’s parent through the parentNode property. Once you have a reference
to both the parent and the existing element, all you need to do is
create the new div element and insert
it.
Use the document.createElement
method, passing in the type of element—in this case, div. Since the current document is an HTML
document, the createElement method
creates a new HTMLElement, which
inherits all functionality of the more generic Element class, as well as additional
methods and properties. The new element is assigned a CSS style through
the className property,
which is a standard property for all HTMLElement objects. It’s given some content
using the innerHTML property. The
new div element is then added to the
web page with insertBefore.
Each successive click of the original div element prepends a new div element to the original, each with the
same class and content. Figure 12-1 shows the web page
after the original div element has
been clicked several times.
Namespace Variation
Recipe 11.2 included a discussion on namespaces and their impact on some of the DOM methods that allow us to query and add new web page elements in a document that can contain multiple namespaces. If you’re working within an environment where namespaces are supported, such as an XHTML or SVG document, and you create a new element or attribute, it’s automatically added to the document’s default namespace unless you use one of the namespace-specific DOM methods.
Generally, the default behavior is sufficient. However, if you
want to create an element within a specific namespace, such as creating
a title in the Dublin Core namespace rather an XHTML title, use the
namespace variation of createElement,
createElementNS:
var dcTitle = document.createElementNS("http://purl.org/dc/elements/1.1/","title");The createElementNS takes two parameters: the first is the namespace for the
element; the second is the element tag.
The namespace method createElementNS is not supported in HTML
currently, as namespaces aren’t supported in HTML. The method is also
not currently supported in IE8, but should be in IE9, when Microsoft
adds support for XHTML.
See Also
See Recipe 11.2 for
more information about namespaces and the DOM. For a specific
description of the HTMLElement, see
the related W3C
page.
12.3. Appending a New Element to the End of a Page
Problem
You want to add a new element to a web page, but you want to append it to the end of the page.
Solution
Access the highest level web page element, the body element, and use the appendChild method to append the new element
to the page:
var bdy = document.getElementsByTagName("body")[0]; // body element
var newDiv = document.createElement("div");

// append to body
bdy.appendChild(newDiv);
Discussion
Since we’re appending the new element to the end of the page, it
makes sense to access the top-level page element (the body element) directly, using the DOM getElementsByTagName method. Since the method
always returns an array (more properly, a nodeList), we get the individual element
in the first array index:
var bdy = document.getElementsByTagName("body")[0];Once we have the parent element, the appendChild method appends the new element to
the end of the parent element. The method takes just one parameter: the
newly created element.
Will a document always have a body element? Typically, yes, if the document
is HTML or XHTML. However, if you’re working with other document types,
such as SVG or MathML, or are concerned about ensuring that the new
element is appended to whatever is the top-level document element, you
can use the approach demonstrated in Recipe 12.0 to get the parent of an existing
element that will be a sibling to the new element:
var bdy = document.getElementById("div1").parentNode;This sibling-parent approach ensures that the new element is appended as a sibling of the existing element, and at the same level in the document tree.
12.4. Triggering Older Versions of IE to Style New Elements
Problem
You want to use one of the new HTML5 elements, such as article, and have it styled or
programmatically accessible in IE7/8.
Solution
Use document.createElement in
order to trigger IE8 (and IE7) into properly handling new HTML5
elements:
// add article element
document.createElement("article");
Discussion
The article element is one of
the new HTML5 elements, accessible via the DOM by all of the book’s
target browsers except for IE. In order to style or programmatically
access article with IE8 or older, you
need to apply an HTML5 shim. This shim introduces the
article and other new elements to the
IE DOM tree by using the document.createElement method to create
one instance of the element:
document.createElement("article");The element doesn’t have to be assigned to a variable name or inserted into the web page—it just has to be created. Once an instance of the element type is created, IE can recognize the element. This step is essential not only for JavaScript applications, but to ensure the element can be styled with CSS.
Entire libraries now exist in order to define all of the HTML5 elements. All you need do is include the library before any other script in the page. The html5-shims page at Google Code maintains a list of HTML5 shims and other resources. The library I use in the book examples is the html5shiv, originally created by John Resig and now maintained by Remy Sharp, at http://html5shiv.googlecode.com/svn/trunk/html5.js.
12.5. Inserting a New Paragraph
Solution
Use some method to access the third paragraph, such as getElementsByTagName, to get all of the
paragraphs for a div element. Then
use the createElement and insertBefore DOM
methods to add the new paragraph just before the existing third
paragraph:
// get the target div
var div = document.getElementById("target");

// retrieve a collection of  paragraphs
var paras = div.getElementsByTagName("p");

// if a third para exists, insert the new element before
// otherwise, append the paragraph to the end of the div
var newPara = document.createElement("p");
if (paras[3]) {
   div.insertBefore(newPara, paras[3]);
} else {
   div.appendChild(newPara);
}
Discussion
The document.createElement
method creates any HTML element, which then can be assigned other
elements or data and appended or inserted into the page. In the
solution, the new paragraph element is inserted before an existing
paragraph using the insertBefore
method.
Since we’re interested in inserting the new paragraph before the
existing third paragraph, we need to retrieve a collection of the
div element’s paragraphs, check to
make sure a third paragraph exists, and then use the insertBefore method to insert the new
paragraph before the old. If the third paragraph doesn’t exist, we can
append the element to the end of the div element using the appendChild method instead.
See Also
Chapter 11 demonstrates several
techniques for accessing page elements, including getElementsByTagName. If your target browsers
support it, you could also use the Selectors API to fine-tune the
query.
The following recipe, Recipe 12.6, contains a complete example
demonstrating how to access the div
element and the paragraphs, and add a paragraph with text just before
the second paragraph.
12.6. Adding Text to a New Paragraph
Problem
You want to create a new paragraph with text and insert it just
before the second paragraph within a div element:
// use getElementById to access the div element
var div = document.getElementById("target");

// use getElementsByTagName and the collection index
// to access the second paragraph
var oldPara = div.getElementsByTagName("p")[1]; // zero based index

// create a text node
var txt =
 document.createTextNode("The new paragraph will contain this text");

// create a new paragraph
var para = document.createElement("p");

// append the text to the paragraph, and insert the new para
para.appendChild(txt);
div.insertBefore(para, oldPara);
Discussion
The text within an element is itself an object within the DOM. Its
type is a Text node, and it is
created using a specialized method, createTextNode. The
method takes one parameter: the string containing the text.
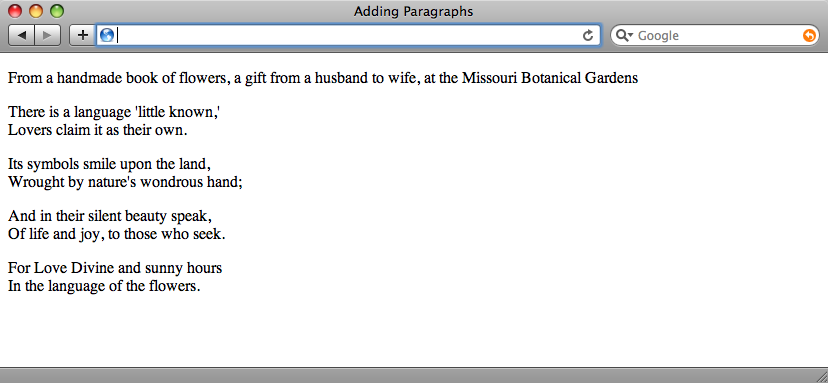
Example 12-2 shows
a web page with a div element
containing four paragraphs. The JavaScript that runs after the page
loads creates a new paragraph from text provided by the user via a
prompt window. The text could just as easily have come from an Ajax
application, as we’ll see later in the book.
The provided text is used to create a text node, which is then
appended as a child node to the new paragraph. The paragraph element is inserted in the web page
before the first paragraph.
<!DOCTYPE html>
<html xmlns="http://www.w3.org/1999/xhtml" xml:lang="en" lang="en">
<head>
<title>Adding Paragraphs</title>
<script type="text/javascript">
//<![CDATA[

window.onload=function() {

   // use getElementById to access the div element
   var div = document.getElementById("target");

   // get paragraph text
   var txt = prompt("Enter new paragraph text","");

   // use getElementsByTagName and the collection index
   // to access the first paragraph
   var oldPara = div.getElementsByTagName("p")[0]; //zero based index

   // create a text node
   var txtNode = document.createTextNode(txt);

   // create a new paragraph
   var para = document.createElement("p");

   // append the text to the paragraph, and insert the new para
   para.appendChild(txtNode);

   div.insertBefore(para, oldPara);

  }
//]]>
</script>
</head>
<body>
<div id="target">
  <p>
    There is a language 'little known,'<br />
    Lovers claim it as their own.
  </p>
  <p>
    Its symbols smile upon the land, <br />
    Wrought by nature's wondrous hand;
  </p>
  <p>
    And in their silent beauty speak,<br />
    Of life and joy, to those who seek.
  </p>
  <p>
    For Love Divine and sunny hours <br />
    In the language of the flowers.
  </p>
</div>
</body>
</html>
Figure 12-2 shows a web page after some text has been added.
Note
Inserting user-supplied text directly into a web page without scrubbing the text first is not a good idea. When you leave a door open, all sorts of nasty things can crawl in. Example 12-2 is for demonstration purposes only.
See Also
See Chapter 18 for demonstrations of using Ajax to retrieve new page contents.
12.7. Adding Attributes to an Existing Element
Solution
You can use the createAttribute method
to create an Attr node, set its value
using the nodeValue property, and
then use setAttribute to add to an element:
var someElement = document.getElement("elem");
var newAttr = document.createAttribute("newAttribute");
newAttr.nodeValue = "testvalue";
someElement.setAttribute(newAttr);
or you can set the value directly with setAttribute, passing in the attribute name
and value:
someElement.setAttribute("newAttribute","testvalue");Discussion
You can add any number of attributes to a document element using
either createAttribute and setAttribute, or setAttribute directly. Both approaches are
equally efficient, so unless there’s a real need, you’ll most likely
want to use the simpler approach of setting the attribute name and value
directly in setAttribute.
When would you need to use createAttribute? If the attribute value is
going to be another entity reference, as is allowable with XML, you’ll
need to use the createAttribute to
create an Attr node, as setAttribute will only support simple
strings.
You can also use setAttribute
to modify the value for an existing attribute, such as the id or class
attributes:
someElement.setAttribute("id", "newId");Note, though, that some values have a different name when set
directly, than when they’re set using setAttribute. One such as is class, which is set directly using className:
someElement.className = "new";
someElement.setAttribute("class", "new");
If the attribute already exists, assigning a value to the
attribute directly or using setAttribute modifies the attribute’s
value.
Namespace Variation
As discussed in Recipes 11.2 and 12.2, if you use the createAttribute or setAttribute methods in a document where
multiple namespaces are supported (such as in an XHTML or SVG document),
the engine processing the request sets the attribute without a
namespace. If you mix setAttribute
and setAttributeNS in the same
document, you can end up with the same attribute in different
namespaces.
If you’re working in a document that’s using elements and
attributes from different namespaces, such as an XHTML document that
incorporates SVG and MathML, you’ll need to use the namespace-sensitive
variants, createAttributeNS and
setAttributeNS:
someElement.setAttributeNS("http://somecompany.com/namespace",
                           "class",
"somename");
12.8. Testing for a Boolean Attribute
Solution
Use the hasAttribute method to
check for the existence of the Boolean or any other attribute:
var targetNode = document.getElementById("target");
if (targetNode.hasAttribute("class")) {
   alert(targetNode.getAttribute("class"));
}
Discussion
Boolean attributes, referred to as attribute minimization in the XHTML
specifications, are attributes in HTML where the attribute’s presence
signifies a state, and is assigned no value. An example is the use of
the Boolean attribute compact with
the dl element:
<dl compact>
In XHTML, these attributes have to be assigned a value, so they’re assigned a value comparable to the name of the attribute:
<dl compact="compact">
You can check for the Boolean attribute (or any other) using
hasAttribute or its namespace
variation:
var res = div.hasAttributeNS("http://some.com/namespace","attrnm");A value of true signifies the
attribute is present; false that it
is not.
12.9. Removing an Attribute
Solution
Use the removeAttribute
method:
if (targetNode.hasAttribute("class")) {
   targetNode.removeAttribute("class");
   alert(targetNode.getAttribute("class")); // null
}
Discussion
Most of the time, you’re probably interested in changing an
attribute’s value, but there may be times when you want to remove an
attribute completely. You might be tempted to set the value of the
attribute to null to remove
it:
div.setAttribute("class",null);However, this is not correct. To remove any attribute, use the
removeAttribute method, or its
namespace variant, removeAttributeNS:
div.removeAttributeNS("http://somecom.com/namespace","customattr");You don’t technically have to use hasAttribute to check if the attribute exists
first—using removeAttribute on a
nonexistent attribute does not throw an exception. Handy, since IE7 does
not support hasAttribute.
12.10. Moving a Paragraph
Solution
Get a reference to the paragraph you want to move, the first
paragraph, and the parent element for the first paragraph, and use
insertBefore to insert the last paragraph before the first:
var para = document.getElementsByTagName("p");
var parent = para[0].parentNode;
parent.insertBefore(para[para.length-1], para[0]);
Discussion
An element exists only once in the DOM regardless of its location. When you insert or append the element in a new location, it’s automatically removed from its previous position in the page layout.
See Also
See Recipe 12.2 for
a description of insertBefore.
12.11. Replacing Links with Footnote Bullets
Problem
You want to scan a web page for links, remove the links from the page, and replace them with text-based footnote bullets at the end of the document.
Solution
You’ll have to use a variety of techniques to accomplish this task. Example 12-3 demonstrates a full application that moves all of the links contained in a paragraph to a bulleted footnote list at the end of the document—copying the contents of the link to the original link position first, and adding a superscript to reference the new footnote.
<!DOCTYPE html>
<head>
<title>Moving Links</title>
<style>
 ul li
  {
    list-style-type: none;
    padding-bottom: 5px;
  }
</style>
<script type="text/javascript">

window.onload=function() {

  var links = document.querySelectorAll("a");
  var footnote = document.createElement("ul");

  // for all links
  for (var i = 0; i < links.length; i++) {

    // get parent element
    var parent = links[i].parentNode;

    // create number index text
    var num = document.createTextNode(i+1);
    var sup = document.createElement("sup");
    sup.appendChild(num);

    // process the children
    var children = links[i].childNodes;
    for (var j = 0; j < children.length; j++) {
         var newChild = children[j].cloneNode(true);
         parent.insertBefore(newChild,links[i]);
    }

    // add number subscript
    var sup2 = sup.cloneNode(true);
    parent.insertBefore(sup2,links[i]);

    // add a link to footnote
    var li = document.createElement("li");
    li.appendChild(sup);
    li.appendChild(links[i]);

    footnote.appendChild(li);
  }

  document.getElementsByTagName("body")[0].appendChild(footnote);}
</script>
</head><body>  <div id="target">
    <p>A favorite place of mine to visit in St. Louis is the <a
href="http://http://www.mobot.org/">Missouri Botanical Gardens</a>.
Great flowers all year round, and one of the finest annual
orchid shows. My most visited places, though, are the <a
href="http://www.stlzoo.org/">St.
Louis Zoo</a>, the <a href="http://www.nps.gov/jeff/index.htm"><em>Gateway
Arch</em></a>,
 the new <a href="http://www.citygardenstl.org/">City Garden</a>,
and the <a href="http://mdc.mo.gov/areas/cnc/powder/">Powder
Valley Conservation Nature Center</a>.
    </p>
  </div>
</body>
Discussion
As demonstrated in the solution, you can use querySelectorAll to find all the links in the
page, passing in the anchor tag:
var links = document.querySelectorAll("a");You can’t use getElementsByTagName to get the links, and
I’ll explain why a little later in the discussion. The solution also
creates a new unordered list to contain the links we pull out of the
document.
Once you have a reference to all the links in the page, it’s time for the fun part. One of the interesting challenges with moving a link is that you typically want to preserve the link’s text in place—especially if the link references meaningful content—beyond the to-be-discouraged “here” or “link”.
You can’t assume the link contents are text because a link can
contain other elements (though not another link). You could use innerHTML to access and copy the contents, but
innerHTML isn’t well supported in
XHTML.
Another approach is to move all of the child nodes out of the link. Now, you might think a way to move the link contents out of the link is to use something like the following:
var children = links[i].childNodes;
for (var j = 0; j < children.length; j++) {
     parent.insertBefore(children[j],links[i]);
}
The problem with this approach, though, is that childNodes points to a
nodeList. In Chapter 11, we learned that nodeLists are live collections, which means
changes in the page are reflected immediately in the nodeList in our code. So, if the link is
something like the following:
<a href="http://oreilly.com">O'Reilly sells <em>books!</em></a>
The childNodes collection would
have a length of 2 for the text node and the em. However, in the first loop iteration, once
the first element has been moved (in this case, inserted before the
existing link’s location, but it could be moved to the bullet list), the
length of the childNodes value is now
1, but the for loop iterator has been
incremented to 1—there is now only one child in the collection, and the
for loop exits, leaving us with a
link with the contents of the em
element.
This is all really nice functionality, but it works against us
sometimes. This is also the reason I didn’t use the getElementsByTagName method to get a list of
the anchor tags. The getElementsByTagName also returns a live
nodeList, and when we append the
links to the in-memory unordered list, the link is removed from the
document, and the length of the collection is affected.
Luckily, as the solution demonstrates, we have other methods that
do what we want, without the interesting side effects. The cloneNode method is
used to clone the child elements, which the solution places just before
the link. Once the children are taken care of, the entire link element
is moved to the bulleted list using appendChild on a newly created list element
(li), which is then appended to our
unordered list (ul).
When using cloneNode,
especially in a circumstance such as this, you’ll want to pass a
parameter of true when cloning the
node:
var newElement = oldElement.cloneNode(true);
This ensures that all of the node’s children are also cloned in place, in addition to the element. Once all of the links are processed in the document, the last act is to append the unordered list to the end of the document. Figure 12-3 shows the web page after the JavaScript is finished.
The application works with all the book’s target browsers. It
doesn’t work with IE7, because that browser version does not support the
querySelectorAll method.
12.12. Adding Rows to an Existing Table
Solution
Adding table rows isn’t complicated, but depending on the size of
the table, it can be tedious. For each table cell, you have to create a
textNode for the value, append the
value to a new td element, append the
element to a new tr element, and then
append the whole thing to the table:
var table = document.getElementById("targettable");

var tr = document.createElement("tr");
var td = document.createElement("td");
var txt = document.createTextNode("some value");

td.appendChild(txt);
tr.appendChild(td);
table.appendChild(tr);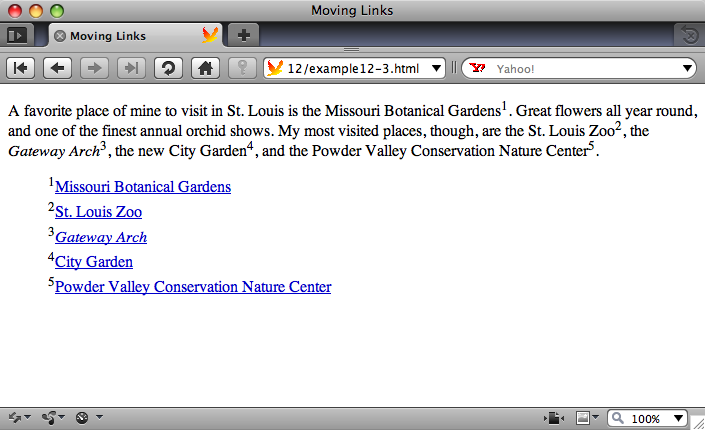
Discussion
Usually, when we’re creating table rows it’s because we’ve
received data back from an Ajax function call. Typically, the data is
organized in such a way that we can use loops of some form to process
the data and simplify the process. Example 12-4 demonstrates how
for loops can be used to process data
in arrays, and to create all the necessary table elements.
<!DOCTYPE html>
<head>
<title>Sum Table Column</title>
<script>
window.onload=function() {

  var values = new Array(3);
  values[0] = [123.45, "apple", true];
  values[1] = [65, "banana", false];
  values[2] = [1034.99, "cherry", false];

  var mixed = document.getElementById("mixed");

  // IE7 only supports appending rows to tbody
  var tbody = document.createElement("tbody");

  // for each outer array row
  for (var i = 0 ; i < values.length; i++) {
     var tr = document.createElement("tr");

     // for each inner array cell
     // create td then text, append
     for (var j = 0; j < values[i].length; j++) {
       var td = document.createElement("td");
       var txt = document.createTextNode(values[i][j]);
       td.appendChild(txt);
       tr.appendChild(td);
     }

     // append row to table
     // IE7 requires append row to tbody, append tbody to table
     tbody.appendChild(tr);
     mixed.appendChild(tbody);
   }

}

</script>

</head>
<body>
<table id="mixed">
<tr><th>Value One</th><th>Value two</th><th>Value three</th></tr>
</table>
</body>
The data for the table is in static arrays, but could easily be XML or JSON returned from an Ajax call.
To repeat, the steps to create and add a table row are:
Create the table row (
tr).For each table cell, create a table cell element (
td).For each table cell, create a text node for its data, and set the data.
Append the text node to the table cell.
Append the table cell to the table row.
When all of the table cells have been appended to the table row, append the table row to the
tbodyelement, and thetbodyelement to the table.
The application includes support for creating a tbody element and appending the table rows to
this element, which is then appended to the table. IE7 does not allow
for direct appending of table rows to the table. IE8 does, though, as do
the other supported browsers.
See Also
Working with XML- and JSON-formatted data is covered in Chapter 19.
12.13. Removing a Paragraph from a div Element
Solution
You need to find the paragraph’s parent and use the removeChild method to
remove the paragraph:
var para = document.getElementById("thepara");
para.parentNode.removeChild(para);
Discussion
The DOM removeChild method
removes the element from the display and the DOM tree. The element still
remains in memory, though, and you can capture a reference to the
element when you make the removeChild
call:
var oldpara = paraParent.removeChild(child);
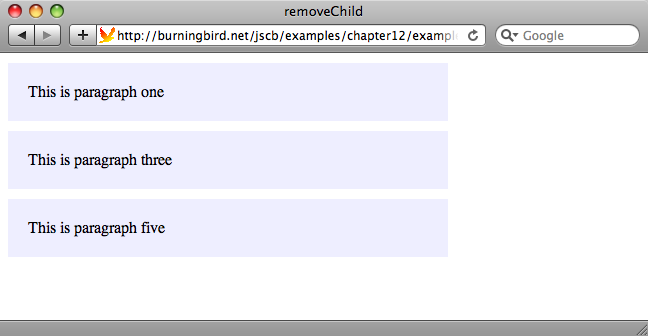
Example 12-5
demonstrates how to remove paragraphs from the page. When the page is
first loaded, all of the paragraphs are accessed via getElementsByTagName and the onclick event handler for each assigned to the
pruneParagraph
function.
The pruneParagraph function
references the element that received the click event, finds its parent
node, and then removes the paragraph. You can continue to click
paragraphs until they’re all gone. After the paragraph is removed, the
paragraphs in the page are queried again, and their count printed
out.
<!DOCTYPE html>
<head>
<title>removeChild</title>
<style>
p
{
   padding: 20px;
   margin: 10px 0;
   width: 400px;
   background-color: #eeeeff;
}
</style>
<script>

window.onload=function() {

   var paras = document.getElementsByTagName("p");
   for (var i = 0; i < paras.length; i++)
     paras[i].onclick=pruneparagraph;
}

function pruneparagraph() {
  var parent = this.parentNode;
  parent.removeChild(this);

  alert("paras " + document.getElementsByTagName("p").length);
}

</script>

</head>
<body>
   <p>This is paragraph one</p>
   <p>This is paragraph two</p>
   <p>This is paragraph three</p>
   <p>This is paragraph four</p>
   <p>This is paragraph five</p>
</body>
Figure 12-4 shows the page after the second and fourth paragraphs have been removed. Notice that the paragraphs that follow the removed elements move to fill in the space newly freed.
12.14. Deleting Rows from an HTML Table
Solution
You can use the DOM removeChild method on
an HTML table row, and all of the child elements, such as the table
cells, will also be removed:
var parent = row.parentNode;
var oldrow = parent.removeChild(parent);
Discussion
When you remove an element from the web document, you’re not only
removing the element, you’re removing all child elements. You can also
get a reference to the removed element if you want to process its
contents before it’s completely discarded. The latter is helpful if you
want to provide an undo method in
case the person accidentally selects the wrong table row.
To demonstrate the nature of DOM pruning, Example 12-6 is a modification
of Example 12-4, except
that before each new table row is added, the tr element’s onclick event handler is assigned to a
function. When any of the new table rows is clicked, it’s removed from
the table. The removed table row element is then traversed and the data
in its cells is extracted and concatenated to a string, which is then
printed out.
<!DOCTYPE html>
<head>
<title>Adding and Removing Elements</title>
<style>
table {
   border-collapse: collapse;
}
td, th {
   padding: 5px;
   border: 1px solid #ccc;
}
tr:nth-child(2n+1)
{
   background-color: #eeffee;
}
</style>
<script>
window.onload=function() {

  var values = new Array(3);
  values[0] = [123.45, "apple", true];
  values[1] = [65, "banana", false];
  values[2] = [1034.99, "cherry", false];

  var mixed = document.getElementById("mixed");

  // IE 7 requires tbody
  var tbody = document.createElement("tbody");

  // for each outer array row
  for (var i = 0 ; i < values.length; i++) {
     var tr = document.createElement("tr");

     // for each inner array cell
     // create td then text, append
     for (var j = 0; j < values[i].length; j++) {
       var td = document.createElement("td");
       var txt = document.createTextNode(values[i][j]);
       td.appendChild(txt);
       tr.appendChild(td);
     }

     // attache event handler
     tr.onclick=prunerow;

     // append row to table
     tbody.appendChild(tr);
     mixed.appendChild(tbody);
   }
}

function prunerow() {
  var parent = this.parentNode;
  var oldrow = parent.removeChild(this);

  var datastring = "";
  for (var i = 0; i < oldrow.childNodes.length; i++) {
    var cell = oldrow.childNodes[i];
    datastring+=cell.firstChild.data + " ";
  }

  alert("removed " + datastring);
}
</script>

</head>
<body>
<table id="mixed">
<tr><th>Value One</th><th>Value two</th><th>Value three</th></tr>
</table>
</body>
The example demonstrates that it’s a whole lot simpler to prune the DOM tree than to grow new branches.
See Also
Example 12-4 can be found in Recipe 12.12.
12.15. Changing the Element’s CSS Style Properties
Solution
If you’re only modifying a single property, you can change the CSS
setting directly using the element’s style property:
var elem = document.getElementById("elem");
elem.style.width = "500px";
If you’re modifying one or more values, you can use the element’s
setAttribute method:
elem.setAttribute("style","width: 500px; background-color: yellow;");Discussion
An element’s CSS properties can be modified in JavaScript using
one of two approaches. As the solution demonstrates, the simplest
approach is to set the property’s value directly using the element’s
style property:
elem.style.width = "500px";
If the CSS property contains a hyphen, such as font-family or background-color, use a CamelCase notation for
the property:
elem.style.fontFamily = "Courier";
elem.style.backgroundColor = "rgb(255,0,0)";
You can also use the element’s setAttribute method to set the style
property:
elem.setAttribute("style","font-family: Courier; background-color: yellow");However, when you set the style property using setAttribute, it erases any previously set
values in the JavaScript.
Example 12-7
demonstrates how the style-setting techniques work, including the impact
of using setAttribute. Various
techniques are used to set and get style attributes, including a
cross-browser approach to access the computed style
for the attribute.
<!DOCTYPE html>
<head>
<title>Changing style</title>
<meta charset="utf-8" />
<style>
#elem
{
  width: 200px; background-color: lime;
}
</style>
<script type="text/javascript">


function getStyle(elem, cssprop, cssprop2){

 // IE
 if (elem.currentStyle) {
   return elem.currentStyle[cssprop];

 // other browsers
 } else if (document.defaultView &&
                   document.defaultView.getComputedStyle) {
   return document.defaultView.getComputedStyle(elem,
null).getPropertyValue(cssprop2);

 // fallback
 } else {
   return null;
 }
}
window.onload=function() {

   // setting and accessing style properties
   var elem = document.getElementById("elem");

   var color = getStyle(elem,"backgroundColor", "background-color");
   alert(color); // rgb(0,255,0)

   elem.style.width = "500px";
   elem.style.backgroundColor="yellow";

   alert(elem.style.width); // 500px
   alert(elem.style.backgroundColor); // yellow

   // array notation
   elem.style["fontFamily"] = "Courier";

   // demonstrating overwriting properties
   var style = elem.getAttribute("style");
   alert(style); // should display color: purple; width: 500px;
                 // background-color: yellow;

   elem.setAttribute("style","height: 100px");
   var style = elem.getAttribute("style");
   alert(style); // now only displays height, resets styles

   var font = getStyle(elem,"fontFamily", "font-family");
   alert(font); // default font family

}
</script>
</head>
<body>
<div id="elem" style="color: purple">
testing
</div>
</body>
As soon as the page loads, the div element is accessed using getElementById, and its background-color is retrieved using a
cross-browser function that gets the computed style for the attribute.
The message output is “rgb(0,255,0)”, representing the lime color set in
the page’s stylesheet.
Next, two CSS properties are set using the element’s style property: the width and background-color. Now the div element has a yellow background and is
500, rather than 200, pixels wide. Both of the modified values are
accessed and printed out, so we can confirm that yes, the values have
changed.
Next, the font-family for the
element is set to Courier, using the array notation, which is another
approach you can use to set and get style property values. Now the
div element is 500 pixels wide, with
a yellow background, and its font family is Courier.
The style property is accessed using getAttribute. A string of the values set using
the style property is returned for
all browsers:
color: purple; width: 500px; background-color: yellow;
font-family: Courier;
The purple font color is set inline within a style attribute in the div element.
Next, I’m using the setAttribute method to change the element’s
height. A couple of things happen when I used the setAttribute method in the example. The height
of the element is changed to 100 pixels, but the previously set style
properties (color, width,
background-color, and font-family)
have been “erased,” and revert back to the original settings in the
stylesheet, or the defaults by the user agent. The element is now 200
pixels wide, 100 pixels tall, with a green background, and the font
reverts back to the default font for the browser (typically a serif
value), and the default font color, black.
As you can see, using setAttribute to change the style element property can significantly
impact on previous settings, including any inline CSS settings. You
should only use setAttribute if
you’re changing many values at once, and you don’t use any inline style
attributes or haven’t modified the element’s style settings previously
in your application.
The effects demonstrated in this recipe work the same with all of
the book’s target browsers, except for IE7. The style property is an
actual object in IE7, so when you access style with getAttribute, you’ll get an object, not a
string. Since it is an object, it’s read only, which means you can’t use
setAttribute with IE7.
See Also
See Recipe 11.13 for more information about accessing the computed style for an element.
Get JavaScript Cookbook now with the O’Reilly learning platform.
O’Reilly members experience books, live events, courses curated by job role, and more from O’Reilly and nearly 200 top publishers.

