You can download the Tomcat Server in binary format or as source code that you compile yourself. If you’re primarily interested in learning about JSP, I recommend that you use the binary download for running the examples in this book and to develop your own applications. If you’re a Java programmer and are interested in seeing how Tomcat is implemented, feel free to download the source as well and take a look at the internals.
The binary distribution is available at http://jakarta.apache.org/site/binindex.html.
On this page you find three types of builds: release builds, milestone builds, and nightly builds. Release builds are stable releases that have been tested extensively and verified to comply with the servlet and JSP specifications. Milestone builds are created as intermediary steps towards a release build. They often contain new features that aren’t yet fully tested but are generally known to work. A nightly build, however, may be very unstable. It’s actually a snapshot of the latest source code and may have been tested only by the person who made the latest change. You should use a nightly build only if you’re involved in the development of Tomcat.
I recommend that you download the latest release build. All examples
in this book were developed and tested using the 4.0.4 version, but
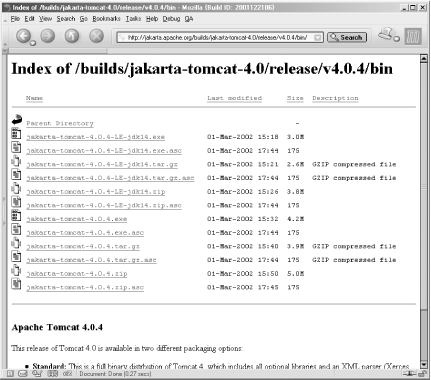
any release later than 4.0.4 should work fine as well. When you click
on the link for the latest release build and select the
bin directory, you see a list of archive files
in different formats, similar to Figure 4-1.
How to continue from here varies a bit depending on your platform.
For Windows,
select
jakarta-tomcat-4.0.4.zip and save it to your
hard drive, for instance in a directory named
C:\Jakarta. You can unpack the package either
with a ZIP utility program, such as WinZip or
using the jar command that’s
included in the Java distribution. Use the Command Prompt window
where you set the JAVA_HOME and PATH environment variables earlier,
change to the directory in which you downloaded the ZIP file, and
unpack it:
C:\>cd JakartaC:\Jakarta>jar xvf jakarta-tomcat-4.0.4.zip
This creates a directory structure with a top directory named
jakarta-tomcat-4.0.4 with a number of
subdirectories. Like most software packages, the
top directory contains a file named
README.txt; do exactly that. Software
distributions change and if, for instance, the instructions in this
chapter no longer apply when you download the software, the
README.txt file should contain information about
how to get started.
You should also set the CATALINA_HOME environment variable to point to the Tomcat installation directory:
C:\Jakarta> set CATALINA_HOME=C:\Jakarta\jakarta-tomcat-4.0.4If you wonder about the variable name, Catalina is the name of the servlet container, and Jasper is the name of the JSP container; together they are known as the Tomcat server.
The Tomcat installation directory contains a number of
subdirectories, described later. The bin
directory
contains
Windows batch
files for starting and
stopping the server. The batch files are
named
startup.bat,
shutdown.bat, and
catalina.bat. The
catalina.bat file is the main script for
controlling the server; it’s called by the two other
scripts: startup.bat and
shutdown.bat. To start the server in a separate
window, change to the bin directory and run
the startup.ba
t file:
C:\Jakarta>cd jakarta-tomcat-4.0.4\binC:\Jakarta\jakarta-tomcat-4.0.4\bin>startup
A new Command Prompt window pops up, and you see startup messages similar to this:
Starting service Tomcat-Standalone
Apache Tomcat/4.0.4
Starting service Tomcat-Apache
Apache Tomcat/4.0.4
Just leave this window open; this is where the server process is running.
If you’re running this on a Windows 95/98/ME
platform, you may see an error message “Out of
environment space,” when you try to start the
server. That’s because the default amount of space
allocated for environment variables isn’t enough. To
be able to run Tomcat, run this command in the Command Prompt window
before you run the
startup.ba
t file again:
C:\Jakarta\jakarta-tomcat\bin> COMMAND.COM /E:4096 /PThis command sets the environment space to 4096 bytes (4 KB). That should be enough for the server. If you still get the same message, use a higher value.
For some installations, this command may not work. If it doesn’t, try this instead:
Close the Command Prompt window, and open a new one.
Click on the MS-DOS icon at the top left of the window.
Select the Properties option.
Click on the Memory tab.
Change the Initial Environment value from Auto to 4096.
Click on OK and try to start the server again.
At this point, the server may not start due to other problems. If so, the extra Command Prompt window may pop up and then disappear before you have a chance to read the error messages. If this happens, you can let the server run in the Command Prompt window with this command instead:
C:\Jakarta\jakarta-tomcat-4.0.4\bin> catalina runOn Windows NT/2000 and Windows XP, you should first make sure that the Command Prompt window has a large enough screen buffer so that you can scroll back in case the error messages don’t fit on one screen. Open the Properties window for the Command Prompt window (right mouse button in the upper left corner), select Layout and set the screen buffer size height to a large value (for instance 999). Unfortunately, the Command Prompt screen buffer can’t be enlarged for Windows 95/98/ME, so scrolling back isn’t an option. If you run into problems on these platforms, double-check that you have installed the Java SDK correctly and that you have set the JAVA_HOME and PATH environment variables as described earlier.
For Unix
platforms, you can download the
jakarta-tomcat-4.0.4.tar.gz file, for instance
to /usr/local, and use these commands to unpack
it (assuming you have GNU tar installed):
[hans@gefion /]cd /usr/local[hans@gefion local]tar xzvf jakarta-tomcat-4.0.4.tar.gz
If you don’t have GNU tar installed on your system, use the following command:
[hans@gefion local] gunzip -c jakarta-tomcat-4.0.4.tar.gz | tar xvf -This creates a directory structure with a top directory named
jakarta-tomcat-4.0.4 with a number of
subdirectories. Like most software packages, the
top directory contains a file named
README.txt; do exactly that. Software
distributions change and if, for instance, the instructions in this
chapter no longer apply when you download the software, the
README.txt file should contain information about
how to get started.
You should also set the CATALINA_HOME environment variable to point to the Tomcat installation directory:
[hans@gefion local] export CATALINA_HOME=/usr/local/jakarta-tomcat-4.0.4If you wonder about the variable name, Catalina is the name of the servlet container, and Jasper is the name of the JSP container; together they are known as the Tomcat server.
The Tomcat installation directory contains a number of
subdirectories, described later. The bin
directory
contains Unix
scripts for starting and stopping the server. The
scripts are named
startup.sh,
shutdown.sh, and
catalina.sh.
Start the server with this command:
[hans@gefion jakarta-tomcat-4.0.4] ./startup.shIf you want to have Tomcat start each time you boot the system, you
can add the following commands to your /etc/rc.d/rc.local
(or equivalent) startup script:
export JAVA_HOME=/usr/local/jdk1.3.1_01export CATALINA_HOME=/usr/local/jakarta-tomcat-4.0.4$CATALINA_HOME/bin/startup.sh &
Get JavaServer Pages, Second Edition now with the O’Reilly learning platform.
O’Reilly members experience books, live events, courses curated by job role, and more from O’Reilly and nearly 200 top publishers.

