INSERTING IMAGES INTO ARTICLES
Now that you've resized your photos and uploaded them to the Media Manager, you're ready to insert them into an article. I'm going to work with the clock image that's included with Joomla by default, but you can try your own image if you'd like.
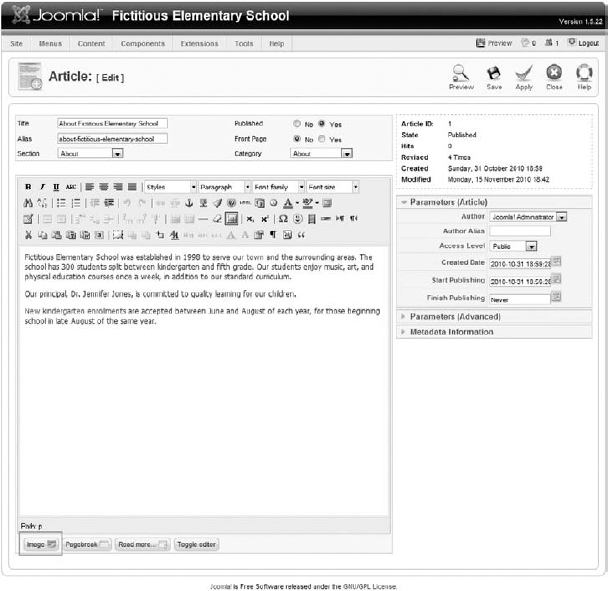
Go to the Article Manager and find an article that requires an image. I'm going to edit the About Fictitious Elementary School article again, since we're very familiar with it at this point! I'm in the editing window shown in Figure 12-6.
FIGURE 12-6
First, click before the very first word in the article, just to the left of the F in Fictitious. Next, click the Image button at the bottom left of the editing window. The screen shown in Figure 12-7 will appear.
FIGURE 12-7
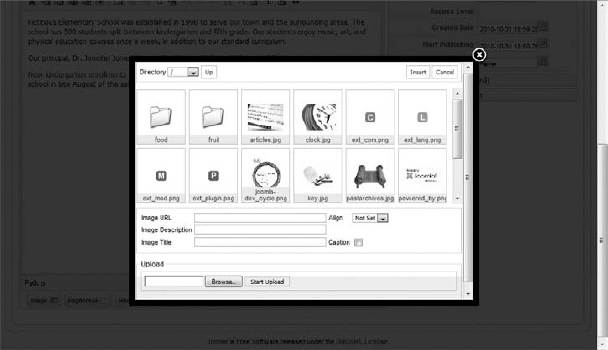
This should look familiar to you — it's the stories folder from the Media Manager. This is why you want to put your images here — so you can easily access them from the article editor. If instead you put them in the first folder you see when you open Joomla (the images folder, where the administrator template images are located), you won't be able to easily access them from this interface.
Note that the bottom of this window provides the same image upload interface you just saw in the Media Manager. This enables you to upload images from here ...
Get Joomla!® 24-Hour Trainer now with the O’Reilly learning platform.
O’Reilly members experience books, live events, courses curated by job role, and more from O’Reilly and nearly 200 top publishers.

