MX-VC Configuration
The configuration of virtual chassis on the MX is very similar to the EX. The most challenging part is collecting the required information before creating the configuration. Each chassis that is to be part the virtual chassis must be identified, and a handful of information must be collected.
Warning
Be sure to use the console port on the routing engines as you configure virtual chassis; this will ensure that if a mistake is made, the connection to the router will not be lost.

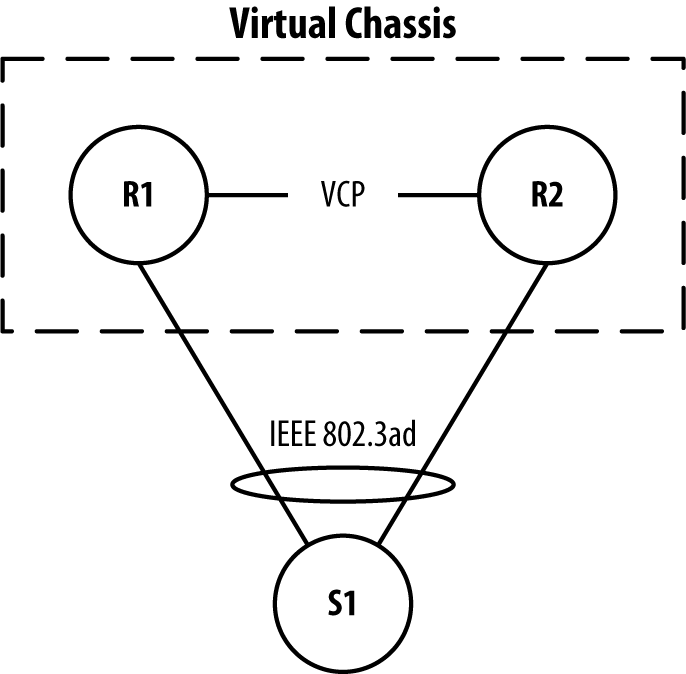
Figure 6-19. Illustration of MX-VC Configuration Topology.
This section will build a MX-VC, as illustrated in Figure 6-19, using R1 and R2.
The S1 switch will be used to create an
IEEE 802.3ad interface into the MX-VC.
Chassis Serial Number
Virtual chassis uses the serial number to uniquely identify each chassis in the topology. It’s
important to note that only the chassis serial number should be used.
It’s easy to confuse other serial numbers such as a power supply or line
card. Use the show chassis hardware
command to find the chassis serial number. Let’s find the serial number
for the R1 chassis:
1 dhanks@R1-RE0>show chassis hardware2 Hardware inventory: 3 Item Version Part number Serial number Description4 Chassis JN111992BAFC MX2405 Midplane REV 07 760-021404 TR5026 MX240 Backplane 6 FPM Board REV 03 760-021392 KE2411 Front Panel Display 7 PEM 0 Rev 02 740-017343 QCS0748A002 DC Power Entry ...
Get Juniper MX Series now with the O’Reilly learning platform.
O’Reilly members experience books, live events, courses curated by job role, and more from O’Reilly and nearly 200 top publishers.

