The Kinect was designed and marketed as an accessory to the Xbox 360 with the intention of breathing new life into Microsoft’s gaming division without the company having to release a brand new console. The multimillion dollar idea was to offer a new and exciting way for Xbox 360 owners to play video games. Microsoft’s marketing department hit the nail on the head with the catchy tag line "You are the controller"; in other words, the Kinect offers a natural user interface free of any cables, chargers, or controllers. When you move your hand, the game or dashboard interface responds accordingly. The Kinect was launched on November 4th in North America at a retail price of $150 and allowed users to simply plug the device into their Xbox 360 and start playing right away.
What Microsoft may not have anticipated was that its affordable gaming accessory was capable of many great things once placed in the hands of creative developers around the world. A mere six days after its launch, the Kinect was hacked and people started experimenting with it, shortly thereafter discovering what they could do with this affordable depth-sensing camera.
To truly get an idea of the amazing things you can do with the Kinect, you need to understand what it actually is and what it can do.
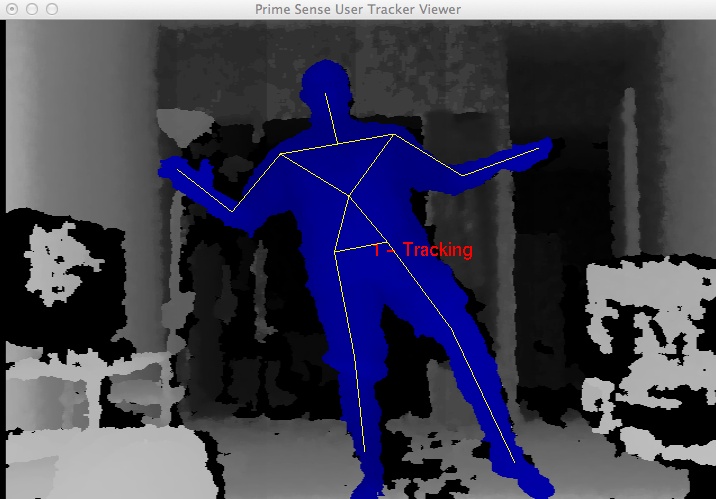
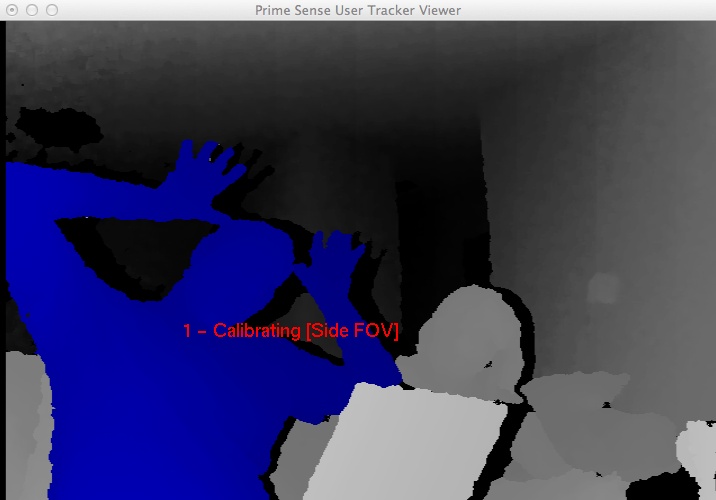
The Kinect is a pretty impressive piece of tech. Sporting an RGB camera, multiarray microphones, and a depth sensor capable of full-body 3D motion capture along with facial and voice recognition capabilities, this video game accessory packs a serious punch. The Kinect uses both hardware and software simultaneously to capture and interpret depth data on the fly. The software, developed by a company called PrimeSense, is able to recognize humans based on their skeletal structure (Figure 1-1). People have the distinct advantage of, well, standing on two legs and having arms. This is how the Kinect is able to determine that a human being is present. It can then focus on capturing data from the movements of that recognized "player." Unless you have apes frequently interrupting your game time by busting into your living room, this is a pretty rock-solid means of isolating and tracking a human skeleton in the room and disregarding everything else.
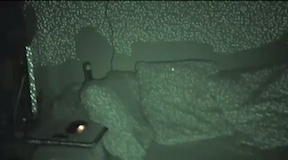
At its core, the Microsoft Kinect’s true innovation and technical prowess lie within its depth-sensing technology. An infrared (IR) cluster of light (also referred to as a point cloud) is produced and spread out across a room, carrying with it encoded information in the form of varying light patterns—picture hundreds of little laser-point–size dots covering the room. The IR beams that are being emitted are undetectable to the naked eye, but when viewed in the dark through night vision goggles, they are on brilliant display (Figure 1-2).
Point cloud data is accurate only at a distance of approximately 1.2 to 3.5 m (3.9 to 11 ft) but within this range, data is collected and sent back, relaying information such as the distance of any detected objects based on any deformations in the IR light patterns. Two onboard complementary metal-oxide semiconductor (CMOS) cameras are used in individual capacities to further analyze any data that’s been collected from the IR light patterns. The RGB camera collects 30 frames per second of actual real-time events at a 640x480 resolution, while the other handles the 3D depth imaging. An onboard processor then renders the collected data in the form of 3D images so everything is wrapped up in a nice little package—and all of this for a measly $150. If only it did things other than rate my pathetic dance moves or let me pet jungle cats. If only….
I think it’s a pretty safe bet to say that the Kinect would have been hacked at some point or another. Its potential was just too great to have people sit around idly waiting for Microsoft to release its own software development kit (SDK) for the device. For all we know, it may never have even released its SDK were it not for the efforts of the OpenKinect community. Actually, I’m getting a little bit ahead of myself. Let’s back it up to the fledgling days of the Kinect’s launch and talk about a little bounty put forth by the good folks over at Adafruit.
The bounty, called the X prize, was to be awarded to the first person able to produce open source drivers for the Kinect. The drivers could be functional on any operating system and had to be accompanied by an application that demonstrated their functionality by displaying a split window of the depth data and the RGB camera. Microsoft caught wind of this little competition, and its initial response was that of any company undergoing a major hardware launch. Since the Xbox 360 was hacked quite some time ago, this knee-jerk response was issued from a Microsoft PR rep:
Microsoft does not condone the modification of its products… With Kinect, Microsoft built in numerous hardware and software safeguards designed to reduce the chances of product tampering. Microsoft will continue to make advances in these types of safeguards and work closely with law enforcement and product safety groups to keep Kinect tamper-resistant.
Most would cower in fear thinking of what Microsoft, with its deep pockets, could do to keep this sort of thing from catching the world’s attention, but what actually happened was the complete opposite. Microsoft’s response enticed Adafruit to increase the bounty of its X prize, not shy away. Fast-forward six days, and a winner was announced! Héctor Martin took the prize and dubbed his open source Kinect drivers "libfreenect." With this, a new generation of open source Kinect development was under way, and excited developers interested in working with Kinect wasted no time getting involved. The OpenKinect project was born, and a community of programmers and developers began building futuristic applications using the Kinect’s depth-sensing capabilities.
On December 9, 2010, PrimeSense embraced the work being put forth by the open source community with the release of OpenNI and NITE. Things were really starting to get cooking at this point. With the backing of the developers responsible for the Kinect hardware, a wave of hacks began gaining a lot of attention all around the world. Wrappers started pouring in at this point, enabling people to toy around with their favorite programming language or framework in order to start experimenting with their own Kinect-related projects.
If ever there were a case for presenting the term "hacker" in a positive light, the efforts of the OpenKinect community would be it.
This section is all about getting your Kinect set up on your computer so you can get started on that next game changer. We’ll be covering the installation process with a few different methods to get up and running. Step-by-step walkthroughs are available for Windows 7, Mac OS X, and Ubuntu that cover installing the libfreenect drivers, OpenNI, NITE, and SensorKinect, along with the Kinect SDK. For the sake of consistency, the guides formulated in this section have been successfully tested on a Mac running OS X 10.7, Windows 7, and Ubuntu 11.10.
Although having a wide variety of options can be a great thing, at times, the potential of getting mixed up in things can always rear its nasty little head. So we’ll focus on two main options. As I mentioned earlier, libfreenect was the first set of open source–compatible Kinect drivers made available to the public. It is maintained by the Open Kinect community of developers and can be downloaded at https://github.com/OpenKinect/libfreenect.
PrimeSense, the developers behind the Kinect’s depth-sensing technology, released OpenNI, a derivative of the open source LGPL PrimeSense code. You’ll need to also install the avin2 SensorKinect module, built specifically for the Kinect based on code from the PrimeSense sensor driver, if you want to use OpenNI.
So what we’re left with is two completely viable options available for us to use when working with Kinect depth data. The question now is, which one is right for you?
Well, for starters, if you plan on releasing your program in some commercial form, OpenNI and libfreenect are both fine to use, so you can scratch that off of your list. If you’re interested in motor control, however, go with libfreenect; OpenNI with SensorKinect does not support it. For higher-level NUI support, OpenNI has its NITE middleware integration available. libfreenect has a much more complicated installation process, so if you’re unfamiliar with compilers and are more comfortable dealing with binary installers, OpenNI/NITE involves a much less complicated installation process. Whichever route you decide to take, you’ll be in good hands. Both organizations have a huge, supportive community with great online forums.
There are usually two different methods of installing the open source drivers required to capture data from the Kinect sensor. You can compile the latest builds from scratch, or just install the binaries if available. We’ll cover both methods in case one or the other just doesn’t quite work out the way it was supposed to. It’s always good to have a plan B, right?
For the sake of simplicity, we’ll start things off the nice and easy way. Since PrimeSense was kind enough to release its own binary installers, we’ll begin with this route.
Tip
The title of this hack is a bit deceiving. You can apply these guidelines to a Windows XP or Vista machine, if that’s all you have. As I mentioned before, however, I used a Windows 7 machine for all of these guides.
Download the OpenNI package installer from http://www.openni.org/Downloads/OpenNIModules.aspx.
Select OpenNI Packages from the first drop-down menu. From the next drop-down, select Stable, and then choose PrimeSense Package Stable Build for Windows-Development Edition.
Tip
Be sure to download the appropriate 32- or 64-bit versions depending on your system. If you don’t know what you’re running, go to Control Panel → System and Security → System, and see System Type.
Launch the executable file to begin installing OpenNI and NITE.
Download the Kinect sensor drivers from https://github.com/avin2/SensorKinect.
Once you’ve downloaded the package, extract the contents and install the driver mod by executing the binary located in the Bin folder. Be sure to choose the right 64- or 32-bit installer.
Note
When prompted, allow the unsigned driver from PrimeSense during the installation.
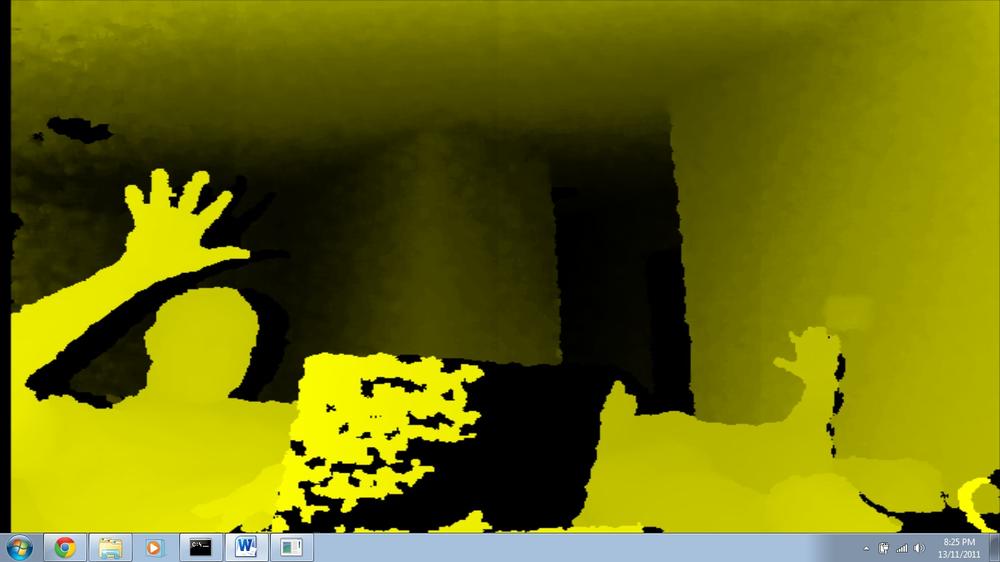
To see if everything was installed correctly, plug the Kinect into a USB port and make sure it is plugged into a power source as well. Go to your Start Menu → All Programs → OpenNI → NiViewer. After a few seconds, a window should open showing you a simple depth view from the Kinect sensor (Figure 1-3).
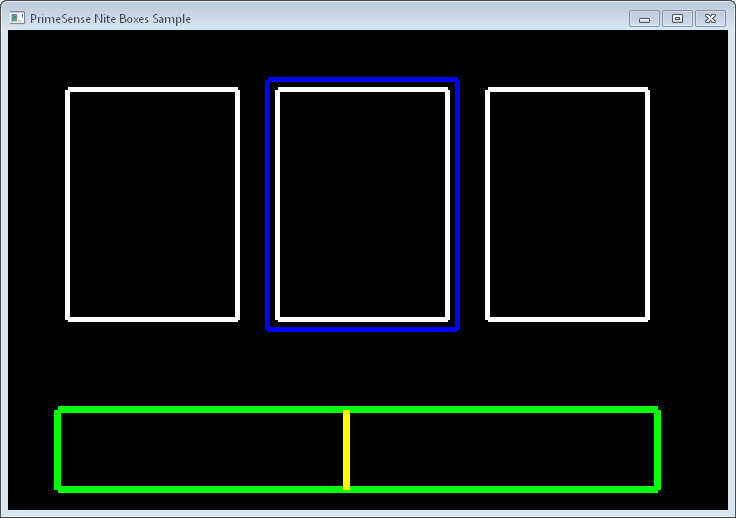
To see if the NITE samples are working, you’ll need to copy all of the sample XML files from the PrimeSense/NITE/Data folder to the PrimeSense/Sensor/Data folder. Once they’ve been copied over, go to Start → All Programs → PrimeSense → NITE 64 bit (for those who installed the 64-bit version) → Samples → Sample-Box64 (Figure 1-4).
Before we get started, you’ll need the following applications installed and configured:
- Xcode
- CMake
- MacPorts
- Git
You’ll need to install a few library dependencies as well. Using MacPorts, install libtool and libusb-devel + universal. Open up your Terminal application (Applications → Utilities → Terminal) and run the following command:
sudoportinstalllibtool
Restart your Mac. Open up your Terminal again and install libusb-devel + universal as follows:
sudoportinstalllibusb-devel+universal
Restart your computer once again. Create a directory in which you’ll store all of our installers. We’ll create a Kinect folder in the Home directory.
cd~/mkdirKinectcdKinect
Download the latest version of OpenNI from its GitHub repository.
sudogitclonehttps://github.com/OpenNI/OpenNI.git
Change the working directory to OpenNI/Platform/Linux-x86/CreateRedist and run RedistMaker.
sudo./RedistMaker
Once the build has finished, back out of that directory and make your current working directory Bin/Release.
cd../Bin/Release
Run one of the examples to make sure everything is working properly.
sudo./Sample-NiUserTracker
Next, we’ll need to install the avin2 SensorKinect driver mod to retrieve data captured by the Kinect. Navigate back to the Kinect directory and use Git to download the latest version of SensorKinect.
cd~/Kinectsudogitclonehttps://github.com/avin2/SensorKinect.git
Change your working directory to ~/Kinect/SensorKinect/Bin and extract the contents of SensorKinect-Bin-MacOSX-v*...*.tar.bz2.
Navigate into the newly extracted directory and run the installer script.
sudo./install.sh
Last but not least, we’ll want to install NITE. Download the latest unstable build of NITE from http://www.openni.org and place it in your Kinect directory. (Go to http://openni.org/Downloads/OpenNIModules.aspx and select OpenNI Compliant Middleware Binaries → Unstable Release → PrimeSense NITE Mac OSX.)
I will refer to the NITE root directory as NITE to keep things consistent. If you’d like to rename it, by all means do so.
mvnite-bin-macosx-v*.*.*.*NITE
Extract the contents of the file, change the working directory to the NITE folder, and run the install script.
sudo./install.sh
You will then be prompted to enter the PrimeSense license key, which is 0KOIk2JeIBYClPWVnMoRKn5cdY4=.
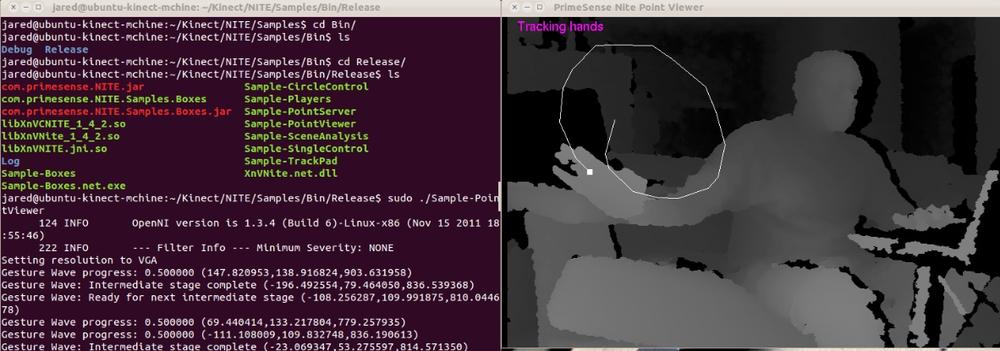
We’re almost done! If you want to run some of the examples, you’ll need to move the sample XML files from the SensorKinect/Data directory over to NITE/Data. You can do this in the Finder or in a Terminal.
Cruise on over to the Samples directory and try one out for size! (See Figure 1-5.)
cd~/Kinect/NITE/Samples/Bin/Releasesudo./Sample-PointViewer
Getting your Kinect working with Ubuntu is pretty straightforward. It will definitely help if you’re comfortable working on a command line. We’ll be using apt to download everything except the NITE middleware package, so things should go smoothly.
First, as always, we’ll need to ensure that all of the required libraries and other dependencies are installed before we’ll be able to download the required SDK, drivers, and middleware from the usual spots.
We’ll install OpenNI first.
Warning
The order in which we install each component is important, so try not to veer off course and install NITE or SensorKinect before OpenNI!
There are a few libraries that we need to install, so we’ll tackle those before moving on. I’ve listed the requirement names along with the official sites that host the downloads. Instead of installing them all manually, apt commands you to install everything in one swift motion.
Open up your Terminal application and enter the following commands, allowing time for each install to finish successfully before moving on to the next one.
sudoapt-getinstallgit-corecmakeg++python\freeglut3-devpkg-configbuild-essential\libxmu-devlibxi-devlibusb-1.0-0-dev\doxygengraphviz
Don’t be surprised if this takes a lifetime to complete, especially if you’re using a fresh Ubuntu installation.
You’ll also need to install the Java Development Kit. I used a separate session of apt since I needed to build a repository.
sudoadd-apt-repository"deb http://archive.canonical.com/ lucid partner"sudoapt-getupdatesudoapt-getinstallsun-java6-jdk
Hopefully everything installs properly without your having to cruise the backwaters of the Internet in search of dependencies for those dependencies. Always remember, in times of trouble, Copy, Google, and Paste are your best friends in the whole wide Web. Moving on, create a Kinect directory wherever you’d like. I chose the Home directory.
mkdir~/Kinectcd~/Kinect
Download OpenNI using Git and make sure you’re dealing with the unstable version.
sudogitclonehttps://github.com/OpenNI/OpenNI.gitsudogitcheckoutunstable
To check out some of the samples, you’ll need to build them first.
cdOpenNI/Platform/Linux-x86/Buildsudo./RedistMaker
Tip
If you’re unable to run the previous command, you may need to change the file permissions. Type chmod 777 * while in the Build directory.
After compiling everything, we can now move on to installing the SensorKinect driver.
cd~/Kinectsudogitclonehttps://github.com/avin2/SensorKinect
Change the working directory to CreateRedist to compile and create a redist package.
cdSensorKinect/Platform/Linux-x86/CreateRedist
Run the script RedistMaker.
sudo./RedistMaker
Navigate to the newly created Redist directory located inside of Build and run the installation script.
cd../Build/Redistsudo./install.sh
Change the working directory to Build and run make and then make install.
cd~/Kinect/SensorKinect/Platform/Linux-x86/Buildsudomake&&sudomakeinstall
That’s it for SensorKinect. The final step is to install the PrimeSense NITE Middleware package. First download the version of PrimeSense NITE from http://www.openni.org/Downloads/OpenNIModules.aspx. In the first drop-down, select OpenNI Compliant Middleware Binaries. Then select the unstable version. Download the package that corresponds to your Ubuntu installation (32- or 64-bit).
Tip
I created a new directory called NITE in which I placed the contents of the extracted NITE package. This is just to keep things consistent, as version numbers may be different at the time this book is released.
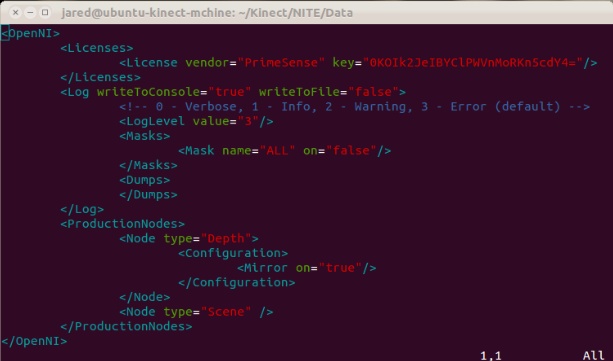
If you want to try out some of the sample programs, you’ll need to edit the XML files located in the Data directory to include the PrimeSense license key, as shown in Figure 1-6. To do this, you’ll need to change the third line of the XML sample files from:
<Licensevendor="PrimeSense"key=""/>
<Licensevendor="PrimeSense"key="0KOIk2JeIBYClPWVnMoRKn5cdY4="/>
Change the working directory to NITE and run the installation script.
cd~/Kinect/NITE./sudoinstall.sh
Right away, you’ll be prompted to enter the PrimeSense license key. Enter the following key to complete the installation process.
0KOIk2JeIBYClPWVnMoRKn5cdY4=
Note
Newer versions do not require a license key.
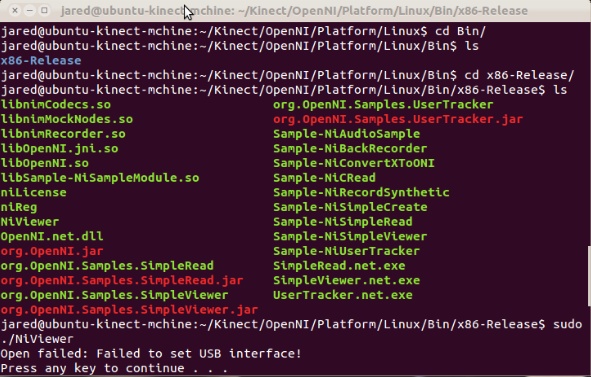
Atthispoint,youshouldbereadytoseeifthesamplesareworking.ConnectyourKinecttoaUSBportandensurethatthepoweradapterisalsopluggedin.
Change the working directory to NITE Sample and execute one of the accompanying demos (Figure 1-7).
cd~/Kinect/NITE/Samples/Bin/Releasesudo./Sample-PointViewer
Tip
If you are continuously running into the "InitFromXML failed: Failed to set USB Interface! Error," shown in Figure 1-8, try the following (it solved my problem right away):
sudormmodgspca_kinect
For this guide, we will be using MacPorts to download and configure the libraries along with other components. We’ll perform the majority of the work using the Terminal application located in your Utilities directory: Applications/Utilities/Terminal. You will need to install Git to process the latest repository builds from GitHub and install the libtool and libusb-devel libraries. You’ll need to issue the following commands to download and install the prerequisites and dependencies for compiling libfreenect:
sudoportinstallgit-coresudoportinstallsudoportinstalllibusb-devel
Caution
The sudo command requires the admin-level password for Mac, which grants you temporary root-level access.
You will also need to download and install CMake to compile libreenect. You can find the latest version at http://www.cmake.org/cmake/resources/software.html. Create a directory from which you would like to work. It can be named anything and placed anywhere. For the sake of simplicity, we will create the directory OpenKinect located in your Home directory.
cd~/mkdirOpenKinectcdOpenKinect
Download the latest libfreenect repository using the git clone command in your current working directory:
sudogitclonehttps://github.com/OpenKinect/libfreenect.git
Navigate to the libfreenect directory:
cd~/OpenKinect/libfreenect
Create a new build directory, navigate into it, and compile the source code:
mkdirbuildcdbuildccmake..
When prompted, press the C key to begin compiling.
If the ccmake command fails, you will need to manually change the LIBUSB_1_INCLUDE_DIR path to usr/local/include/libusb-1.0.
Press C to restart the build.
Press the G key to generate and then type the following once everything has been completed:
ccmake..
Once this process has completed and the cursor prompt has returned, run the following commands:
sudomake&&sudomakeinstall
The installation should be complete at this point. Navigate to the libfreenect/build/bin directory and run the glview demo to see if things are working properly.
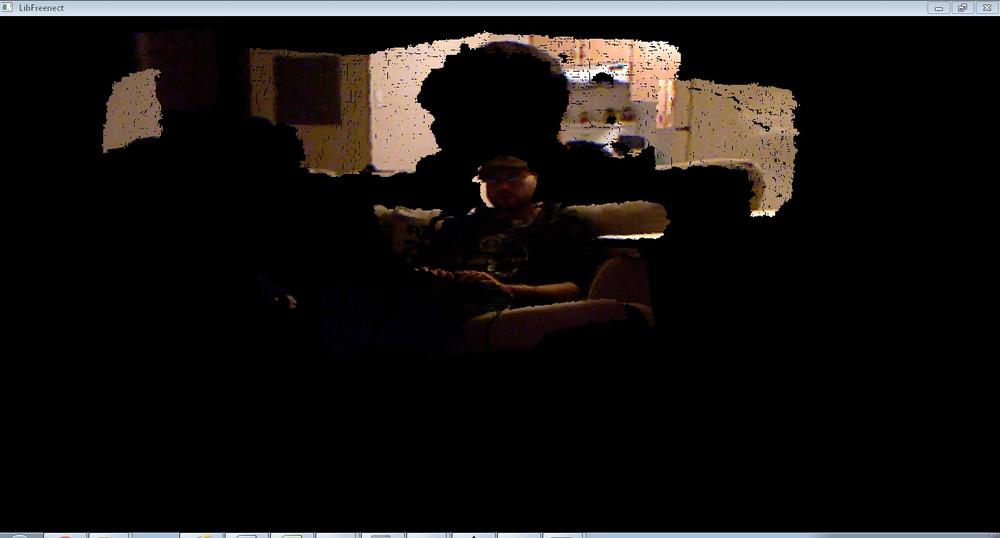
cd~/libfreenect/build/binsudo./glview
As with the Windows installation method described in Install OpenNI, SensorKinect, and NITE for Windows 7, there is a binary package available for Ubuntu installations of OpenKinect that allows us to easily install the drivers. You can find precompiled RPM and Deb packages by visiting http://bit.ly/TlFy5x.
These packages are rather old, so if you run into any installation problems, skip to the next section, which covers compiling libfreenect from source.
If you’re using a fresh install of Ubuntu, you’ll more than likely have to install quite a few dependencies on your machine to get started. A quick way to get things moving is to manually install everything at once by issuing the following command:
sudoapt-getinstallgit-corecmakefreeglut3-dev\pkg-configbuild-essentiallibxmu-devlibxi-devlibusb-1.0-0-dev
After the library dependencies have all been successfully installed, we can now move on to compiling libfreenect from source. For the sake of this tutorial, I created a Kinect folder in my Home directory. This is where we’ll place the extracted contents of libfreenect.
mkdir~/Kinectcd~/Kinect
Download libfreenect using Git and then create and move into a build directory.
gitclonehttps://github.com/OpenKinect/libfreenect.gitcdlibfreenectmkdirbuildcdbuildsudocmake..
Once CMake is done compiling, you can now run make and then make install.
sudomakesudomakeinstall
Then there’s one last command before we can run some of the sample demos.
sudoldconfig/usr/local/lib64/
Navigate to bin inside the build directory and run the glview demo. Make sure your Kinect sensor is connected via USB and that the power adapter is plugged in as well.
cd/libfreenect/build/binsudo./glview
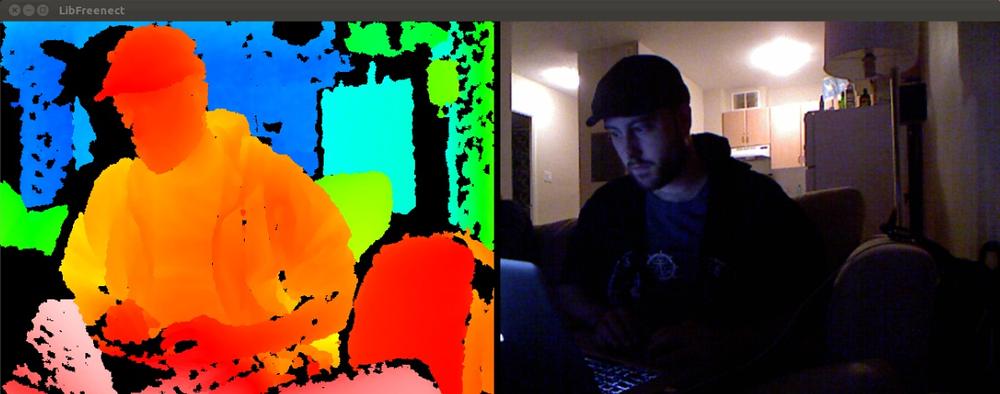
If glview opens properly, you should now be looking at the famous dual view of the RGB and depth camera output that the Kinect is currently capturing. See Figure 1-9.
Get ready for quite the ride if you’re interested in compiling and building libfreenect on a Windows machine. It is by far the most involved process, requiring a lot of tinkering around with library dependencies to properly compile and build libfreenect.
Before we get started, we’ll need to download and install CMake and Visual Studio 2010 from the following places:
- Visual C++ 2010 Express
- http://www.microsoft.com/visualstudio/eng/downloads
- CMake Windows Binary Installer
- http://cmake.org/cmake/resources/software.html
Farther down the road, you’ll need to manually assign the path for certain library files and includes to finish compiling libfreenect in CMake. I’ve added them all to a nice little ZIP file, which you can download at http://developkinect.com/resource/library/libfreenect-windows-dependencies.
If, for whatever reason, you need to download the files individually, here are their names and download locations:
- libus-win32
- http://sourceforge.net/apps/trac/libusb-win32/wiki
- pthreads-win32
- http://sourceware.org/pthreads-win32/
- Glut
- http://www.xmission.com/~nate/glut.html
Following are the steps required to install the drivers for the Kinect sensor.
Download and extract the libfreenect drivers from GitHub: https://github.com/OpenKinect/libfreenect/zipball/master.
Tip
For the sake of consistency, create an OpenKinect folder on your desktop where all these downloads will be placed.
Extract the contents of the ZIP file into the OpenKinect folder.
Tip
I’ll refer to this new folder simply as libfreenect, although it may be labeled differently on your computer.
At this point, we’ll install the drivers for the Kinect sensor. Plug the Kinect sensor into a USB port on your computer and make sure the AC adapter is plugged in as well. You will be presented with an "install drivers" pop-up notification. Cancel it.
Navigate to your Device Manager: Start → Control Panel → System and Security → System → Device Manager.
You will see a device called Xbox NUI Motor with a yellow exclamation mark indicating that the device is unknown and drivers need to be installed. Select (highlight) the device and click the Update Driver Software icon. When prompted for where to search for updated drivers, select Browse My Computer for the driver software.
Select the inf directory located within the libfreenect source folder (libfreenect/platform/windows/inf). Once you click Next, you’ll encounter a warning stating that the driver is not certified. Disregard this and continue with the installation.
Once the driver is installed, you should notice that the green LED on the Kinect sensor will now be lit up. Repeat the previous step for the two other unknown devices, Xbox NUI Camera and Xbox NUI Audio.
The necessary drivers should now be successfully installed for your Kinect sensor. Now that that’s over with, you will need to download and install (if you haven’t already, of course) CMake and Visual Studio 2010.
Before we start compiling libfreenect, create a build folder in the libfreenect directory. This is where we’ll point the output of the CMake compiled binaries.
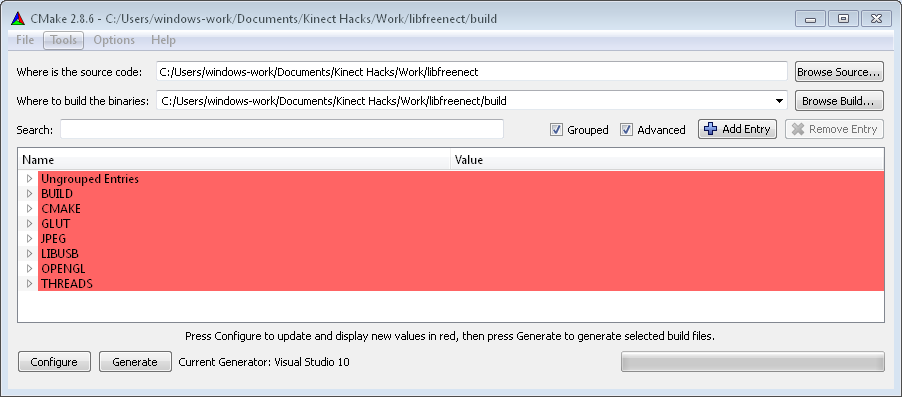
Open the CMake GUI and set the "Where is the source code" path to /libfreenect.
Set the “Where to build the binaries” browse build path to /libfreenect/build. Click Configure. It will fail (as shown in Figure 1-10), but don’t worry about it. We still need to set a few includes and library paths, among other things.
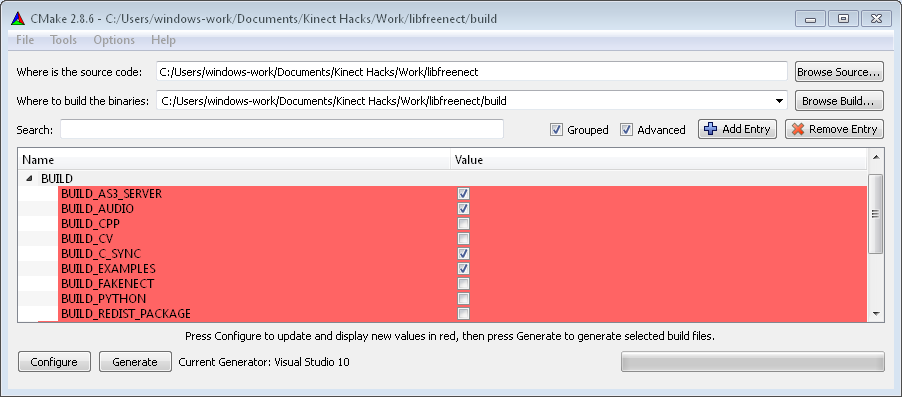
First up, take the following actions in the expanded configuration list (Figure 1-11):
You will now need to point certain build paths to the freenect_win_deps folder you downloaded earlier. If you haven’t done so already, download it from http://developkinect.com/resource/library/libfreenect-windows-dependencies and extract the contents of the ZIP file. Remember its location. Now do the following:
- Set LIBUSB_1_INCLUDE to the freenect_win_deps/include folder of the uncompressed freenect_win_deps.
- Set LIBUSB_1_LIBRARY to point to the libusb.lib file inside the uncompressed freenect_win_deps folder located at freenect_win_deps/lib/msvc/libusb.lib.
- Set THREADS_PTHREADS_INCLUDE_DIR to the freenect_win_deps/include folder within freenect_win_deps.
- Set THREADS_PTHREADS_WIN32_LIBRARY to point to the pthreadVC2.lib file inside the uncompressed freenect_win_deps located at freenect_win_deps/lib/pthreadVC2.lib.
- Set JPEG_INCLUDE_DIR to freenect_win_deps/include, located within the uncompressed freenect_win_deps folder.
- Set JPEG_LIBRARY to point to the libjpeg.lib file inside the uncompressed freenect_win_deps located at freenect_win_deps/lib/libjpeg.lib.
Click Configure again. It should successfully complete the process this time, but we still need to add the Glut references.
At the top of the configuration list, you should now see four notices in red that need to be fixed.
- Set GLUT_INCLUDE_DIR to the include directory in the freenect_win_deps folder, (freenect_win_deps/include).
- Set GLUT_glut_LIBRARY to point to the glut32.lib file inside the freenect_win_deps folder as well (freenect_win_deps/lib/glut32.lib).
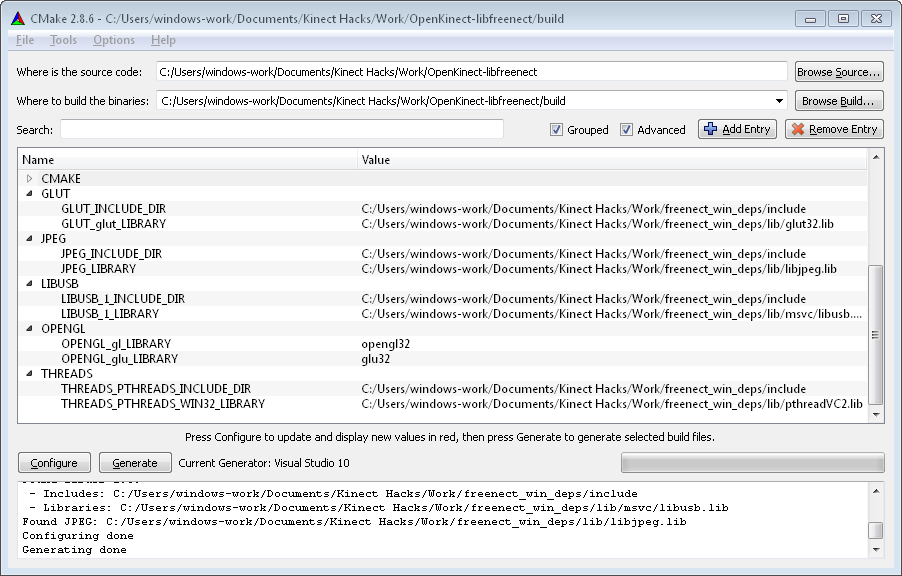
Click Configure, and it should successfully complete this time (Figure 1-12). Click Generate once it’s complete.
You can now open the libfreenect.sln file from the build folder in which the output was placed (/libfreenect/build/).
Open libfreenect.sln in Visual Studio and build the project.
You will receive a few errors when building the solution, but it should compile correctly regardless. The binaries of the build will be placed in the build/bin/Debug folder.
The final step is to place a few .dll files in the appropriate folders as follows, and then we can run some of the samples provided:
- Copy freenect.dll and freenect_sync.dll from build\lib\Debug to build\bin\Debug.
- Copy pthreadVC2.dll from freenect_win_deps\lib to build\bin\Debug.
- Copy libjpeg-8.dll from freenect_win_deps\lib to build\bin\Debug.
- Copy glut32.dll from freenect_win_deps\lib to build\bin\Debug.
- Copy libusb0.dll from platform\windows\inf\xbox nui camera\amd64 to build\bin\Debug.
If you’re compiling for a 32-bit version of Windows, copy libusb0_x86.dll from libfreenect\platform\windows\inf\xbox nui camera\x86 to libfreenect\build\bin\Debug.
That’s it. The libfreenet package should be fully installed. You can now try running a few of the samples, such as tiltdemo and glview (Figure 1-13).
Microsoft released its own SDK on June 16, 2011, roughly seven months after it launched the Kinect for Xbox 360. After the incredible reception of all of the custom hacks built by the community of open source developers, what choice did Microsoft have, really? Sit back and watch these creative hobbyists and enthusiasts change the world with its Xbox peripheral? With the release of its own SDK, Microsoft opened up the channels for voice recognition and other audio capabilities, features that are currently unavailable with the libfreenect drivers.
The Kinect SDK has a ton of great features but a few limitations as well. For instance, at the time of this writing, the Kinect SDK toolkit is available only for Windows 7, so if you haven’t upgraded from Vista or are still rocking XP, you’re out of luck. Development using the Kinect SDK is for noncommercial use only. You’ll need DirectX 9.0 runtime installed, and you’ll be required to develop your projects in C++, C#, or Visual Basic using Visual Studio 2010. There’s also no built-in support for recording or playing back to disk, and it tracks only the full body—there’s no upper-body or hands-only mode.
On the upside, it’s easy to install, does not require the "Freeze! Hands in the air!" calibration pose (the Psi pose), has audio capabilities, and supports motor tilt as well.
The beauty of the Microsoft Kinect SDK is that it’s pretty much plug and play. You will, however, need to meet a few system requirements to get up and running:
- Standalone Kinect sensor with power adaptor (sold separately from Xbox 3601/n bundled Kinect)
- Computer with a dual-core, 2.66 GHz or faster processor
- Windows 7–compatible graphics card that supports DirectX 9.0 capabilities
- 2 GB RAM (4 GB RAM recommended)
- Windows 7 (x86 or x64)
- Visual Studio 2010 Express (or other 2010 edition)
- Microsoft .NET Framework 4.0 (comes with Visual Studio 2010)
If all systems are go, you’re pretty much in the clear. Simply download the Kinect SDK (32- or 64-bit) from http://www.microsoft.com/en-us/kinectforwindows/develop/overview.aspx and run the installer.
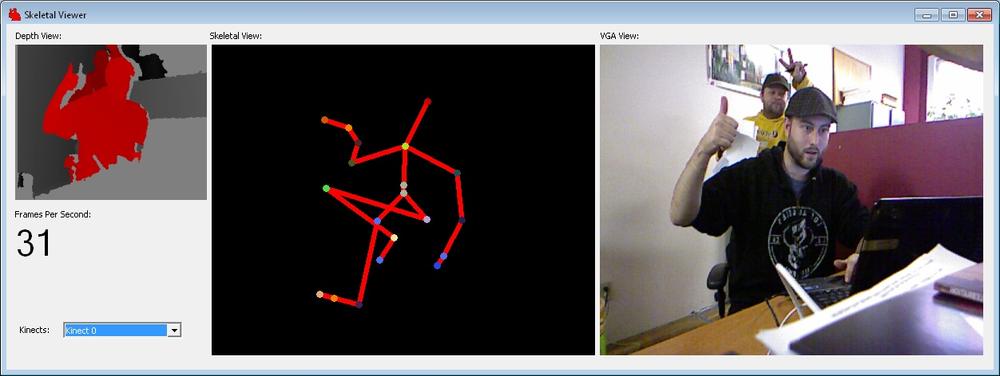
To see if everything is working properly, go to your Start menu, locate the newly installed Microsoft Kinect SDK application, and check out the Skeletal Viewer and Shape Game (Figure 1-14).
Tip
If you try to run the Skeletal Viewer demo and receive the "NuiInstaller Failed" error message, try removing any devices that are currently occupying USB ports on your computer. You may also need to close applications that use your webcam, such as MSN Messenger, AIM, or Skype. This also applies to the Shape Game sample if the Kinect isn’t tracking any users. For more, visit Microsoft’s support forums at http://social.msdn.microsoft.com/Forums/en-US/category/kinectsdk.
Get Kinect Hacks now with the O’Reilly learning platform.
O’Reilly members experience books, live events, courses curated by job role, and more from O’Reilly and nearly 200 top publishers.

