Examining Values: The Autos and Locals Windows
Look at the tabs below the code window—if you’re using Visual Studio, you’ll find a Locals window and an Autos window, possibly as tabs in a single window along with some others. If you’re using C# Express, the Autos window won’t be there, but Locals will be. Both of these display your local variables. The difference is that the Autos window shows variables used in the current statement and the previous statement. (The current statement is the statement at the current execution location, which is highlighted automatically in the debugger—thus, the window’s name.) The Locals window displays all the variables in the current method, including parameters, as shown in Figure 9-8, along with each variable’s current value and type.
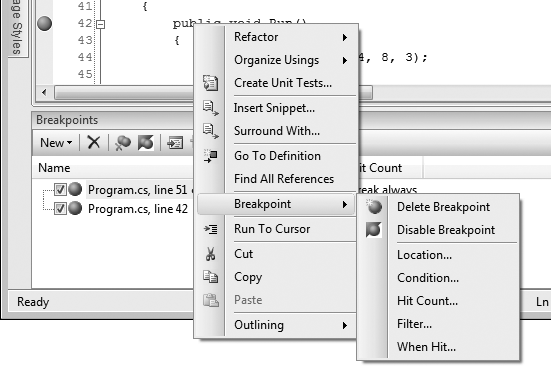
Figure 9-5. In Visual Studio, the Breakpoint menu allows you to select various options for your breakpoint settings.
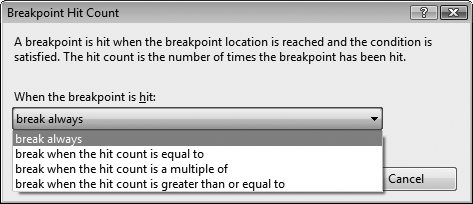
Figure 9-6. The Breakpoint Hit Count dialog lets you choose how often you want this point to be reached before breaking.
Tip
The debugger stacks the Autos and Locals windows together with other tabs, as shown in Figure 9-8. You are free to separate these windows or to move them to be tabbed with other windows. You can simply drag-and-drop the windows where you want them. When you drop one window onto another, ...
Get Learning C# 3.0 now with the O’Reilly learning platform.
O’Reilly members experience books, live events, courses curated by job role, and more from O’Reilly and nearly 200 top publishers.

