Sharing your music collection with friends has never been easier.
If you’ve ever wished that you could share your entire audio collection with others and build a communal MP3 collection that your friends can tap into, then this hack has a perfect solution in store for you. Until recently, Linux users had the choice between two leading networked jukeboxes: Netjuke and Jinzora. But now Netjuke has merged into Jinzora and now two development teams work toward one common goal. This means that you can expect the development pace for Jinzora to pick up quite a bit, which seems slightly ironic for an application package already overflowing with features.
Jinzora’s (http://www.jinzora.org) impressive feature list includes:
Fully web based, so there are no client-side tools to install
Complete music collection browsing (by artist, album, or genre) and searching
Media management support for retagging and massaging your music collection via the web interface
Download lyrics, cover art, and metadata over the net
Suggest related artists from your own collection
Stream from the server via m3u playlists
Support for multiple users and themes
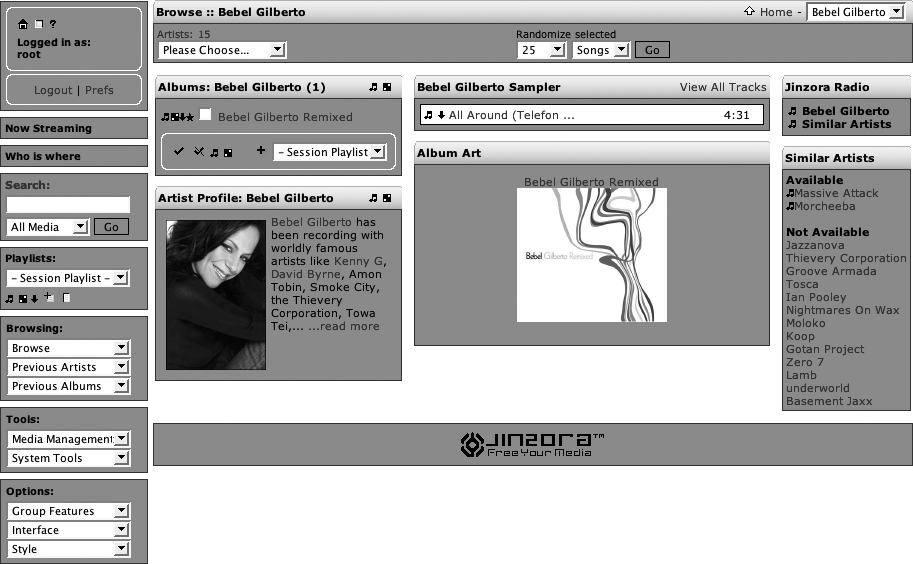
Since Jinzora uses the web interface for everything, the only software required by the client machine is an MP3 player, which makes Jinzora particularly useful in mixed OS environments. Jinzora also supports user accounts, which gives you control over who can view, play, and manipulate the music collection. All of these features make it perfect for an office environment or a large home environment where multiple users want to share one music collection. Figure 4-2 shows a typical artist browse screen in Jinzora.
Even though Jinzora requires a lot of packages to run, the installation process proves quite simple. To install it, you’ll need a web server capable of running PHP scripts, which should be prepackaged by your Linux distribution of choice. Use your distributions software installation tool to install these programs. If for some reason you don’t have these tools prepackaged, download the tarballs from http://httpd.apache.org and http://php.net, compile, and install them according to the included installation instructions.
Once you have Apache set up, download the latest Jinzora tarball
and untar it into the DocumentRoot of
your Apache web server. Apache serves its files from this location, and
the exact location of this directory depends on how you installed the
web server. If you’re not sure, locate Apache’s configuration file
httpd.conf and search for DocumentRoot. After untarring the Jinzora
tarball, change to the jinzora2 directory and
run:
$ sh configure.shThis sets up the permissions so that the install can proceed.
After this, switch to your web browser and load the install pages with
this URL: http://myserver.com/jinzora2/index.php.
Replace myserver.com with the URL for
your own Apache installation. This brings up the excellent Jinzora
webbased installer—from here you’ll need to follow the instructions on
the web pages to finish the setup of Jinzora. During the first install
step, Jinzora checks for prerequisite software and verifies the
permissions on the files and directories that it needs to use. If you
need to install more software modules (e.g., required PHP modules)
during this step, make sure to restart your Apache server after you’ve
installed the new modules to ensure that the new modules get loaded into
Apache.
Tip
The installer does seem to have one flaw—once you’ve made a selection, Jinzora remembers your selection and doesn’t give you the option to change it later in the install process. Rather than going in and hand-editing the configuration files to change the configuration files to your liking, it may be easier for you to wipe out the existing installation. This way you can simply untar the Jinzora tarball, re-run the configure.sh script and start the install process over again. You’ll find that the second time around the install script, you’ll fly right though it.
In the last step of the install, you’re prompted for your media directories to import existing MP3s into your new Jinzora setup. Point Jinzora to your MP3 collection and have it import all your music. Once Jinzora completes the import, it will launch Jinzora and prompt you to remove the install directory that contains unsafe installation files (for security reasons). Now you’re ready to explore Jinzora and invite your friends to help you build and enjoy the MP3 collection.
—Robert Kaye
Get Linux Multimedia Hacks now with the O’Reilly learning platform.
O’Reilly members experience books, live events, courses curated by job role, and more from O’Reilly and nearly 200 top publishers.


