Inkwell, Apple’s handwriting-recognition technology, has the potential to put some of the joy back into writing by hand.
The recent launch of the Microsoft Tablet PC was accompanied by major fanfare, hailing writing as a whole new way of using the computer. The Tablet PC is basically a notebook equipped with a graphics tablet built in to allow users to scribble notes on it. Behind the hardware is the Microsoft Windows XP Tablet PC edition, a souped-up version of Windows XP with handwriting-recognition capabilities.
Unknown to many, surprisingly enough to any longtime Apple devotee, Apple also possesses similar handwriting recognition technology, dating from the days of the now-discontinued Newton message pad (http://www.panix.com/~clay/newton/). In Mac OS X Jaguar, Apple has quietly shipped the handwriting-recognition technology known as Inkwell (http://www.apple.com/macosx/jaguar/inkwell.html). Let’s dip our pens into Inkwell and see how it measures up and how you can make use of it.
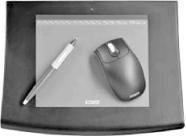
First and foremost, to use Inkwell you need a graphics tablet; unfortunately, you cannot use a mouse to simulate handwriting strokes. Perhaps this is one reason why Inkwell has not been widely used, as not everyone has a graphics tablet. For my experimentation, I used the Intuos2 graphics tablet from Wacom (http://www.wacom.com/), shown in Figure 4-35.
The package comes with a tablet, a pen, and a mouse. For most of the stuff that I am going to show you, using the pen is sufficient. But you may want to consider using the bundled mouse; it’s wireless and glides nicely on the tablet.
To invoke Inkwell, you need to plug in your tablet and install the drivers provided by Wacom. A required restart and you should find a new Ink icon under the Hardware section of your System Preferences, as shown in Figure 4-36.
Before you start using Inkwell, you need to do a little configuration. Click the Ink icon.
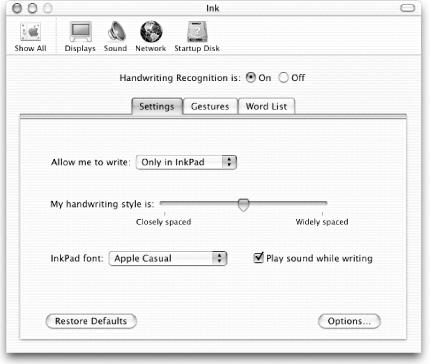
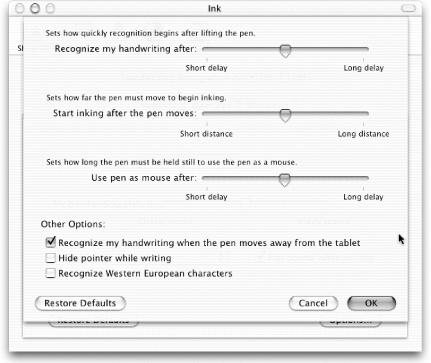
Under the Settings tab (see Figure 4-37), you can configure Inkwell to let you write anywhere on the screen or only within InkPad (more on this in a moment). You can also set your handwriting style and fine-tune your writing style by clicking the Options... button. Figure 4-38 shows the Ink options.
In my test, I found that if you are a slow writer, it is useful to increase the delay for handwriting recognition.
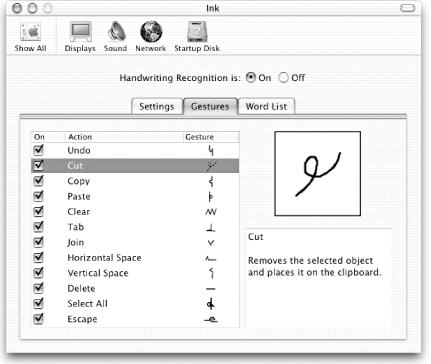
The next tab, Gestures, contains support for gestures. Anyone who’s used a PDA — particularly a Palm — will find these familiar. They’re essentially scribbled shortcuts for common actions you’d normallly find under the menu bar’s Edit menu: Cut, Copy, Paste, Undo, Select All, and so forth, as shown in Figure 4-39.
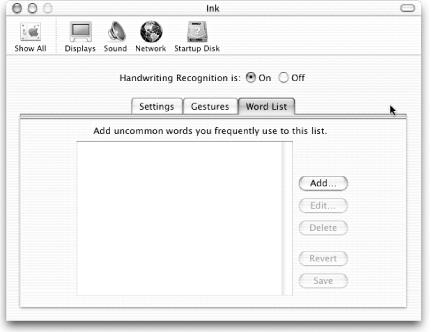
The last tab is Word List (see Figure 4-40), which allows you to enter unusual words that you use often. Inkwell uses a built-in dictionary, comparing words that you write against known common words and exceptions you’ve added yourself. To speed up the process, you should add words that are not found in the dictionary on the fly (Inkwell will tell you if a word is found in the dictionary).
With configuration out of the way, let’s get down to work. Make sure that you have turned on handwriting recognition, as shown in Figure 4-41.
Whenever handwriting recognition is turned on, the InkBar (Figure 4-42) will be floating about somewhere on your screen.
Of interest are the four icons: Command, Shift, Option, and Control.
These icons allow you to input special characters or commands without
using the mouse. For example, if I want to cut out a specific segment
of text, I can highlight the text (using the other tip of the pen)
and tap on the Command icon, then write x.
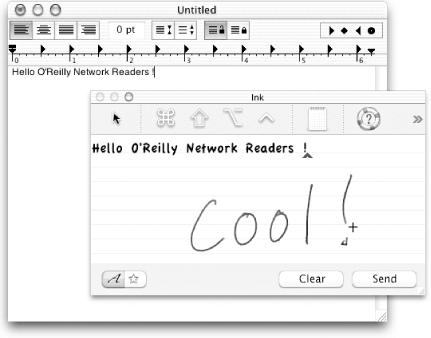
You can input text into your application with the pen in two ways: using the InkPad or writing directly on the application. To use the InkPad, click on the InkPad button and start writing on your tablet, as shown in Figure 4-43.
The InkPad is a temporary writing space, not unlike a sticky. In Figure 4-43, I have opened a TextEdit document and used the InkPad for writing. When you are done with the writing, you can transfer your writing to the application by clicking the Send button at the bottom of the window. The Clear button clears the content of the InkPad.
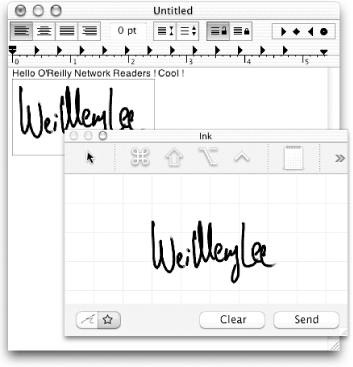
To create a drawing, you can click on the Drawing button (see Figure 4-44).
This is useful for signatures or when you want to insert drawings into your documents, as shown in Figure 4-45.
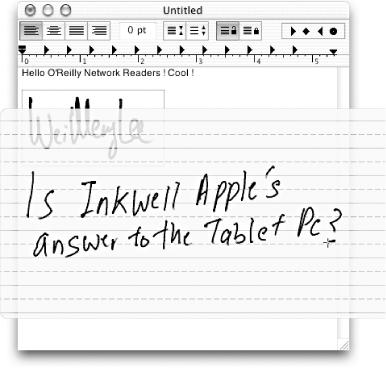
Besides using the InkPad, you can also write directly onto the document. In this case, you need to set Inkwell to write anywhere, as shown in Figure 4-46. When you move your pen into your application and start writing, a yellow writing pad will be shown. The writing pad will expand as you write to accommodate the text that you are entering.
While the ability to write directly into my application sounds cool, I am quite skeptical of its practical use. I am better at typing using my keyboard, as it is definitely much faster than scribbling onto a tablet. Furthermore, the handwriting recognition requires you to print the characters in order to achieve the best result. If you write like a doctor (read: illegibly), Inkwell is going to have a lot of trouble deciphering your handwriting. In my test, it works quite well when I print slowly. Cursive writing is definitely not recommended.
While Inkwell has the potential to bring back some of the joy of writing to the keyboard-addicted geek, as yet it is of limited practical use.
—Wei-Meng Lee
Get Mac OS X Hacks now with the O’Reilly learning platform.
O’Reilly members experience books, live events, courses curated by job role, and more from O’Reilly and nearly 200 top publishers.
